How to Crochet Easy Turkey Ragdoll Amigurumi for Thanksgiving
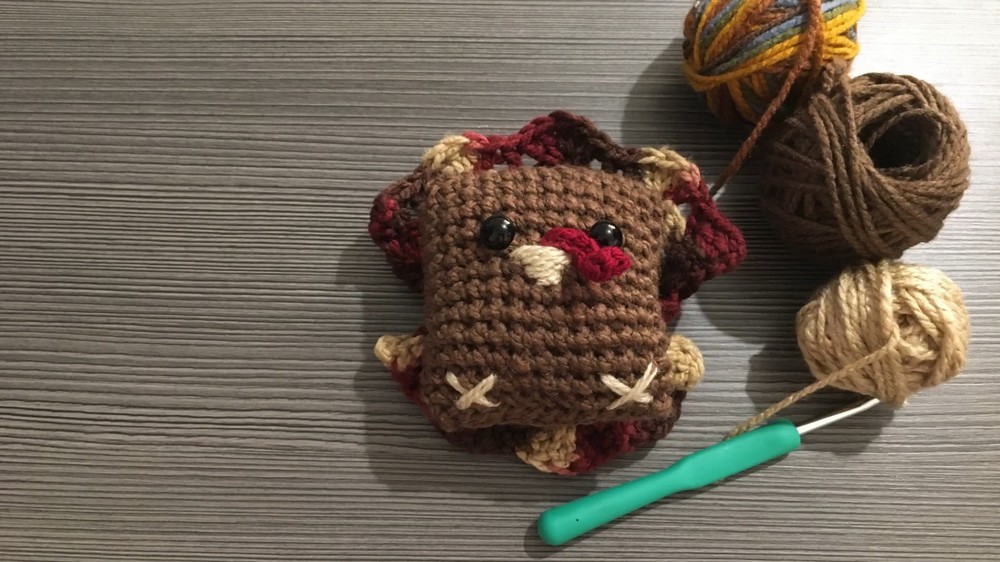
In this post, learn how to crochet an adorable turkey crochet feathers using variegated four-weight yarn and a 4.5mm hook. The step-by-step guide demonstrates essential crochet techniques, such as creating slip knots, chains, double crochets, and shell stitches, with clear explanations for every phase of the project. The video covers multiple rounds, including forming shells, working along the bottom chains, and attaching the feathers to the turkey.
By the end, viewers will have a beautifully detailed turkey accessory, ready for seasonal decorations. It’s an engaging project, perfect for adding a handmade touch to your holiday décor! So, follow through with us for the complete tutorial.

Crochet Turkey Feathers Tutorial
This tutorial guides viewers through the process of creating colorful crochet turkey feathers for a fun seasonal craft project. Using variegated four-weight yarn and a 4.5 mm crochet hook, the creator explains each step in detail, ensuring clarity for crafters of all skill levels. Below is a structured summary:
Introduction
- The video is part two of the “Square Pie Turkey” crochet series.
- The focus in this episode is on crocheting the turkey feathers.
Supplies Needed
- Variegated four-weight yarn.
- Crochet hook (size 4.5 mm).
Step-by-Step Process
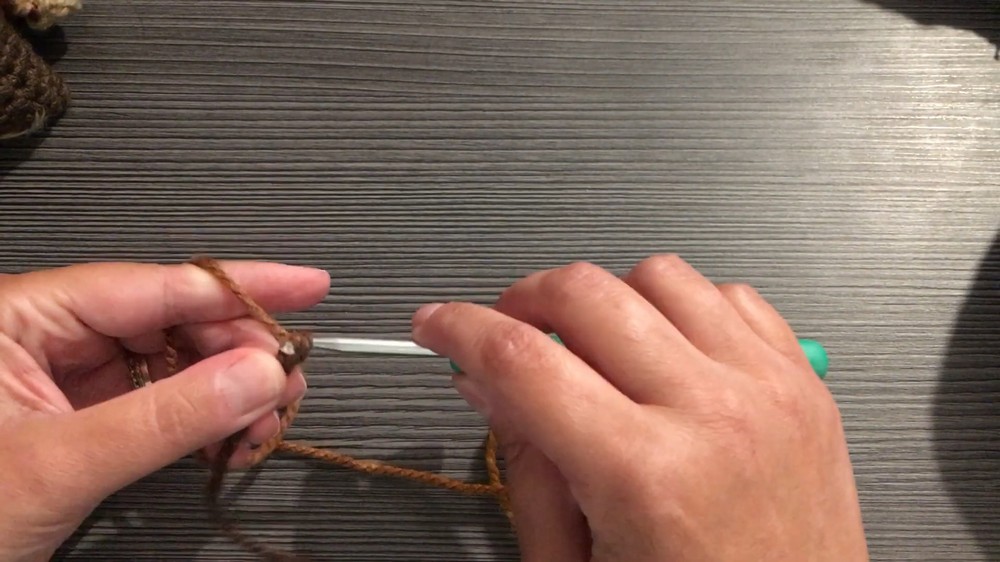
Creating the Foundation Chain
- Begin by making a slip knot and attaching it to the hook.
- Create the desired number of chains to serve as the base for the feathers.

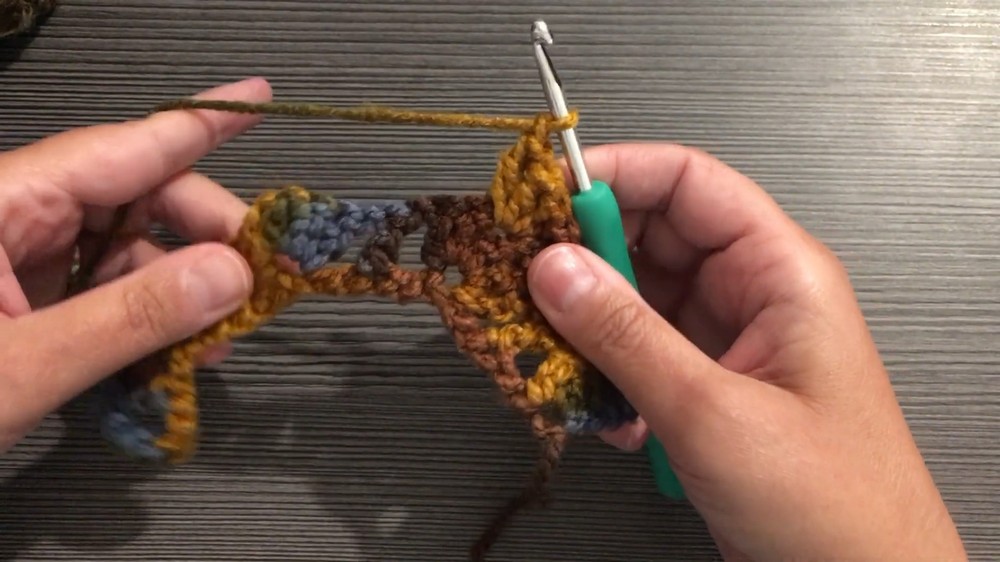
First Row: Adding Double Crochets and Shells
- Work a series of double crochets into specified chain spaces.
- Incorporate shell stitches (clusters of multiple double crochets in one stitch) to create rounded feather shapes.
- Alternate between double crochets and shells along the row.
Second Row: Building on the Design
- Turn the work and chain at the beginning of the row.
- Add more double crochets and shell stitches, ensuring alignment with the first row’s placement.
- Continue this consistent pattern to define the feather shape.
Third Row: Completing the Feather Base
- Work similarly to the second row to solidify the design.
- Repeat the process of alternating double crochets and clusters to achieve the desired size and shape.
- Tie off and cut the yarn after finishing this row.
Working Along the Bottom Edge
- Create a slip knot and reattach the yarn to the bottom foundation row.
- Work a series of double crochets along the bottom to create a clean edge and add uniformity.
- Chain stitches are added between double crochets for extra spacing.
Additional Rows for Fullness
- Work additional rounds of double crochets to give the feathers dimension.
- These rows focus on building shape and depth without adding new shell stitches.
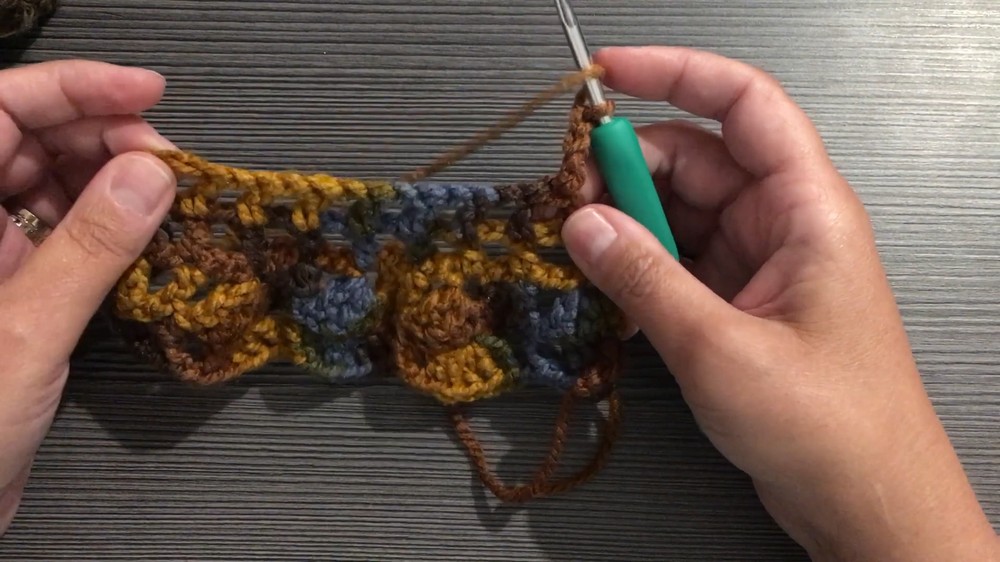
Final Rounds: Mirroring the Shell Stitches
- Add shell stitches back into the rows following the established feather pattern.
- Work symmetrically to ensure the feathers replicate the original design on both sides.
- Complete three rounds of shell stitches to finish the feather design.
Finishing Touches
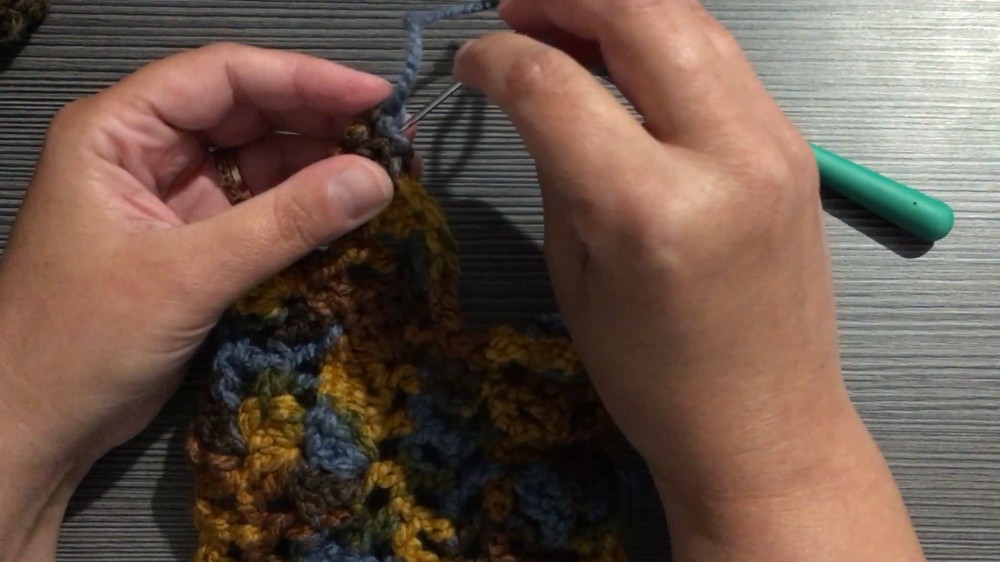
Weaving in Ends
- Use a needle to weave in loose yarn ends at the back for a polished finish.
- Stitch securely to ensure no unraveling.
Attaching the Feathers to the Turkey’s Body
- Position the completed feathers on the back of the turkey’s body.
- Secure the piece with a yarn needle and matching thread.
- Sew the feathers onto the body, ensuring they are centered and tight.
- Hide knots and cut excess yarn to tidy up the project.
Conclusion
This crochet turkey feather project is a delightful and creative addition to your holiday crafting. The tutorial provides clear instructions, making it suitable for beginners and intermediate crocheters alike. By following this guide, crafters can create a vibrant turkey decoration perfect for fall or Thanksgiving displays. Don’t forget to check out part three for completing the entire turkey!