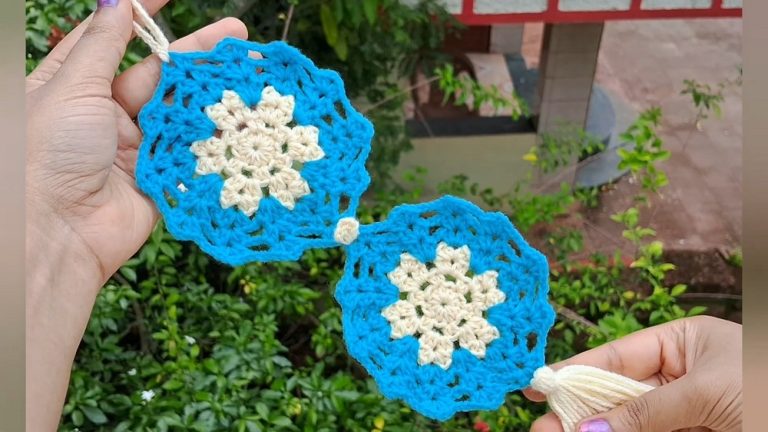
How to Crochet Floral Granny Square for Beginners

In this post, you’ll learn how to create a beautiful floral granny square inspired by a clothing design. Using 100% cotton yarn in four colors and a crochet hook (3–4mm), the process begins with a magic ring, followed by single crochets for the center and petals made with double crochet clusters. The tutorial also covers adding leaves with alternating green and white yarn for corners and shows how to expand the square further with additional rounds.
This simple yet versatile design can be customized for various projects such as cardigans or blankets, making it an excellent choice for creative crochet enthusiasts.

Floral Granny Square Crochet Tutorial
This tutorial demonstrates how to crochet a beautiful floral granny square inspired by a cardigan design. The instructor uses colorful cotton yarns, incorporating modifications and borders to enhance the design. This beginner-friendly step-by-step guide covers the creation of the center flower, petals, leaves, and border extensions, offering flexibility to customize the square’s size and color.
Materials Required
- Yarn: 100% cotton yarn in four colors (pink, rainbow, green, and white/ivory).
- Crochet Hook: 3mm to 4mm crochet hook, depending on your preference and yarn weight.
- Other Tools: Scissors and tapestry needle for securing and finishing.
- Flexibility: Any yarn and hook size can be used based on your project goals.

Creating the Center Flower
- Magic Ring Foundation: The square begins with a magic ring, forming the core of the floral design.
- Single Crochet Center: Single crochets are added into the magic ring and secured with a slip stitch to close the center.
- Petal Formation: A new color (pink) is introduced to create the flower petals. Each petal is crocheted as clusters of double crochets.
- Repetition of Petal Pattern: The petal pattern is repeated evenly around the center to form a symmetrical 8-petal flower.

Adding the Leaves
- Green Yarn for Corners: Green yarn is added to create leaves, creating the basis for the square’s corners.
- Corner Design: The corner stitches alternate with chains to shape the square.
- Color Switching: Green and white yarns are alternated for the leaves and other sections to add color variety. The transitions are done by completing the final part of the last stitch with the new color.

Expanding the Shape into a Square
- Building the Foundation Square: The green leaves serve as starting points for turning the circular floral design into a square.
- Alternating Colors: White or ivory yarn is used in combination with green to complete the initial square structure. Double crochets are worked in between chain spaces, maintaining the floral motif in the center.
- Anchor for Future Rounds: The first completed square serves as a base for additional border rounds, expanding the size gradually.

Adding More Rounds and Borders
- Extending the Square: The instructor shows how to add additional rounds to increase the square’s size.
- Customizing Colors: The tutorial emphasizes color variations, demonstrating how different border colors can change the final look.
- Repetition of Pattern: The rounds are based on the same pattern of alternating double crochets, chains, and corners.
Final Tips and Suggestions

- Versatility: The granny square can be used for multiple projects like cardigans, blankets, or any creative idea.
- Custom Designs: You can alternate colors, change yarn types, or add more rounds to suit your preference.
- Future Projects: The instructor teases future videos, including tutorials for half granny squares and a larger project using these squares.