Easy Free Crochet Heart Headphone Covers for Beginners

In this tutorial, you’ll learn how to crochet a heart headphone cover, perfect as a thoughtful Anniversary Day gift, with a step-by-step tutorial for beginners. Designed for Sony WH-CH710N headphones, the pattern can be adjusted based on the size of your headphones by using different hook sizes. Materials required include yarn in two colors, scissors, a 5 mm crochet hook, stitch markers, and a tapestry needle.
The step-by-step instructions guide you through creating the heart shape, assembling the cover, and adding finishing touches for a snug fit.

This video tutorial explains how to create crochet covers for round headphones, featuring heart designs. Below is a structured and detailed summary of the process as outlined in the video:
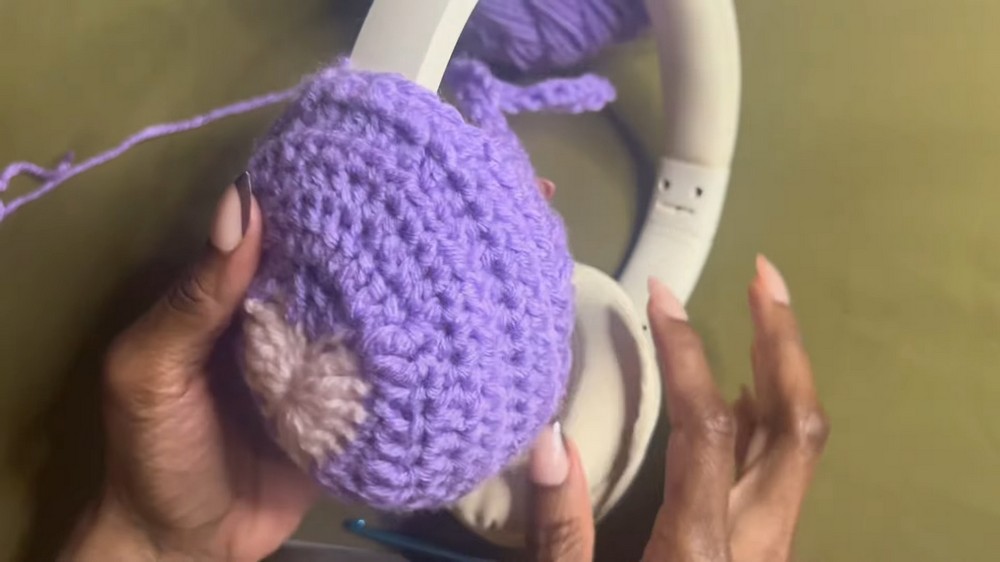
Heart Headphone Crochet Covers
Materials List
- Yarn: Two skeins of different colors, worsted/medium weight (category 4).
- Hook: 5 mm crochet hook (adjust to 6 mm for larger headphones, 4 mm for smaller).
- Scissors
- Tapestry Needle (for weaving in ends and sewing)
- Stitch Markers: At least 2
- Headphones: Round, approx. 8 cm diameter (Sony WH-CH710N as used in the tutorial; adjust for your headphones)
Abbreviations (US Terms)
- ch: Chain
- sc: Single crochet
- hdc: Half double crochet
- dc: Double crochet
- tr: Treble crochet
- sl st: Slip stitch
- inc: Increase (work 2 sts into the same stitch)
- dec: Decrease (work 2 sts together)
- st: Stitch
Special Notes
- Pattern is worked in rounds.
- Adjust hook size and yarn weight to fit headphone size.
- Use stitch markers to keep track of rounds and band placement.
- Make two covers, one for each headphone side.
Pattern
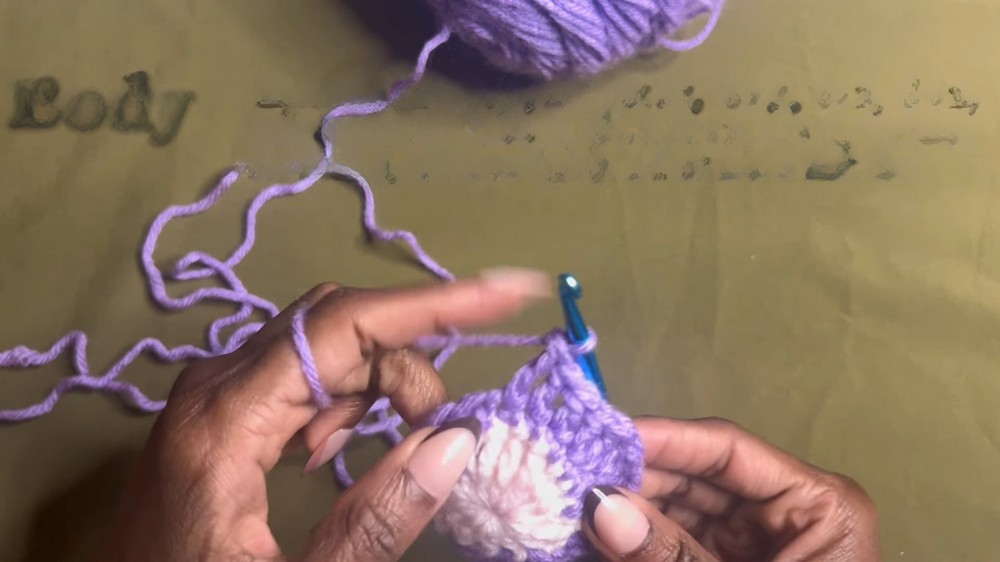
Heart Motif (Center)
With Color A (Heart color):
- Magic Ring.
- ch 3.
- In ring:
- 3 tr
- 3 dc
- 1 tr
- ch 1
- 3 dc
- 3 tr
- ch 3
- sl st into ring to close round.
- Pull tail tight. Fasten off and weave in ends.
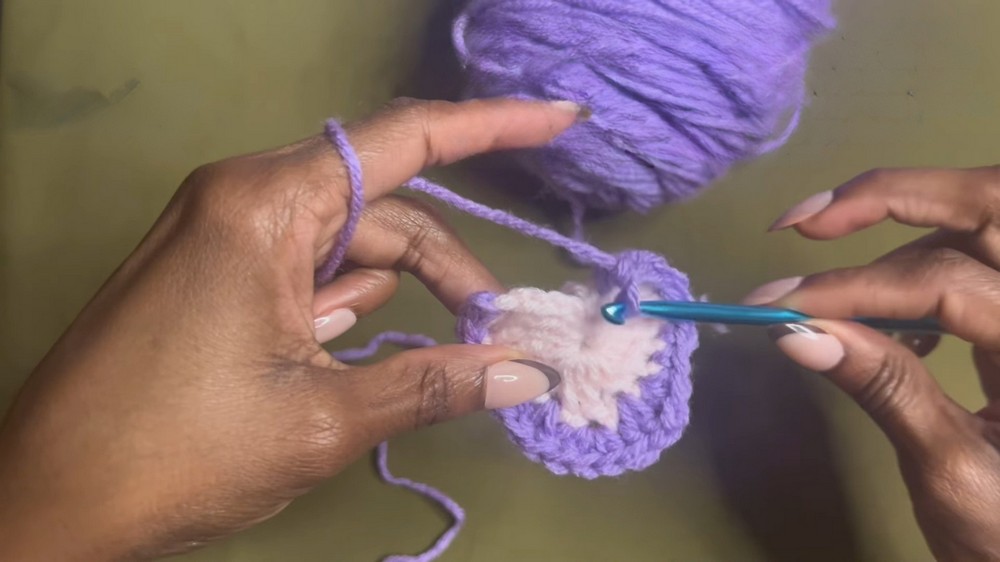
Headphone Round Cover
With Color B (Main cover color):
Rnd 1:
- Attach Color B to first tr after the starting chain.
- sc in same st, 3 sc, (total 4 sc)
- hdc inc (2 hdc in same st)
- dc inc (2 dc in next st)
- hdc inc (3 hdc in next st)
- Skip chain space, dc inc (2 dc in next st)
- hdc inc (2 hdc in next st)
- 4 sc, working in chain stitches around heart edge.
- Single crochets, hdc, dc, etc. as in video, matching the heart motif with band area.
Rnd 2 (Band shaping):
- Continue sc, hdc, dc increases evenly around outer edge to build up the circle.
- For each chain space on the heart, work into chain for an even, smooth round.
- Place a stitch marker at top center, and as needed on both sides to mark beginning/end of band area.
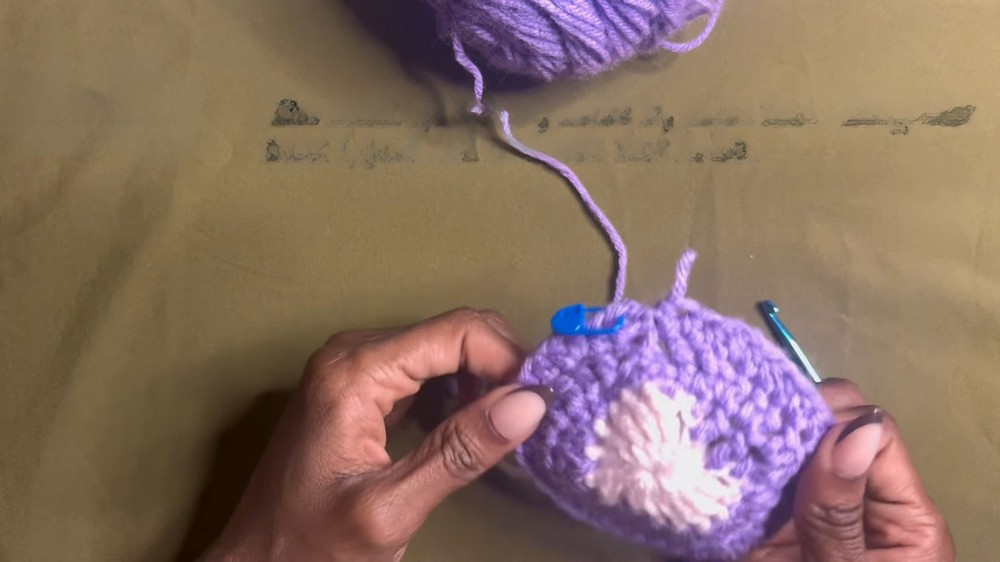
Rnd 3–4 (Circle body):
- ch 2, hdc in each st around, placing increases evenly to maintain flat circle.
- At end of each round, sl st to starting st and count to ensure symmetry.
- Continue until the diameter is close to that of your headphone.
Band Construction
- Mark out about 4 stitches at the top (centered above heart) for band.
- Attach yarn at band starting marker.
- ch 2, turn, hdc in each st across band (4–5 sts), ch 2, turn.
- Repeat row until band is wide enough to fit over headphone arch.
- Try cover on headphones; adjust length as needed.
- Slip stitch along band side and edge for neat finish.
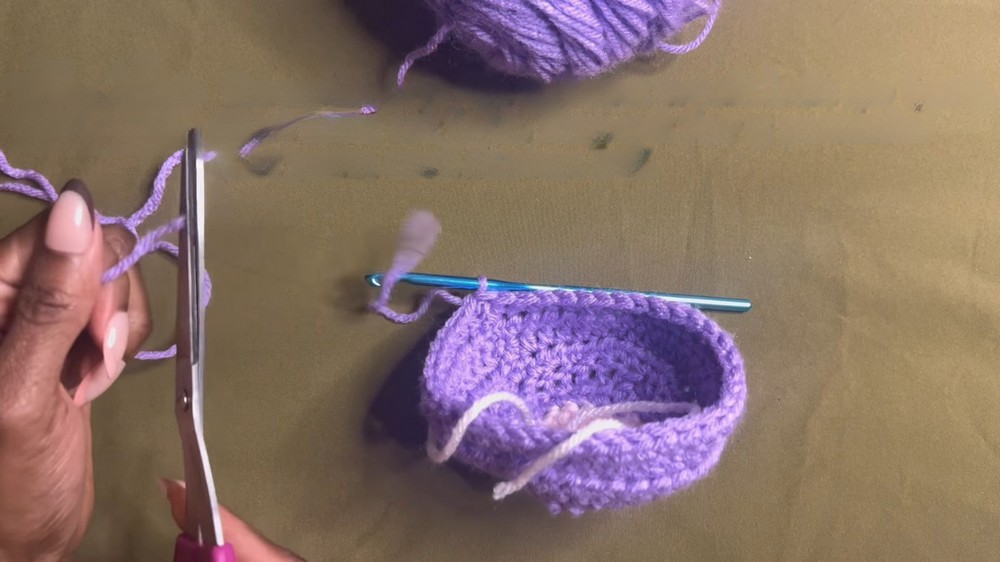
Finishing
- Single crochet around edges of cover for reinforcement.
- Slip stitch or single crochet along band, sides, and circle edge for a completed look.
- Weave in all ends with tapestry needle.
- Repeat entire pattern for second headphone cover.
Conclusion
You have now created a pair of heart headphone covers—perfect as a personalized gift or accessory. Adjust colors, band width, and size to perfectly fit your headphones. This project is great for gifting or customizing your own tech gear!
Pattern Corrections & Tips
- Fit Check: Try on headphones after Rnd 4, adjust increases for a snug or loose fit.
- Yarn Choice: For softer covers, use acrylic or cotton blend yarns.
- Customizing: Make the band wider/narrower or the heart larger/smaller as needed.
- Evenness: Always count stitches at the end of rounds to ensure symmetry and adjust as necessary.