How to Crochet Lace Bow Hair Clip for Beginners

Here is a step-by-step tutorial on crocheting a cute lace bow hair clip with lovely tulip flowers using crochet techniques perfect for beginners and spring. It starts with creating a base strip using single crochet, followed by detailed instructions to make flowers and decorative borders with picots and puff stitches.
A clip is assembled by attaching the pieces together and securing them with glue. This easy and creative project is perfect for beginners and DIY enthusiasts.
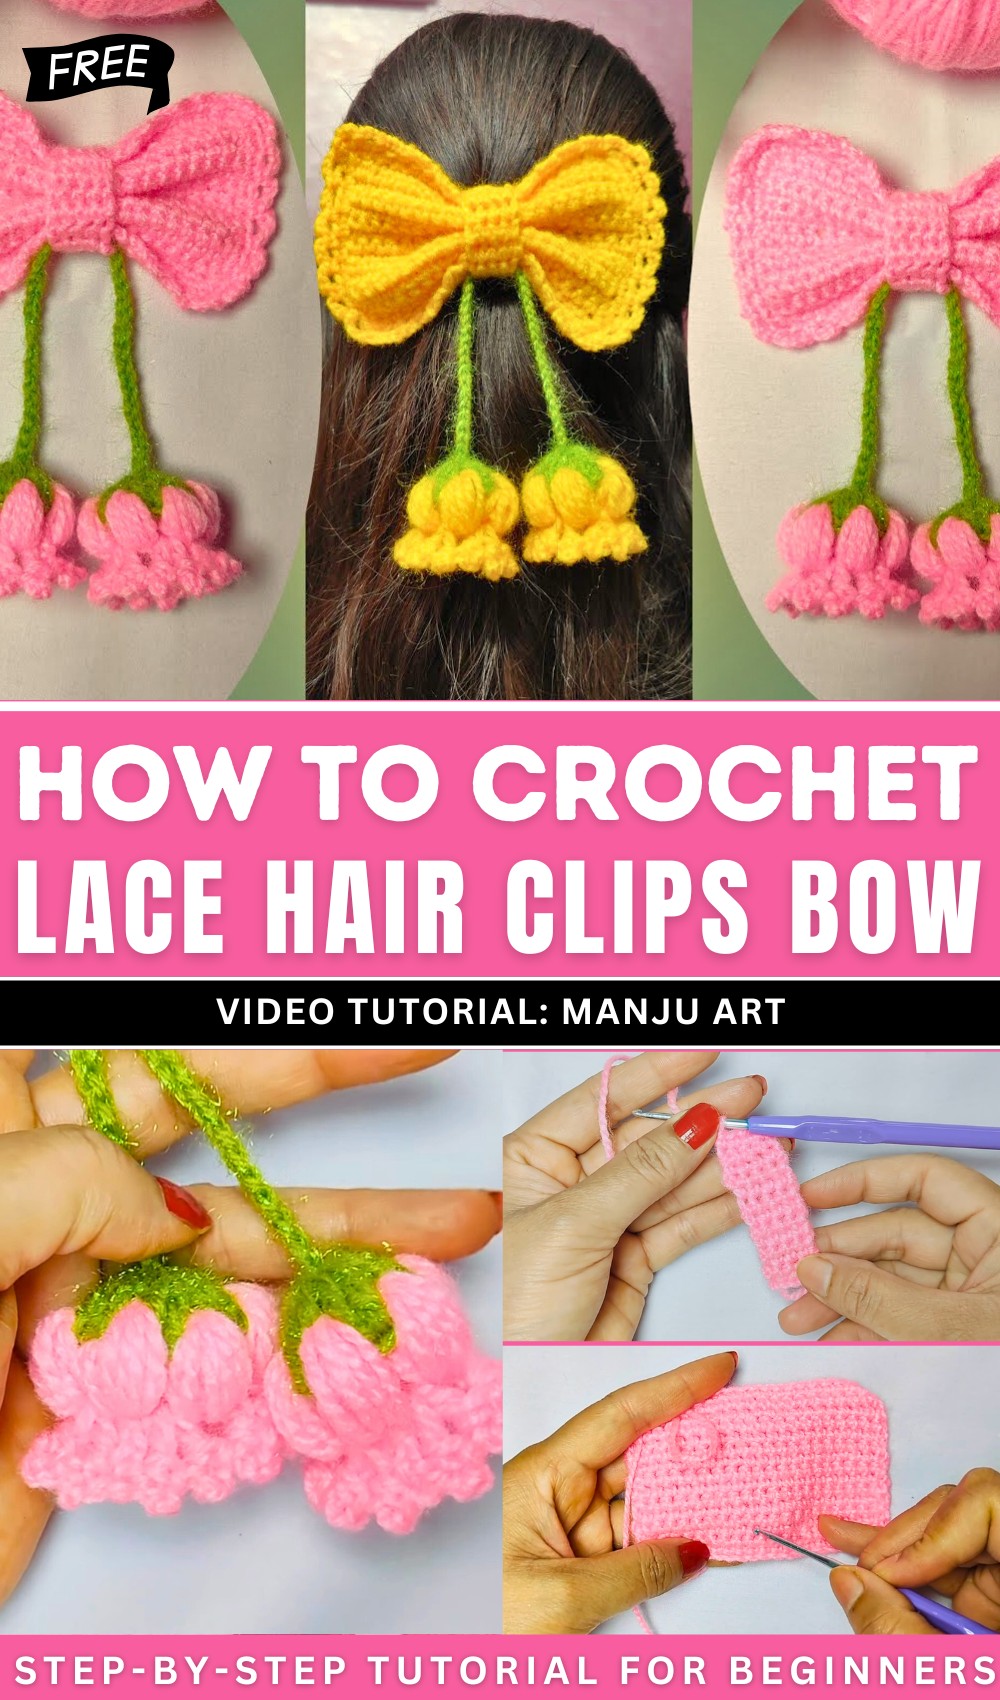
Crochet Lace Hair Clips Bow Tutorial
The tutorial demonstrates how to make a cute crochet hair clip with flowers and decorative details. Two colors, pink and green, are used in this project, but the design allows customization with any preferred colors. The crochet hook size used is 2.5 mm, along with simple knitting wool.
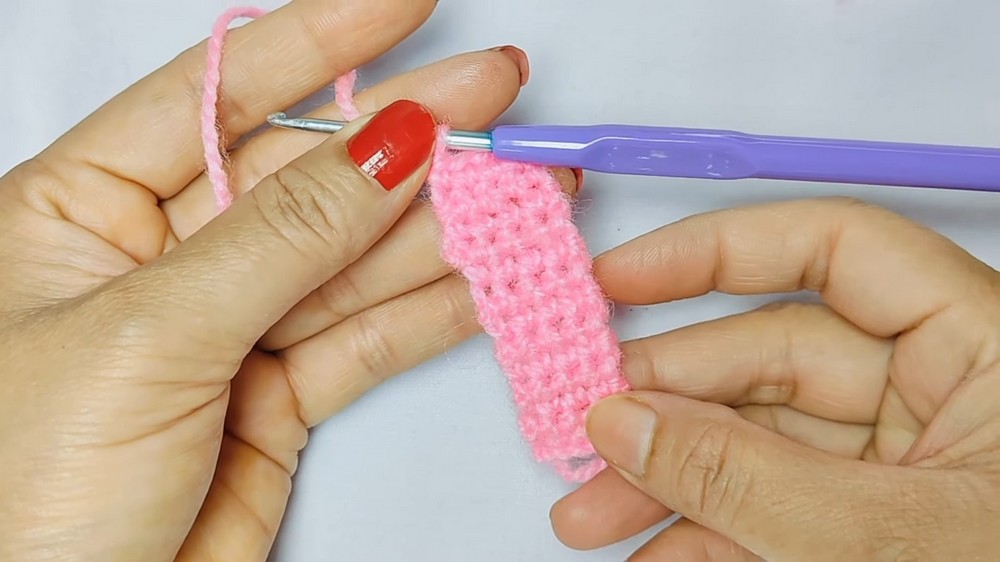
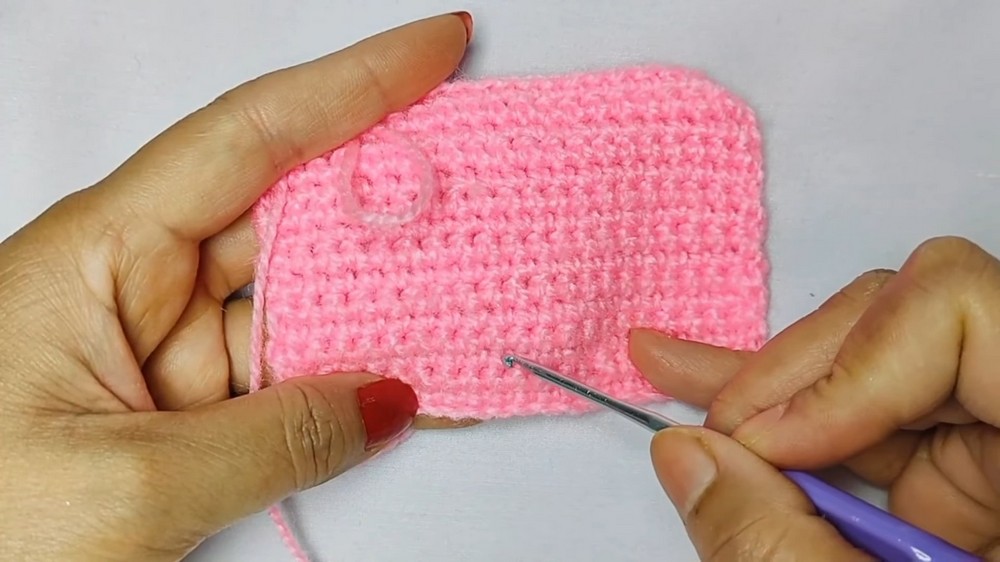
Creating the Base Strip
-
Starting the Chain:
- A chain is made as the strip’s foundation.
- Single crochet stitches are used throughout the chain, creating a uniform, textured base.
-
Building Layers:
- The strip is widened by adding rows of single crochet.
- Edges are rounded by adding three single crochets at the corners to ensure smooth transitions.
-
Adding the Border:
- A decorative border is added using a pattern of chain stitches combined with single crochet.
- This creates a scalloped effect that enhances the appearance of the base strip.
Creating the Center Strip
-
Starting the Chain:
- A smaller strip is created using single crochet, intended for the middle of the bow.
- The strip is made with about 13 rows and adjusted for neatness.
-
Preparing the Thread:
- The thread is left longer at the end to allow sewing later for assembly.
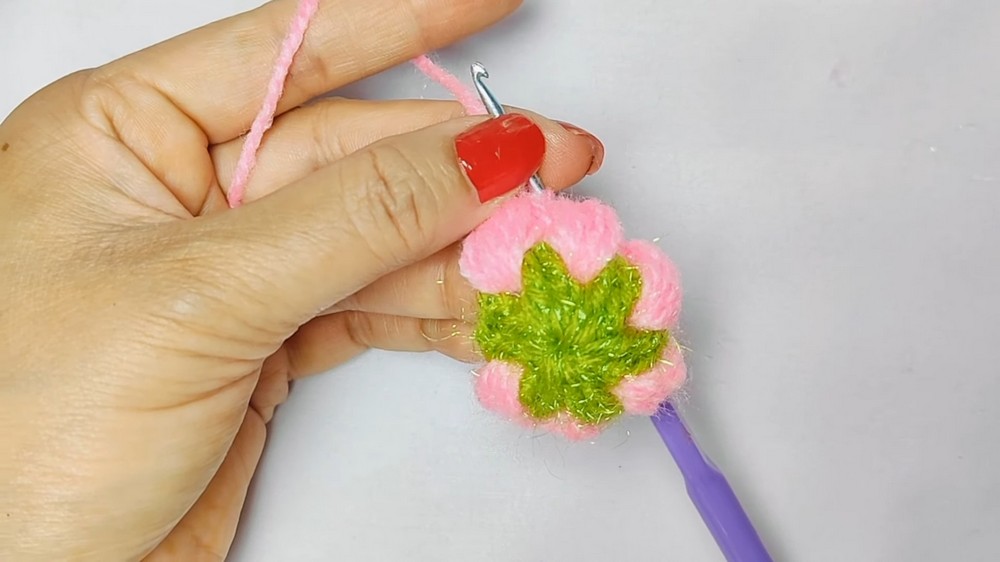
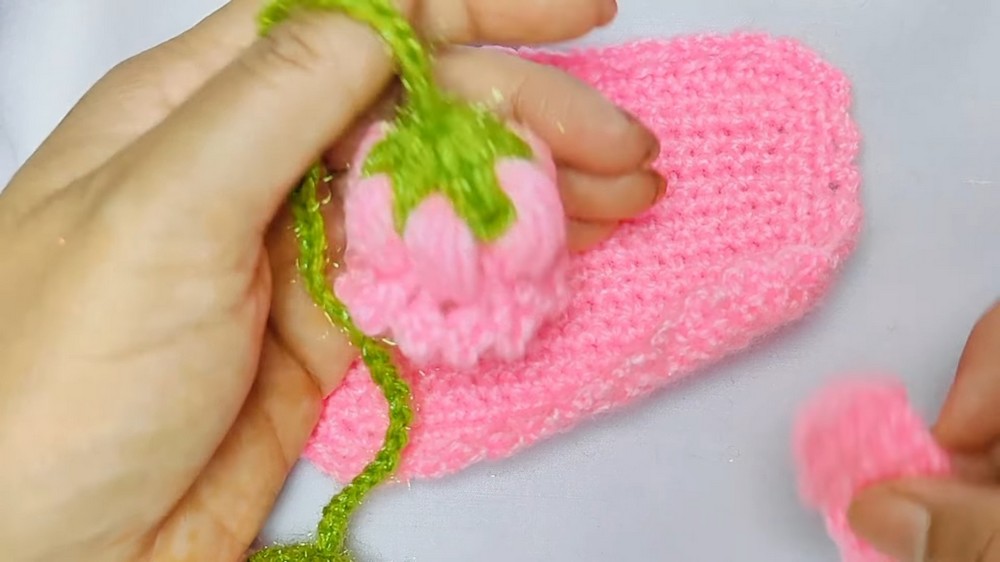
Making the Flower
-
Foundation:
- A magic ring is used to form the flower’s base, with additional chains for structure.
- Triple crochet stitches are used to create a circular base.
-
Forming Puffs:
- Puffs are created by skipping spaces on the base and working loops together.
- Six puffs are formed in total, spaced evenly around the flower.
-
Adding Decorative Details:
- Between each puff, double crochets and picots (small loops) are added for intricate design.
- Each puff gets two decorative designs, creating a layered and delicate look.
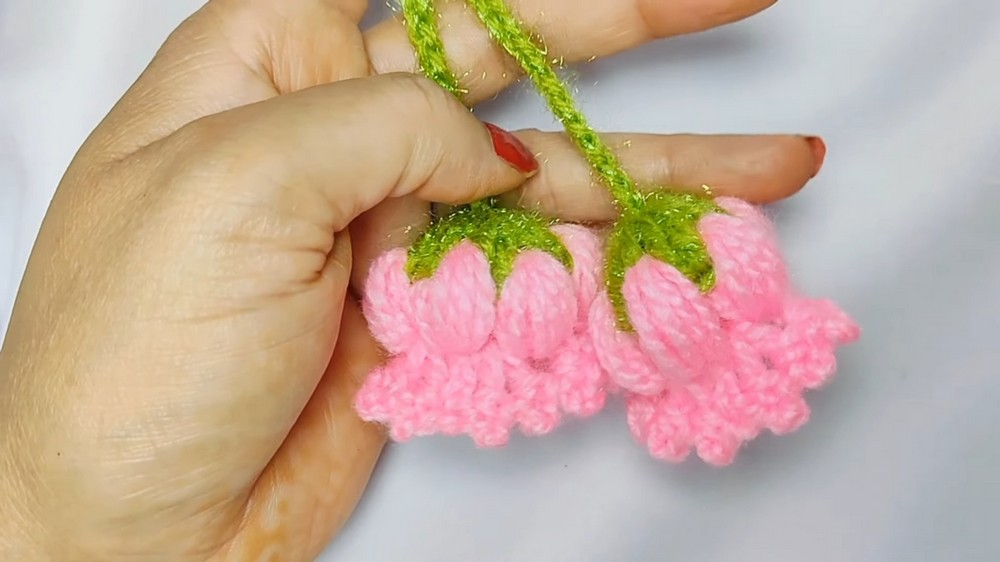
Creating the String
-
Attaching the Flower:
- The string starts with one flower fixed to the end.
- Puffs are added near the flower to secure it in place.
-
Forming the Chain:
- Chains are added to the string, and the length can be customized based on preference.
-
Adding the Second Flower:
- Another flower is attached to the opposite end of the string.
- The thread is adjusted and tidied up once both flowers are in place.
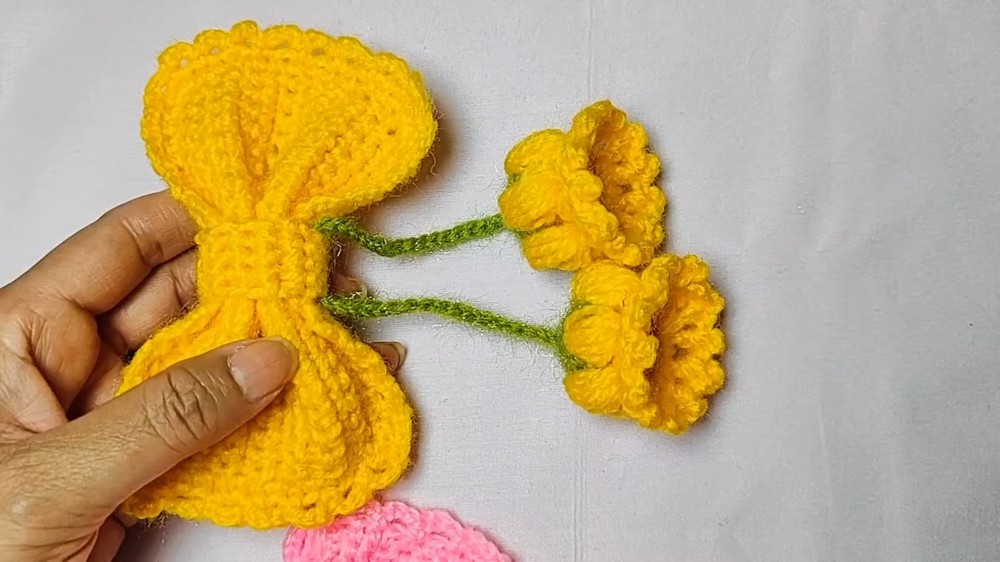
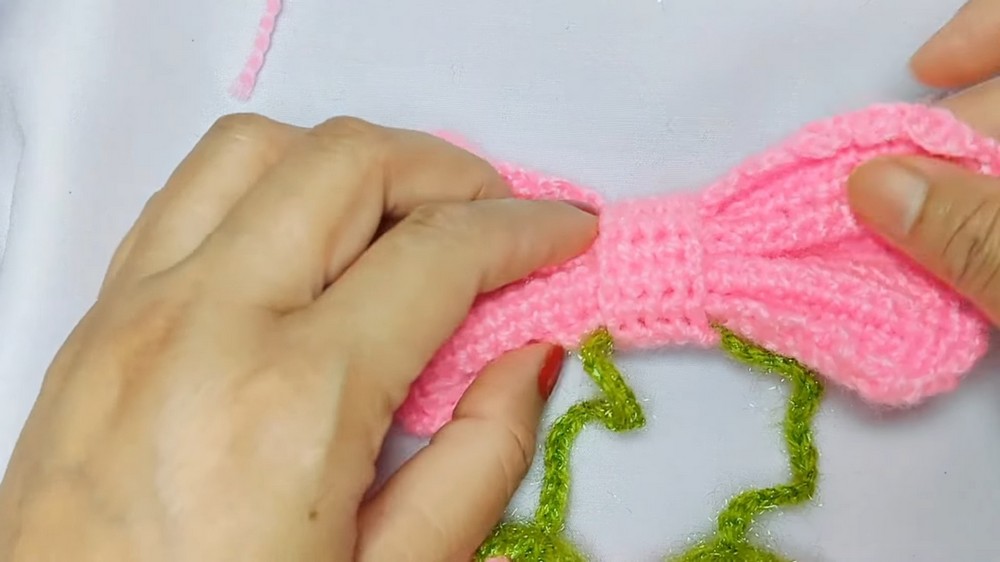
Assembling the Bow
-
Folding the Base Strip:
- The base strip is folded evenly to create the bow shape.
- The center strip is sewn onto the middle of the bow to hold the fold in place.
-
Attaching the Pendant:
- The decorative string with flowers is attached below the bow.
- Flowers and puffs secure the pendant for added charm.
Finishing Touches
-
Securing the Clip:
- A small pin or clip is chosen to attach to the back of the bow.
- The clip is glued on using a glue gun, ensuring it stays firmly in place.
-
Final Customization:
- The bow can be made in various colors, such as pink or yellow.
- The completed design is cute and colorful, making it perfect for accessories.
Video Guide
https://youtu.be/7PAQwCOLU8g