How to Crochet Beautiful Keychain Butterfly for Beginners
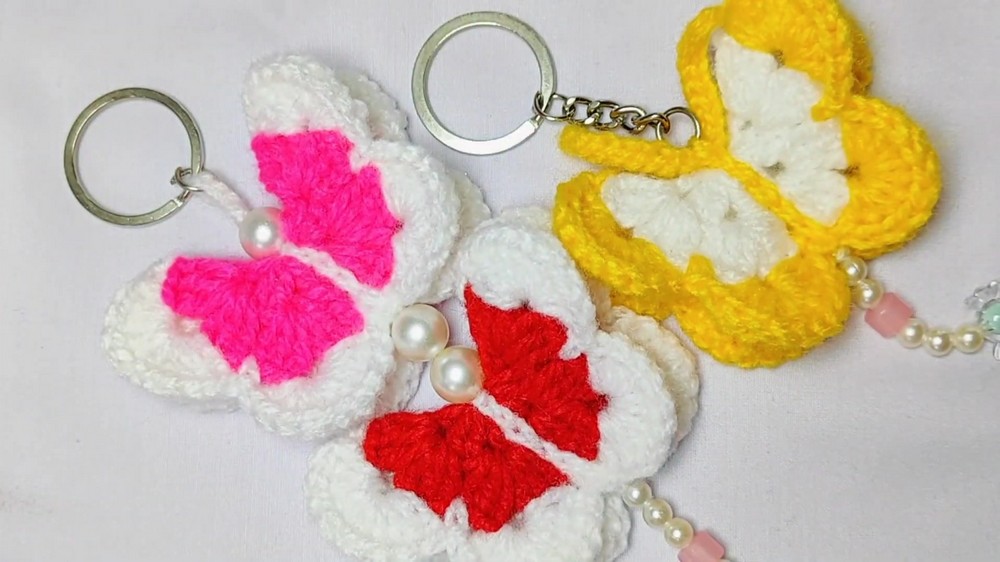
Beautiful Free Crochet Keychain Butterfly Tutorial
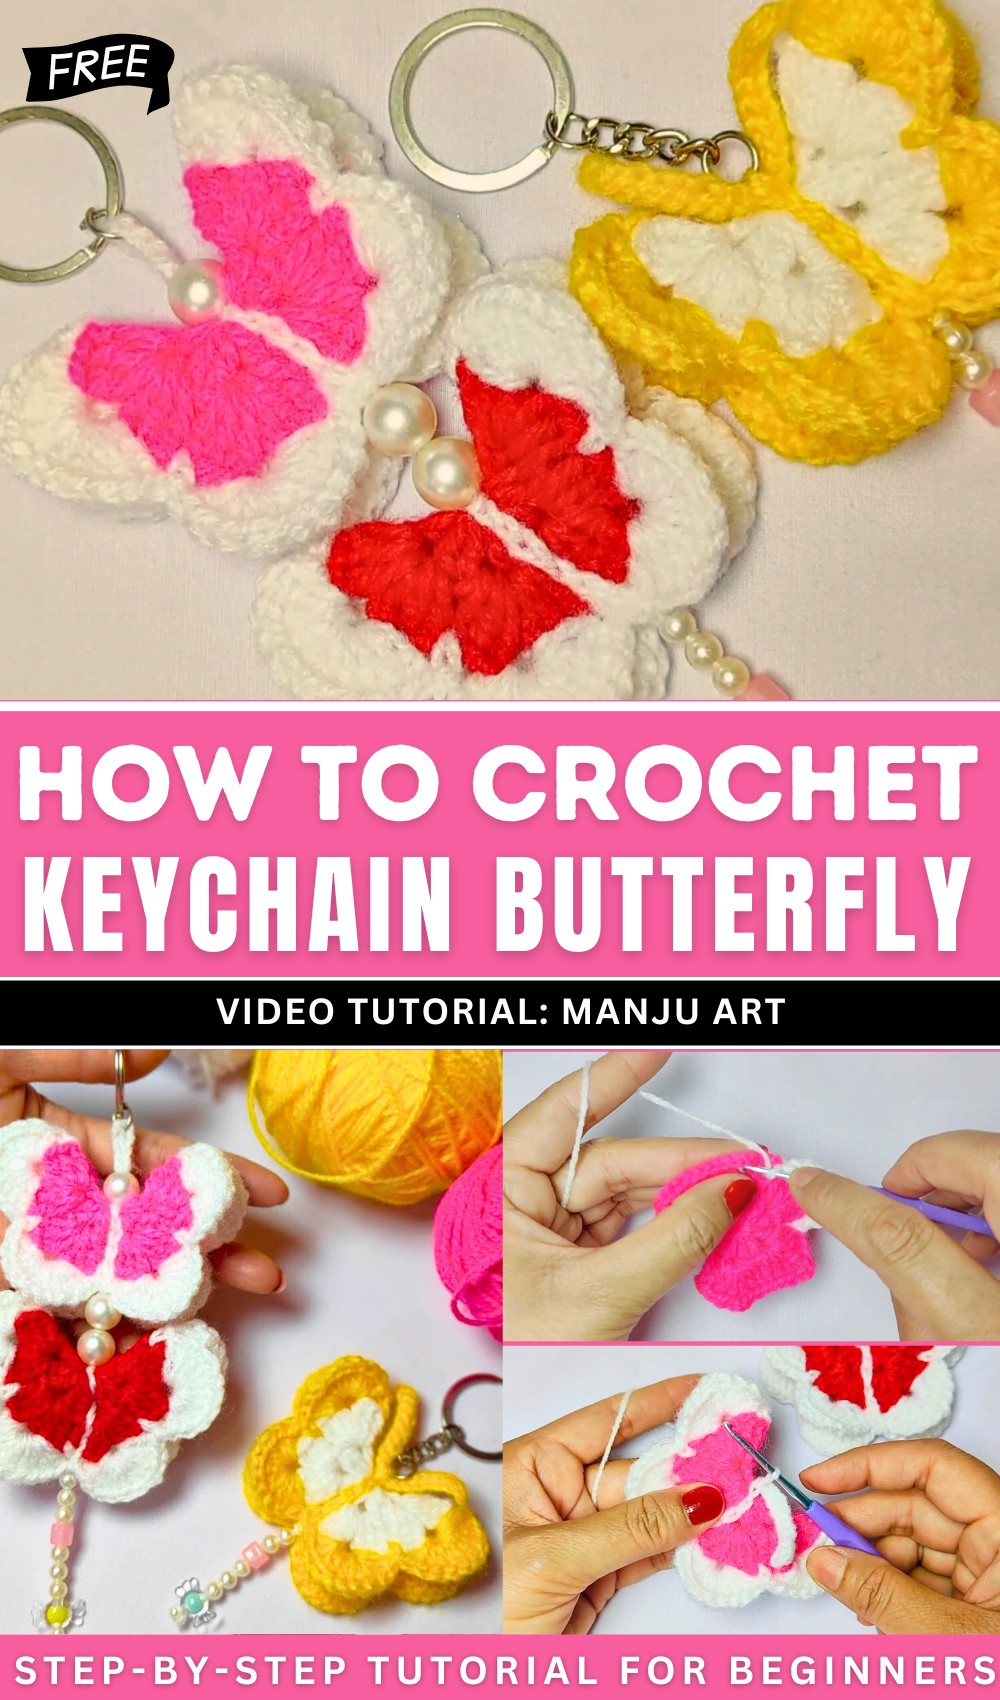
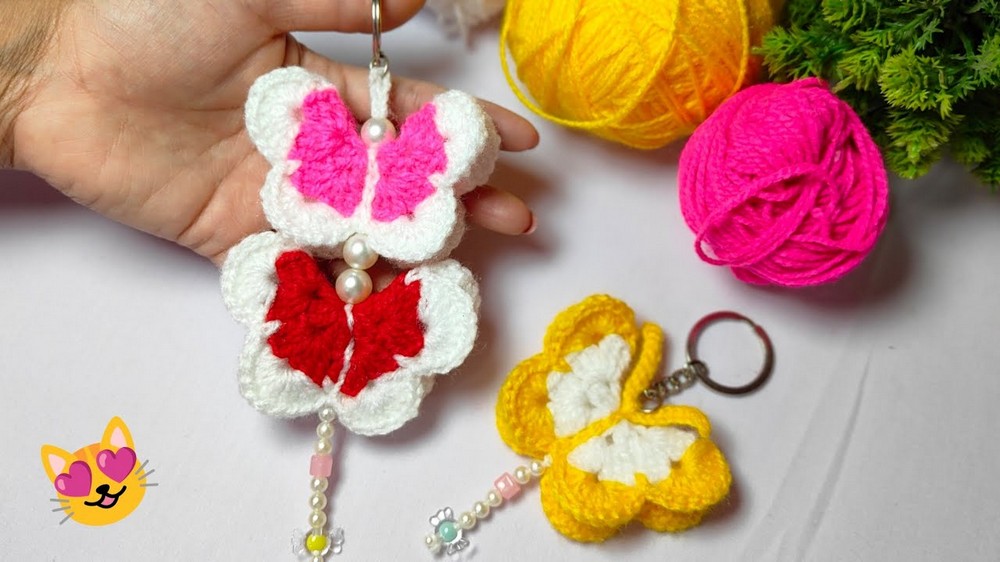
The video tutorial showcases how to craft two cake chains, one featuring a lovely butterfly design. The design is presented as simple, quick to complete, and suitable for beginners. The creator encourages viewers to use leftover yarn and experiment with multiple colors.
Free Crochet Butterfly Keychain Pattern
Materials
- Yarn: Light or DK weight acrylic knitting wool (e.g., Vardhaman Simple), assorted colors for butterfly body and wings, and white/accent color for edging
- Hook: 2.5 mm (or adjust to yarn thickness; use 3–3.5 mm for thicker yarn)
- Tapestry needle
- Scissors
- Key ring or split ring (for keychain)
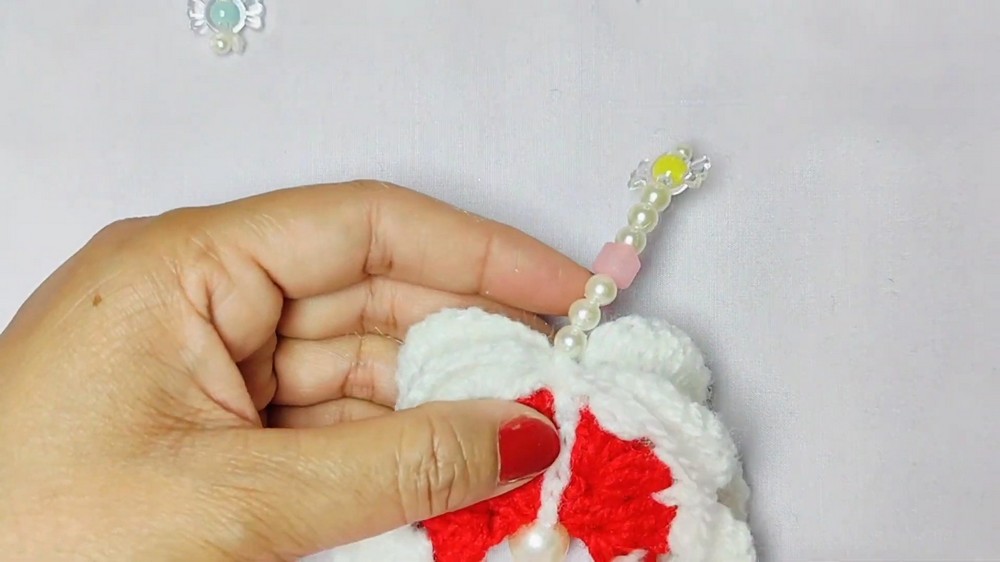
- Beads or pearls (optional, for decoration; shown: 12mm beads)
- Small crochet hook or sewing needle (to attach beads/pearls)
Key Abbreviations
| Abbreviation | Meaning |
|---|---|
| MR | Magic ring |
| ch | Chain |
| sc | Single crochet |
| dc | Double crochet |
| sl st | Slip stitch |
| st(s) | Stitch(es) |
| rep | Repeat |
| FO | Fasten off |
Special Notes
- Use any color combinations. This is a great project for scrap yarn!
- Work the wings and edging in chosen contrasting or matching colors for effect.
- Tension should be firm for a sturdy keychain.
Pattern
Butterfly Body & Base (Make 2 for each keychain)
Round 1
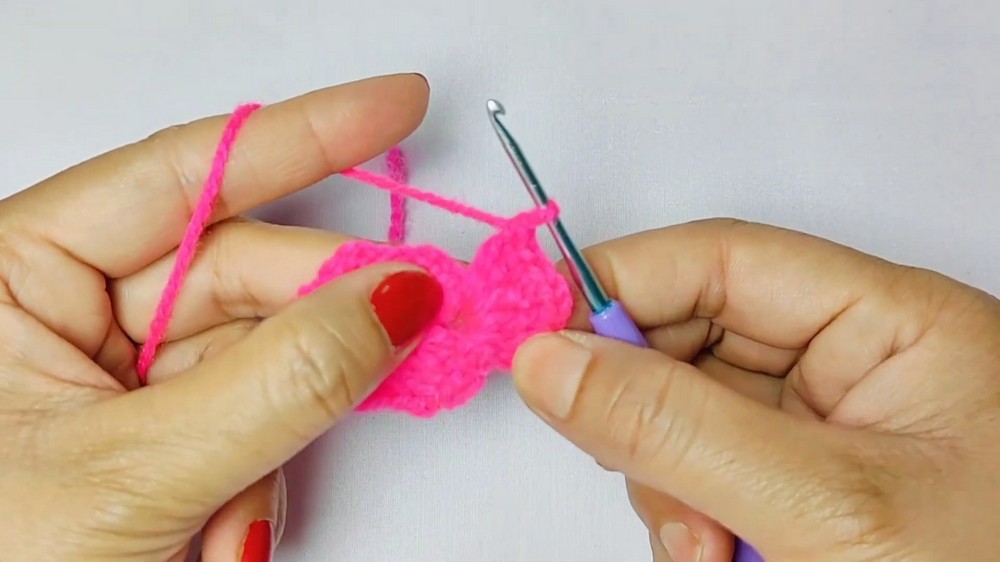
- With Color A (dark pink), make a MR.
- Ch 3 (counts as first dc), dc in MR, ch 2, 2 dc in MR, ch 2;
rep from * a total of 8 times (so you form 8 paired dc groups separated by ch-2 spaces).- You will have 8 pairs (16 dc), separated by ch-2 spaces.
- Join with sl st to top of ch 3.
- Sl st in next dc and into the next ch-2 space (to center yourself for the next round).
Round 2
- Ch 3, 2 dc in same ch-2 space, ch 3, 3 dc in same space.
- (In each remaining ch-2 space around: 3 dc, ch 3, 3 dc.)
- Work in each ch-2 space, forming petals around.
- Sl st to top of ch 3, FO.
- Weave in ends.
- You now have a flat butterfly “body” with 8 petal clusters.
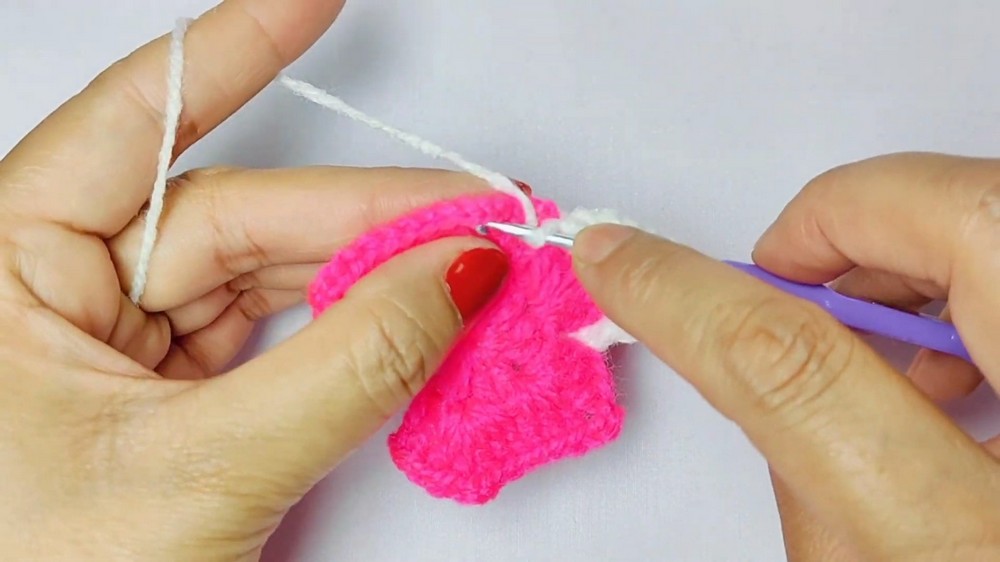
Edging (White/Contrast Color)
- Join Color B (white) in any ch-3 space with a sc.
- In same ch-3 space: sc, 10 dc, sc.
- In the space between clusters, sc.
- In next ch-3 space: sc, 10 dc, sc; then sc in the space between clusters;
Repeat this pattern all around to edge all petals. - Join with sl st to the starting sc.
- FO and weave in ends.
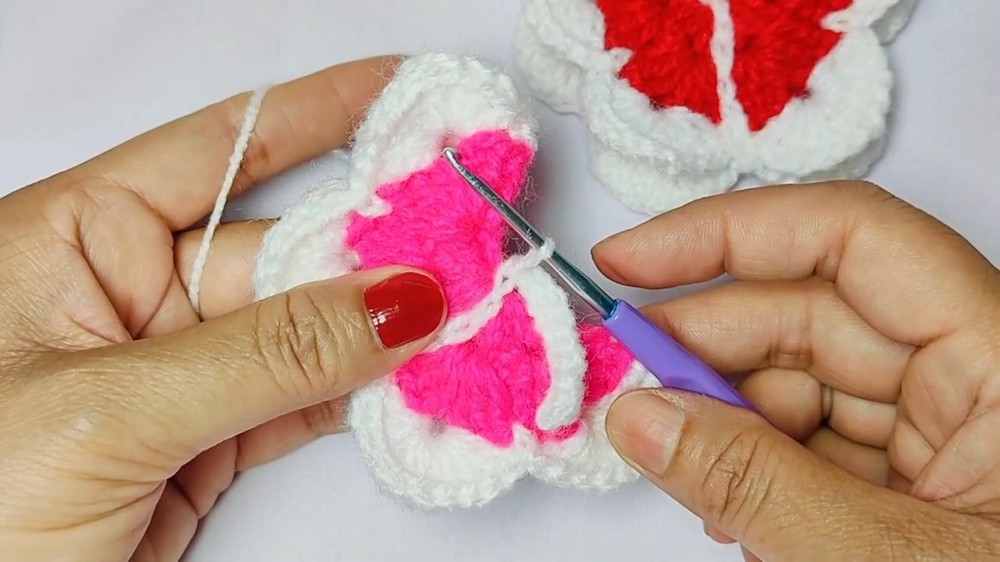
Assembly – Shaping and Joining
- Fold butterfly in half so you have the “wings” on each side.
- On underside, join body with 3–4 sl st or sc stitches to make it sit symmetrically.
- FO. Weave in ends.
Butterfly Antennae & Keychain Ring
Antennae:
- Ch 6.
- Skip first ch, sl st in each of next 5 ch.
- Ch 6 again, sl st in each ch back down (for second antenna).
- FO, leaving long tail for sewing.
- Use the tails to sew the antennae to the butterfly’s head (center between wings).
Keychain Loop:
- Ch 6.
- Sl st to first ch to form a loop.
- FO, leaving a tail for sewing.
- Sew this loop to the head/center of the butterfly securely; attach your key ring/split ring to this loop.
Optional:
- Thread a bead or pearl onto your loop before sewing, or use a needle to securely sew a bead as a “head” or “body” detail.
(Optional) Add Decorative Beads
- Thread beads through the antenna or center before finishing.
- Use a tapestry needle to attach as shown in the video.
Conclusion
Your butterfly keychain is ready! It’s charming, fast to crochet, and a delightful project for all levels. Use up leftover yarn, add beads, and make as gifts or for your own keys and bags.
Pattern Corrections & Tips
- Petal counts: Each “wing” cluster should always be made into the ch-3 corner.
- Wings: You may adjust the number of dc in the edge for smaller or fuller wings.
- Firmness: To keep the keychain sturdy, crochet tightly, or back the butterfly with felt/fabric if desired.
- Antennae/chain ring: Make longer chains for larger rings or longer antennae.
- Customization: Add a face, blush, or safety eyes for character!