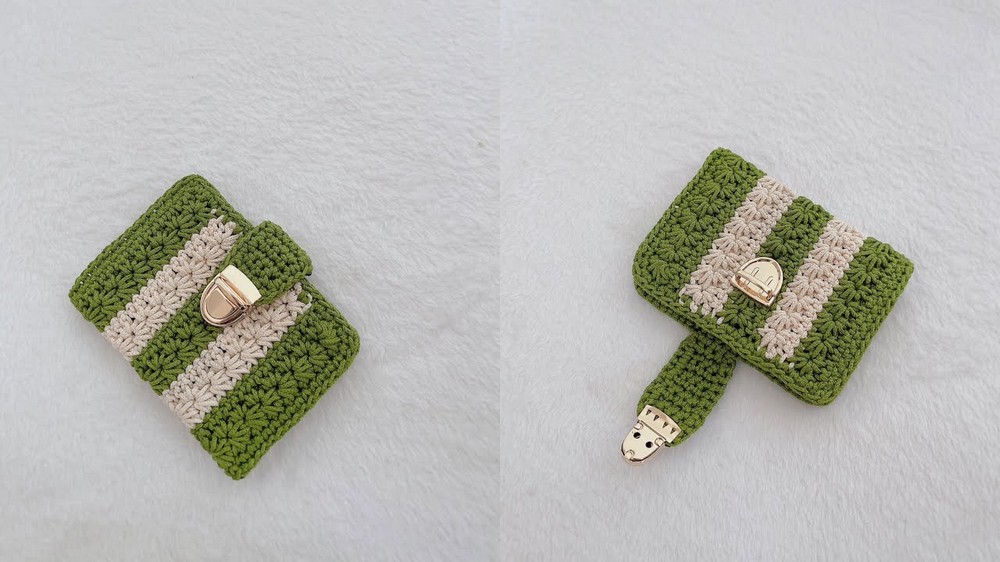
How to Crochet Mini Wallet for Everyday Use
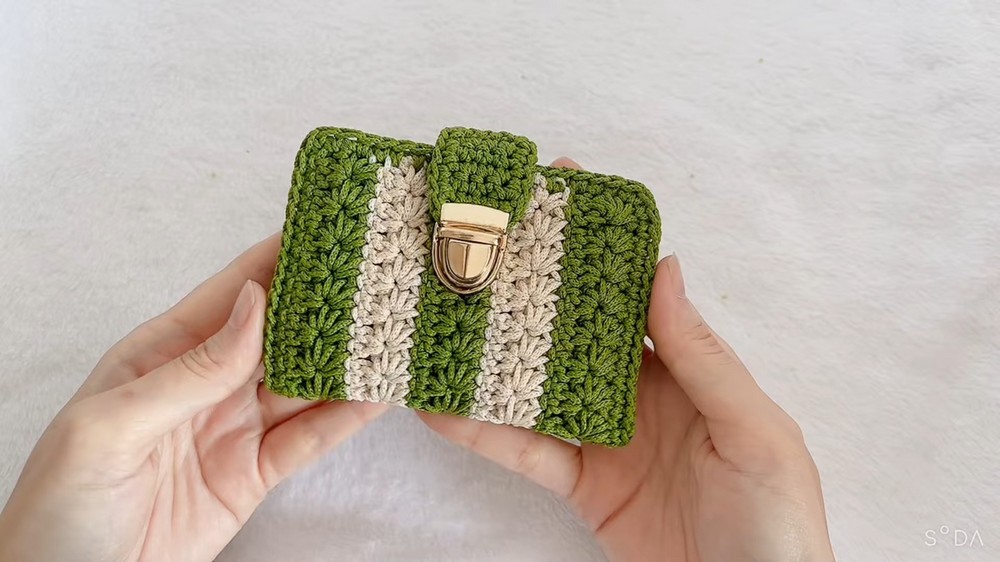
Learn how to crochet a compact mini wallet, perfect for holding change or personal items following this step-by-step tutorial for all skill levels. Using 2 meters of woven yarn in two colors, a 3.0 mm crochet needle, and a key lock set, the tutorial walks viewers through creating the wallet body, compartments, and strap. Techniques include double crochet, single crochet, and assembling parts with precise markings. The finished wallet is stylish and lovely!

Overview
- Project: Mini Crochet Wallet
- Purpose: Create a compact wallet suitable for holding change or personal documents.
Materials Needed
- 2 meters of woven yarn in two colors (cream and blue)
- 3.0 mm crochet needle
- Key lock set for the wallet
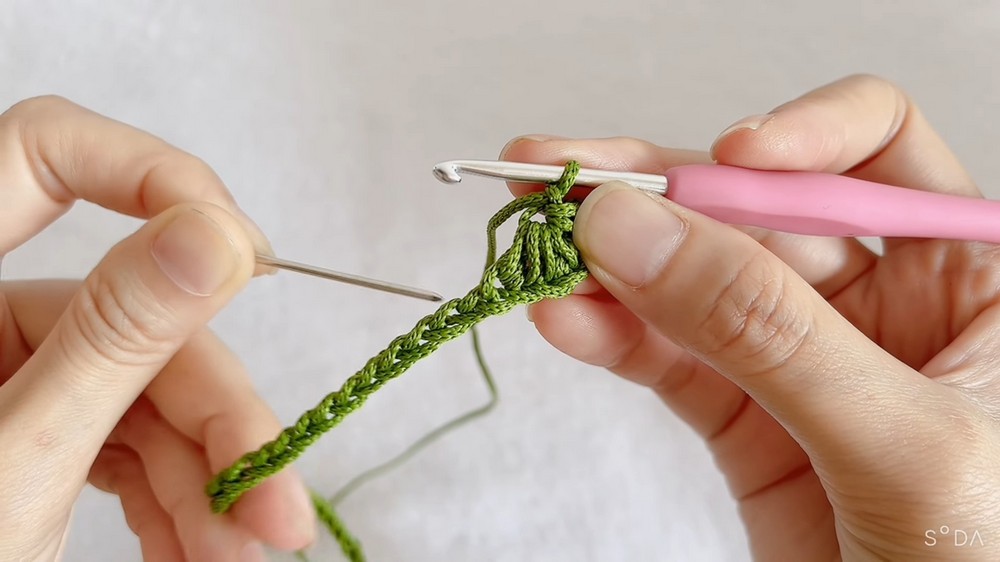
Starting the Project
- Initial Setup:
- Crochet a foundation chain.
- Skip the last stitch and start crocheting from the second to last stitch.
- Use the double crochet stitch method to create a strong base.
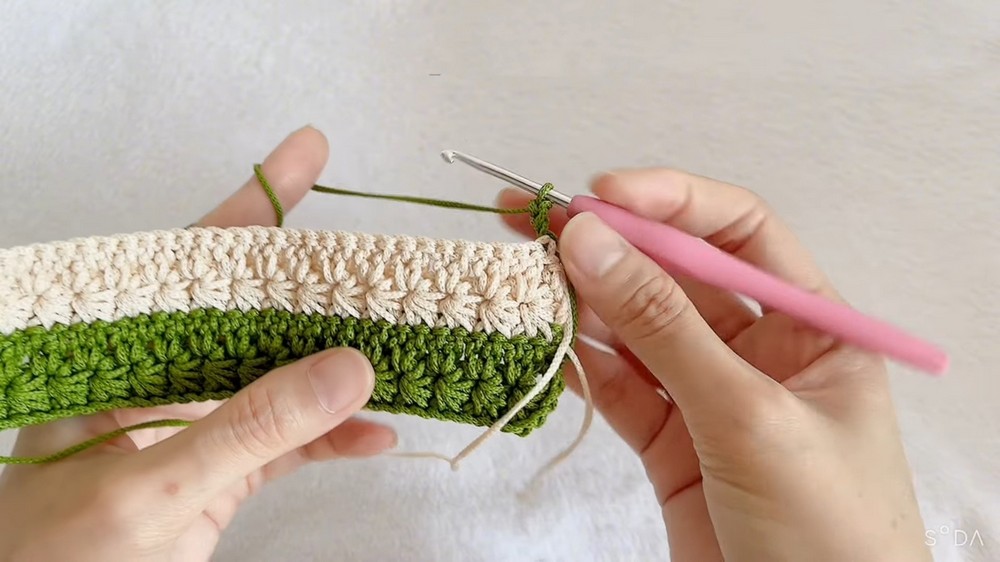
Creating the Pattern
- First Row:
- Insert the needle sequentially into the crochet stitches and pull the thread through each stitch.
- Create a unique pattern by pulling the thread through multiple times and completing the double crochet stitch.
- Subsequent Patterns:
- Continue this method, inserting the needle into the stitch, pulling the thread up multiple times, and completing the double crochet.
- Repeat this process to form the first row of distinct patterns.
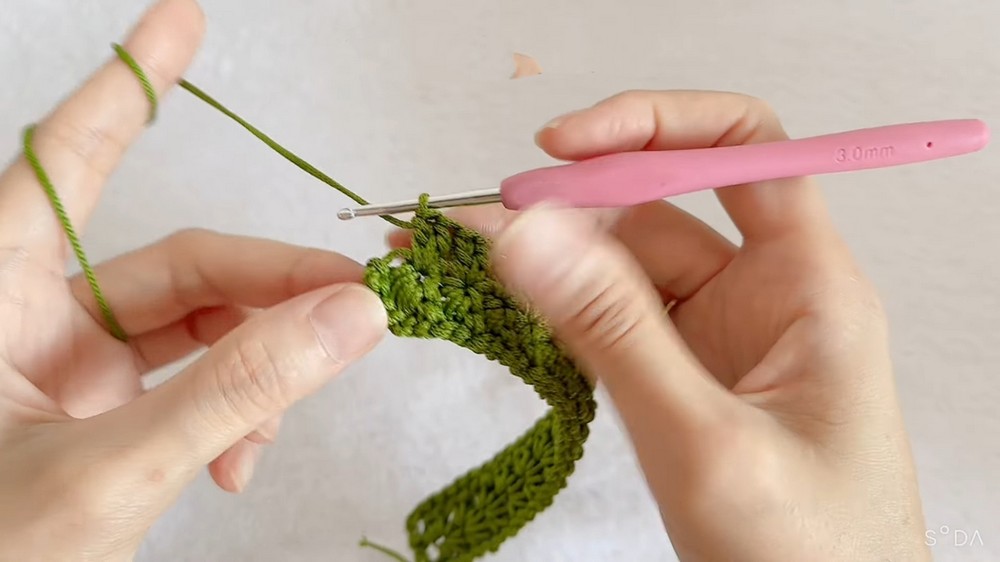
Transitioning Rows
- Turning the Needle:
- At the end of the first row, hook up stitches and turn the needle to start the second row.
- Each crochet leg should include two double crochet stitches in the designated positions.
- Completing the Rows:
- Follow this pattern until reaching the end of the row.
- Continue to alternate colors as specified (e.g., cream to blue).
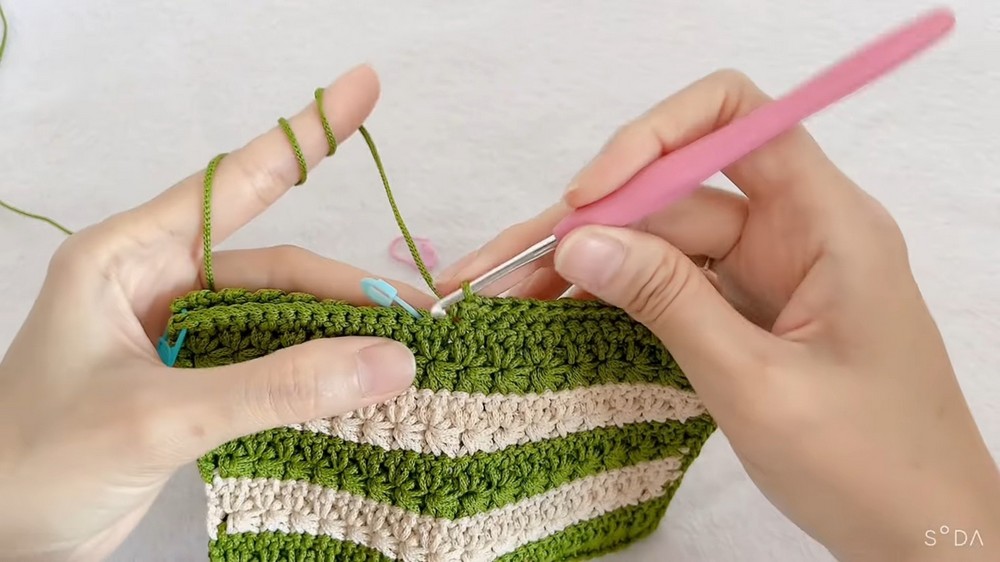
Constructing the Wallet Body
- Creating Additional Rows:
- Continue crocheting rows following the similar pattern used in the first row.
- Alternate rows and patterns until reaching the 10th row to complete the outer part of the wallet.
Making the Wallet Compartments
- Small Rectangular Pieces:
- Crochet two smaller rectangular pieces to form the wallet compartments.
- Ensure the compartments are of uniform size and resemble the completed wallet’s dimensions.
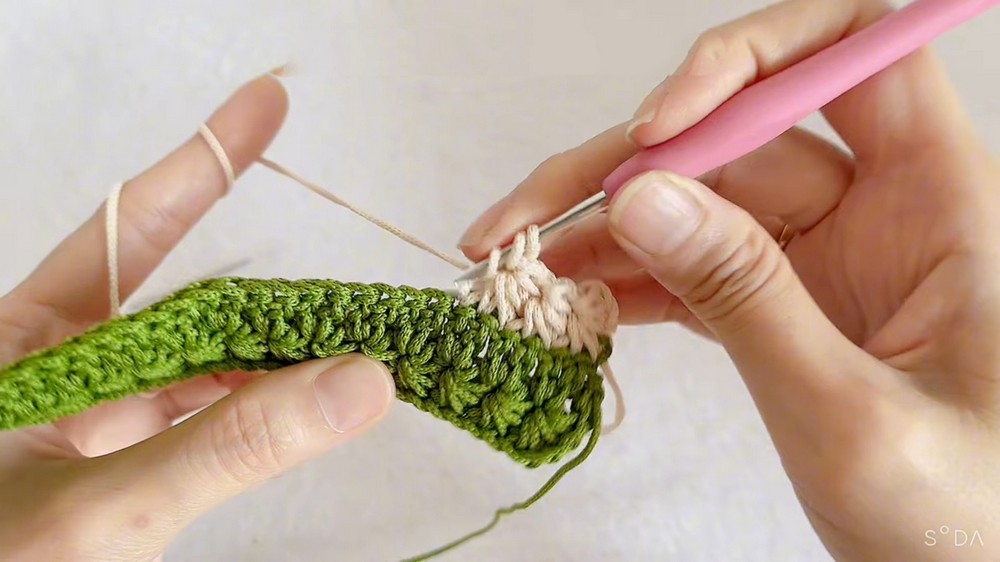
- Assembling the Compartments:
- Use a needle to mark positions and join the pieces using a single crochet stitch.
- Maintain a specific distance between compartments and join them evenly.
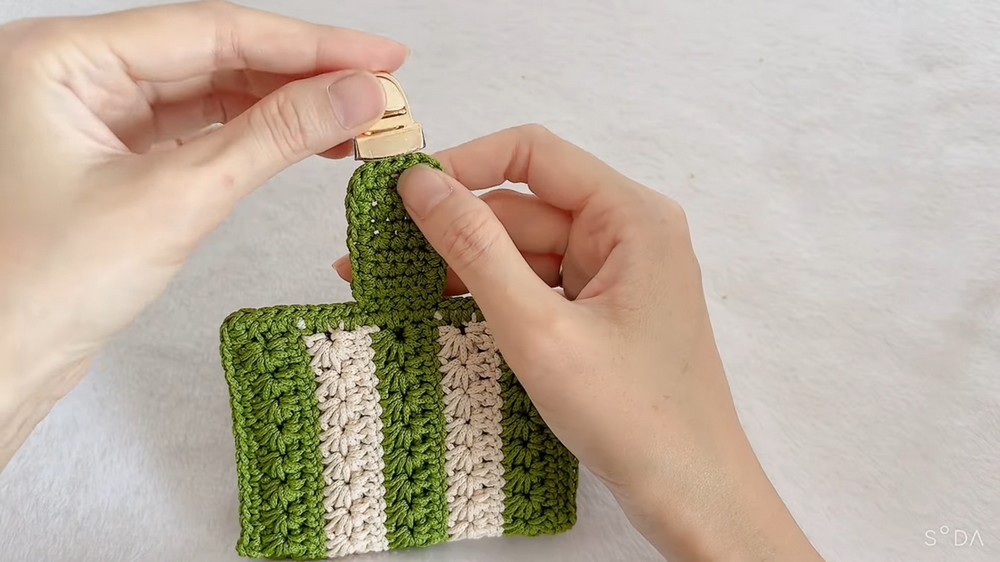
Adding the Wallet Strap
- Strap Construction:
- Create the strap piece with five stitches in width and nine rows of single crochet.
- Crochet the edge of the strap using single crochet stitches.
- Strap Attachment:
- Use a sewing needle to securely attach the strap to the wallet.
- Ensure proper alignment and tight attachment for functionality.
Completing the Wallet
- Final Assembly:
- Attach the key lock set to the wallet.
- Ensure all parts are securely fixed and the wallet is functional.
- Finishing Touches:
- Smooth out any rough edges and make sure the crochet stitches are consistent throughout the wallet.