How to Crochet Pineapple Skin Basket for Beginners
In this post, you’ll learn how to crochet a pineapple skin stitch basket using t-shirt yarn and a 4-inch base for beginners. The tutorial covers essential techniques like single crochet, waste coat stitches, and extended spike stitches, using tools like 4 mm and 6 mm crochet hooks. The creator emphasizes adapting to base hole sizes for consistency and offers tips on achieving a seamless finish.
Variations, like using ribbon yarn, are shown for different textures, making it a versatile project for crochet enthusiasts. So, follow through with us for the complete tutorial.

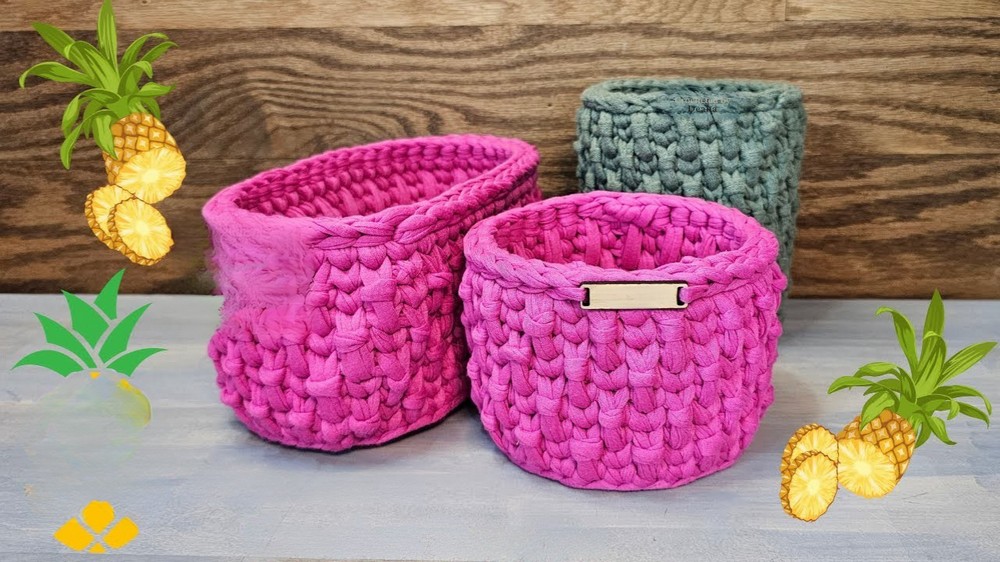
Pineapple Skin Stitch Basket
The tutorial demonstrates how to create a crochet basket using a unique “pineapple skin stitch” technique with t-shirt yarn. It provides step-by-step guidance to ensure the basket is crafted with clean edges, sturdy walls, and a textured finish. The tutorial covers essential stitches, tools, tips, and techniques to master the process. Here’s the detailed breakdown:
Materials Used
- Base: A 4-inch base with pre-punched holes (different hole sizes might affect your outcome).
- Yarn: T-shirt yarn (tutorial mentions sourcing issues from Joann Fabrics) or alternatives like extra-large ribbon yarn.
- Hooks: A 4 mm hook for foundational work and a 6 mm hook for the main basket body.
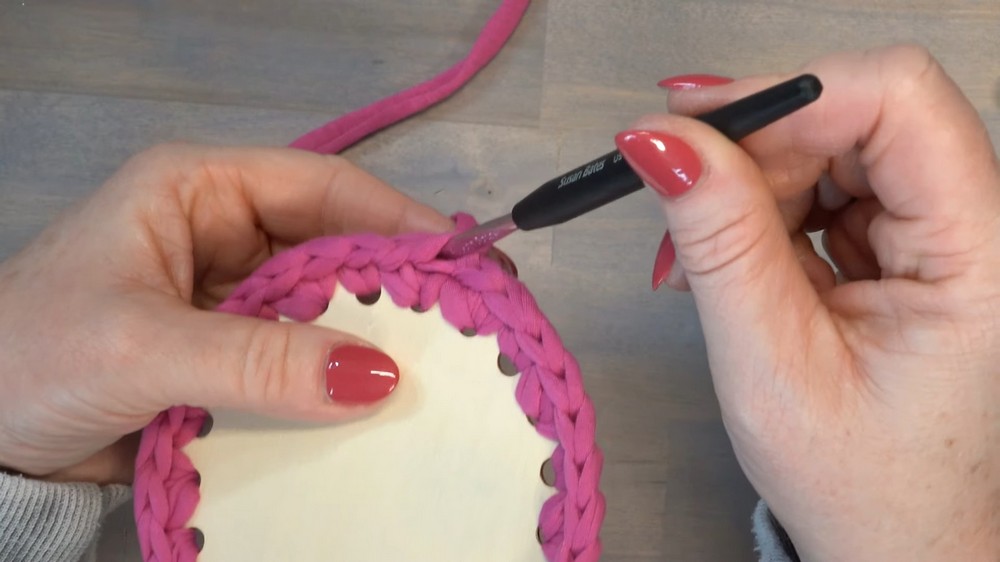
Starting the Basket: Attaching to the Base
-
Foundation Row Setup:
- Begin by attaching t-shirt yarn to the base using a 4 mm hook.
- Depending on the size of the base holes, adjust the starting method (e.g., skip the slip stitch for smaller holes).
-
Tailor to the Base:
- The tutorial highlights that even if the bases are labeled 4 inches, the size and spacing of the holes can vary. Pay attention to ensure a consistent look.

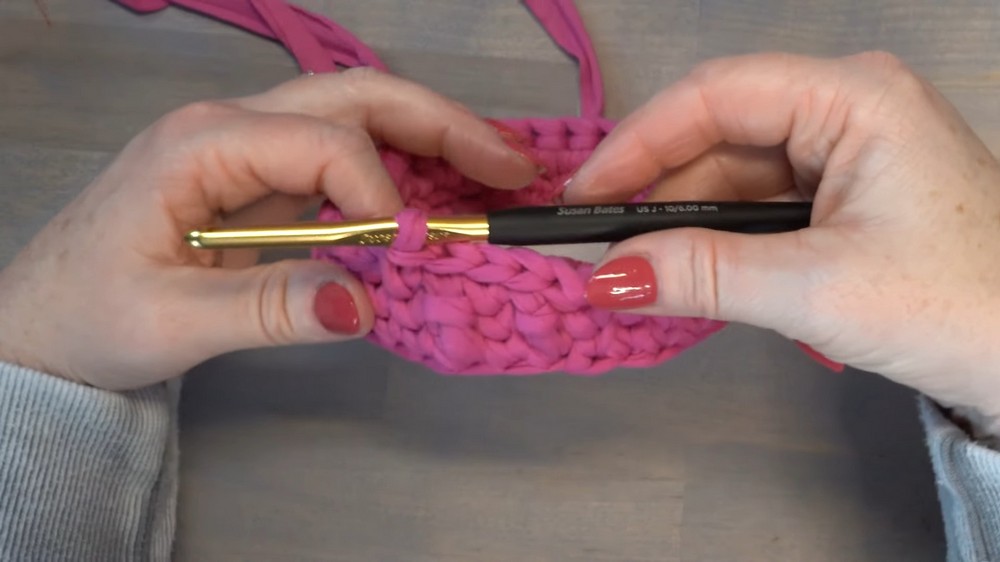
Raising the Walls
-
Switching Hooks for Walls:
- After completing the foundation row, switch to a 6 mm hook to begin building the basket’s walls.
- The walls start with single crochets worked into the back loop only, which helps create lift and structure at the basket’s base.
-
Smooth Transitions Between Rows:
- The video demonstrates a neat joining technique to ensure that rows are connected without visible gaps or bumps.
Pineapple Skin Stitch Pattern
-
Two-Row Repeat:
- The pineapple skin stitch consists of a two-row pattern.
-
Row 1 – Single Crochet Waistcoat Stitches:
- Perform single crochet stitches worked into the “V” space of the previous row to ensure a straight and structured row.
-
Row 2 – Alternating Single and Extended Spike Stitches:
- Combine waistcoat stitches with extended spike stitches to create the characteristic textured “pineapple skin” look.
- The tutorial emphasizes proper tension control to avoid uneven or puffy rows.
-
Seam Alignment Tip:
- Adjust stitch placement in certain rows to minimize the appearance of misaligned seams.
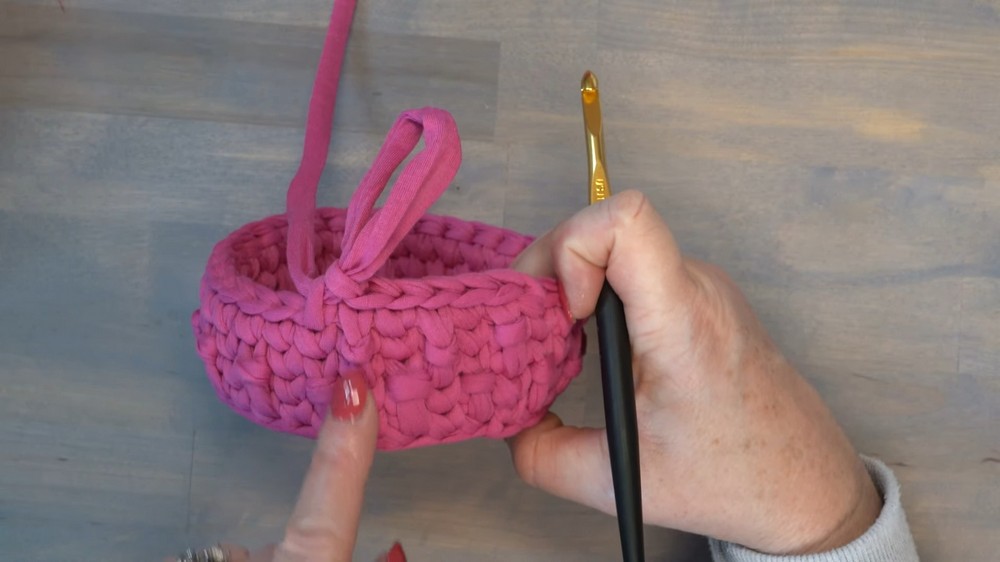
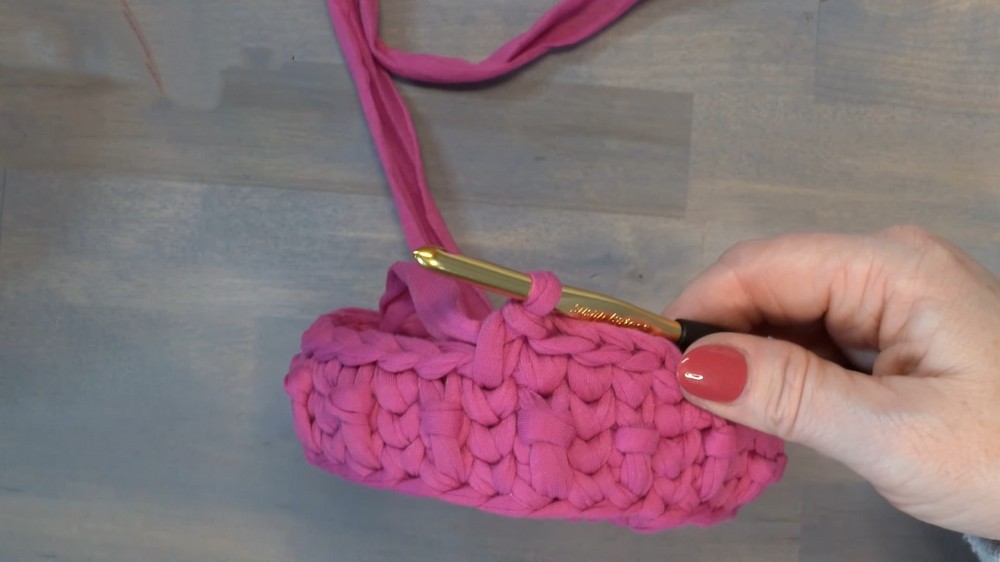
Finishing the Basket
-
Final Rows:
- Once the yarn is almost finished or the desired basket height is reached, a slip stitch row is added to secure the edge.
- Top off the basket with a neat slip stitch finish, choosing to add this row either after the single crochet section or the patterned section, depending on your preference.
-
Weaving in Ends:
- Securely weave in the tail to complete the basket.
Alternative Yarn Option
- The tutorial demonstrates the pineapple skin stitch with ribbon yarn as an alternative to t-shirt yarn, which provides a different texture and slightly looser structure.

Tips and Tricks
- Hole Sizes and Slip Stitches: Adjust techniques if base holes are too small for slip stitches to fit.
- Maintaining Consistent Tension: Ensure the extended spike stitches aren’t too loose, or the textured design may look uneven.
- Experimenting with Yarn Types: Try different yarns to achieve unique textures and styles.
This tutorial delivers clear instructions for an intermediate-level basket project, showcasing how to combine functional design with beautiful texture. Following the steps, viewers can create a versatile basket suitable for storage or decorative purposes!