How to Crochet Reversible Kerchief Bandana for Beginners
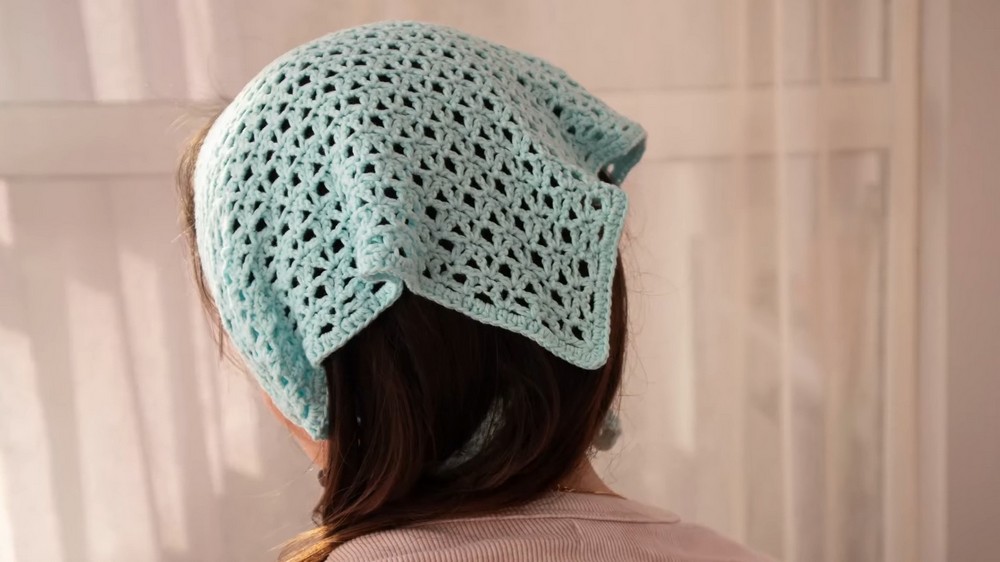
In this post, you’ll learn how to crochet a reversible kerchief with a beautiful triangular pattern using cotton yarn and a crochet hook perfect for all. Ideal for beginners, the project is simple, quick, and requires minimal materials. The kerchief is crocheted from the corner, allowing you to adjust its size as you go. With no sewing or motif joining, the design is seamless.
The pattern alternates between two-row repeats, and the video includes step-by-step instructions for completing rows and an edging border. So, follow through with us for the complete tutorial.
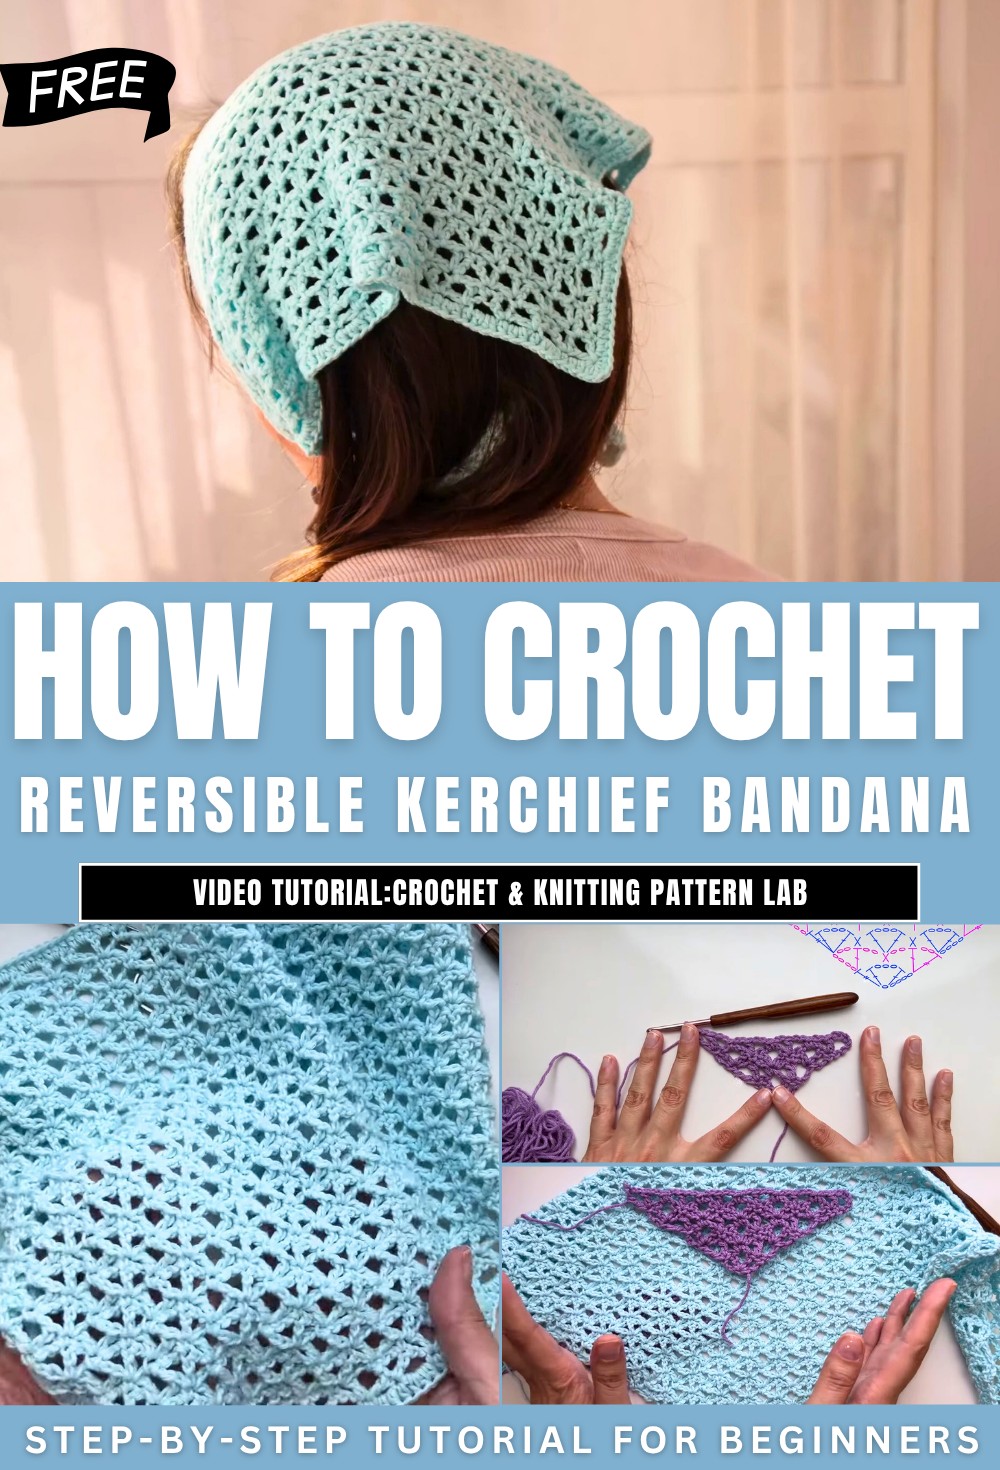
Crocheted Reversible Kerchief
This tutorial from the provided video explains how to crochet a beautiful, reversible triangular kerchief (or bandana) using cotton yarn and minimal sewing and crafting skills. Below is a detailed summary of the tutorial, broken into clear steps and headings.
Introduction
- The tutorial begins with an overview of the kerchief design.
- The kerchief is reversible, allowing it to be worn on either side. It has a simple yet elegant triangular pattern.
- It is beginner-friendly, quick to crochet, and can be completed in one evening using minimal yarn.
- Unlike traditional projects, there’s no need to join motifs or weave in multiple ends—this kerchief is created as a single piece with one starting and ending tail.
Materials Used
- Yarn: The presenter uses Alize Bella 100% cotton yarn, which is soft and has a loftier texture, making it ideal for a drapey fabric.
- Crochet Hook: A 3mm hook is used for the main project, although the tutorial demonstrates the pattern using thicker yarn and a 4mm hook for clarity.
- The tutorial emphasizes that any cotton yarn can be used based on preference.

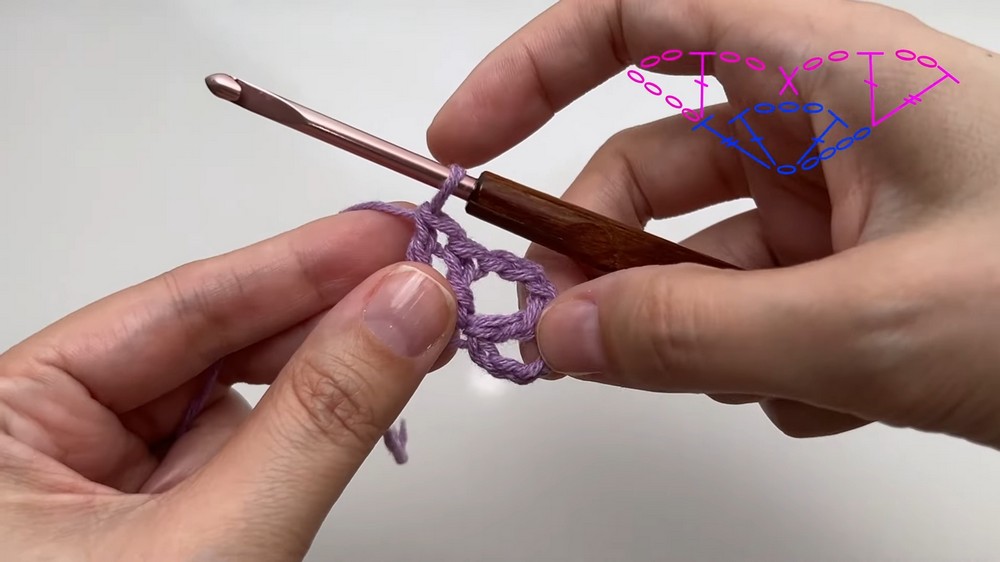
Overview of the Pattern
- The kerchief is crocheted from one corner, gradually expanding into a triangular shape. This allows for easy adjustment of the size during the process.
- The entire design is based on a two-row repeat pattern:
- Odd-numbered rows: Focus on building and increasing the triangular structure.
- Even-numbered rows: Introduce chain spaces and shaping techniques to enhance the layout.
Step-by-Step Process
Foundation Row
- The project starts with a simple chain foundation that forms the base of the triangular pattern. The first few stitches set the structure for an expanding triangle.

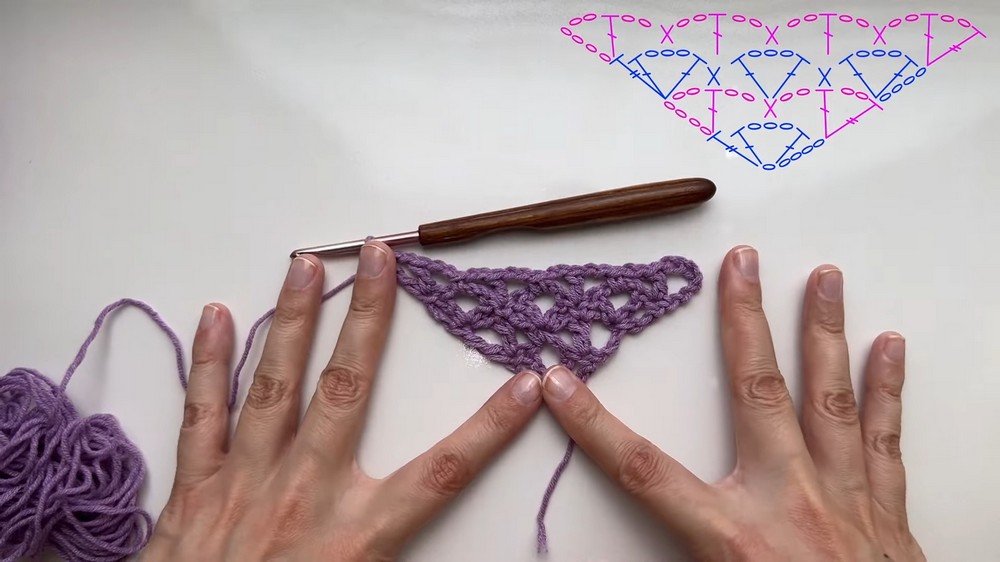
Two-Row Repeat
- The main pattern alternates between odd and even rows:
- Odd rows: Feature increases at the edges, adding width to the triangular fabric.
- Even rows: Introduce chain spaces and connecting stitches, creating fluidity in the design.
- The tutorial demonstrates how to complete these rows while focusing on tension and stitch placement for a secure fabric.
Adjusting Size
- The triangular pattern grows row by row, allowing the user to stop at the desired size. The presenter stops once the length from the corner to the middle measures approximately 25-26 cm.
Finishing Touches
Final Border
- A clean border is added using half-double crochets. This edges the triangular fabric while maintaining flexibility and avoiding rippling.
- The tutorial alternates stitches creatively for consistent results along the edges.

Tail Management
- The single yarn tail is secured using a needle and hidden within the fabric for a seamless finish.
Measurements
- After blocking and drying, the kerchief measures approximately 90 cm across, making it easy to tie without additional straps. It can also be styled as a neckerchief.
Conclusion
- The crocheted kerchief is a versatile piece that can be worn as a bandana or neckerchief. Its triangular design and seamless assembly make it a quick and satisfying project for beginners.