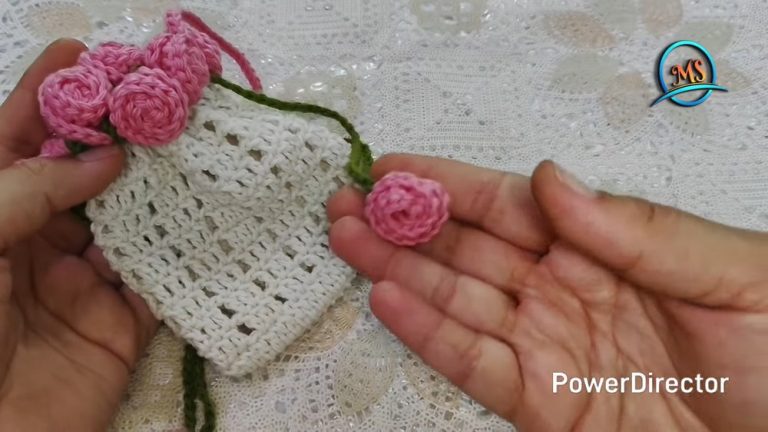
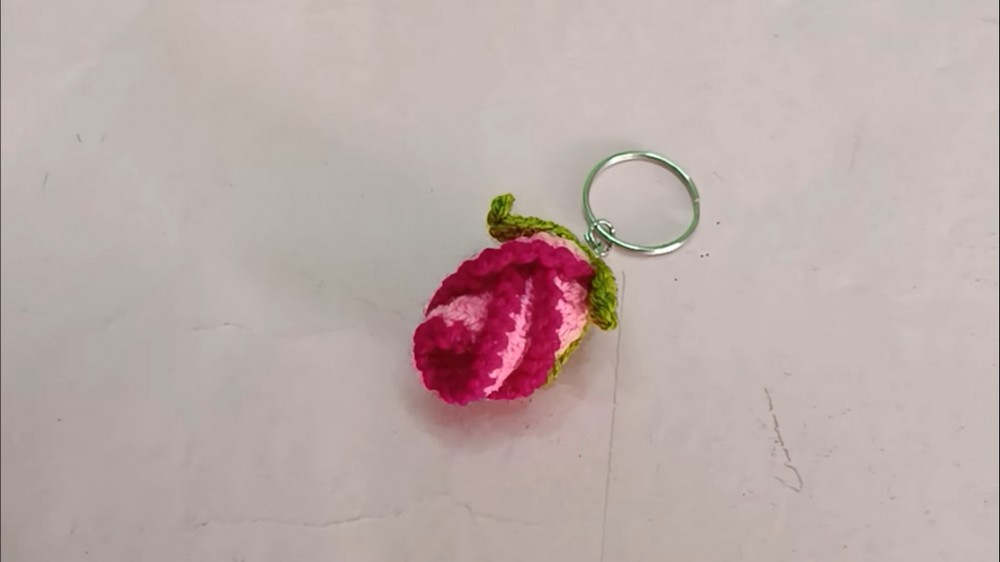
How to Crochet Rose Bud Keychain Step by Step Tutorial
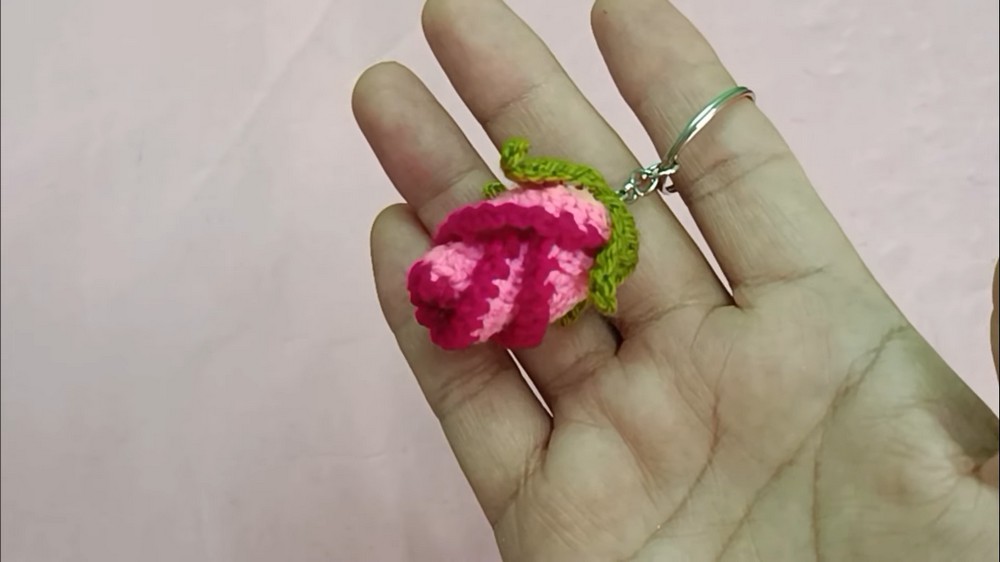
With a step-by-step tutorial, learn how to crochet a beautiful crochet rose bud keychain—a charming and unique handmade gift. Using a 2.5mm crochet hook and three-ply yarn, the presenter demonstrates the creation process, starting with a magic ring and progressing through rounds with half-double crochet stitches and decorative patterns. The tutorial also includes instructions for crafting sepals and assembling the final keychain.
Ideal for beginners and crochet enthusiasts, the video encourages viewers to follow along, learn the technique, and personalize their creations. So, follow through with us for the complete tutorial.

Crochet Rose Bud Keychain Tutorial
This tutorial provides a step-by-step guide to creating an elegant and charming crochet rose bird keychain. Ideal as a unique handmade gift or personal project, it is designed to help complete this crochet project effectively.
Materials Needed
- Crochet Hook: A 2.5 mm crochet hook.
- Yarn: Three-ply crochet yarn or thread.
- Additional Items: Keychain ring, sewing thread, and glue.
Steps to Crochet the Base of the Bird
Round 1: Starting the Magic Ring
- Begin by creating a magic ring, which forms the center of the design.
- Work the specified stitches to shape the foundation of the round.
- Tighten the ring and join the last stitch to the first with a slip stitch.
Round 2: Increasing the Base
- Begin the second round with chain stitches, counting them as stitches where applicable.
- Add stitches in every stitch around to create the necessary increases for this round.
Round 3: Additional Increases
- Start with chain stitches and include pattern increments.
- Alternate between creating single stitches and increasing stitches for this round’s pattern.
Rounds 4–6: Further Development
- Continue subsequent rounds with chain stitches and a combination of single and increased stitches.
- Progressively increase the number of stitches between the increase points to maintain the circular shape.
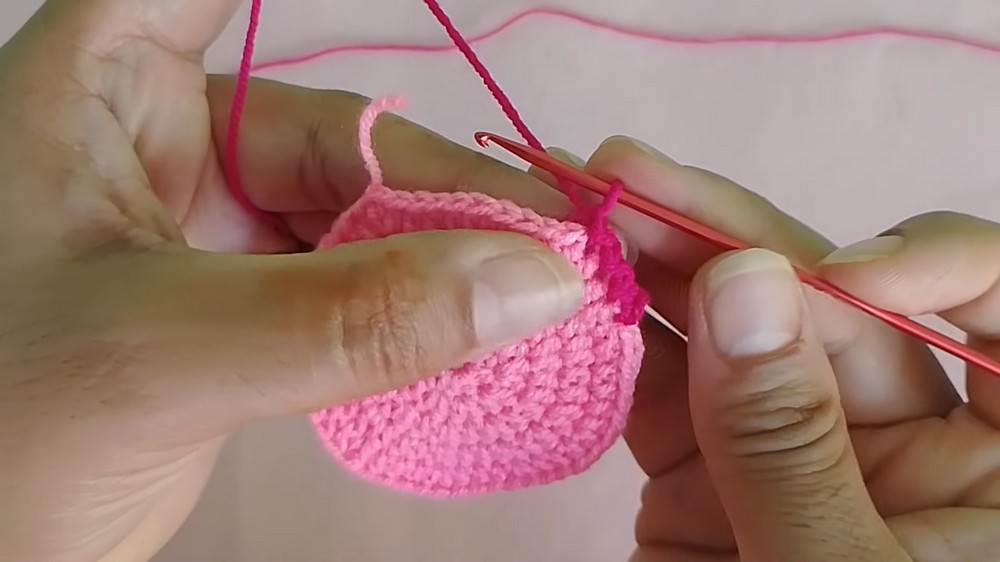
Adding the Border
- Use a contrasting yarn color to add detailing to the edges.
- Work chain stitches alternating with slip stitches around the edges to create a polished border design.
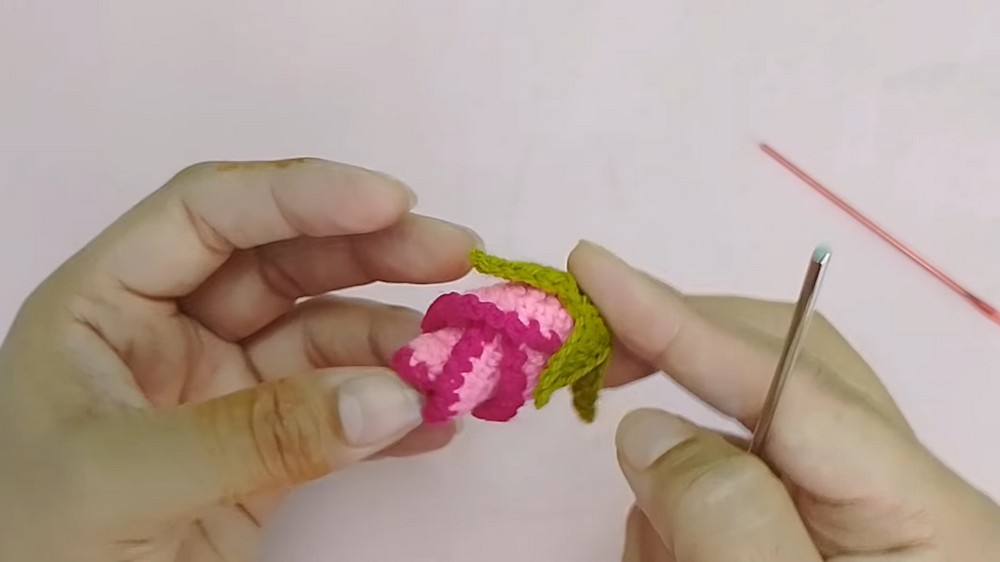
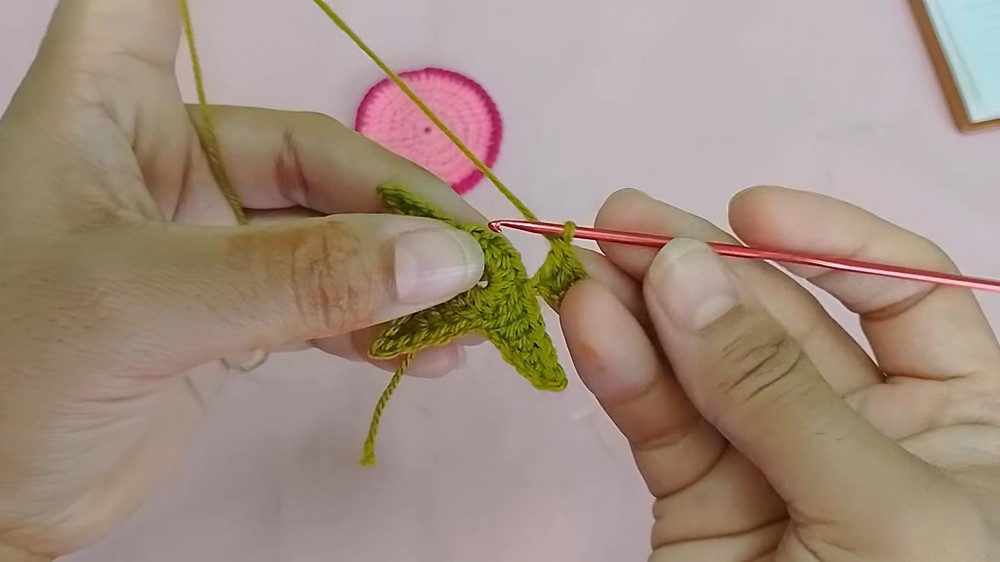
Creating the Sepals
- Start with a magic ring to form the base of the sepals.
- Work the specified pattern to produce petal-like structures for the sepals, completing a total of four.
- Join the sepals at the base of the keychain using slip stitches.
Assembling the Crochet Rose Bird
-
Shaping the Bird:
- Fold the crocheted circle into a “B” shape by overlapping one side over the other.
- Secure the folded shape by tying thread or stitching it together at the appropriate points.
-
Attaching the Sepals:
- Attach the sepals to the bird’s base.
- Ensure the sepals align neatly and secure them using glue for stability.

-
Adding the Keychain Ring:
- Attach the keychain ring at the middle hole of the sepals.
- Use glue to secure it firmly in place.
Final Touches
- Adorn the bird with any additional decorations as desired.
- Ensure all loose ends are trimmed and secured to give the project a neat, finished look.
Conclusion
The tutorial concludes with the finished project – a beautifully handcrafted crochet rose bird keychain. This tutorial offers an easy-to-follow guide for crafters looking to create something unique and personal, providing clear instructions for every step of the process.