How To Crochet Ruffle Hair Scrunchies Perfect For Beginners
Learn how to upcycle yarn from an old or thrifted sweater to create beautiful ruffled crochet scrunchies. Designed for beginners, the video covers essential crochet techniques, including chain stitches and double crochets, to create a wavy, textured scrunchie. Kara emphasizes consistency in tension for a polished look and provides helpful tips for working with different yarns.
The project is perfect for sustainable fashion enthusiasts looking to create personalized accessories while embracing a low-waste lifestyle. Follow along to turn your yarn scraps into stylish, handmade scrunchies!

Crochet Scrunchie Tutorial
In this detailed crochet tutorial by Kara from Kara’s Style, you’ll learn how to create beautiful ruffled crochet scrunchies by upcycling yarn from an old or thrifted sweater. Kara takes viewers step-by-step through the process, making it suitable for beginners while encouraging sustainable fashion practices. This project emphasizes creativity, sustainability, and personalization. Below is a structured summary of the video:
Introduction
- Kara introduces the concept of upcycling yarn from unravelled sweaters to create crochet scrunchies.
- She highlights the benefits of a low-waste lifestyle and how handmade accessories like scrunchies can add a personalized touch to outfits.
- Kara recommends referencing her previous tutorial on how to unravel yarn from sweaters for reuse.
Materials Needed
You will need the following materials:
- An elastic scrunchie or hair tie.
- Crochet hook (recommended size: US G6/4mm).
- Scissors.
- A yarn needle (to sew in the yarn tail at the end).

Preparing for Crochet
- Start by creating a basic loop (slip knot) with the yarn to attach it to your crochet hook.
- Prepare the elastic scrunchie by making single crochet stitches all the way around the elastic.
- Kara stresses the importance of being consistent with tension to achieve a professional and polished look.

Creating the Base Layer
- Begin by making chain stitches to start the foundation layer around the scrunchie.
- Fill the elastic with single crochet stitches until it is completely covered. This creates a neat and uniform base.
Adding the Ruffles
- Once the base layer is completed, start adding ruffles using double crochet stitches. This step involves:
- Creating chain stitches to start the rows.
- Adding double crochet stitches repeatedly into the same stitch to create the wavy ruffle effect.
- Kara explains the importance of consistency in the tension and the number of stitches to ensure the ruffles look even and neat.

Building Additional Layers
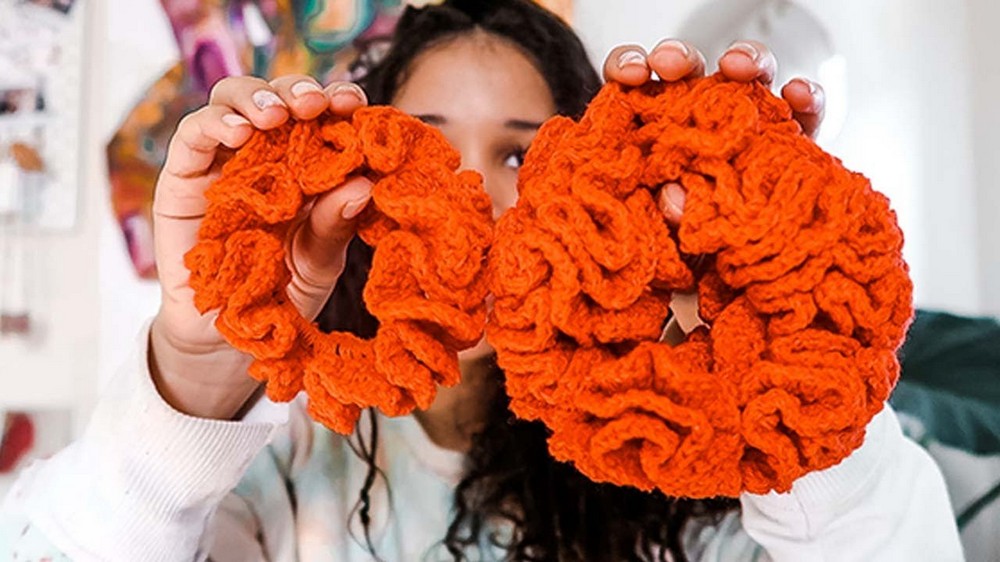
- Optional: To add more volume, you can build multiple layers of ruffles by repeating the same process over the initial layer.
- Kara demonstrates how additional layers create a fuller “coral” style scrunchie for a bold and textured look.
Finishing the Scrunchie
- Once the ruffles are complete, finish with a slip stitch to secure the final row.
- Use scissors to cut the yarn, and sew in the yarn tail using a yarn needle. The tail is carefully hidden between stitches to ensure a clean finish.

Tips and Techniques
- If you’re new to crochet, practice with a sample swatch first to get comfortable with the yarn and hook.
- Kara advises selecting yarn that is easier to work with initially, as some textures can make stitches harder to see.
- Pay attention to your tension throughout the process to ensure consistency in the ruffles’ appearance.

Final Thoughts
- Kara emphasizes how this project is beginner-friendly and an excellent way to practice basic crochet techniques like chain stitches and double crochet.
- She highlights how handmade scrunchies add a pop of color and texture to your outfit, and they make great sustainable fashion choices.
- The tutorial concludes with Kara encouraging viewers to embrace sustainable fashion and celebrate their creativity.