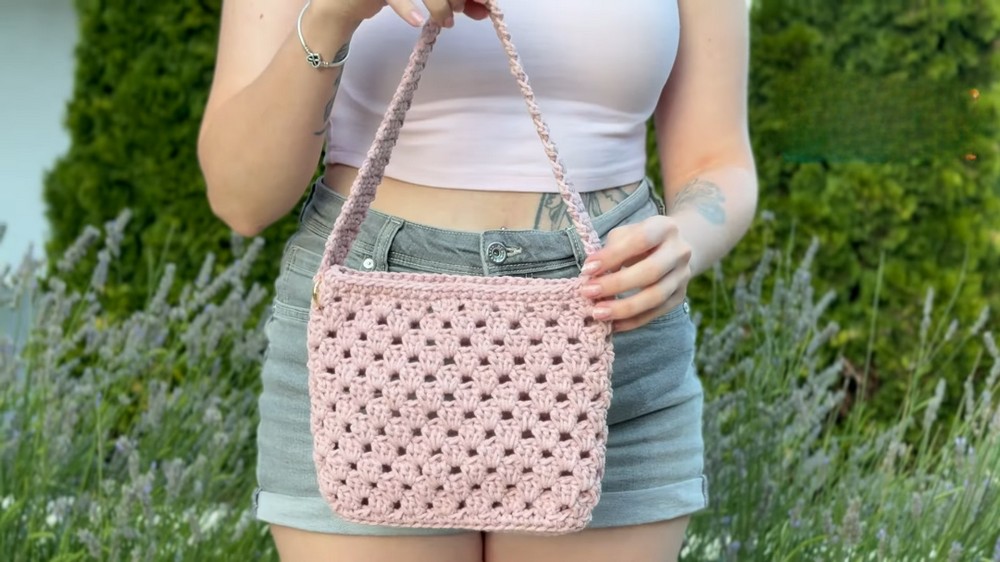
How to Crochet Small Handbag for Beginners
Learn how to crochet a stylish bag using Turkish cotton cord yarn, a 5mm crochet hook, D-rings, scissors, a magnetic button, and a needle. The process starts with creating pieces for the magnetic button, followed by crocheting the bag’s base and body with detailed single and double crochet patterns. The D-rings are incorporated seamlessly into the design for the straps, and a separate strap is crocheted and attached.
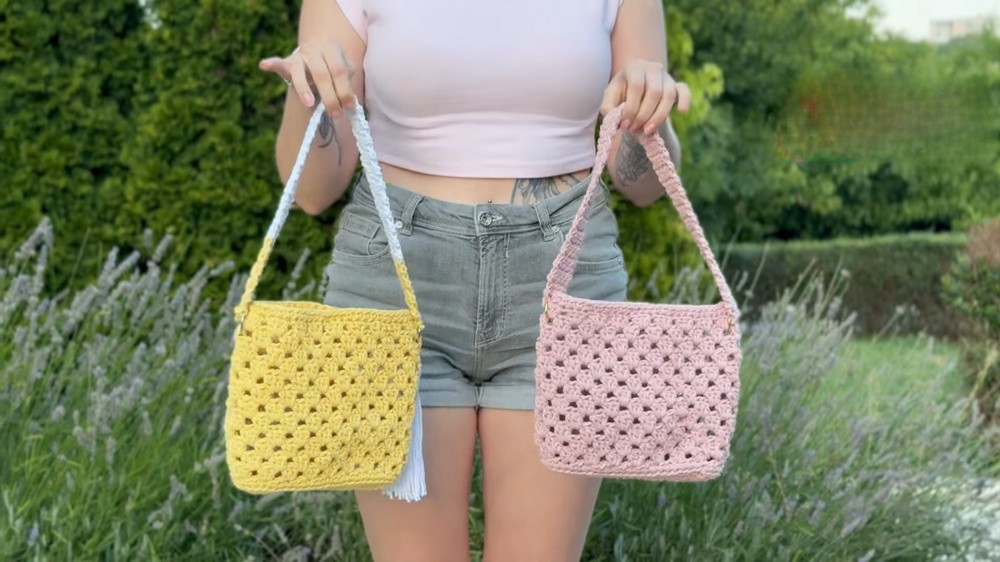
The finished bag is complemented with optional tassel decoration. This step-by-step guide is perfect for crocheters seeking to craft functional, elegant accessories while mastering various techniques. So, follow through with us for the complete tutorial.

How to Make a Handbag
This tutorial provides step-by-step instructions for crocheting a stylish handbag using simple materials and techniques. The creator shares a detailed breakdown of each stage, from preparing the bottom of the bag to adding decorative details and finishing touches. Below is the summarized process of the tutorial, organized by sections:
Materials Needed
- Yarn: The creator uses yellow cotton cord for the project, but displays a similar green cord to illustrate the label. The example yarn is Turkish yarn weighing 250 grams and measuring 150 meters. You can use any yarn according to your preference.
- Crochet Hook: A 5 mm crochet hook is used for this project.
- Accessories:
- D-rings or ring clips (optional, depending on the strap type).
- Magnetic button for fastening.
- Scissors and a needle for sewing and finishing.
Preparing the Magnetic Button Pieces
- Start by crocheting small pieces where the magnetic button will be attached:
- Begin with a slip knot and crochet a small number of chains.
- Work in rows using single crochet stitches.
- Repeat until both pieces are complete.
- Hide the yarn tail as you go and fasten off once finished.

Crocheting the Bottom of the Bag
- Start by creating a foundation chain.
- Work single crochet stitches along both sides of the chain to form an oval base.
- Increase at specific points to shape the bottom.
- Continue working in subsequent rounds until the bag’s bottom is complete.
- Use the back loop in specific rounds to create definition between the base and the body of the bag.
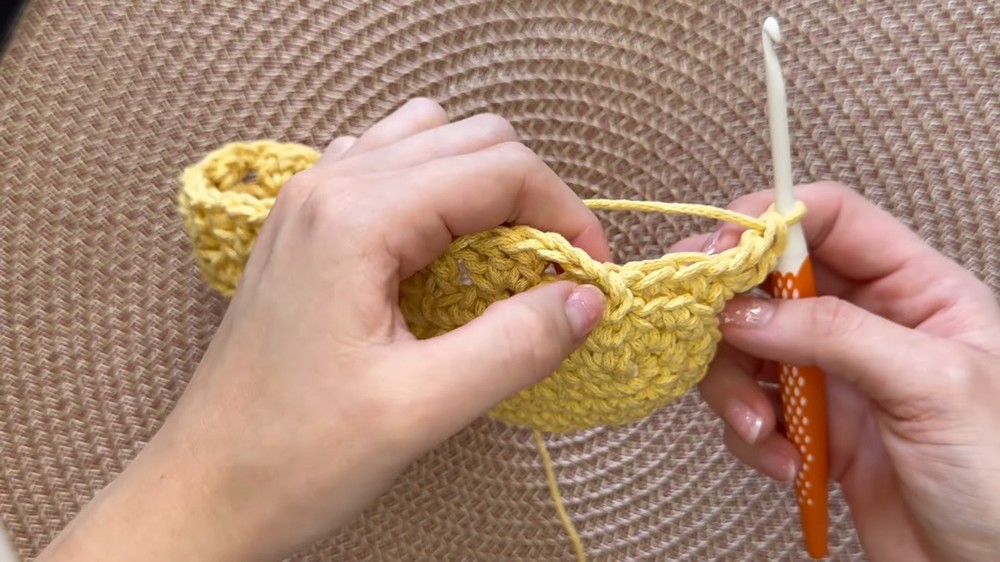
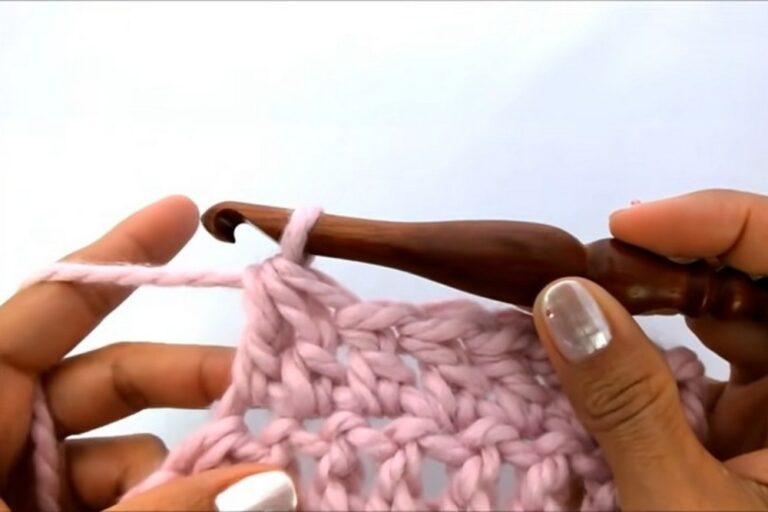
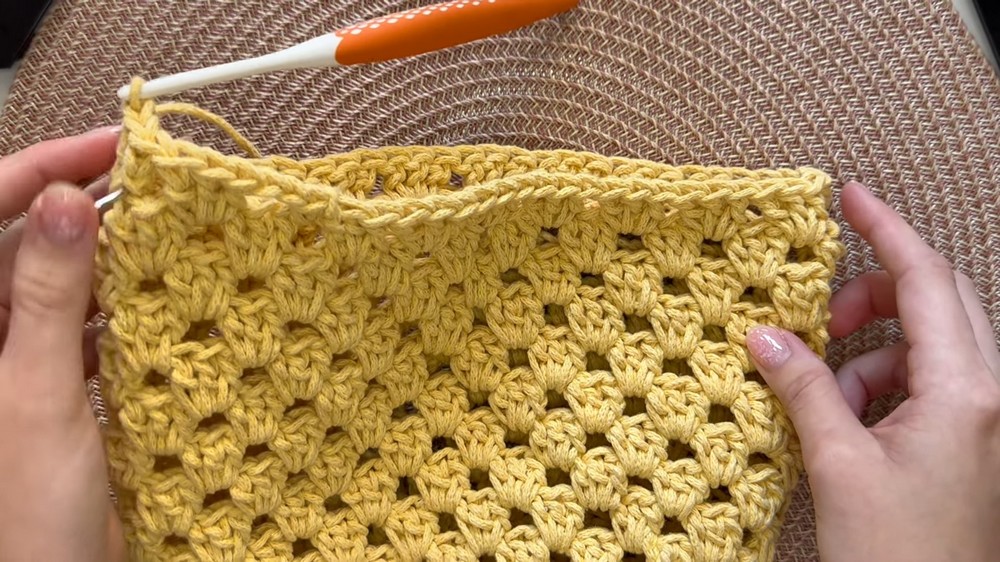
Crocheting the Body of the Bag
- Begin the body by creating clusters of double crochet stitches. Skip a few loops between clusters for spacing.
- In the following rounds, crochet into the spaces between the clusters to form a textured design.
- Repeat this process for 10 more rounds to complete the bag’s body.
- Attach D-rings into specific points (on the 15th round) to secure the strap later.

Crocheting the Final Rounds
- After completing the body rounds, finish with a single crochet round to make the edges sturdy.
- Attach the previously crocheted magnetic button pieces during this round.
Creating the Strap
- Start by crocheting a narrow strip:
- Begin with a foundation chain and continue stitching rows until the desired strap length is reached.
- Decrease stitches as needed to taper the strap at the end.
- Leave yarn tails for sewing.
- Attach the strap to the flat sides of the D-rings.
Finishing Touches
- Fasten off the yarn and hide any tails to ensure a tidy finish.
- As an optional decorative addition, the creator recommends attaching a tassel to the bag.
Conclusion
The tutorial ends with the finished handbag, showcasing its functionality and style. The creator encourages viewers to share their completed projects on Instagram and subscribe to the channel for future tutorials, including one where they will demonstrate how to make the tassel used for decoration.