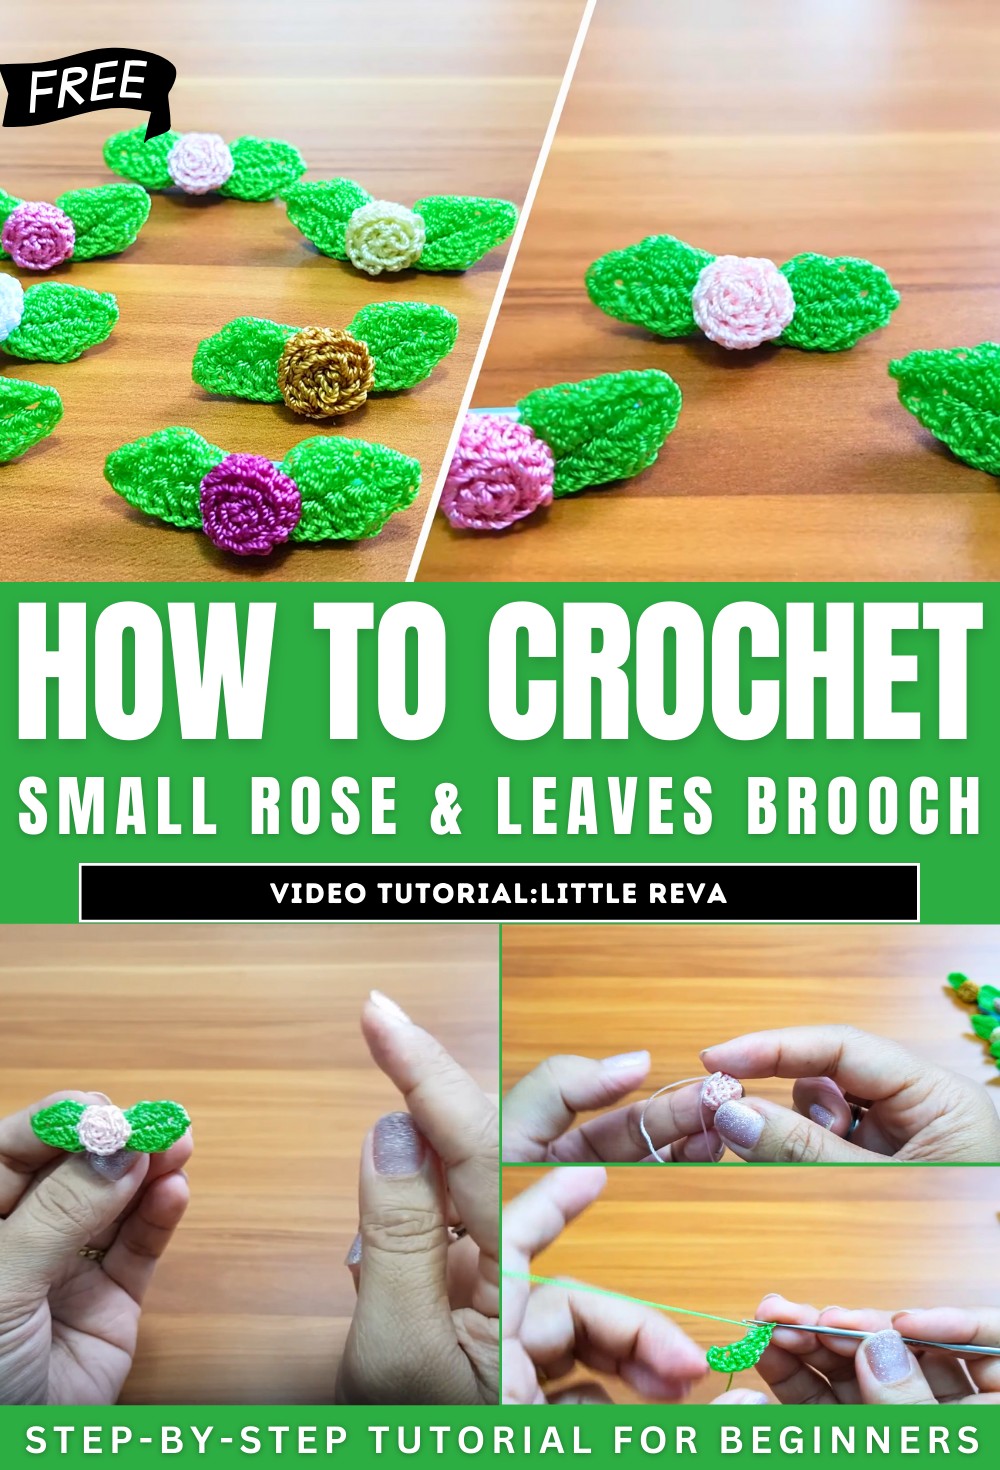
How to Crochet Small Rose & Leaves Brooch for Beginners
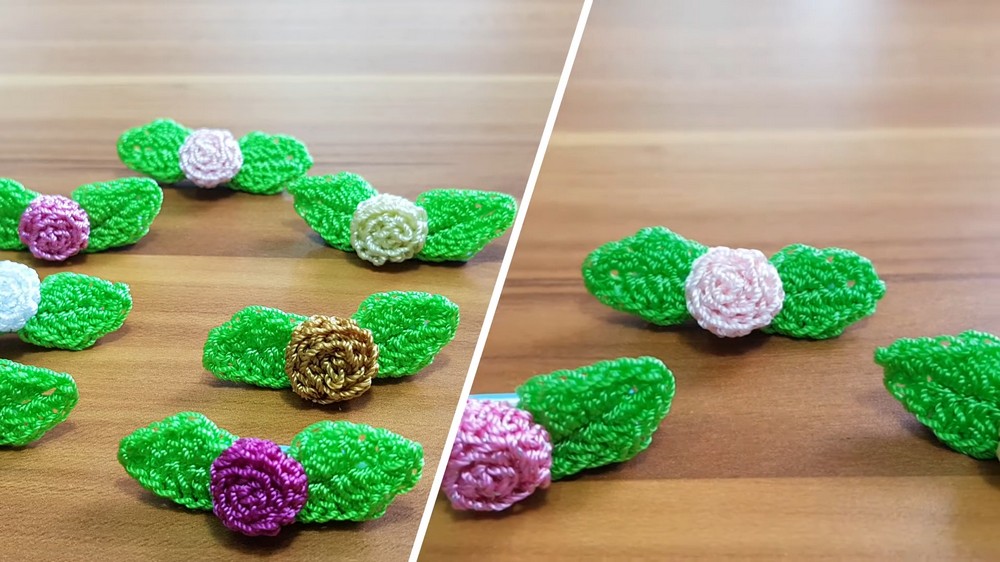
Learn how to crochet a rose brooch with leaves using nylon thread and a small crochet hook (1.25mm) for beginners with a tutorial. It starts by making a rose with 13 chains and a combination of single, half-double, and double crochets, which are then rolled and secured. The leaf is made with 6 chains, working symmetrical stitches on both sides.
The rose and leaf are glued to a brooch pin for assembly, using minimal adhesive to ensure a clean finish. Finally, the piece is packed creatively for sale. The process is versatile, allowing customizations in color and style to suit individual preferences. So, follow through with us for the complete tutorial.
Crochet Brooch Tutorial
This tutorial demonstrates how to create a rose brooch with leaves using a crochet technique. The project involves crafting a small rose flower and leaves, assembling them onto a brooch holder, and giving packaging suggestions for potential sales. The tutorial is designed to help enthusiasts create a simple and beautiful handmade accessory.
Materials Needed
- Yarn/Thread: Nylon thread in two colors (e.g., pink for the flower, green for the leaf).
- Crochet Hook: A small hook (1.25mm) for detailed stitching.
- Brooch Holder or Pin: A barrette pin with adhesive backing.
- Glue: All-purpose adhesive glue for added strength (optional, hot glue also works).
- Additional Tools:
- Sewing needle (to secure tails).
- Cotton bud (to avoid glue sticking to fingers).
Steps to Make the Rose
- Prepare the Yarn:
- Start with a slip knot and a foundation chain.
- Crochet the Rose:
- Create rows combining single crochet, half-double crochet, and double crochet stitches, forming a textured pattern.
- The crocheted strip naturally curls, creating the shape of the rose.
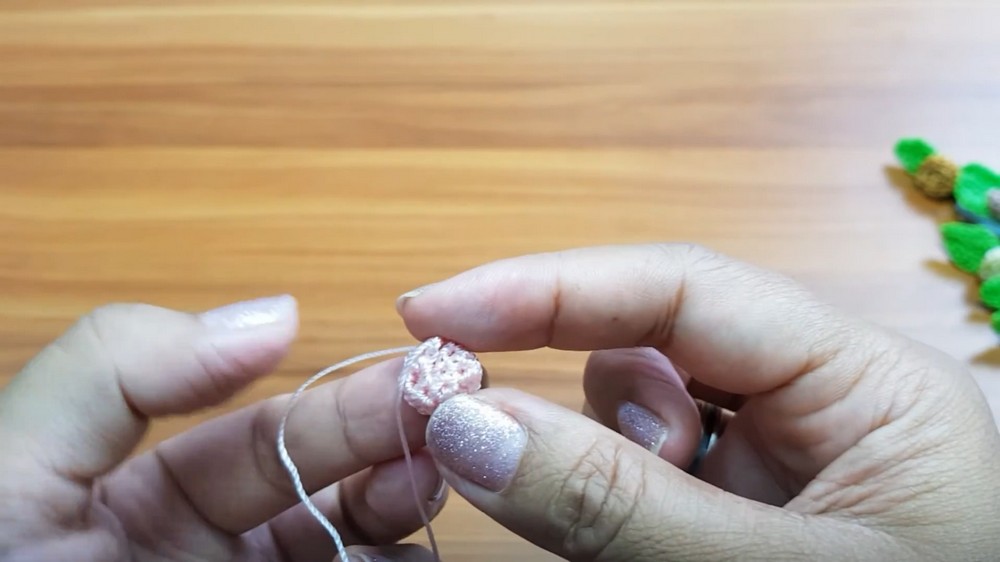
- Secure the Rose:
- Apply a small amount of glue to the edges of the strip to prevent movement.
- Carefully roll the strip into a rose shape, gently securing the bottom.
- Use a sewing needle to stitch the base of the rose, ensuring the structure holds firmly.
- Trim Excess Yarn:
- Use scissors to cut and tidy any loose threads at the base of the rose.
Steps to Make the Leaves
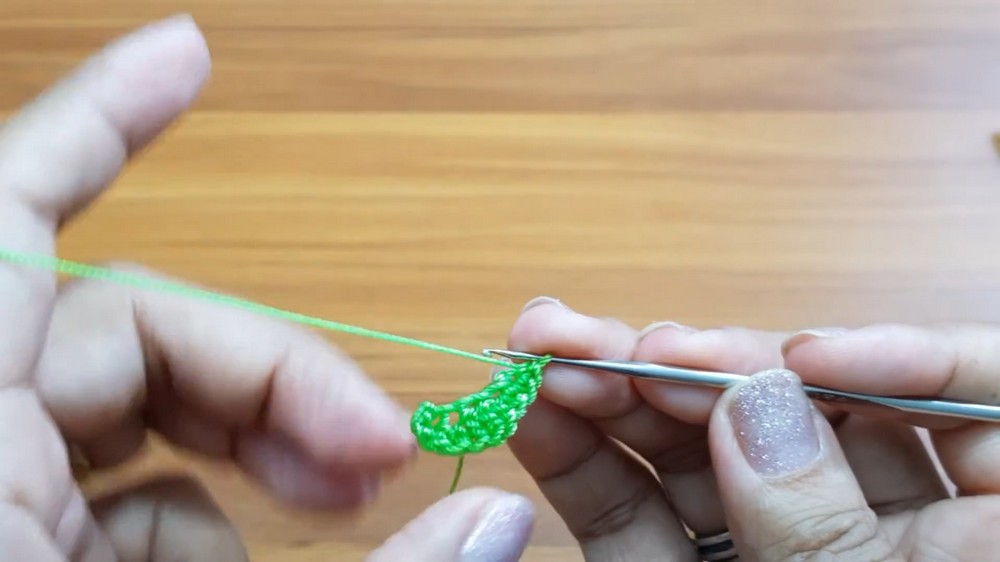
- Start the Foundation:
- Use green nylon thread to create a slip knot followed by chains.
- Crochet the Leaf Shape:
- Work symmetrical stitches (single crochet, half-double crochet, and double crochet) into both sides of the leaf foundation chain.
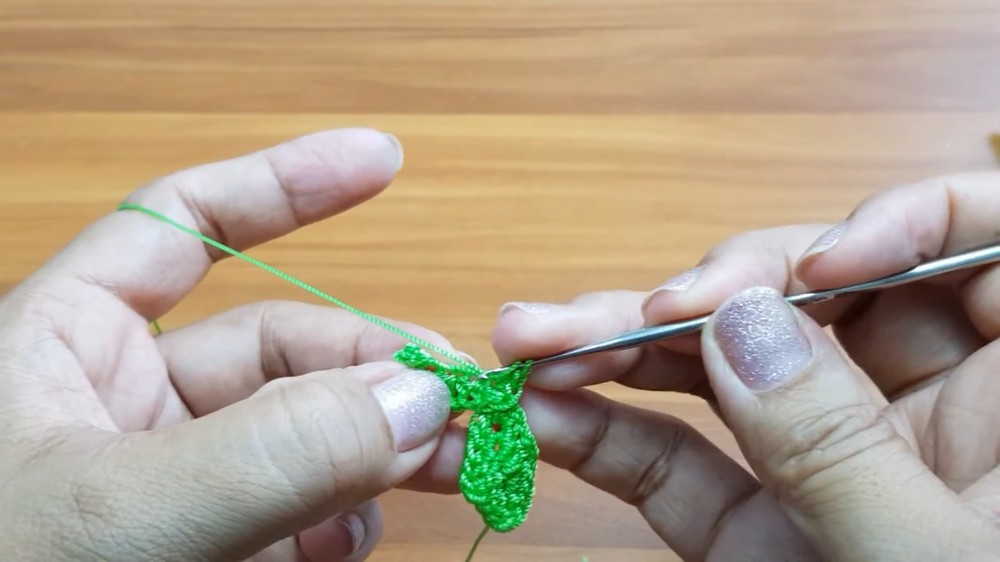
- Repeat the process to make two leaves connected seamlessly.
- Secure the Leaves:
- Stitch the tails securely into the back of each leaf using a needle.
- Finalize the Leaves:
- Trim excess yarn, ensuring neat edges.
Assembly
- Attach the Leaves to the Brooch Pin:
- Peel the adhesive backing from the brooch holder and stick the leaves onto it.
- Optionally, apply a small amount of glue for additional strength.
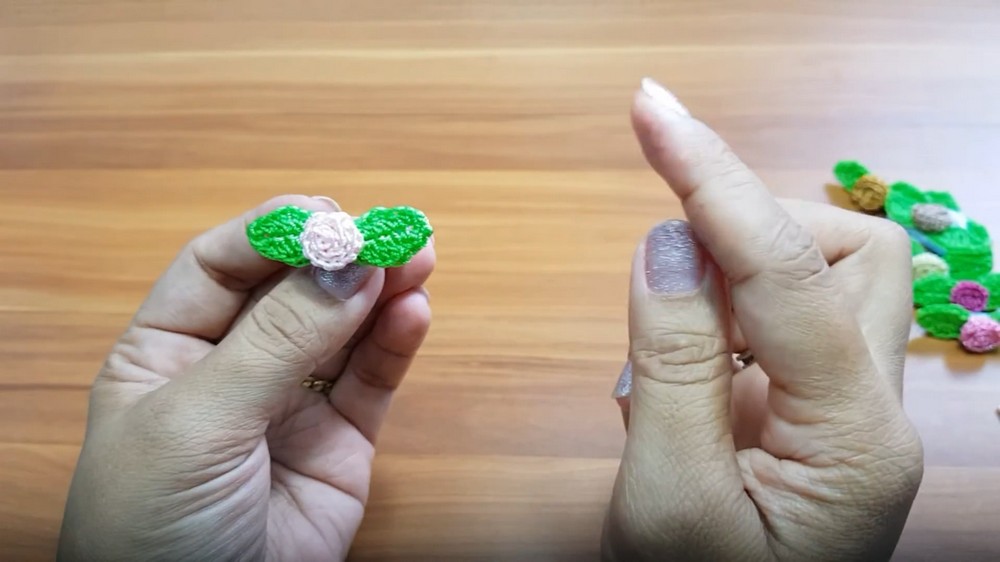
- Add the Rose:
- Apply glue to the center of the leaves and carefully press the rose onto the pin.
- Adjust and secure the rose in place.
Packing Suggestions
- Use transparent or decorative plastic bags for packaging.
- Place a personalized sticker or logo onto the packaging to enhance the presentation.
- Depending on the size of the packaging, arrange multiple brooches, or keep it to one per bag for a professional finish.
Final Thoughts
This tutorial is beginner-friendly and adaptable, allowing users to experiment with different colors and designs. The finished rose brooch can serve as a decorative accessory or be sold as a handmade product. Packaging suggestions add a commercial aspect for those looking to sell their creations.