How to Crochet String of Pearls Hanging Plant for Home Decor
With a crochet tutorial for beginners, learn how to crochet an updated version of the String of Pearls hanging plant design. Using white, green, and brown yarn, and tools like a 3.75 mm the process begins with crocheting a magic circle to form the pot’s base. Techniques such as double crochets, half double crochets, and slip stitches are demonstrated to create the pot, lid, and textured brim.
The String of Pearls is created using chained rows adorned with pearls. The final steps showcase attaching strings for hanging and adding variations for a unique decorative piece. So, follow through with us for the complete tutorial.

String of Pearls Hanging Plant Tutorial
The tutorial demonstrates how to crochet an updated version of a “String of Pearls” hanging pot plant. It is a versatile pattern requiring basic crochet skills, suitable for any yarn type. Tools required include white, green, and brown yarn, a 3.75 mm crochet hook, scissors, and a darning needle.
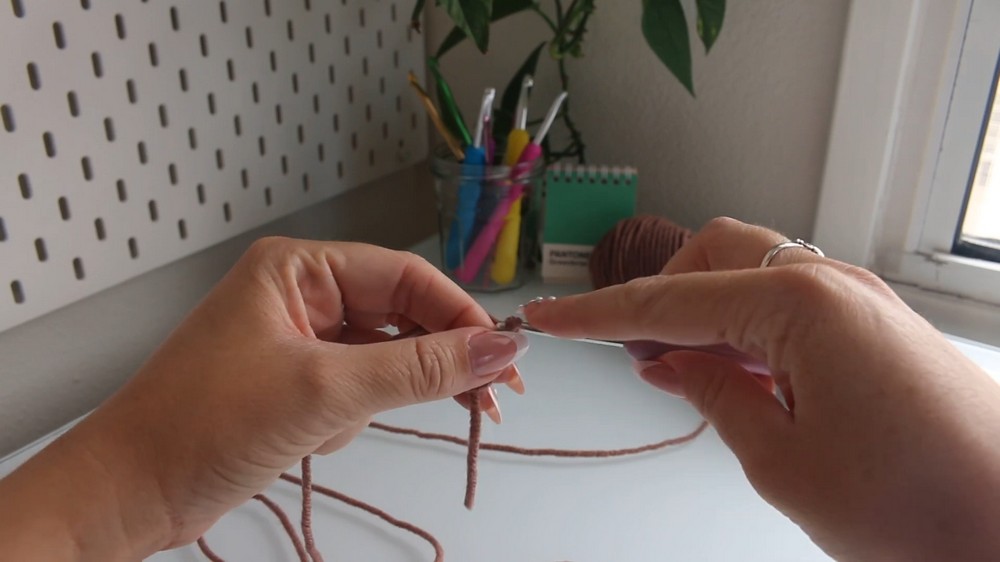
Creating the Pot Base
Materials and Beginning Steps
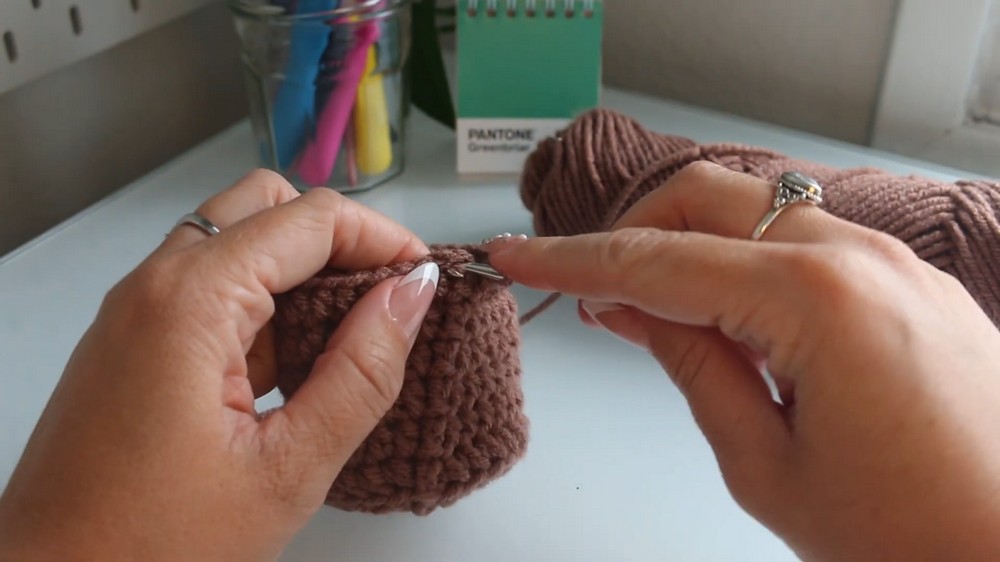
- Use brown yarn to start the pot’s base.
- Begin with a magic circle and secure it with a chain stitch.
Pot Construction Steps
- Crochet a round base using double crochet stitches.
- Close the circle tightly and end the row with a slip stitch.
- In subsequent rows, increase the stitch count and insert new stitches for structure.
- Complete the base by creating multiple rounds for depth and finish with the slip stitch technique.
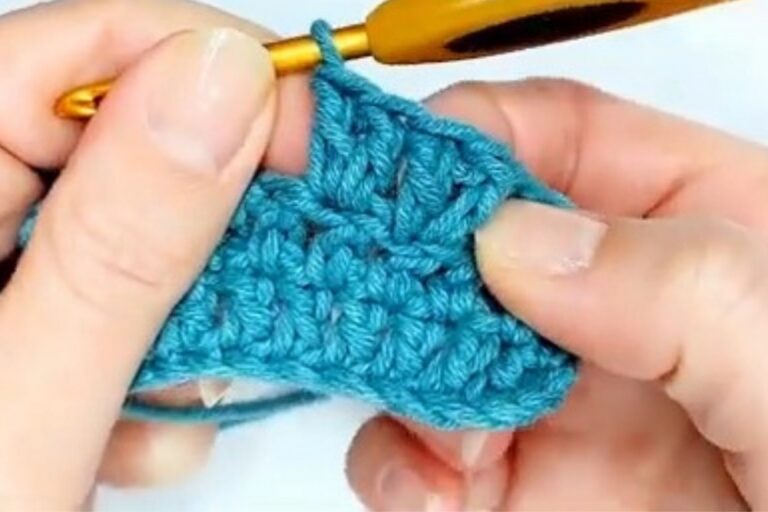
Building the Pot Walls
Elevating the Pot
- Use half double crochet stitches worked into the back loops.
- This technique creates the pot’s brim and gives it a vertical shape instead of a flat design.
- Continue crocheting successive rounds to enhance the pot’s height.
Finishing the Pot
- Add the pot’s lip using half double crochets in front loops, enabling the brim to fold over.
- Fasten off the yarn and hide loose ends inside the pot for neatness.
Creating the Lid
Lid Construction
- Similar to the pot’s base, start the lid with a magic circle.
- Crochet several rounds using half double crochet stitches to give it structure and size.

Assembling the Lid
- Leave a long yarn tail for sewing the lid onto the top of the pot later.
- Stuff the pot with materials like scrap yarn or craft store stuffing to give it firmness.
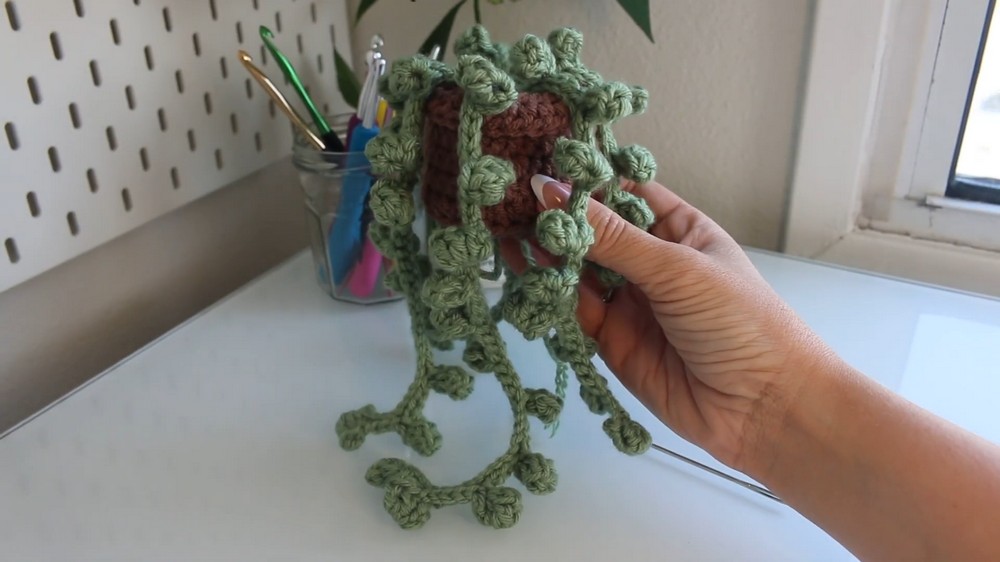
Making the “String of Pearls”
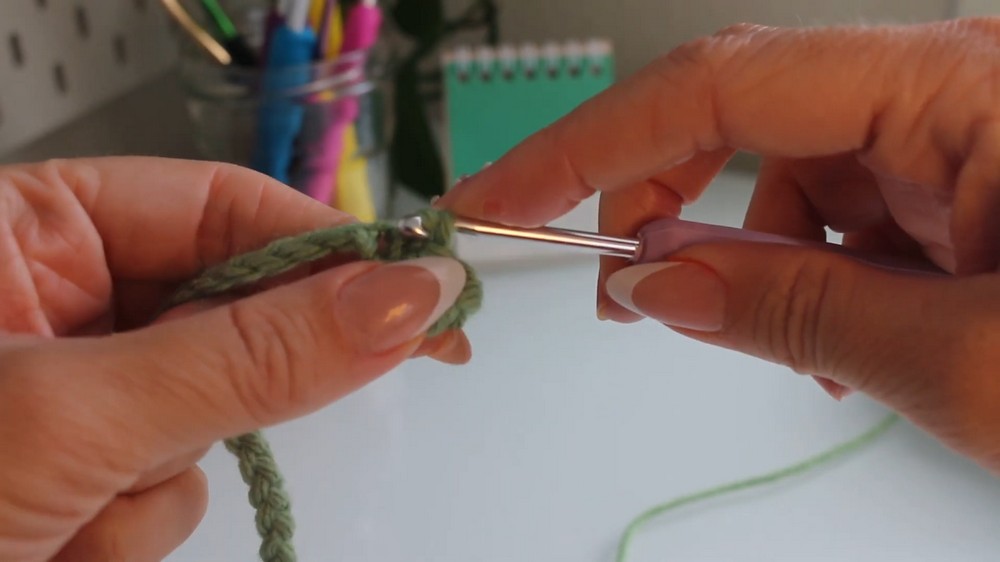
Creating the Strings
- Begin with green yarn and create a slip knot, chaining to your preferred string length.
- Add “pearls” by crocheting clusters of double crochets in specific spaces, shaping them into circular forms.
- Alternate between pearls and chains, adjusting lengths for a natural variation.
Attaching the Strings
- Slip stitch the ends of each pearl chain to the pot securely.
- Sew or glue the strings in place to drape naturally over the edge of the pot
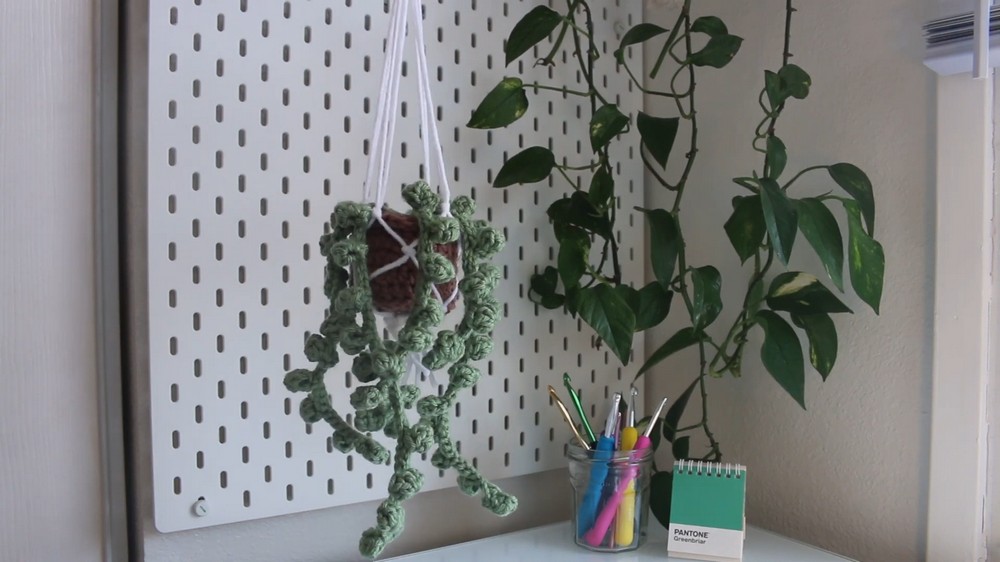
Adding the Hanging Rope
Rope Construction
- Cut eight pieces of white yarn of equal length and knot them together at one end.
- Split the strands into pairs and tie knots between them for a macrame-style rope.

Final Assembly
- Secure the rope to the pot by knotting it around the brim.
- Create a loop or knot at the rope’s top for hanging the finished plant.
Completion
- The finished crochet “String of Pearls” hanging pot plant can be used as decor or given as a handmade gift.