How to Crochet Wire Organizer with SC Stitch
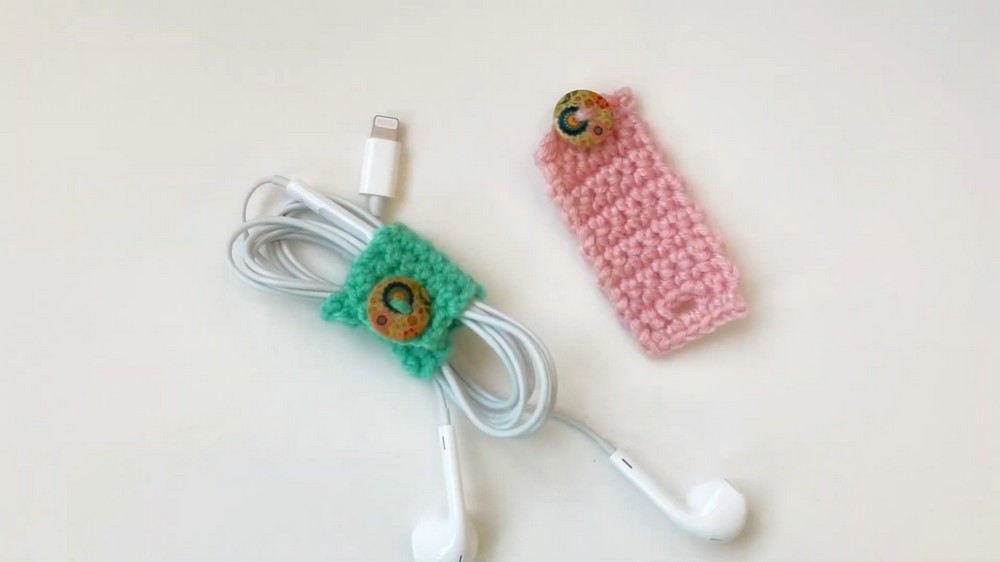
This video is the second part of a crochet tutorial series, focusing on making single crochet stitches while ending up with something useful. You’ll learn how to work in rows, fasten off, weave in ends, and create a wire organizer. Key materials include worsted-weight yarn, a crochet hook, scissors, a tapestry needle, and measuring tape. The tutorial begins with a slip knot and seven chains, followed by detailed instructions for single crochet stitches, counting rows, creating buttonholes, and finishing off.
The video also covers attaching a button and securely weaving in yarn ends. A great guide for beginners seeking practical crochet skills! So, follow through with us for the complete tutorial.
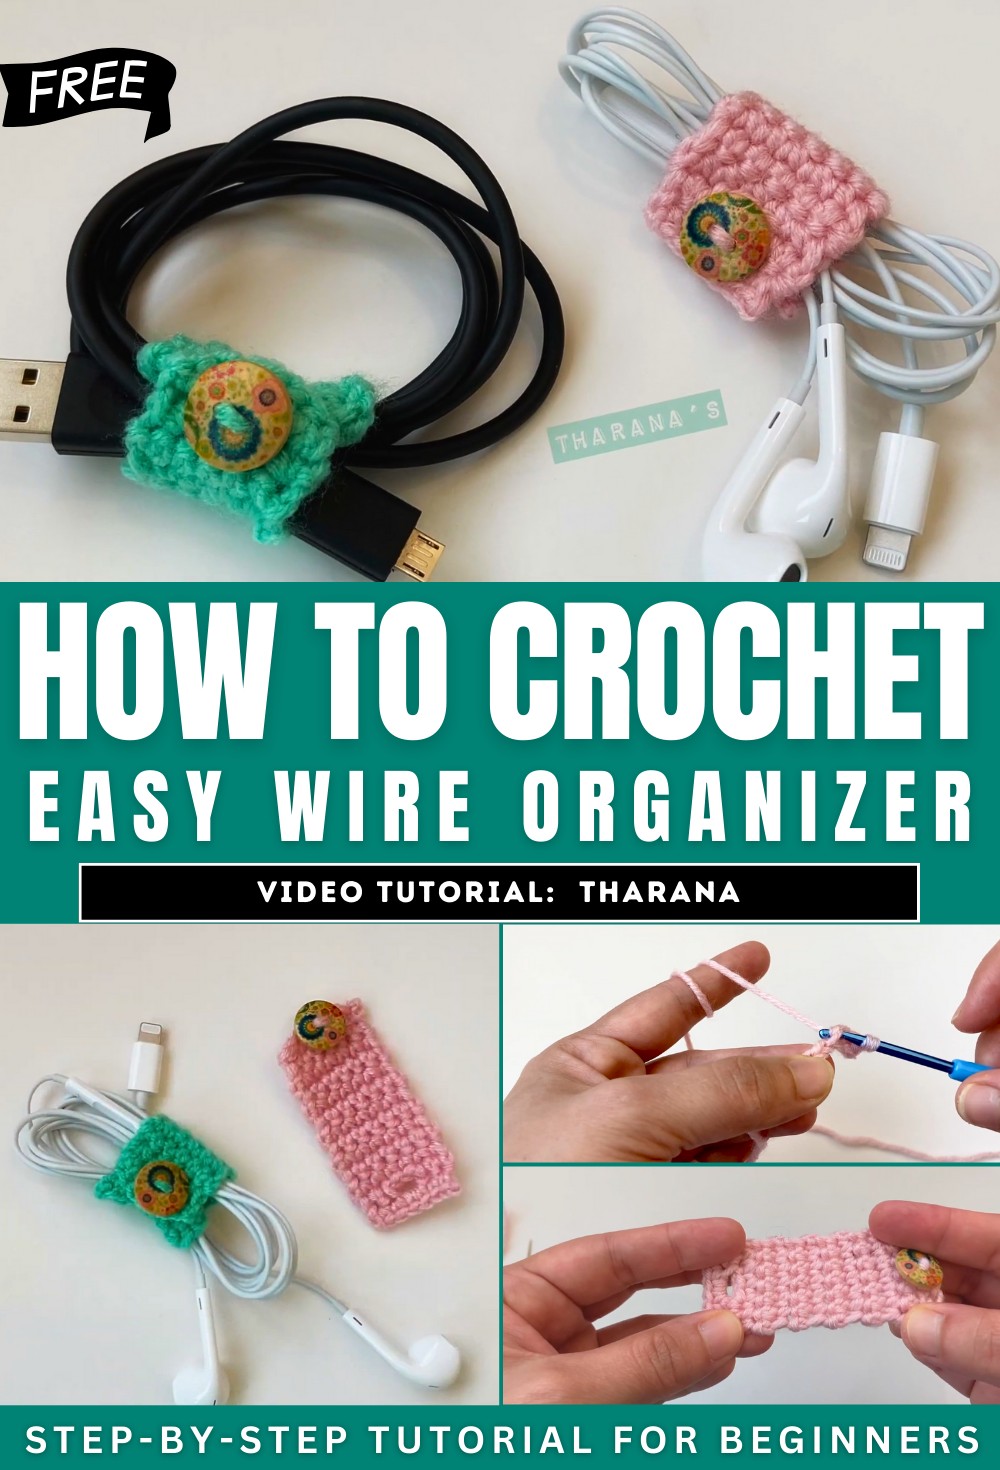
Crocheting a Single Crochet and Wire Organizer
This video tutorial, the second part of a crochet series, teaches viewers how to make a single crochet, work in rows, fasten off, weave in ends, and create a simple wire organizer.
Materials Required
- Worsted-weight yarn
- Crochet hook
- Measuring tape
- Scissors
- Darning or tapestry needle
The tutorial emphasizes checking another video from the creator for guidance on selecting yarns and hooks if you are a beginner.

Getting Started
- The process begins by creating a slip knot and then chaining seven stitches.
- For beginners, a link is provided to another video for detailed instructions on how to make a slip knot and chain.
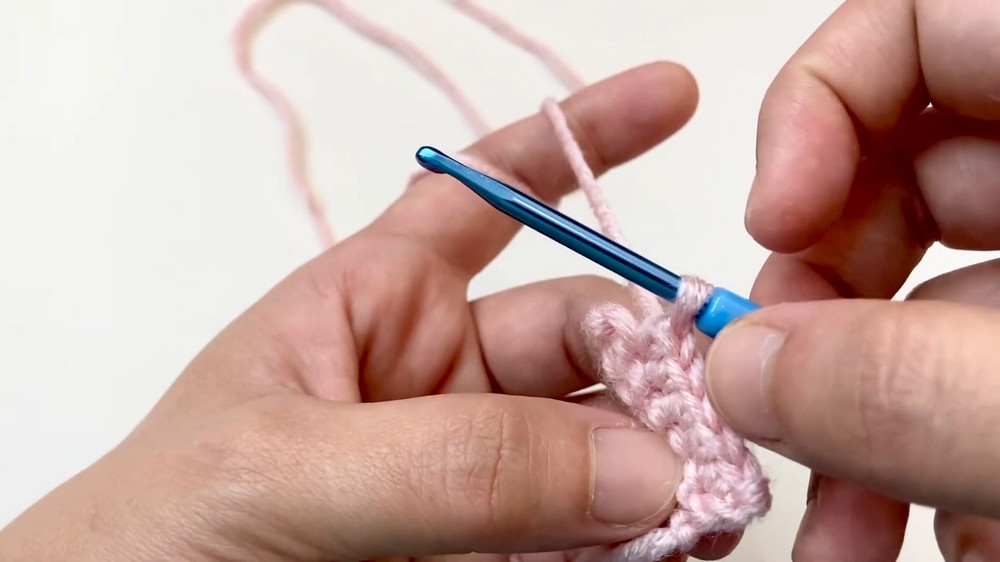
Making Single Crochet Stitches
- The single crochet stitches are introduced step-by-step:
- Insert the hook into the chain.
- Yarn over and pull through to create two loops on the hook.
- Yarn over once more and pull through both loops to complete the stitch.
- The video provides plenty of demonstrations to ensure viewers can follow along and replicate the technique easily.
Working in Rows
- After the initial row of single crochet stitches is completed, the tutorial moves to creating additional rows:
- Chain one at the end of each row, then turn your work to continue crocheting into earlier stitches.
- Insert the hook under both loops (front and back) of each stitch before creating the next single crochet stitch.
- Viewers are encouraged to count stitches at the end of each row to avoid missing any.
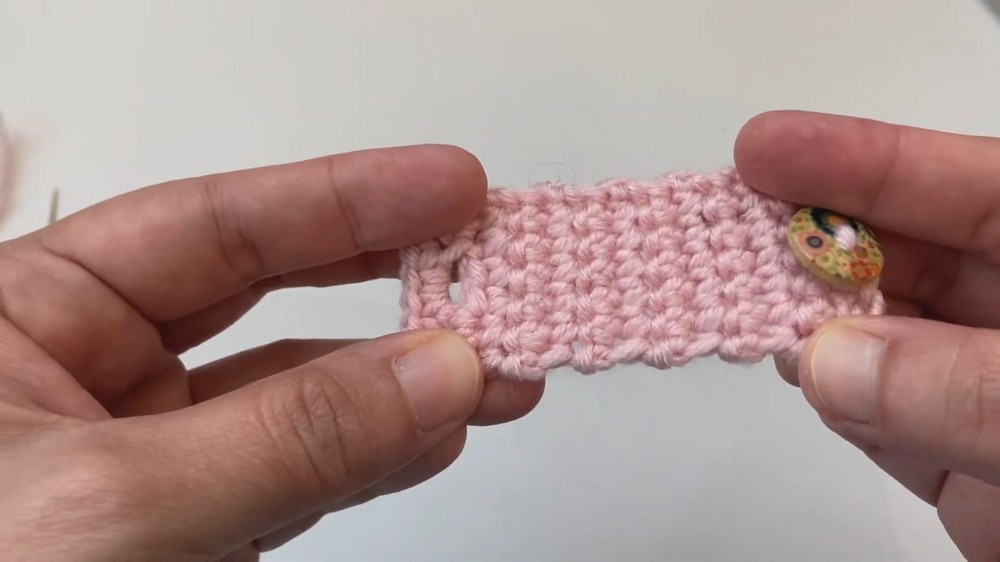
Adding Buttonholes
- Once the base of the crochet piece reaches row 11, the buttonholes are introduced:
- Single crochet two stitches.
- Chain two stitches to create an open space, skipping two single crochets below.
- Continue single crochet stitches into the next available stitch.
- This process creates a functional buttonhole on the piece.

Finishing Off
- The final row involves crocheting into the buttonhole space and completing single crochets across the row.
- To fasten off:
- Make a chain, cut the yarn leaving enough length for weaving in ends, and pull the hook through the chain.
- Tug at the yarn gently to secure it.
Weaving in Ends
- The video demonstrates weaving in ends using a tapestry needle:
- Pass the needle under several stitches in one direction.
- Then, return through stitches in the opposite direction to ensure stability.
- This method is repeated multiple times to prevent the yarn from coming loose.

Attaching the Button
- The button is attached using the same yarn:
- Position the button at the center, aligning it with the buttonhole.
- Secure the button by weaving through crochet stitches multiple times.

Final Steps
- After the button is firmly attached, weave in any remaining loose ends.
- Trim excess yarn.
- The wire organizer measures 2.5 inches in length, making it a practical item for everyday use.

Conclusion
This tutorial is ideal for beginners learning crochet fundamentals, including single crochet stitches, working in rows, fasten-off techniques, and weaving. Creating a functional wire organizer is a simple yet practical project that blends basic crochet skills with real-world applications.