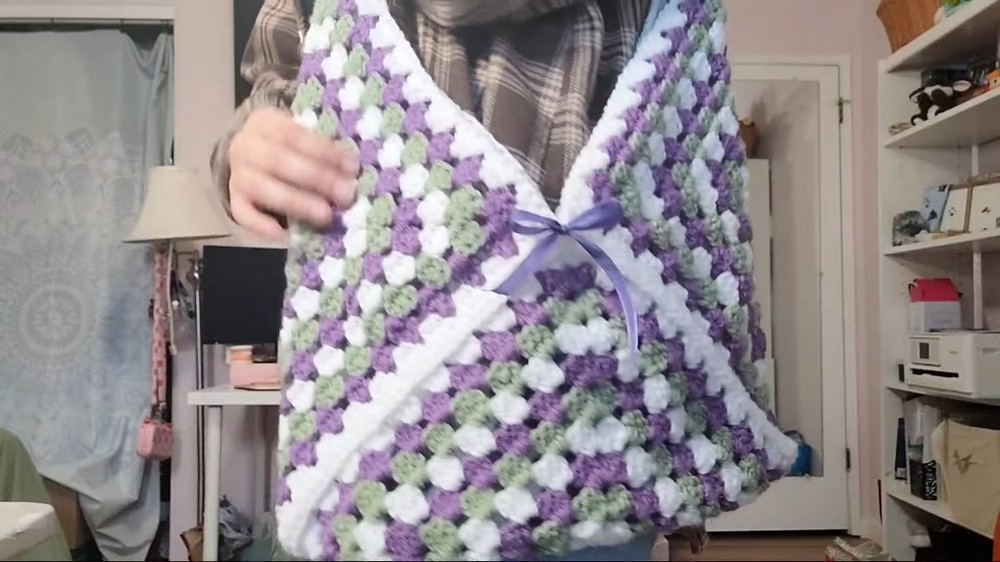
Beginner-Friendly Crochet Granny Square Bag for Ladies
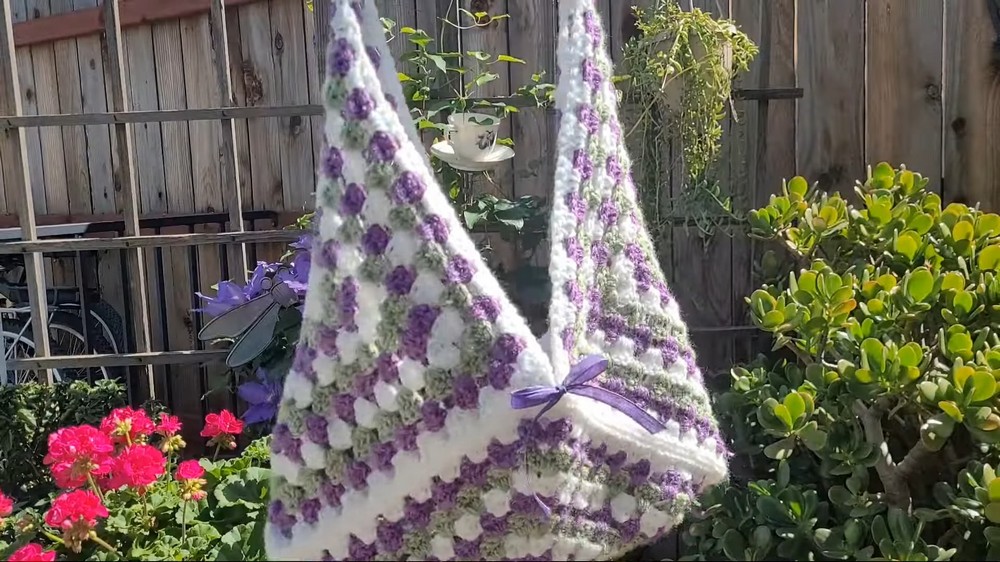
With a detailed step-by-step guide, learn how to crochet a granny square bag using three yarn colors: frosty green, white, and medium purple. The tutorial explains how to crochet granny squares with 10 rows, join them seamlessly, and add straps using half-double crochets. The tutorial also covers techniques like the magic ring, color changes, and hiding loose ends, making it beginner-friendly. With clear instructions, you can complete this stylish and functional DIY bag in just one day!

Materials Needed
- Yarn:
- Three different colors: frosty green, white, and medium purple
- Source: Jo-Ann’s, Walmart, and other stores
- Medium weight
- Hook:
- Size: 5 millimeter
- Scissors:
- For cutting yarn.
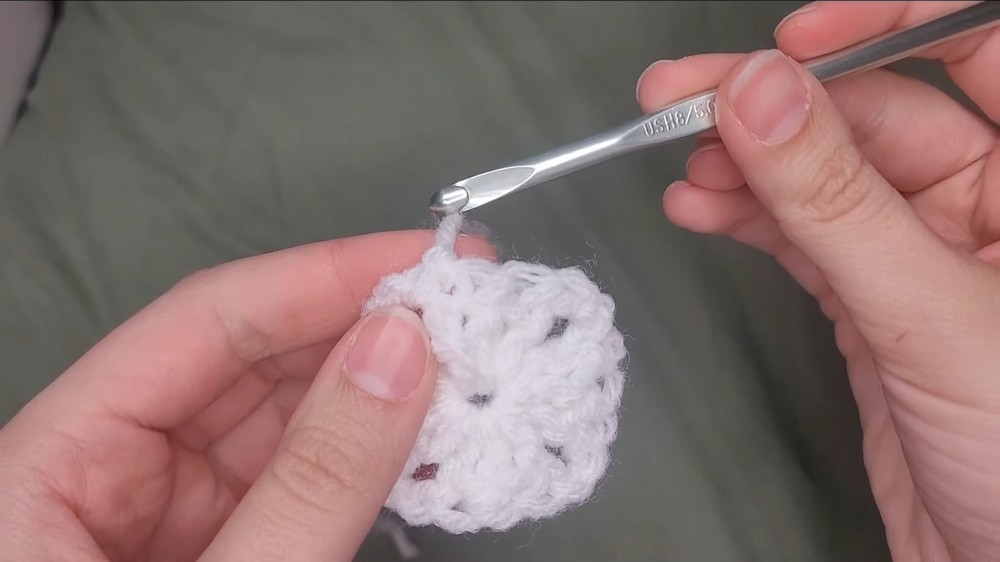
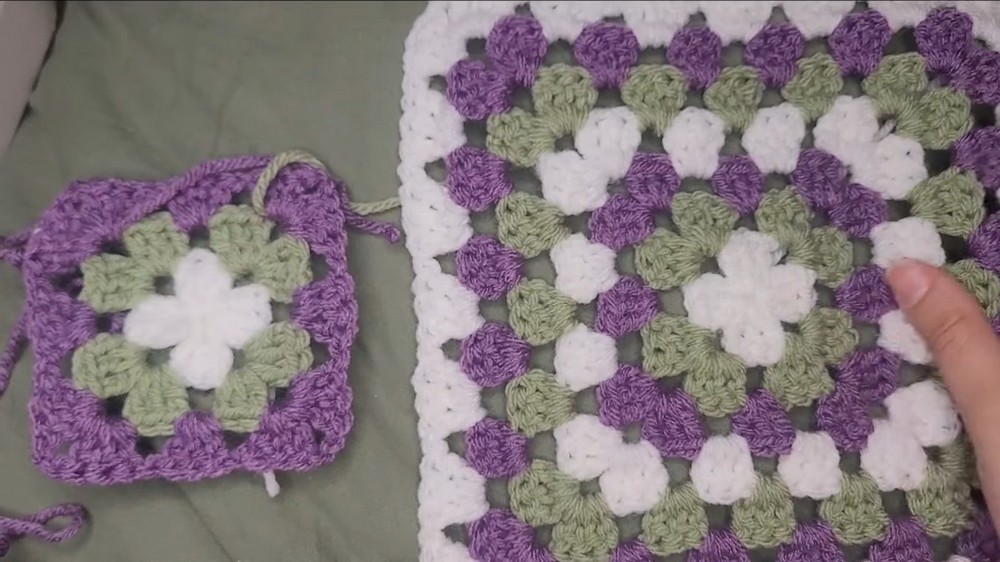
Crochet Granny Squares
- Design:
- 11 inches by 11 inches.
- Create three squares of the exact same size.
- Adjust the rows to make the bag smaller or bigger.
Starting With the Magic Ring
- Steps for Magic Ring:
- Lay the end of the yarn over two fingers and pinch with the thumb.
- Wrap around, cross under the thumb, and pinch again.
- Rotate fingers and hold in place.
- Insert the hook under the first loop, pull through the second loop and twist.
- Pull up and grab the yarn to create the magic ring.
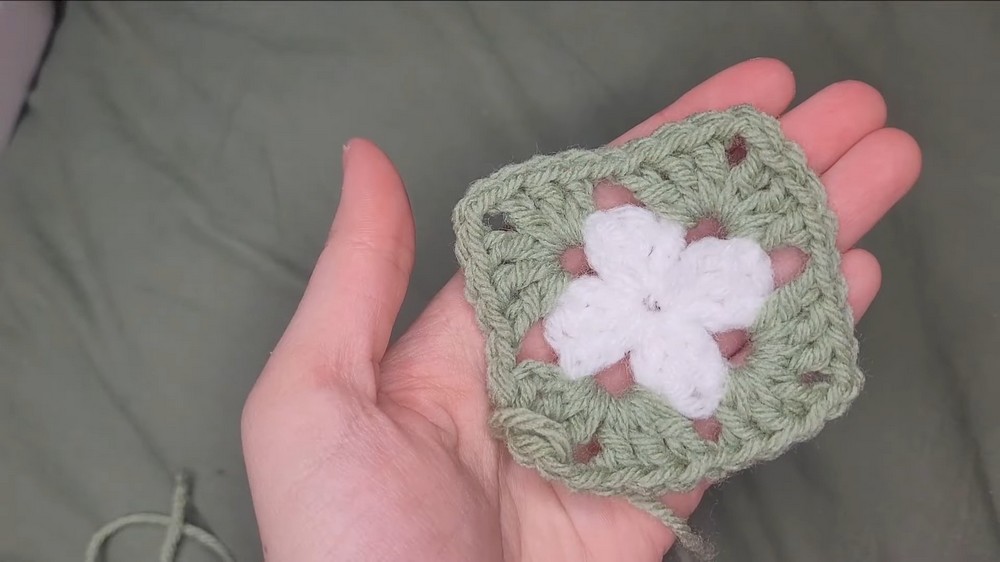
First Row: Cluster Formation
- Creating Clusters:
- Chain three, counting as the first double crochet.
- Yarn over, insert hook into the magic ring, yarn over again and pull through.
- Repeat for double and triple clusters.
- Pull the string to close the magic ring circle.
- Chain Spaces:
- Chain two for the separation of clusters.
- Complete four clusters in the first row.
- Finishing First Row:
- Chain two and slip stitch into the top of the initial chain three.
- Chain one, cut yarn, and weave in the ends if changing colors.

Second Row: Adding New Color
- Steps for Second Row:
- Use a slip knot to add new color yarn.
- Work on the back of first row in chain spaces.
- Insert hook, pull through, and chain three.
- Create clusters in corner spaces separated by a chain two.
- Chain spaces increase for every subsequent row.
- Joining Ends:
- Chain two and slip stitch into the top of initial chain three.
- Chain one, cut yarn and weave in the ends like previous rows.
Subsequent Rows
- Pattern Continuation:
- Add new color and work on the back side.
- Repeat process of chaining three, creating clusters, and chaining one.
- Put clusters in the openings of previous row.
- Increasing Rows:
- Continue until desired number of rows.
- The example uses 10 rows.
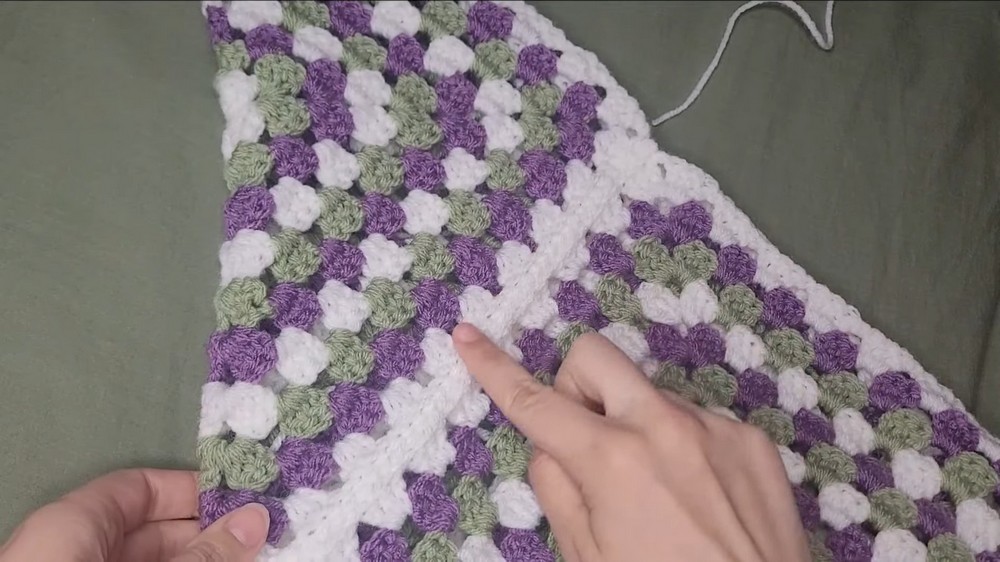
Assembling the Bag
- Combining Granny Squares:
- Fold squares in half.
- Align and stitch together along the seams, starting with two pieces.
- Work in the back loops only for a seamless look.
- Step-by-Step Stitching:
- Insert hook into the corner stitch, align with yarn running parallel.
- Slip stitch through back loops of aligned squares.
- Repeat stitching method for remaining square.
- Finishing Square Assembly:
- Chain one, cut yarn and pull through.
Adding Straps
- Strap Formation:
- Choose desired color for straps.
- Work in the top corner section of each side of the bag.
- Insert hook, add new yarn and chain two.
- Half Double Crochets:
- Perform half double crochets in stitches along the edge.
- Insert hook in the back loops for straps.
- Continue pattern until desired length.
- Attaching Straps:
- Align corner piece and insert hook.
- Slip stitch through back loops to combine strap with the bag.
- Chain one, cut yarn and pull through.
Final Touches
- Hiding Loose Ends:
- Sew in all loose ends securely.
- Optional Addition:
- Add decorative elements like a bow if desired.
Conclusion
- Outcome:
- The completed bag can fit small accessories such as a makeup bag.
- Encouragement:
- Easy and quick project, completed within a day.