Free Crochet Bow Tie Pattern for Beginners

Step into stylish detail with this free crochet bow tie pattern that perfectly merges personality and versatility for a refined yet fun accessory.
Did you know you can crochet your own stylish accessories at home? With the free crochet bow tie pattern, you can easily create a classy and unique bow tie to wear or gift to someone special. If you’re ready to learn, the magic knots YouTube channel has a fantastic step-by-step tutorial to guide you through the process. Their clear and simple instructions make this project enjoyable for beginners and experts alike.
This handmade bow tie is truly a showstopper. It’s crocheted to have a sleek yet slightly textured look, giving it an elegant style with a touch of charm. Its shape is perfectly symmetrical, offering a polished, professional appearance that’s still fun and creative. You can use anything from bold, colorful yarns for a statement piece to neutral tones for a timeless classic. No matter the color, the bow tie looks stylish and feels lightweight and comfortable to wear.

Free Crochet Bow Tie Pattern with a Classic Design
This crochet bow tie isn’t just for fancy occasions—it’s incredibly versatile! Use it as an accessory for weddings, parties, or work outfits. It’s also a thoughtful gift for loved ones or a playful accent to decorate hats, handbags, or even pet collars. Wherever you use it, this bow tie is sure to grab attention and earn compliments.
Thanks to the magic knots channel, learning this pattern is simple and fun. With just a few materials, you can bring this beautiful bow tie to life in no time. So why not give it a try? Enjoy making a unique, handmade piece that’s perfect for any occasion. You’ll love the creativity that goes into making it—and the charm it adds to everything!
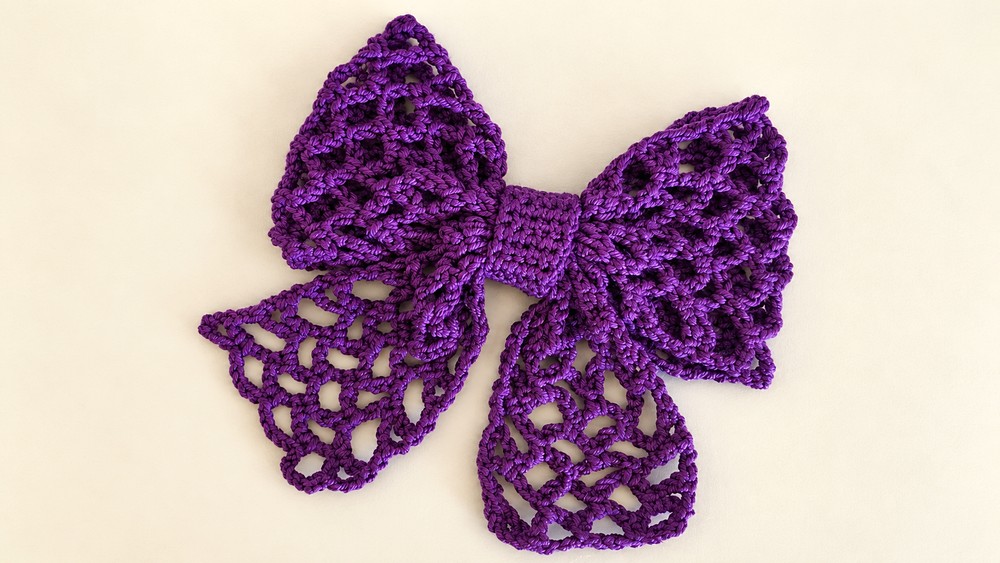
Crochet Bow Hair Clip Pattern Using a Mesh Stitch – Beginner-Friendly Step-by-Step Guide
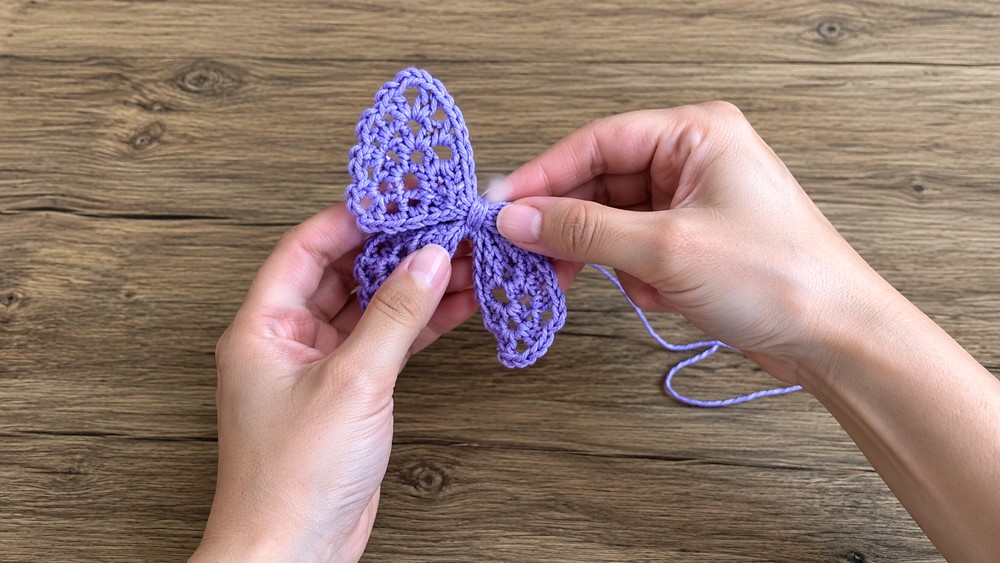
This tutorial will guide you through making a beautiful crochet bow hair clip using a mesh stitch pattern. The bow has two layered pieces and a center strip, all created with simple stitches, then assembled and attached to a hair clip. This project uses a soft 50% cotton and 50% bamboo yarn blend and a small 2 mm hook, making the finished bow lightweight and delicate—perfect for everyday wear or gifting.
Pattern Highlights
- Light and airy mesh stitch fabric
- Two bow pieces of different sizes for layered effect
- Firm center strip to wrap and shape the bow
- Easy assembly with sewing and optional hot glue
- Soft cotton and bamboo yarn for comfortable wear
Notes
- Keep your tension even to have uniform “mesh boxes.”
- Sew edges neatly for a clean, durable finish.
- You can use hot glue or sewing to attach the hair clip—choose what feels best.
- Adjust the number of rows if you want a bigger or smaller bow.
Skill Level
Beginner to Intermediate — you should know how to crochet chains, single crochet, and double crochet, and how to sew pieces together.
Materials
- Yarn: 50% cotton, 50% bamboo blend (e.g., Dacoi Estiva)
- Hook: 2 mm crochet hook
- Extras: Hair clip base, tapestry needle, scissors, optional hot glue
Measurements / Sizing
- Larger bow piece: 14 chains wide and 25 mesh rows tall
- Smaller bow piece: 14 chains wide and 15 mesh rows tall
- Center strip: 6 chains wide and 6 rows tall
- The final bow fits most standard hair clips (around 6–8 cm long)
Stitch Abbreviations
- ch — chain
- sc — single crochet
- dc — double crochet
The Crochet Pattern!
Part 1: The Main Bow Piece (Larger)
- Foundation Chain:
- Chain (ch) 14.
- Row 1:
- Skip the first chain.
- Make 1 single crochet (sc) in the second chain.
- Chain 5 (ch 5), skip 2 chains, make 1 sc in next chain.
- Repeat the chain 5, skip 2, sc sequence across to create 4 mesh boxes in this row.
- Rows 2 to 25:
- Turn your work and chain 6 (ch 6) to start each row.
- Make 1 single crochet (sc) in the first mesh box (chain space) of the previous row.
- Chain 5 (ch 5), then make 1 single crochet (sc) in the next box.
- Repeat across.
- At row end, chain 5 (ch 5) and finish the row with 1 double crochet (dc) into the 3rd stitch of the previous row’s edge to keep edges neat.
- Continue until you complete 25 rows total.
- Forming the Tube:
- After finishing row 25, cut the yarn.
- Fold your rectangle so the beginning and end edges align.
- Use a tapestry needle and yarn tail to sew the edges together neatly, forming a tube shape.

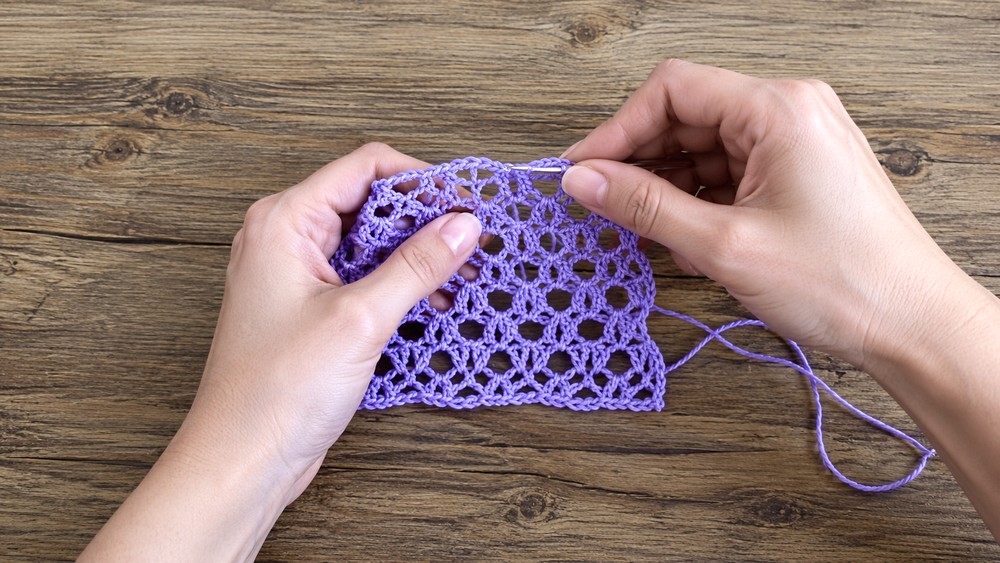
Part 2: The Smaller Bow Piece
Repeat the same process as Part 1:
- Chain 14.
- Work the mesh stitch (ch 5, skip 2, sc) pattern as above.
- Stop after 15 rows instead of 25.
- Sew edges together to create a smaller bow tube.

Part 3: The Center Strip
- Foundation Chain:
- Chain (ch) 6.
- Double Crochet Rows:
- Turn and work 6 rows of double crochet (dc) across the chain, keeping 6 stitches in each row.
- This will create a solid strip to wrap the bow center.
Assembly & Finished Size
- Stack Bow Pieces:
- Lay the larger bow tube flat.
- Place the smaller bow tube on top, aligning the sewn edges in the center.
- Shape the Bow:
- Pinch and fold the center area where the edges meet to create the bow shape.
- Attach the Center Strip:
- Wrap the double crochet center strip tightly around the pinched center.
- Sew the ends of the strip at the back of the bow to secure it firmly in place.
- Attach Hair Clip:
- Position the hair clip base behind the bow.
- Attach the clip securely by sewing or using hot glue.
- Make sure the bow stays firmly attached to the clip for regular use.
- Finish:
- Weave in all loose yarn ends neatly.
- Adjust bow shape as needed for fullness and symmetry.

Conclusion
This elegant crochet bow hair clip is easy to make and perfect for beginners wanting to practice mesh patterns and assembly. The soft cotton-bamboo yarn gives a beautiful texture and comfortable wear. Two layered bow pieces give volume, and the solid center strip creates a polished finish. Securely attaching the clip ensures your handmade bow is practical and long-lasting.