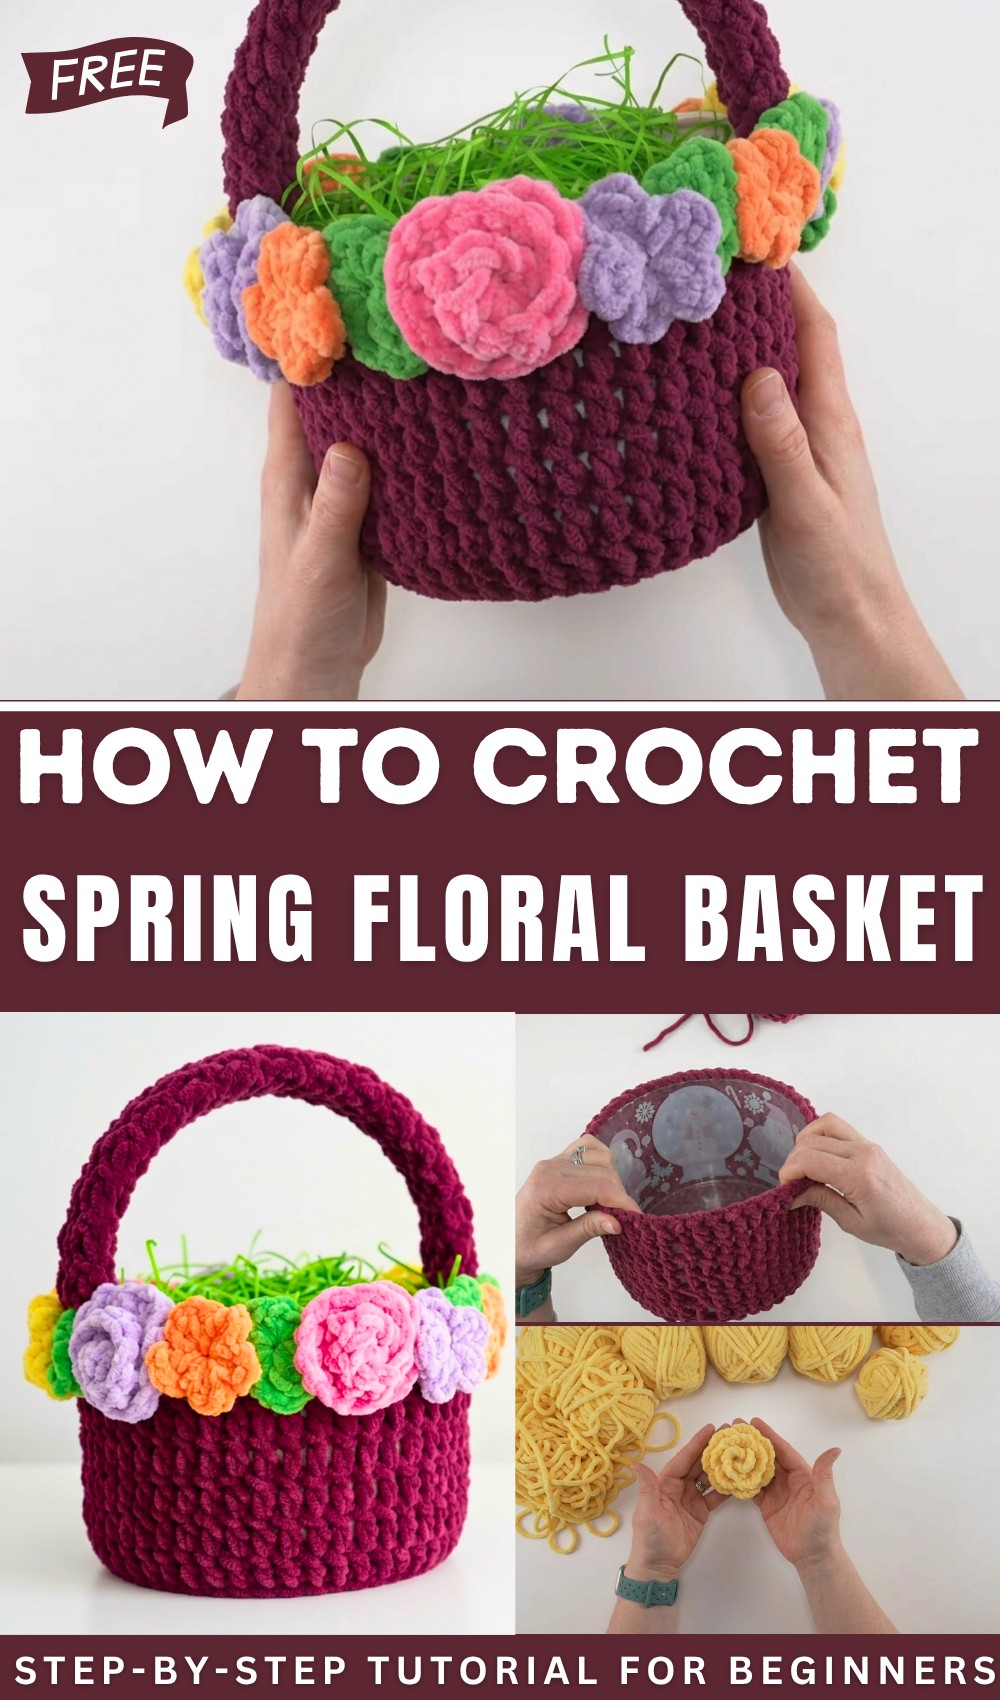
Free Crochet Floral Basket Pattern for Beginners
Spice up your space with this free crochet floral basket pattern that’s perfect for storing goodies while adding cheerful touch to any room.
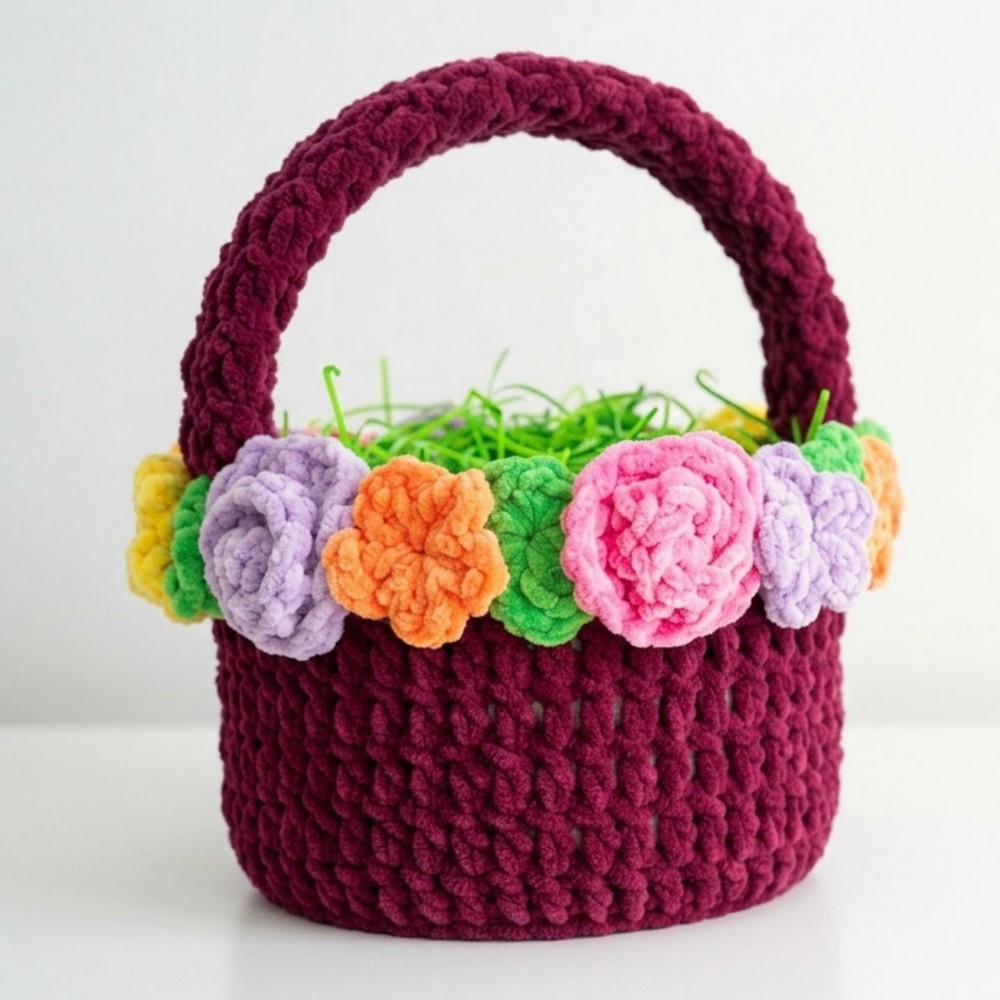
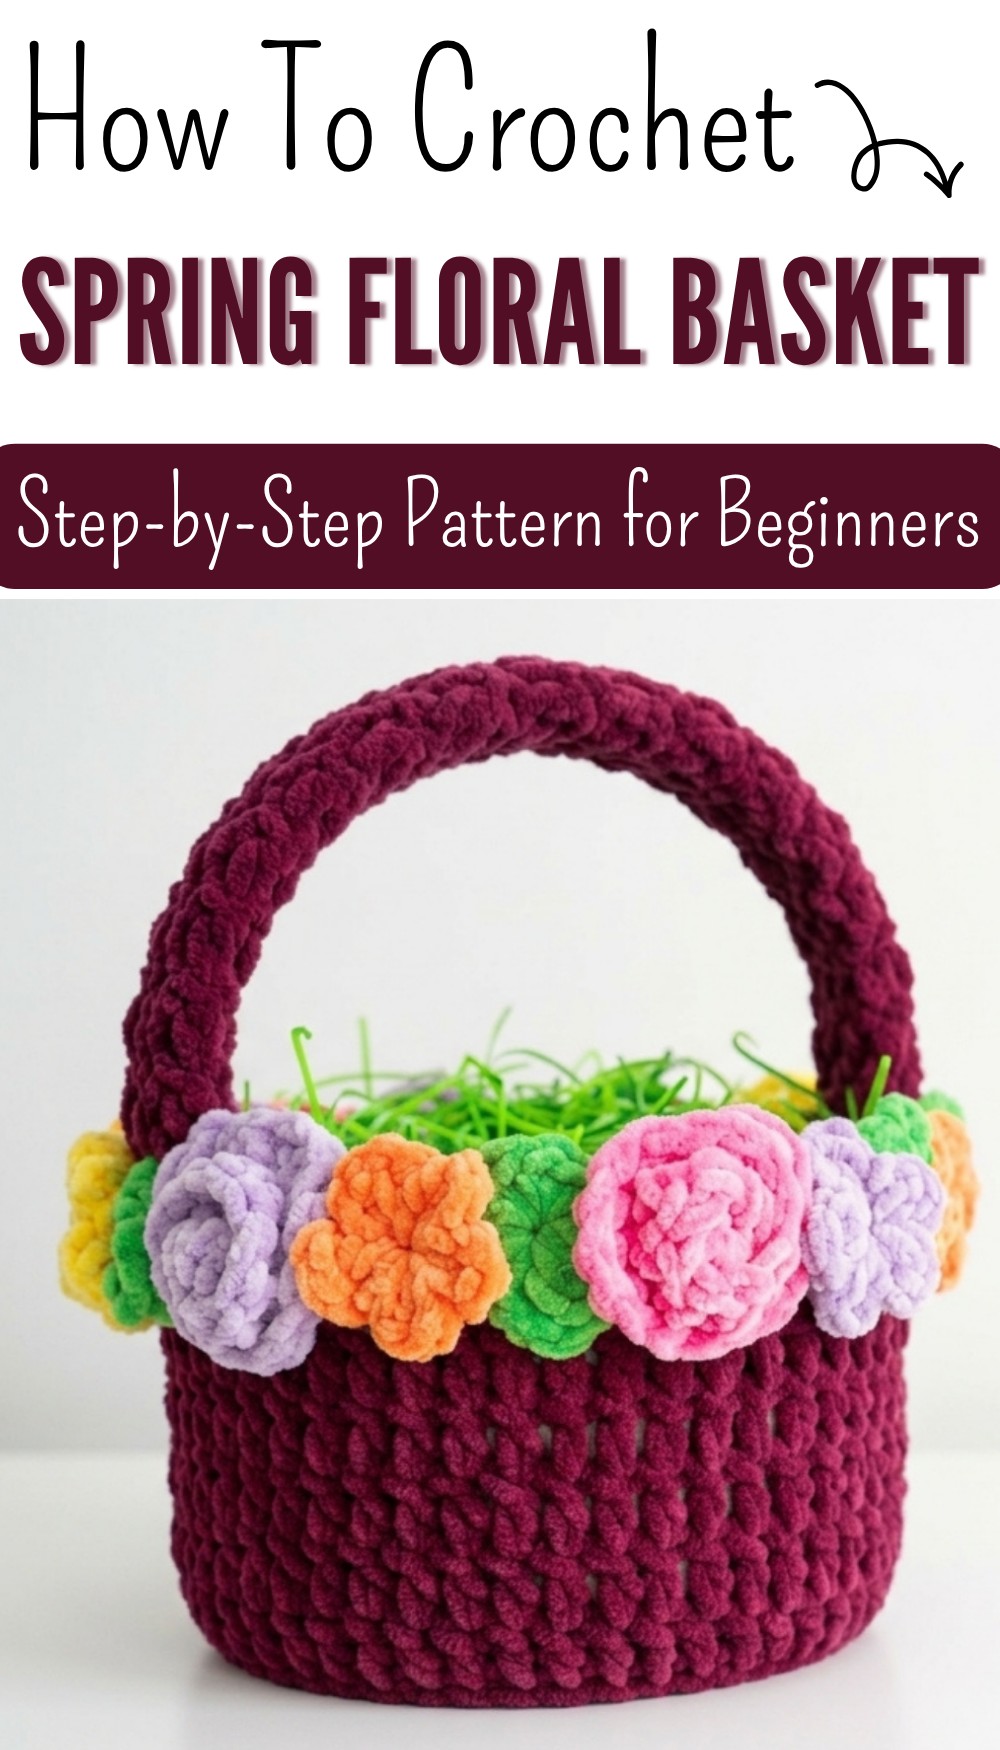
A basket shaped like a blooming flower adds a special bit of beauty to any room and catches every eye with its colorful petals and gentle twists. The crochet floral basket pattern gives you a lovely design that feels soft, looks cheerful, and makes daily life easier. This sweet basket can hold small toys, beauty items, or snacks, keeping everything neat while looking delightful on a shelf or table.
Free Crochet Floral Basket Pattern Perfect for Spring
Its shape and gentle details bring warmth and happiness, brightening dull corners and making homes feel more inviting. Following a crochet floral basket pattern turns yarn into something beautiful and practical, letting anyone enjoy a handmade piece that is useful every day. The finished basket is a little reminder of the magic that simple creations can bring, filling spaces with color and comfort.
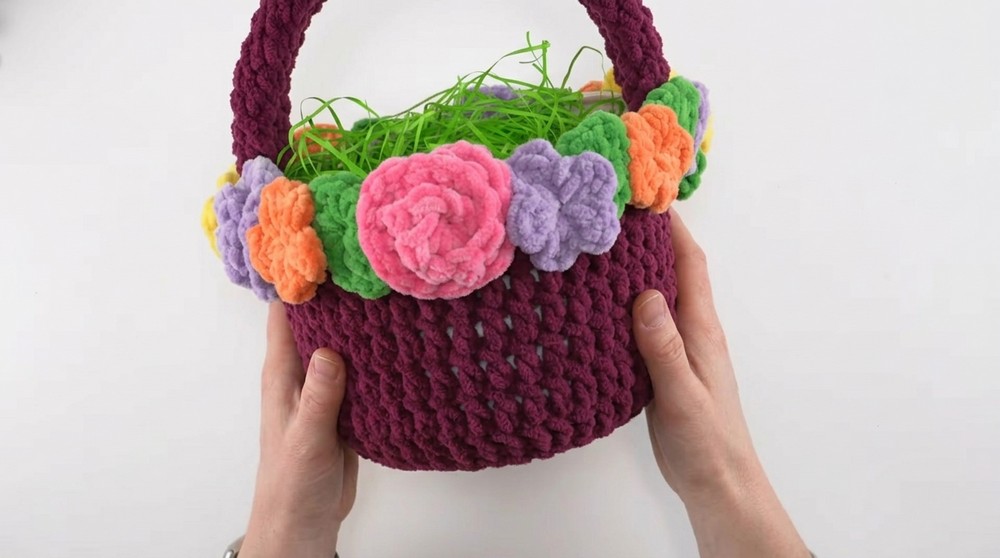
Spring Floral Crochet Basket
Materials
- Yarn:
- Basket & handle: Super bulky (#6) yarn (e.g., “Honey Bunny” from Hobie; brown or basket color)
- Flowers & leaves: Variety of colors
- Hook: K (6.5 mm) crochet hook
- Container: Clean, round, flat-bottom plastic container (food storage, coffee can, holiday tin, etc.)
- Wire: 16–22 gauge floral wire, pipe cleaners, or wire coat hanger (for handle)
- Notions: Tape measure, scissors, tapestry needle, hot glue gun & glue sticks
- Optional: Card stock/paper (to hide container print), clothespin (marking basket back)
Key Abbreviations (US Terms)
| Abbreviation | Meaning |
|---|---|
| ch | chain |
| dc | double crochet |
| tr | treble crochet |
| sc | single crochet |
| sl st | slip stitch |
| rep | repeat |
| st(s) | stitch(es) |
Special Notes
- Basket Measurement: Customize circle and sides to fit your container. Measure the base diameter and height before you begin.
- Wire Handle: Fold a crocheted strip over a wire for stability.
- Assembly: Flowers and leaves can be sewn or glued.
- Changing Container Size: See “Pattern Correction & Tips” for resizing.
Pattern Instructions
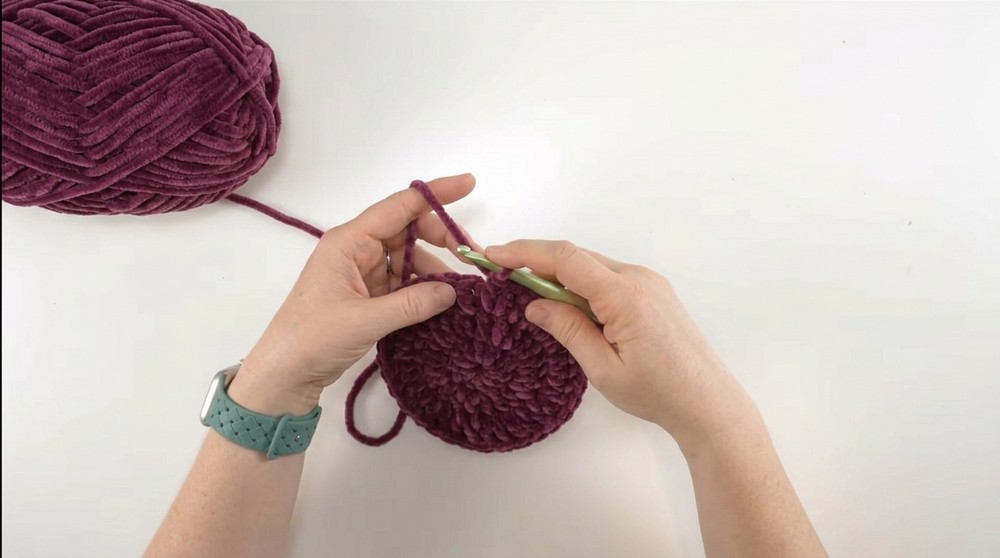
PART 1: Basket Base
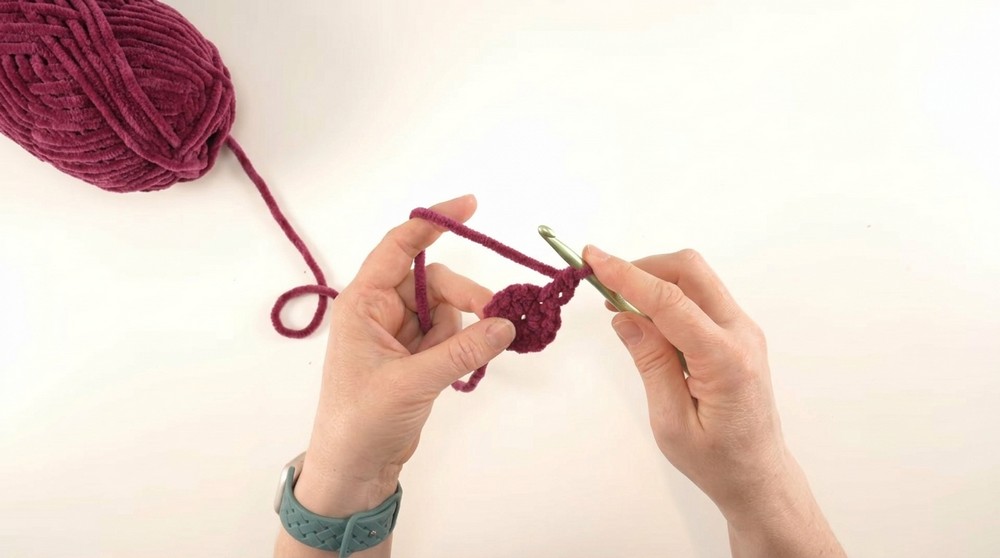
- Foundation Ring
- Make a slip knot.
- Ch 4.
- Join to farthest ch from hook with sl st to form a ring.
- Round 1
- Ch 3 (counts as dc).
- Work 11 dc in ring.
- Join to top of beginning ch-3 with sl st. (12 dc total)
- Round 2
- Ch 3 (counts as dc).
- Dc in first st.
- 2 dc in next st.
- Rep from * around.
- Join with sl st. (Increase each round until circle matches base diameter.)
- Round 3 & more (as needed for size):
- Ch 3.
- Dc in first st.
- 1 dc in next st, 2 dc in following st.
- Rep this increase pattern: alternate 1 dc, 2 dc around.
- Continue similar increase rounds until circle matches container base.
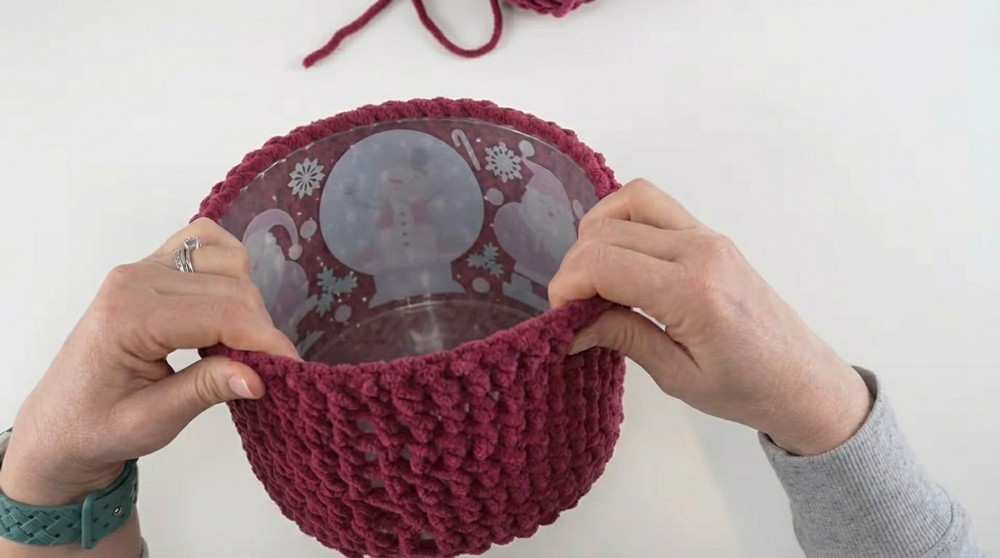
PART 2: Ridge & Sides
- Ridge (Back Post Double Crochet)
- Ch 3.
- Back post dc in each st around:
- YO, insert hook from back around post of dc, YO, pull up loop, YO, pull through 2, YO, pull through 2.
- Join with sl st.
- Sides
- Ch 3 (counts as dc).
- Dc in first st.
- Dc in each st around.
- Join with sl st.
- Rep this round until basket cover is as tall as container height (e.g., 6–7 rounds).
- Finishing
- Fasten off, weave in ends.
- Slip finished cover snugly onto the container.
- (Optional: Insert card stock inside to hide print.)
PART 3: Handle
- Prep Wire:
- Cut wire to desired handle length (e.g., 16 in).
- For thicker handles, twist pipe cleaners together.
- Crochet Handle Strip:
- Slip knot on hook.
- Ch 10 (for a folded handle width; adjust as needed).
- In 3rd ch from hook, dc across each chain (8 dc).
- Ch 3, turn.
- Dc in each st across.
- Rep row until strip matches the wire length.
- Assembly & Seaming:
- Leave a long yarn tail, lay wire inside strip, fold strip over wire.
- Whip stitch (with tapestry needle) the edges together to enclose wire.
- Secure ends with glue.
- Attach Handle to Basket:
- Sew or glue handle ends to the inner basket rim (choose front and back of basket).

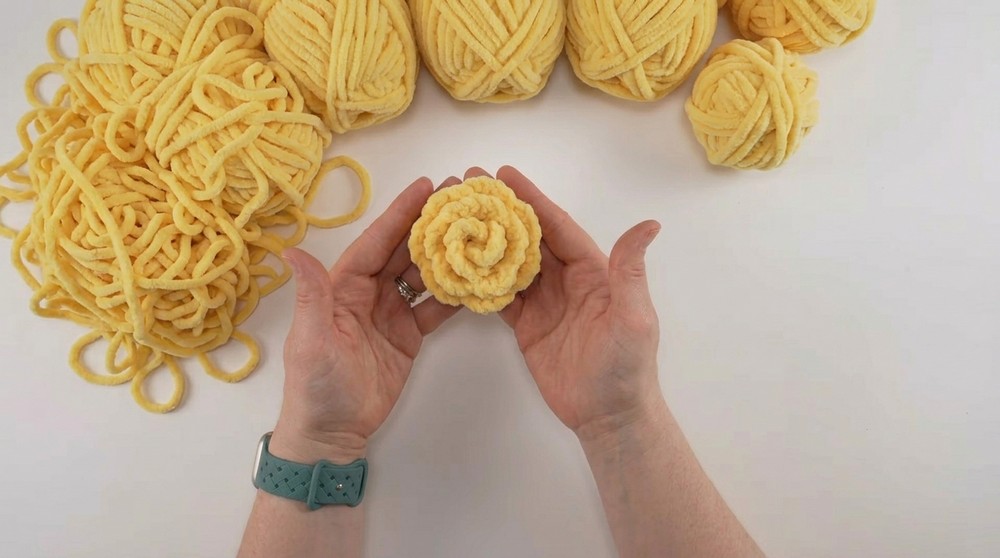
PART 4: Flowers, Roses, & Leaves
Large Rose
- Rose Pattern:
- Slip knot, ch 12 (or ch 6 for mini rose).
- In 3rd ch from hook, 3 dc in each ch across.
- Fasten off leaving a long tail.
- Coil strip into a rose shape.
- Sew or glue base to secure.
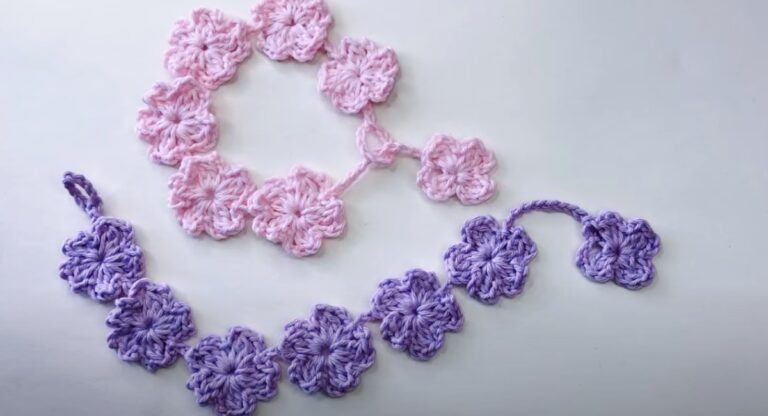
Five-Petal Flower
- Flower Pattern:
- Slip knot, ch 4, sl st to form ring.
- Ch 3 (counts as dc).
- 3 dc in ring, sl st in ring — petal completed.
- Rep for 5 petals.
- Join, fasten off, shape petals.
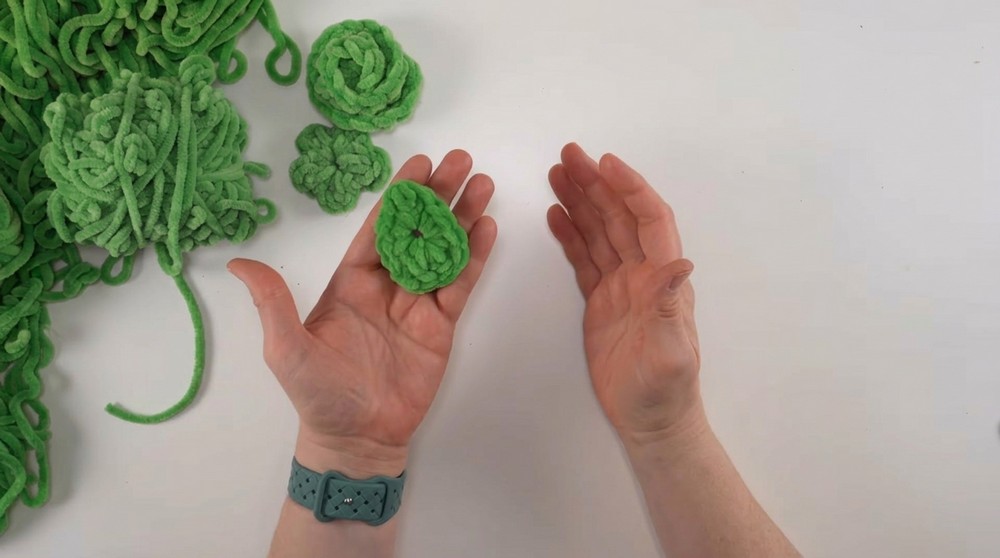
Leaf
- Leaf Pattern:
- Slip knot, ch 4, sl st to form ring.
- Ch 3 (counts as dc).
- 3 dc in ring.
- 4 sc in ring.
- 1 tr in ring (for leaf point).
- 4 sc in ring.
- Join to top of beginning ch-3 with sl st.
- Fasten off, shape leaf.
PART 5: Assembly
- Embellishment:
- Arrange flowers, roses, and leaves around basket rim.
- Sew or glue as desired (hot glue recommended for plush yarn).
- Add extra flowers/leaves for fuller effect.
- Finishing Touch:
- Fill basket with Easter grass, gifts, or other decorative items.
Conclusion
This spring floral crochet basket brings together recycled materials and playful crochet embellishments for a cheerful, functional project. The design is highly customizable for any container size, yarn color, and arrangement—perfect for beginners and advanced crocheters alike.
Pattern Correction & Tips
- Correction: If your circle “ripples” (too many increases), reduce increases in subsequent rounds for a flat base.
- Tip: Use plush or super bulky yarn for best coverage and dimension.
- Tip: Match basket width and height precisely using your tape measure.
- Tip: Use glue for easy, secure flower attachment; sewing works well if you prefer a non-glued option.
- Tip: For structural integrity, the wire handle is recommended, especially if the basket will carry heavier items.