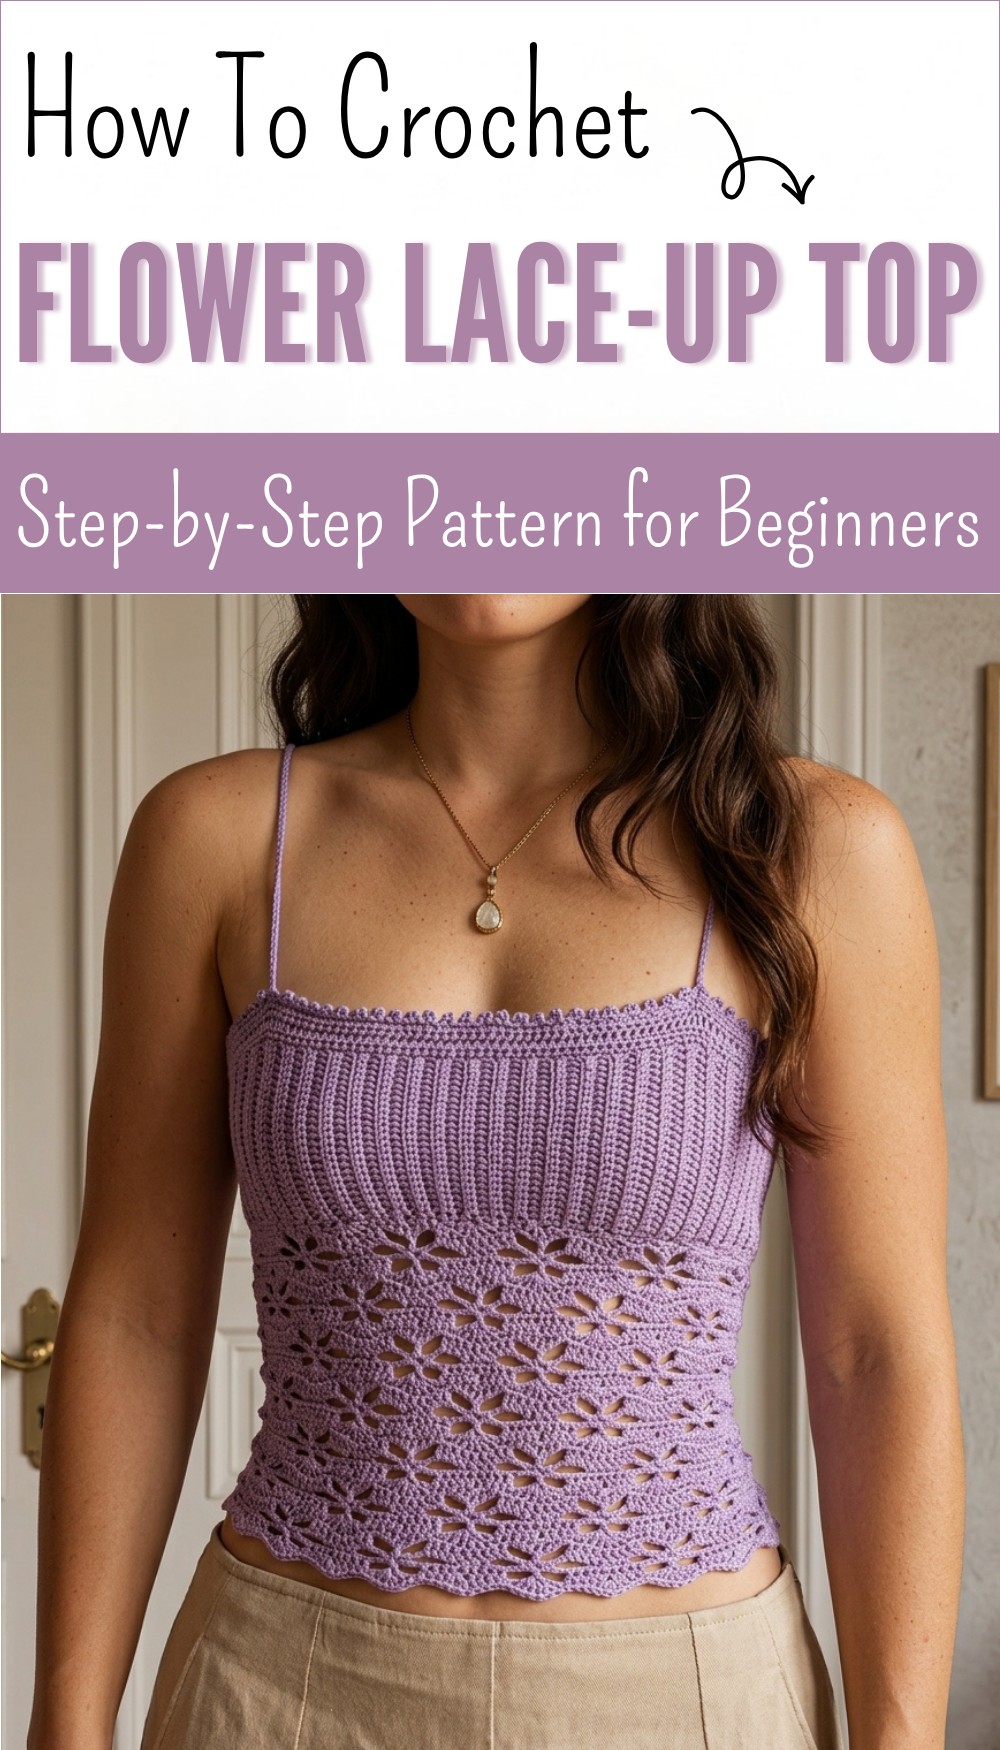
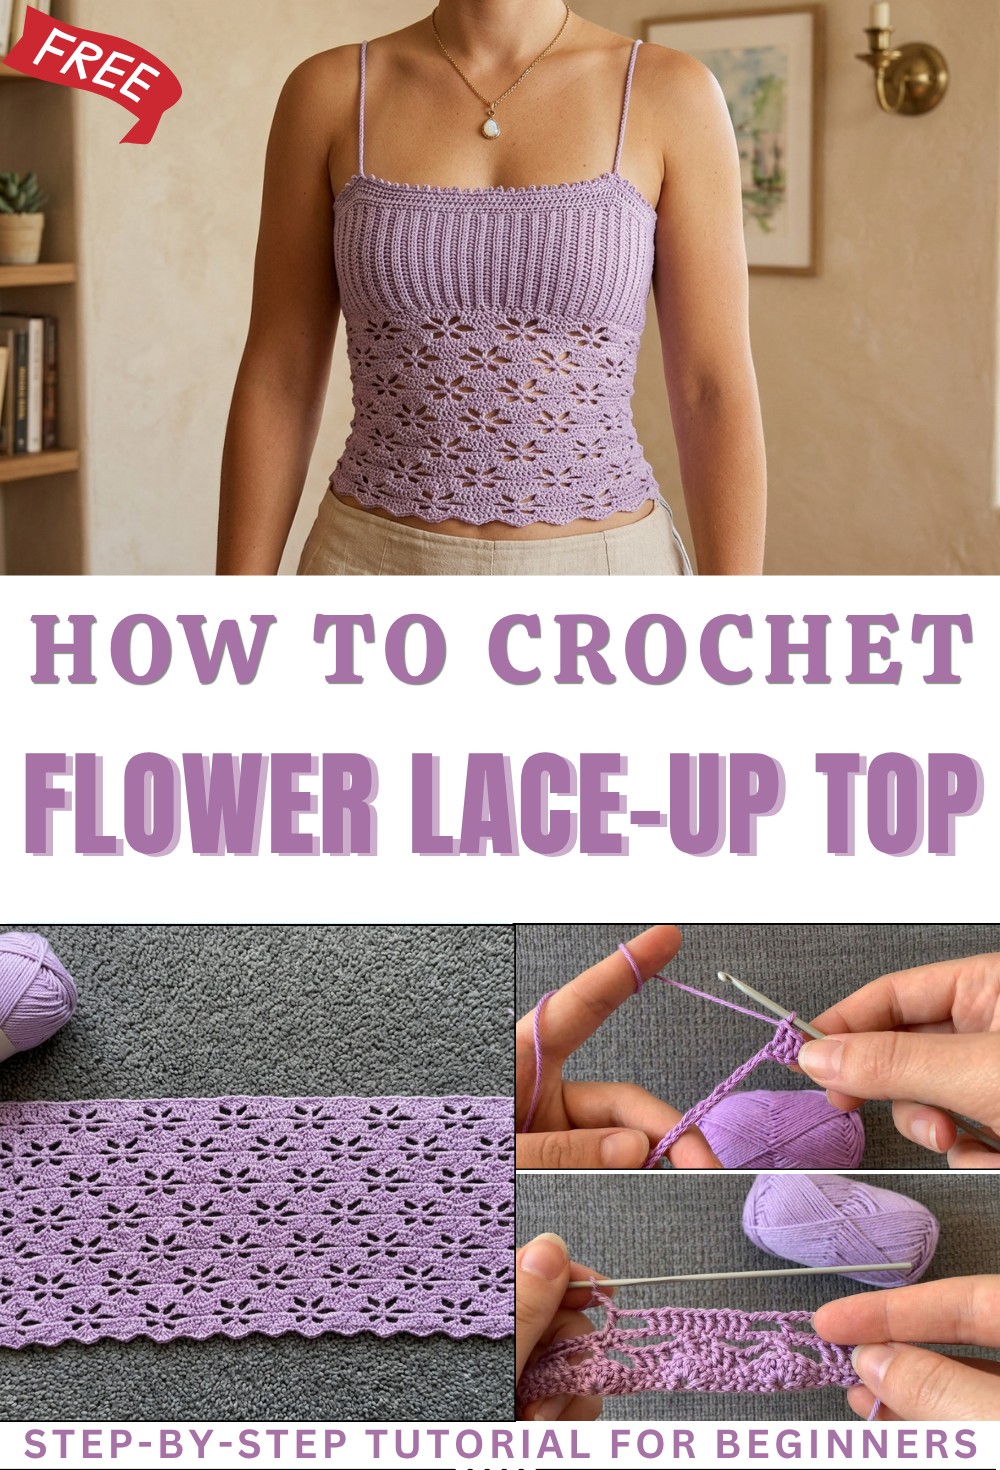
Free Crochet Flower Lace-Up Top Pattern for Fresh Styles
Slip into style with a free crochet flower lace-up top pattern that adds charm and comfort to any sunny day and lets your personality shine.
Sunlight shining through gentle fabric as you pick up a soft top decorated with little flowers and open spaces you can feel with your fingers. This beautiful piece takes the look of a garden and turns it into something you can wear with confidence even if you have never made clothes before. Using a crochet flower lace-up top pattern, anyone can enjoy the pretty blooms and simple ties that let you decide how loose or snug your top should be.
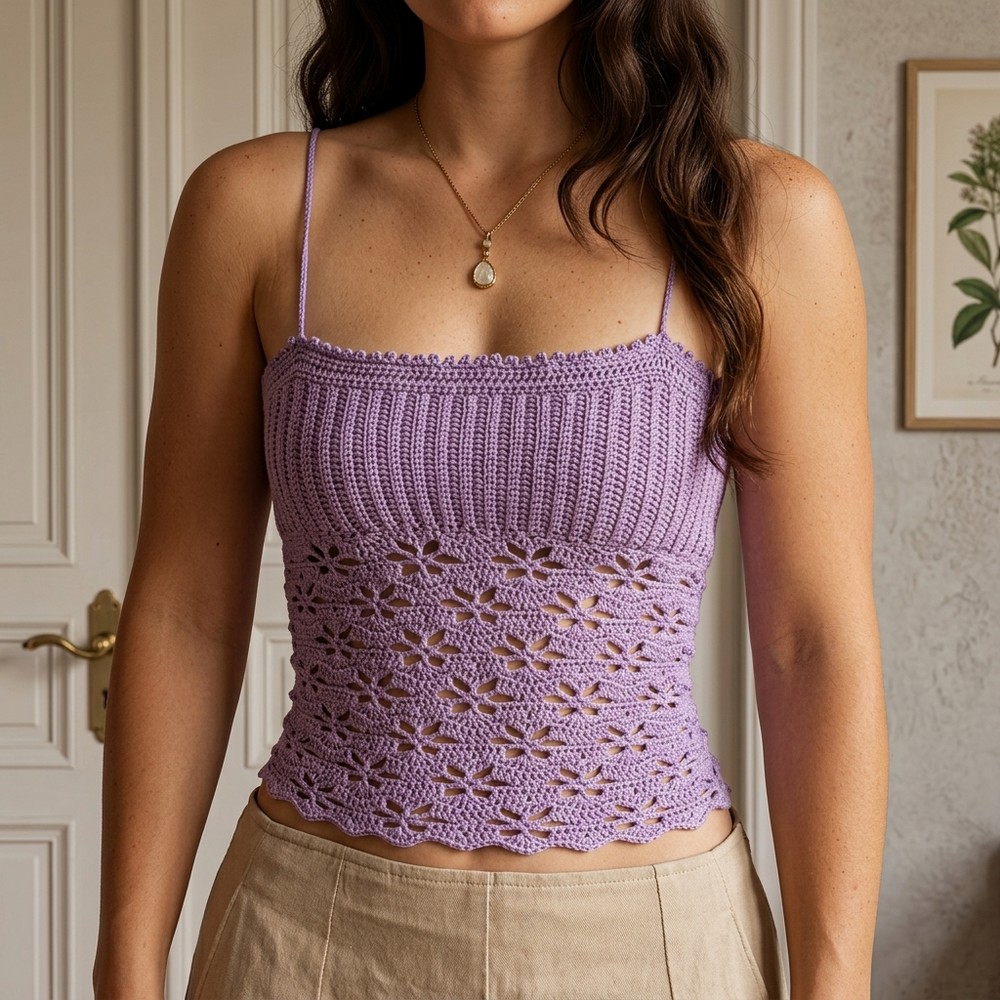
Elegant Free Crochet Flower Lace-Up Top Pattern with Floral Vibes
The big spaces help keep you cool, and the flowers make every moment feel bright and cheerful—perfect for meeting friends, family gatherings, or relaxing anywhere you like. You can choose your favorite colors and let each tie at the back fit you just right, feeling happy with every wear. Soft, light, and welcoming, this top turns ordinary days into colorful memories, giving you comfort and style in every stitch.
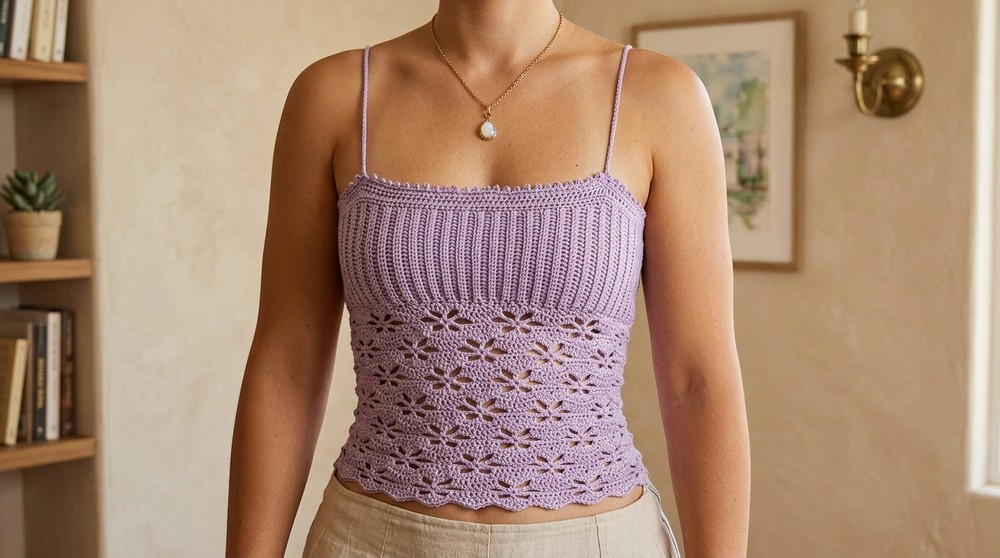
Crochet Flower Lace-Up Crop Top Pattern
Materials
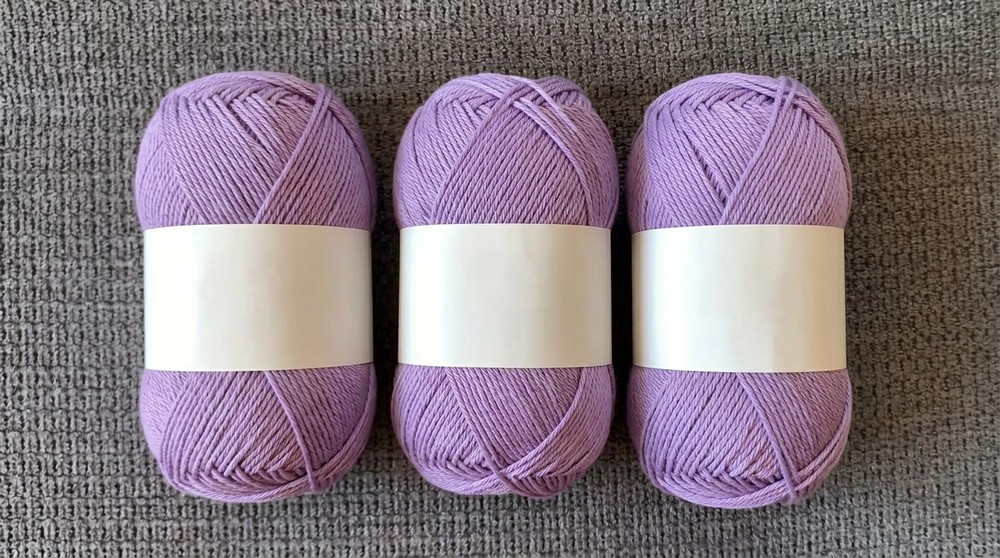
- Yarn: Fine weight cotton yarn (sample is white; approx. 200g required)
- Hook: 2.5 mm crochet hook
- Tapestry needle (for seaming and weaving in ends)
- Scissors
- Stitch markers (optional, for strap placement)
Key Abbreviations (US Terms)
| Abbreviation | Meaning |
|---|---|
| ch | chain |
| sl st | slip stitch |
| sc | single crochet |
| hdc | half double crochet |
| dc | double crochet |
| st(s) | stitch(es) |
| sp(s) | space(s) |
| BL | back loop |
| rep | repeat |
Special Notes
- The main panel is worked flat in rows; ribbing is added vertically along the upper edge.
- Ribbing is worked in hdc BL only for stretch and texture.
- Straps are formed with long chains, secured at marked points.
- Picot edge adds a dainty decorative finish.
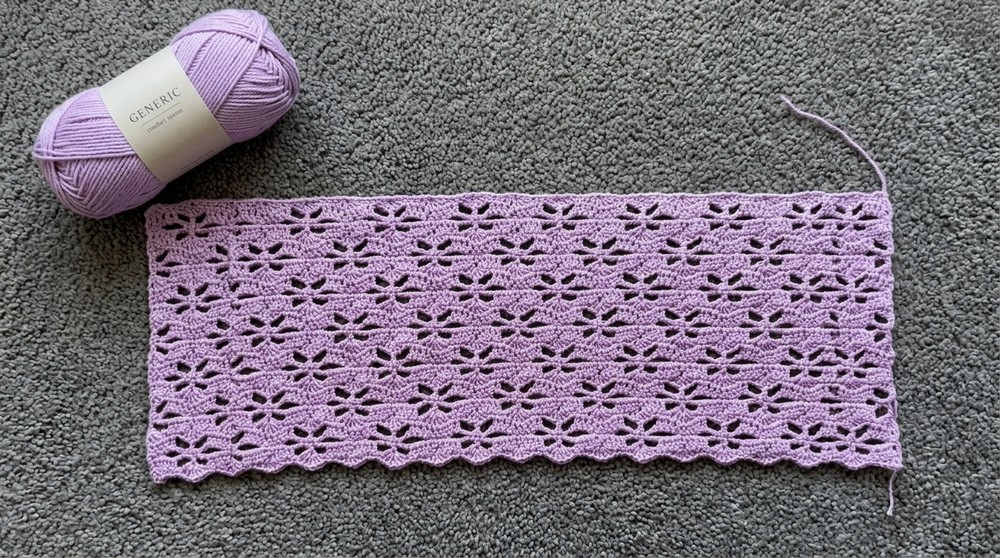
- For the original flower chart or further row repeats, refer to the provided written pattern.
Pattern
Main Flower Panel
Calculate your foundation chain as needed for your bust measurement according to the chart or sizing instructions in the video/pattern.
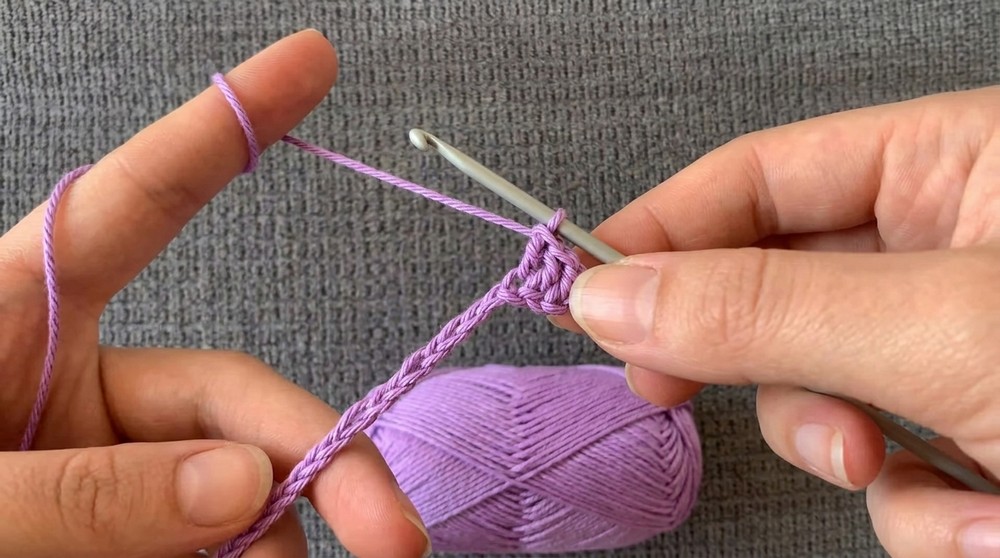
1. Foundation Chain
- Make a slip knot.
- Ch to desired length (number provided in chart).
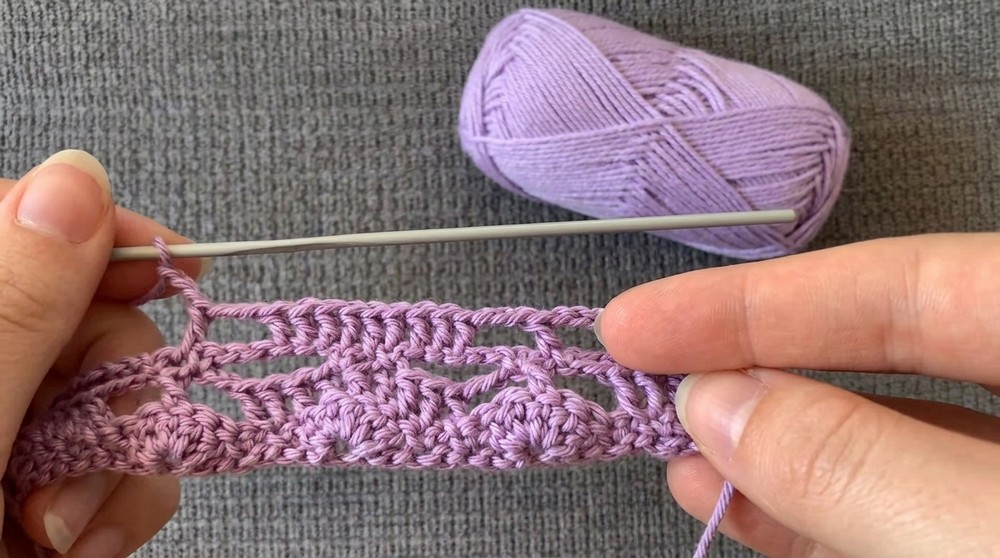
2. Row 1
- Ch 3 (counts as dc).
- 2 dc in the 4th ch from the hook.
- Sc in next (third) ch.
- Ch 1, sc in next (second) ch.
- 5 dc in next (third) ch.
- Sc in next (third) ch.
- Ch 1, sc in next (second) ch.
- Repeat [5 dc in next (third) ch, sc in next (third) ch, ch 1, sc in next (second) ch] until 3 ch remain.
- 3 dc in last ch.
- Ch 3, turn.
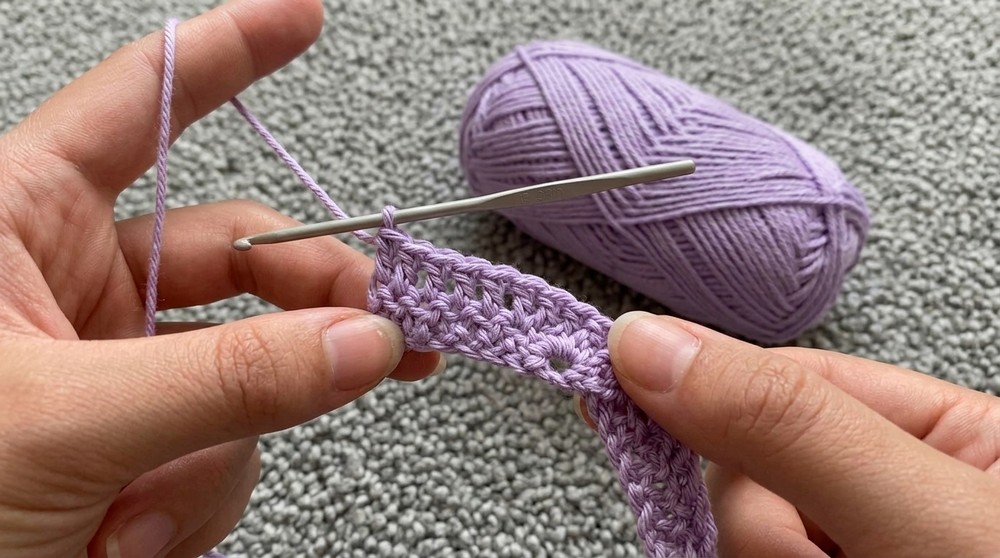
3. Row 2
- Skip 1st dc.
- Dc in each of next 4 sts.
- Ch 3.
- Dc in center st of 5-dc cluster below.
- Ch 3.
- Dc in each of next 9 sts (from ch-1 sp to next ch-1 sp).
- Ch 3.
- Dc in center of 5-dc cluster below.
- Continue this repeat as established, working dc in cluster centers, chaining 3 between sections.
- At end, dc in each st until end.
- Ch 3, turn.
4. Row 3
- Sc in each of the first two dc.
- Ch 5, sc in third ch of ch-3 sp.
- Ch 1, sc in second dc.
- Ch 5, sc in fourth dc.
- Ch 1, sc in following dc.
- Continue the pattern, always placing sc in corresponding position from previous row.
- Last: sc in each of last two dc.
- Ch 3, turn.
5. Rows 4–9 (Continue Lace Pattern)
- Alternate between dc rows and sc/ch rows as previously established.
- The next dc row (Row 4):
- Skip 1 sc, dc in next 4, ch 3, dc in ch-1 space, ch 3, then into 9 dc, etc.
- Continue following the flower repeat provided or available chart/written pattern for your size.
Ribbing (Upper Edge)
1. Attach Yarn & Ribbing Foundation
- Attach yarn to corner of the long, straight edge of flower rectangle (your “foundation row” for ribbing).
- Ch up to desired length for ribbing (e.g., ch 26 for coverage, more for higher neckline).
2. Ribbing Row 1
- Hdc in 3rd ch from hook and all ch across.
- Sl st into each of next 3 sts along the flower motif edge, turn work.
3. Ribbing Row 2
- Ch 2, hdc BLO in each hdc across the ribbing.
- Turn.
- Sl st into the next 3 sts of the flower motif, turn.
4. Ribbing Row 3+
- Continue as in Row 2, always working hdc BLO for the rib texture, and sl st up the motif to attach.
- Repeat until ribbing is complete across the top edge.
Top Edge Finish
- Sc evenly across the top edge of the ribbing for a base row.
- Work 2–3 rows of hdc along the top edge (above the sc) for stability.
Decorative Picot Edge & Strap Placement
Picot Edge
- Ch 1, turn.
Sc in first 2 sts,
Picot: ch 3, sl st in front loop of previous sc. - Continue (sc in next 2, picot) until you reach strap marker.
Straps
- When at each strap marker:
- Ch 200–250 for long, tie-back straps.
- Sl st back down the chain.
- Continue with picot pattern until the next anchor point.
- Repeat as needed for 2 or 4 straps.
Final Steps
- Weave in all loose ends using tapestry needle.
- Lace up the straps at the back for a corset or criss-cross look.
Conclusion
You have completed a beautiful, romantic flower lace-up crop top with ribbed texture, floral details, and a dainty picot and strap edge. The fit is customizable for your bust, and it can be worn with several strap/lacing styles.
Pattern Corrections & Tips
- Correction: When making ribbing, ensure you always sl st in 3 sts before each return (this keeps it even on the motif).
- Tip 1: Count stitches carefully in flower rows for symmetry.
- Tip 2: If your upper edge is rolling, block gently or add another hdc row for structure.
- Tip 3: Try on as you go—adjust ribbing width and strap placement to your body.
- Tip 4: Use stitch markers for easy strap location placement.
- Tip 5: For longer wear, add extra rows to top for more coverage/support.