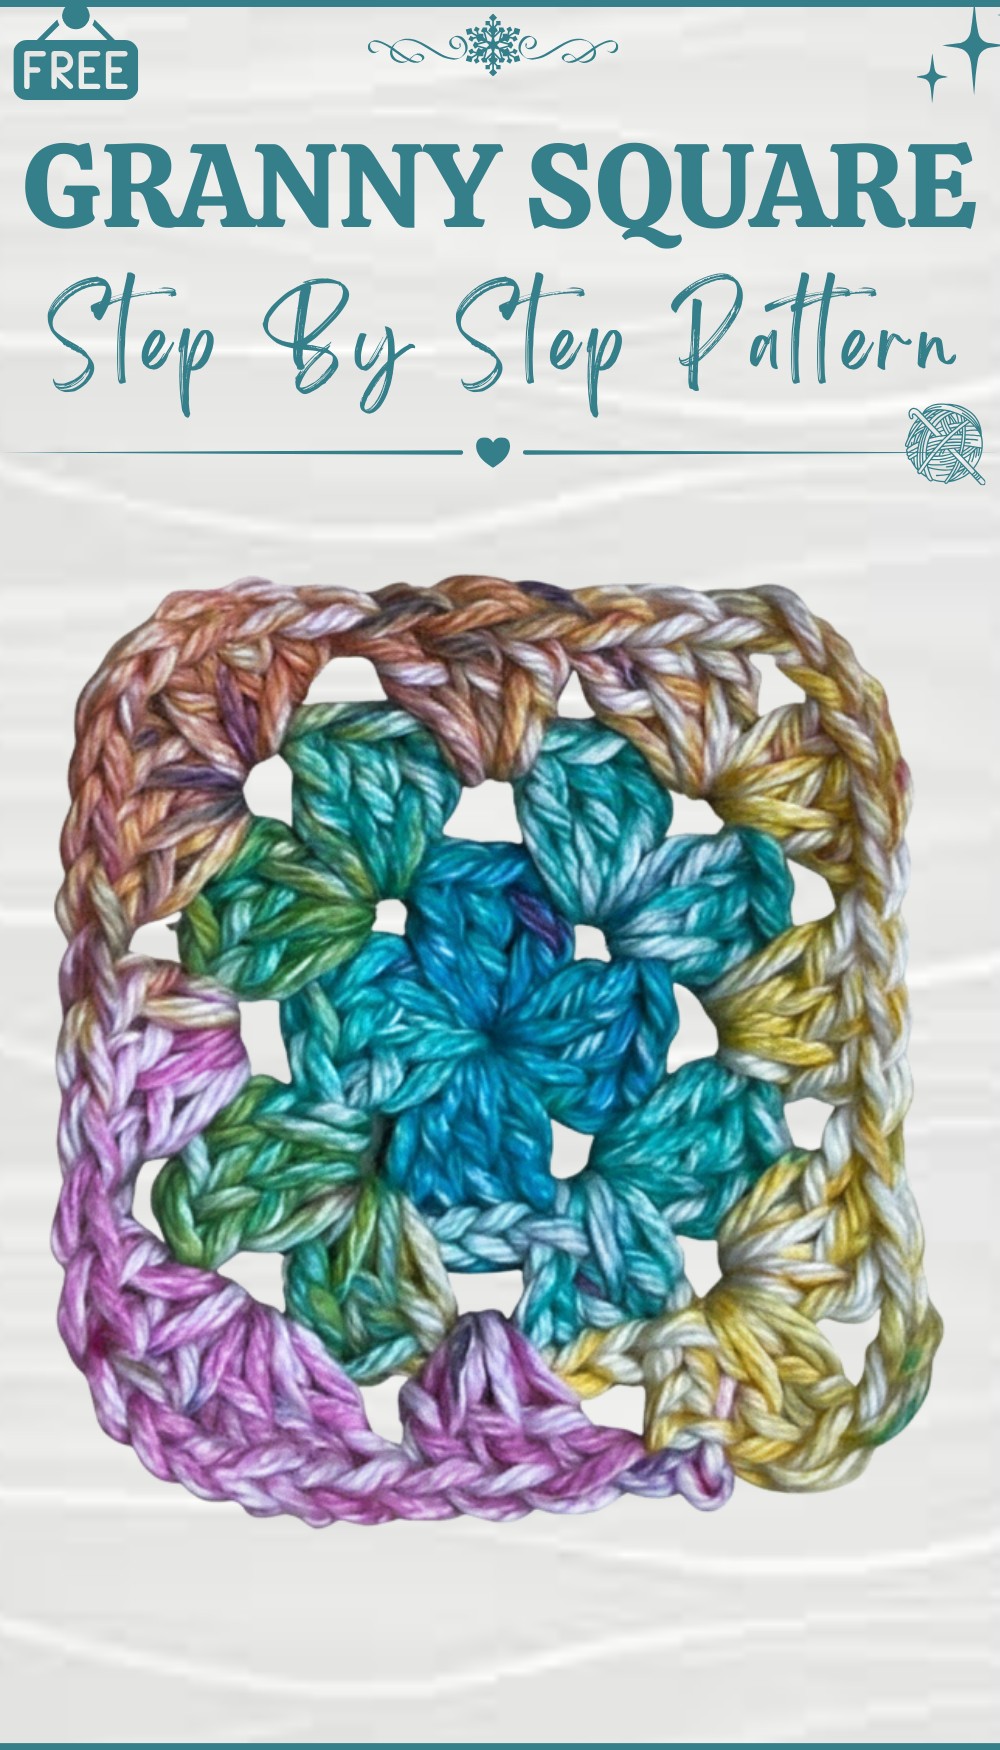
Free Crochet Granny Square Pattern for Daily Projects
Add color and charm to your projects with Free Crochet Granny Square Pattern offering simple easy steps for bright cozy and beautiful result.
Free Crochet Granny Square Pattern for Quick and Easy Results

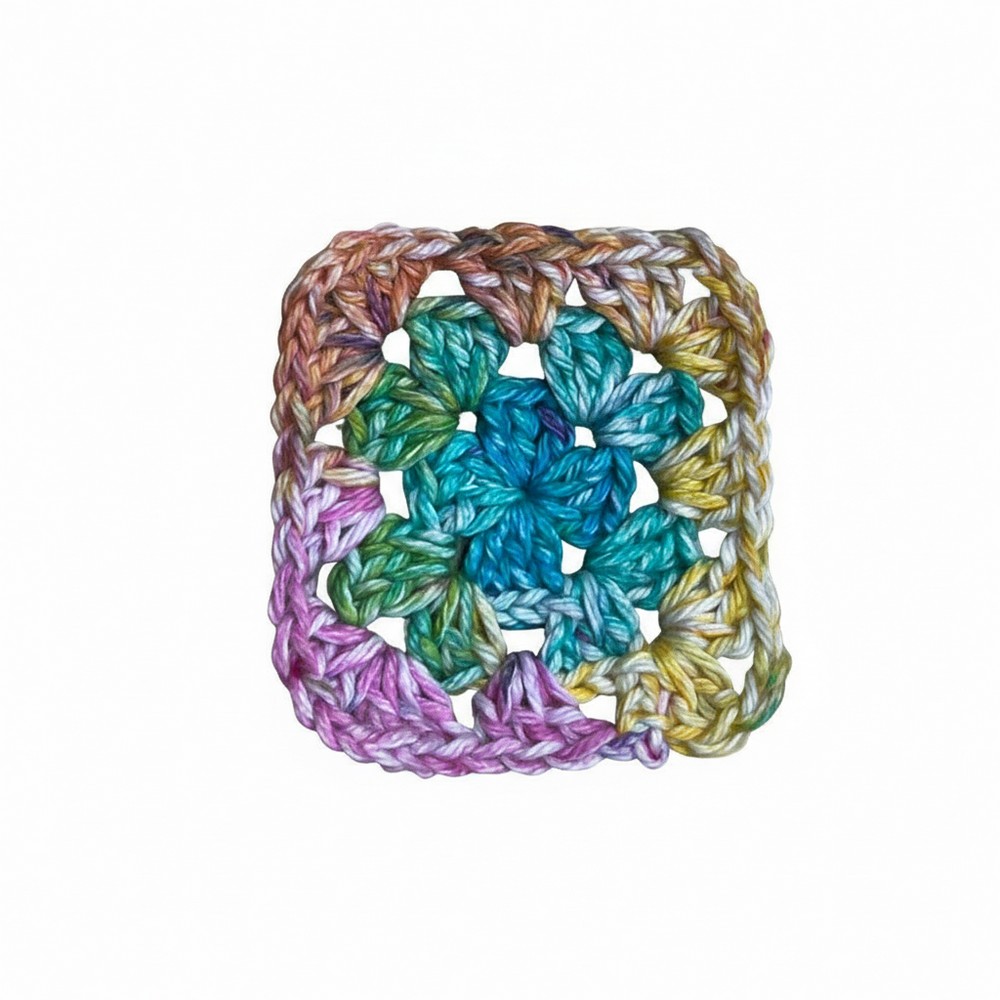
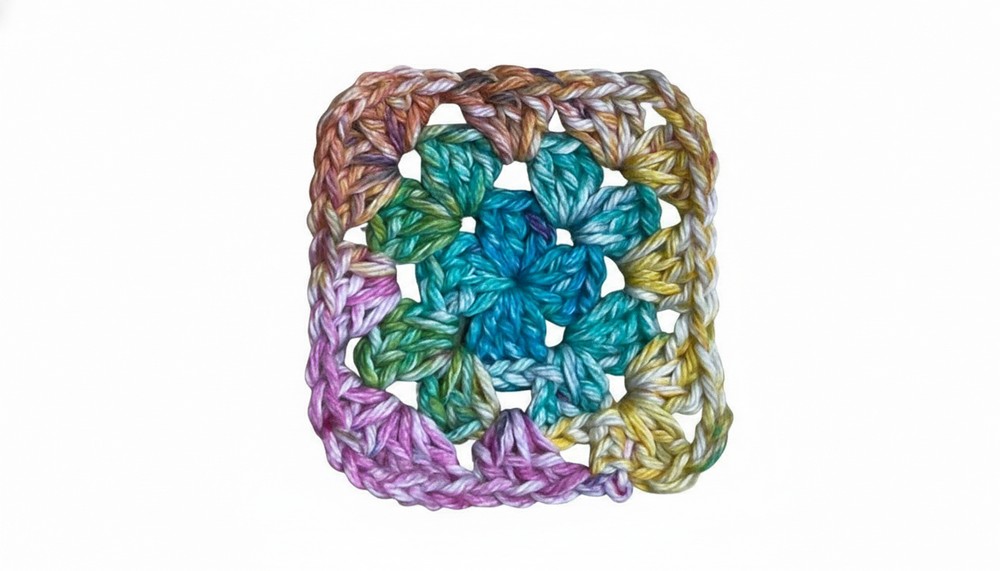
The pattern is easy to follow and perfect for beginners, as it repeats the same steps again and again. It is also a great way to use leftover yarn and mix different colors to create something unique. A Crochet Granny Square pattern is not just about making items, it brings creativity and joy into every piece. The finished work looks bright, cozy, and full of life, adding beauty and warmth to any space or moment.
Crochet Granny Square Pattern – Step-by-Step
Materials List
- Yarn: Any medium weight/Yarn of choice
- Hook: 3.5 mm crochet hook (or to match your yarn)
- Darning (yarn) needle: for weaving in ends
- Scissors
Optional: Stitch marker
Key Abbreviations
| Abbreviation | Meaning |
|---|---|
| MR | Magic Ring |
| ch | Chain |
| dc | Double Crochet |
| sl st | Slip Stitch |
| st(s) | Stitch(es) |
| sp | Space |
Special Notes
- This pattern uses US crochet terminology.
- The number of chains in the corner-space may be adjusted for different effects; the sample uses chain-2.
- When joining rounds, always sl st into the top of the beginning ch-3.
- You may use different colors as desired for each round.
Pattern
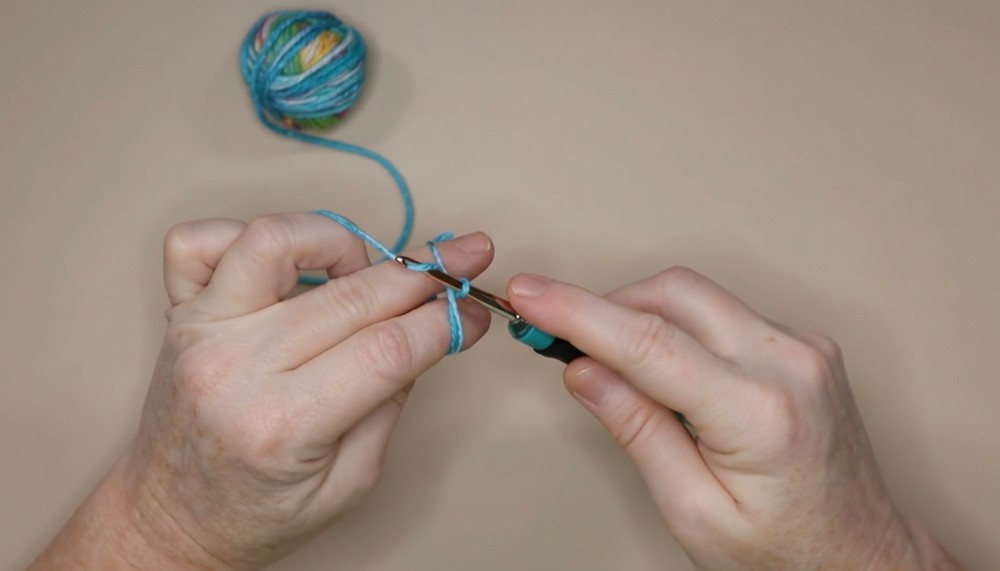
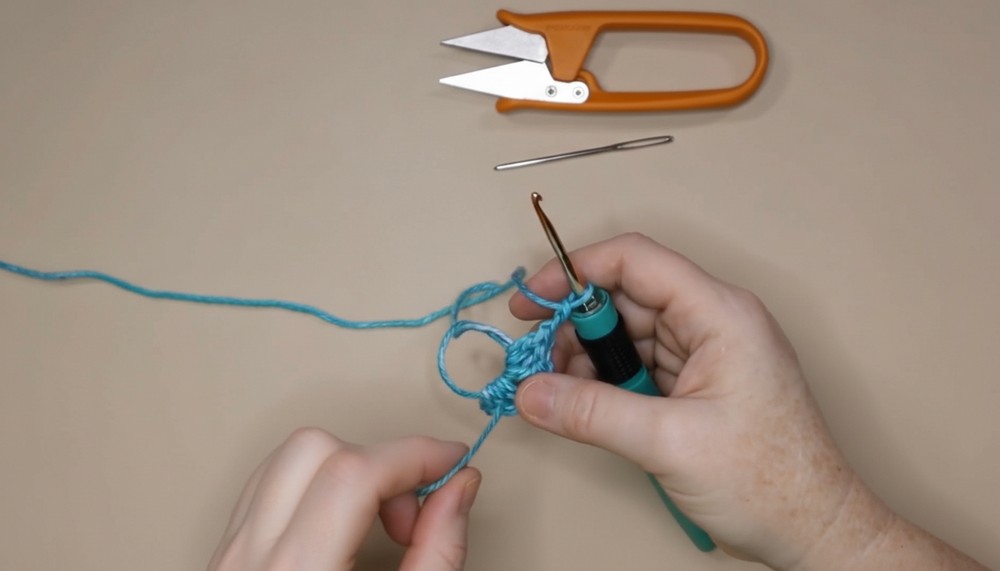
Magic Ring Foundation
- Form a magic ring:
- Drape yarn over your fingers and wrap to make an X shape across the front.
- Insert your hook under the first strand, over the second, and pull up a loop.
- Yarn over and pull through to create a locking chain.
- Begin Pattern:
- Ch 3 (counts as 1 dc—this is your first dc of the first 3-dc cluster).
- 2 dc in ring.
- Ch 2 (forms first corner).
- (3 dc in ring, ch 2) three times (you will have 4 clusters of 3 dc, separated by ch-2 corners).
- Join Round:
- Sl st to top of beginning ch-3.
- Pull tail to tighten the ring.
Round 2
- Slip stitch to first corner sp
- (Sl st across the top of the next two dcs, then sl st into the ch-2 space.)
- Start Round:
- Ch 3 (counts as first dc), 2 dc in same space.
- Ch 2 (corner space), 3 dc in same space.
- In each of the next three ch-2 spaces:
- (3 dc, ch 2, 3 dc) in each ch-2 space around.
- Join round:
- Sl st to top of first ch-3.
Round 3 (and further rounds)
- Slip stitch to first corner space (as before).
- Start Round:
- Ch 3, 2 dc in same space, ch 2, 3 dc in same space (first corner completed).
- Side spaces: For each side space (in between corners):
- (3 dc) in space.
- Corners:
- (3 dc, ch 2, 3 dc) in next corner space.
- Continue around, working (3 dc) in each side sp, and (3 dc, ch 2, 3 dc) in each corner.
- Join with sl st to top of beg ch-3.
- Fasten off:
- If ending, ch 1 and cut yarn.
- If continuing, repeat Round 3 instructions, working (3 dc) in every side space, and (3 dc, ch 2, 3 dc) in every corner space.
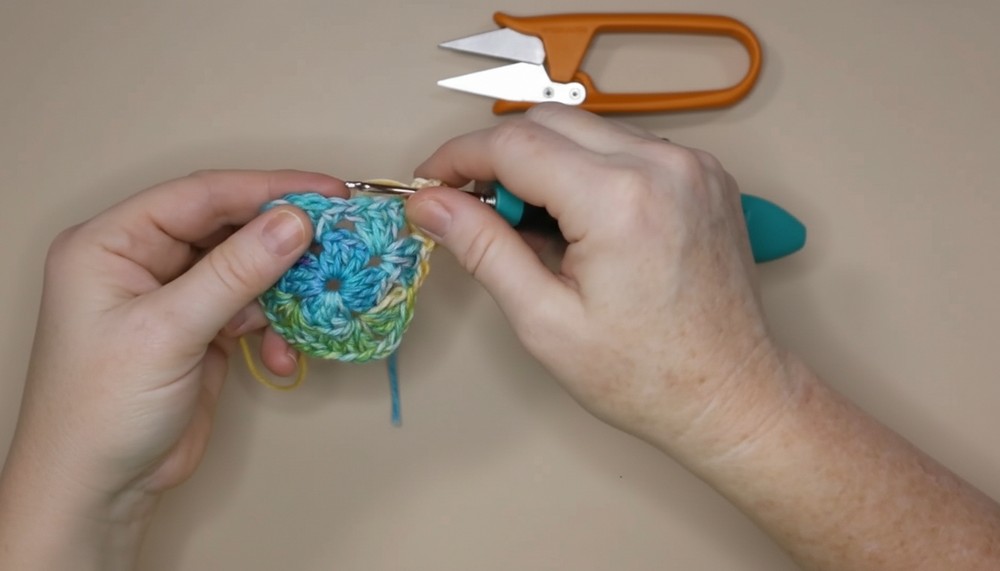
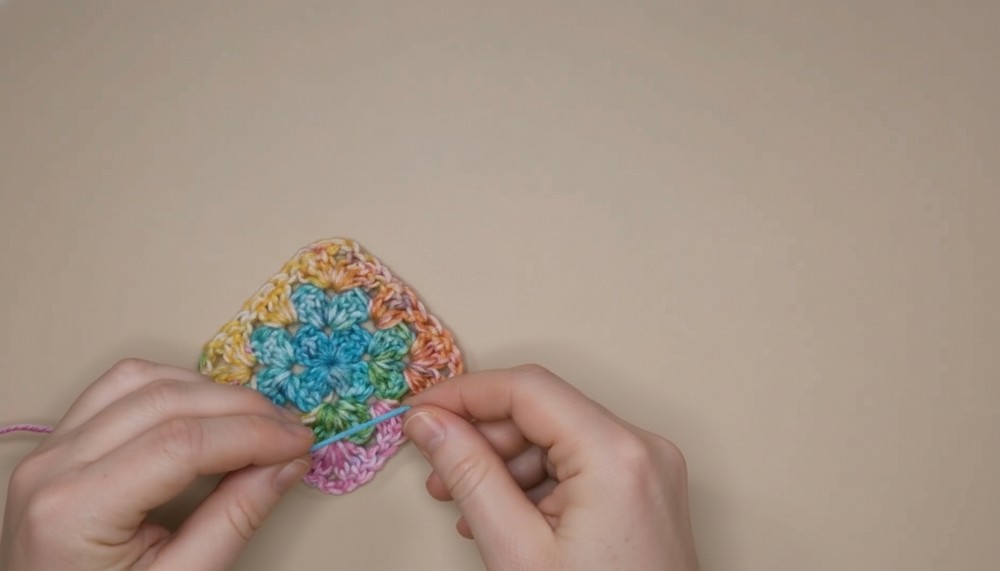
Finishing
- Use a yarn needle to weave in ends securely:
- Weave through several stitches, double back, and repeat for extra security.
- Trim any excess yarn.
Pattern Corrections
- In the demonstration, chain-2 is used for corners; you may use ch-2 or ch-3 depending on your tension/yarn. Both are valid.
- At the start, some may prefer ch-2 for the initial height; for most, ch-3 is standard for the first dc.
Tips
- Always pull your magic ring tail tight at the beginning, but not so tight as to pucker.
- For larger squares, continue in the established pattern, increasing side spaces each round.
- Corners always get (3 dc, ch 2, 3 dc).
- Sides always get 3 dc in the space.
- Block your finished square for best results.
Conclusion
You have now crocheted a classic granny square that begins with a magic ring, producing a neat and closed center—ideal for many projects. Expand by repeating the last round, change colors as desired, and use your square in blankets, bags, and beyond.