Free Crochet Half Moon Shawl Pattern for Cozy Layers
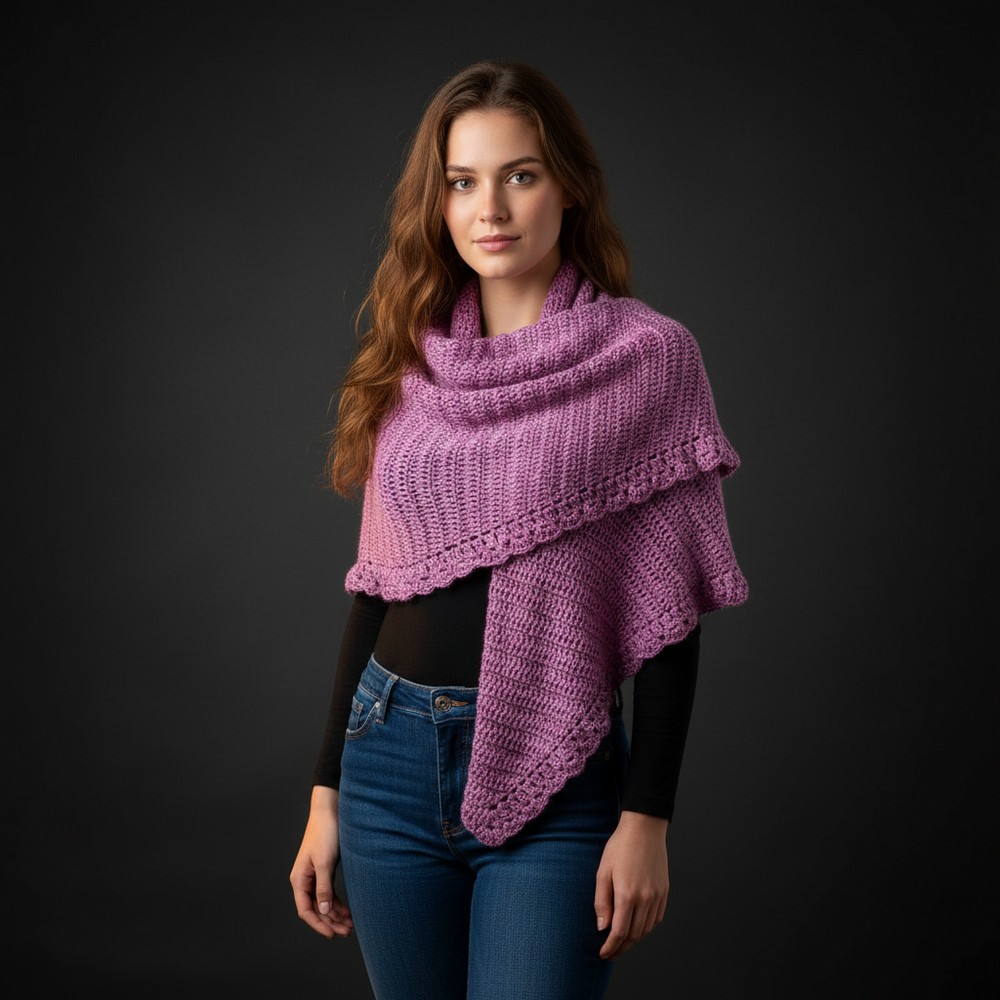
Dress up your look with this free crochet half moon shawl pattern that adds elegance warmth and a personal touch to every outfit you choose.
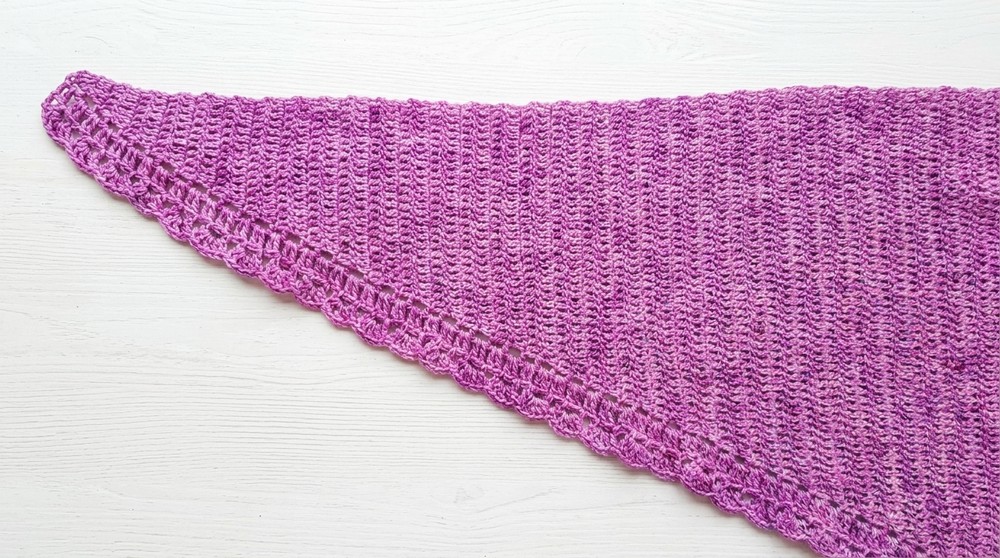
Beautiful colors and graceful curves make this shawl stand out in any crowd. The unique half-circle shape gently hugs the shoulders and drapes softly, creating a lovely look that works for both special occasions and simple days at home. With easy stitches that repeat, even a new maker will find confidence as the pattern grows from their hands. Adding the crochet half moon shawl pattern to a project list means making a light layer that feels cozy on cool evenings or brightening up an outfit for a cheerful daytime stroll.
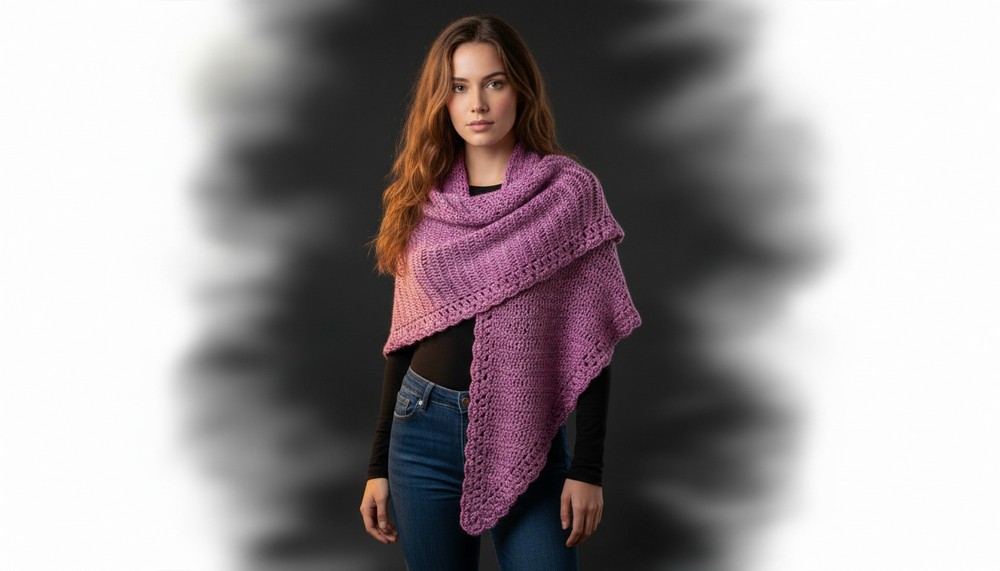
Boho Free Crochet Half Moon Shawl Pattern for Relaxed Vibes

Its curved edge frames the face and flows gently over the arms, giving warmth without feeling heavy. Every shawl made from this design tells its own story through yarn color choices and finishing touches, making it a special gift or a personal treasure. Matching beauty with function, this pattern brings both comfort and style wherever it is worn.
Crochet Half Moon Shawl Pattern
Materials
- Yarn: 260 g sport-weight yarn
- Hook: 4 mm crochet hook (adjust size as preferred for your tension and yarn)
- Scissors
- Yarn needle (for weaving in ends)
- Optional: Stitch markers
Measurements
- Depth (widest point): 41 cm
- Width (curve, end-to-end): 175 cm (finished, including border)
Key Abbreviations (US Terms)
- ch: Chain
- hdc: Half Double Crochet
- dc: Double Crochet
- sc: Single Crochet
- sl st: Slip Stitch
- st(s): Stitch(es)
Special Notes
- The shawl begins at one end, increases up to the straight section, then transitions to decreases to achieve its rounded, crescent shape.
- “False dc”: You can use the technique described (start with hdc and single crochet stacked) for a straight edge, or simply chain 3 as a substitute.
- All border and fan instructions are worked into chain spaces, not stitch tops, unless otherwise indicated.
Pattern
Foundation Row
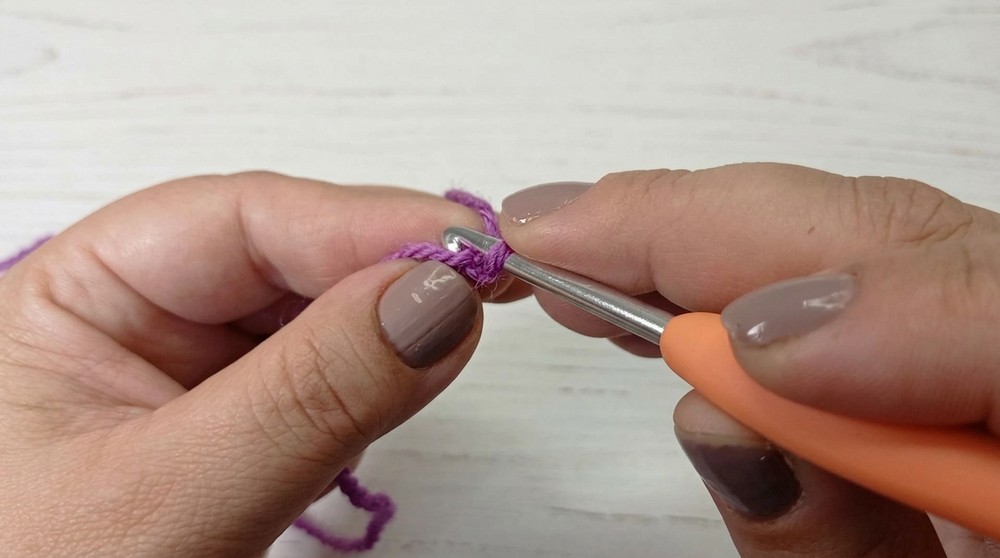
- Make a slip knot.
- Ch 4 (first 3 are foundation, the 4th is a turning chain, does not count as a stitch).
- Row 1:
- Working in the back bump (the “third strand” or “belly”) of each foundation chain, work 1 hdc in each (total: 3 hdc).
- Turn work.
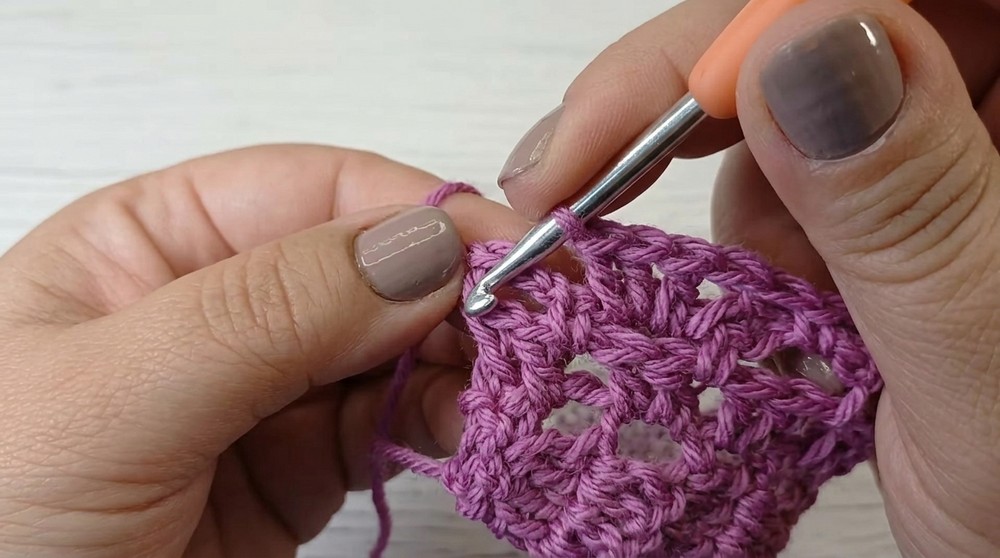
Increase Section (Rows 2–61)
Row 2 (first row of increases):
- Begin with a “false dc” (see notes) or ch 3.
- In the next st, work 2 dc (increase).
- Ch 1 (separation chain).
- In the last hdc, work 1 dc.
- Turn.

Row 3:
- If starting from the side with chain spaces/increases:
- Ch 4 (first 3 count as dc, 4th is separation).
- In first dc, work 2 dc (increase).
- In next two dc, work 1 dc in each.
- If starting from the straight edge:
- Begin with “false dc” (or ch 3),
- Work 1 dc in each st until last before chain space,
- In last st, work 2 dc (increase).
- Ch 1,
- In second ch of previous row’s ch 4, work 1 dc.
- Turn.
Continue alternating these two row types:
- Each “increase side”: Ch 4, 2 dc in first st, then 1 dc in each st across.
- Each “straight side”: False dc or ch 3, 1 dc in each st across, 2 dc in last st before chain space, ch 1, 1 dc in ch-space.
- Repeat until you have 61 rows of increases or until the desired crescent depth (approx. 70 cm depth).
Straight Section (Rows 62 and onward)
When you reach desired depth:
- Start with Ch 4, 1 dc in each st across (no increases).
- At end: ch 1, 1 dc in ch-space as in previous rows.
- Repeat for desired number of straight rows (example: ~31 rows; adjust as preferred for shawl length).
- The depth of this section determines the final width.
- Do not increase or decrease in this section.
- Maintain chain space and mesh pattern at curved edge for consistency.

Decrease Section (Repeat same number of rows as Increase Section)
Row 1 of decreases (after straight section):
- Start from straight edge with a “false dc” (or ch 3).
- Work 1 dc in each st across until 2 sts remain before chain space.
- For last 2 sts:
- dc2tog:
- Yarn over, insert hook into first st, pull up a loop, yarn over, pull through two,
- Yarn over, insert hook into next st, pull up a loop, yarn over, pull through two,
- Yarn over and pull through remaining loops on hook.
- Ch 1, in ch-space, work 1 dc.
- dc2tog:
- Turn.
Next row (starting from mesh/increase edge):
- Ch 4, dc2tog over first two sts (as above), 1 dc in each st across.
- At end: ch 1, 1 dc in ch-space.
- Turn.
Repeat decrease rows for the same number as your increase rows (example: 61 rows) until only 3 sts remain.
Final Row and Edge Preparation
When only 3 sts remain:
- Start with “false dc” (or ch 3),
- dc2tog over the last two sts,
- Do NOT ch 1, but directly make 1 dc in the ch-space.
- Turn.
Final row:
- Ch 1 (does NOT count as st).
- In each of the final dc, work 1 hdc (total: 3 hdc).
- Turn.
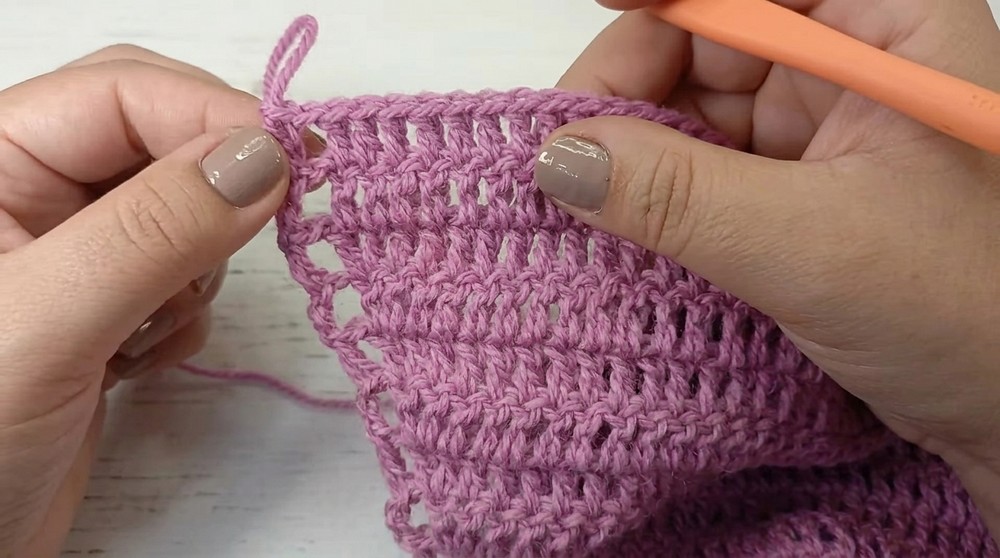
Decorative Border
Positioning:
- Ch 1 (does NOT count as st).
- In each hdc, work sl st. (There should be 3 sl st.)
- Turn work.
- Work a fourth sl st in the next available space to position for border start.
Row 1 (Mesh border):
- Ch 3 (counts as dc).
- In same space, work 1 dc.
- Ch 1 (separation).
- In next space (between dc pairs), work 2 dc.
- Repeat ch 1, 2 dc in next space across shawl edge.
- At end, if only one space remains, work 1 dc in space and 1 dc in the last hdc.
- Turn.
Row 2 (Mesh/arches):
- Ch 5 (counts as first arch).
- In next ch-1 space between dc pairs, work sc.
- Ch 4, sc in next ch-1 space.
- Repeat across.
- At end, for last arch, ch 2, work hdc or sc in final dc to anchor arch.
- Turn.
Row 3 (Fan edge):
- Ch 1 (does NOT count as st).
- In last dc, work sc.
- Skip hdc/sc, in next arch, work (dc, ch 1, dc, ch 1, dc) (“fan”).
- Next arch: hdc or sc (as worked previously).
- Repeat fan, hdc/sc across.
- At end, for last arch, count up the starting ch-5, and work final sc in the third ch.
- Fasten off, weave in end.
Finishing
Weaving in ends:
- Use yarn needle to securely hide all yarn tails within stitches horizontally and vertically for a snug finish. Always invert your thread path and split the strands to lock.
Conclusion
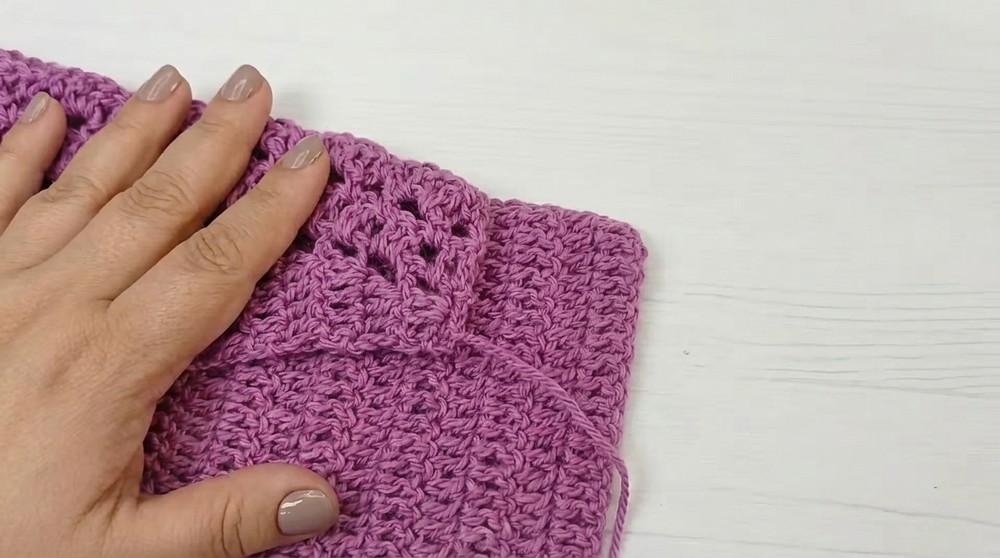
This graceful crescent shawl features an elegant mesh and fan border, resulting from a clear progression of increases, straight section, and decreases. Its shape and lacy trim make a versatile accessory for gifting or personal use, and the technique ensures neat edges.
Pattern Corrections & Tips
Corrections:
- “Areta stitch” = Double Crochet (dc)
- “False double crochet”/rib technique: You may substitute with ch 3 at the beginning of rows for simplicity, though the described stacking method provides a neater edge.
- Always maintain chain space at the increased curve edge for consistency.
Tips:
- Use stitch markers at the increase/decrease edge to easily track row repeats.
- When weaving in ends, thread them through multiple directions for durability.
- Block your shawl gently after finishing to enhance shape and stitch definition.
- Adjust straight section row count for more or less length without impacting the crescent shape.