How to Crochet Granny Square Book Sleeve (Tutorial for Beginners)

Learn how to crochet a beautiful classic granny square book sleeve with a strawberry color combo perfect for gifting to a bookworm, with a step-by-step tutorial from Kendalltai. It features a lovely letter heart strap with border fish which can be closed with a heart applique button. This project will become much easier if you already know the granny stitch.
It is equally perfect for books, tablets, or Kindles, The complete guide for crocheting this book sleeve will be available at the end of this post. Let’s get started!

Skills Used: Key techniques include making a magic ring, double crochet, chaining, color changes, and working in the round to crochet a granny square. Additionally, the tutorial covers securing yarn tails, assembling the sleeve using a yarn needle, and shaping a heart button with triple crochets and slip stitches.
Guide Span: 21 Minutes
Personalization Tips: This crochet book sleeve can be customized in multiple ways by changing yarn colors or adjusting the size just by changing the number of rounds. Instead of a two-tone design, you can use multicolor. The color ideas from the tutor include red for the sleeve and black for the heart, sea green, and pink and purple shades.
The closure can also be modified by using a regular button, a ribbon tie, or a snap closure instead of a heart button.

This step-by-step tutorial provides a detailed guide for crocheting a stylish book accessory, the sleeve, perfect for beautifying books, tablets, or journals for traveling. The tutorial explains how to construct a large granny square, add color changes, assemble the sleeve using simple sewing techniques, and create a unique heart button closure. Here is a quick overview of this guide:
Free Crochet Granny Square Book Sleeve Pattern
Materials
- Yarn: Medium weight (4) acrylic yarn. Example: Loops & Threads Soft Classic Acrylic (colors “Highlighter” and “Light Pink” used in the video—use any color(s) you desire).
- Hook Size: 4.5 mm crochet hook
- Scissors
- Yarn needle (for sewing and weaving in ends)
- Optional: Button (if not using the crocheted heart), extra yarn for heart/button accent

Abbreviations (US Terms)
| Abbreviation | Meaning |
|---|---|
| ch | chain |
| st(s) | stitch(es) |
| dc | double crochet |
| tr | triple (treble) crochet |
| hdc | half double crochet |
| sl st | slip stitch |
| sp(s) | space(s) |
| rpt | repeat |
| MC | magic circle/magic ring |
Special Notes
- Ch-2 at start of rounds: Does not count as a stitch.
- Turn your work at the end of every row/round.
- Change colors as desired at the close of rounds.
- Always weave in or crochet over yarn tails for a neat finish.
Pattern

1. Start Granny Square
With Color A:
- Form a magic circle (MC)
- Ch 2 (does not count as a st)
- [3 dc in MC, ch 1] – repeat from [ ] three more times (total = 4 sets of 3 dc + ch-1)
- Tighten MC to close center.
Close the round:
- Insert hook into the top of the first dc, yarn over, pull up a loop, change color if desired: place new color on hook, pull through all loops—this forms a hdc join.
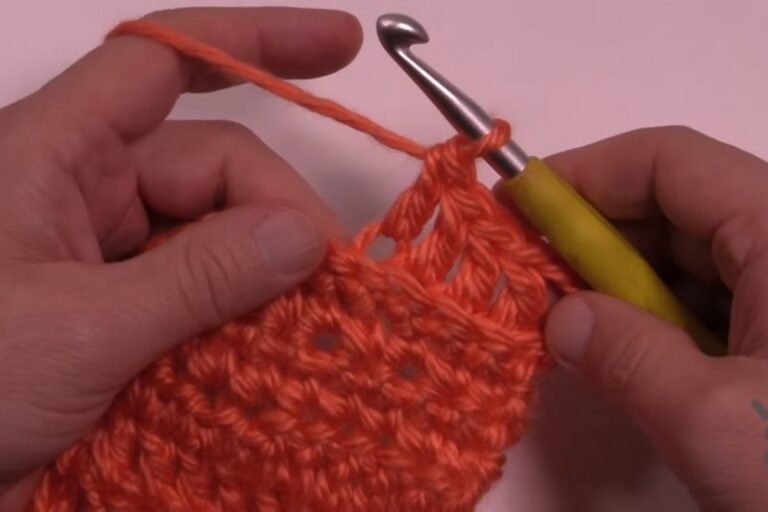
2. Subsequent Rounds: Growing the Square
Each round increases using the granny square technique, turn your work after each round.
All subsequent rounds:
- Ch 2 (does not count as a st)
- In same st as join: 3 dc
- In each ch-1 corner space:
- [3 dc, ch 1, 3 dc] (creates the corner)
- In each space between 3-dc groups on sides (the “side spaces”):
- 3 dc
- At the end of the round, join with a hdc in first dc as before, changing colors if desired.
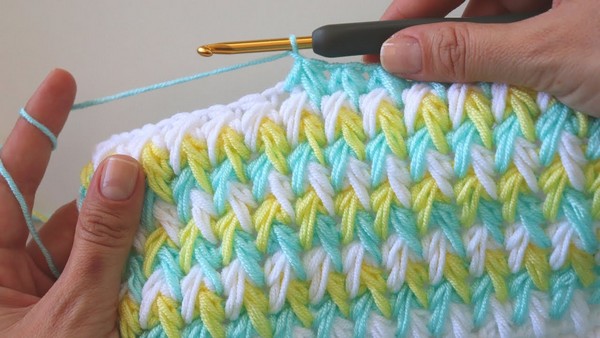
Tips for color change:
Carry your tails left and crochet over them as you go, tying/knotting and trimming for a secure finish as demonstrated.
Continue in this pattern, working as many rounds as needed for your desired book sleeve size (sample uses 16 rounds).
General Stitch Placement:
- Corners: [3 dc, ch 1, 3 dc] into each corner ch-1 sp.
- Sides: 3 dc in each side sp.
- At END of each round: Join with hdc in first dc, switch color if you wish, ch 2, and turn.
3. Finishing the Square
- At the end of your final round, close with a hdc as above, do not change color.
- Ch 1 and cut yarn, weave in tail, leaving a tail long enough for sewing (about 18–20″).
4. Assembly: Sewing the Book Sleeve
- Determine Size:
- Fold your square in half diagonally (envelope shape).
- Place closed/folded square over your book/device to check fit.
- Prepare for Sewing:
- Weave in all ends except the tail at the end of your last round (use this for sewing).
- With right sides facing each other (wrong side out), fold the square.
- Sew Sides:
- Thread yarn needle with sewing tail.
- Stitch through ch-1 sp at corner and then through matching edge on other side.
- Whip stitch or mattress stitch through each matching pair of loops along both sides.
- At the end of seam: secure with a knot, weave in or run yarn through a few stitches, then cut tail.
- Prepare yarn for second side:
- Attach new length of yarn at other corner, tie securely.
- Sew down second side as above.
- Turn Right Side Out:
- Flip the pouch inside out so seams are hidden.
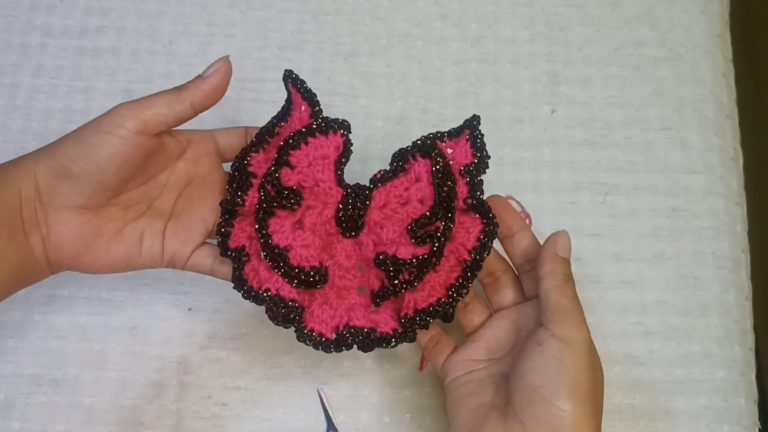
5. (Optional) Heart Button Closure
With Color of Choice:
- Form a magic circle (MC)
- Ch 2, then 3 tr in MC.
- 4 dc in MC.
- 1 tr in MC.
- 4 dc in MC.
- 3 tr in MC.
- Ch 2, sl st in MC.
- Ch 1, cut yarn, leave long tails for attaching.
Finishing Heart:
- Tighten magic circle securely.
- Tie off, use tails to attach heart securely to the front (bottom) center of the book sleeve. Knot on inside, weave in tails.
To use as button:
- Use the open spaces on the granny square as a “buttonhole” to tuck the heart through.

Conclusion
You now have a charming and functional granny square book sleeve! Adapt this accessory for books, tablets, e-readers, or more. Vary your color combinations and button accents for added personality.
Pattern Correction & Tips
Correction:
- Reminder: Ch-2 at start of round does NOT count as a double crochet.
Tips:
- Check sizing before sewing sides by folding the project and testing with your largest device/book.
- If using a traditional button and loop, sew a loop with yarn at the top for secure closure.
- When carrying unused color tails, crochet over them for a smooth color change and less finishing at the end.
- For a neater seam, use mattress stitch instead of whip stitch.
- Always weave in as many ends as you can as you go, to minimize finishing work.
Video Guide