How to Crochet Basket for Coaster with Roses
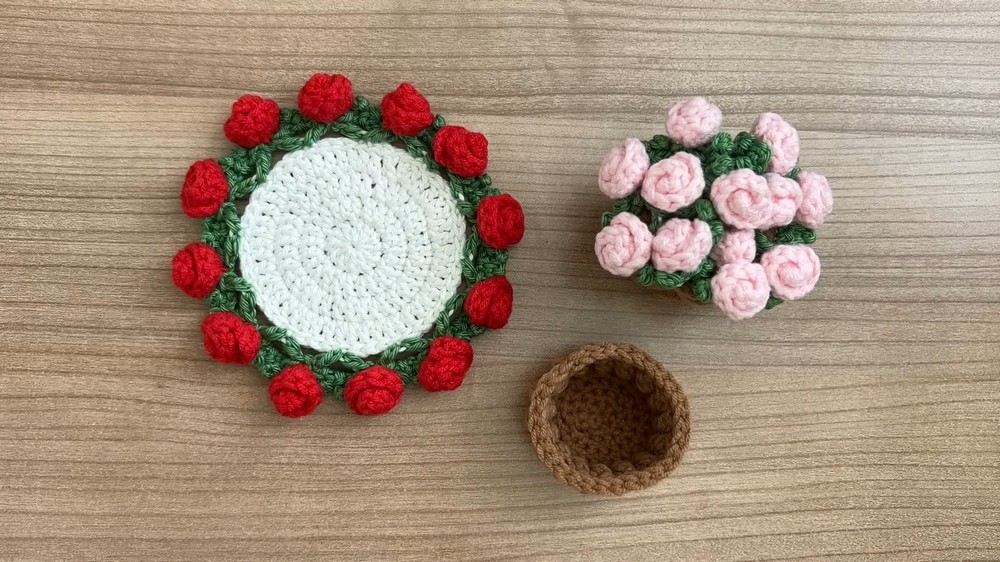
In this post, find a step-by-step tutorial on crocheting a cute crochet flower basket that doubles as a decorative storage for a rose-shaped coaster (from a previous tutorial). Using brown yarn (60% cotton, 40% acrylic), a 3mm crochet hook, and basic crochet techniques like magic circles, single crochets, and double crochets (including front/back post variations), the creator achieves a woven basket effect.
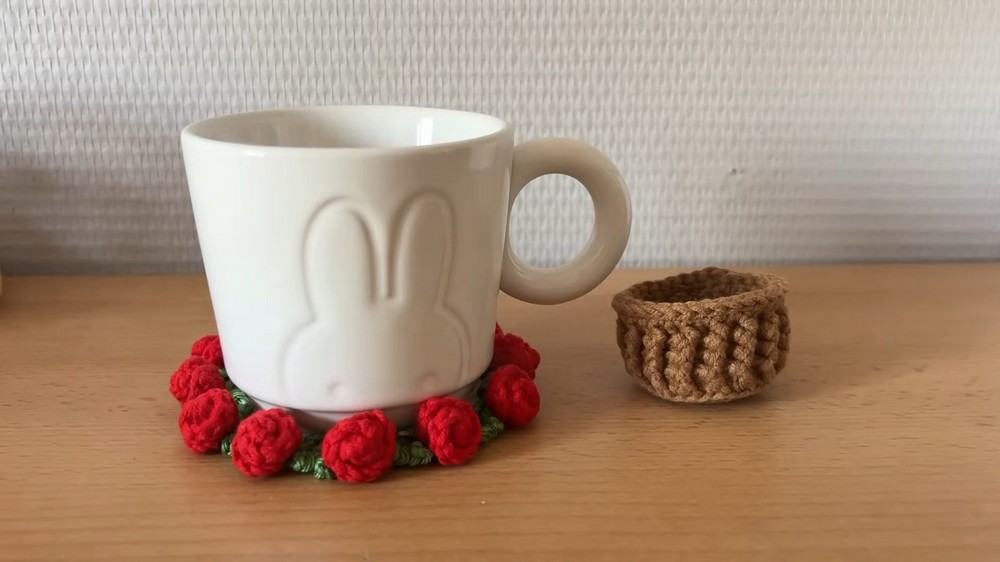
The project is great for gifts or desk decor. So, follow through with us for the complete tutorial for beginners.

How to Crochet a Little Flower Basket
This tutorial guides viewers through the process of crocheting a charming flower basket that doubles as an adorable decorative piece or a thoughtful gift idea. It complements a related project on creating a flower coaster, which can be neatly placed inside the basket.
Materials Needed
- Yarn: Brown yarn (60% cotton, 40% acrylic).
- Crochet Hook: 3 mm hook.
- Additional Tools: Scissors, darning needle, stitch marker.
Steps to Crochet the Basket
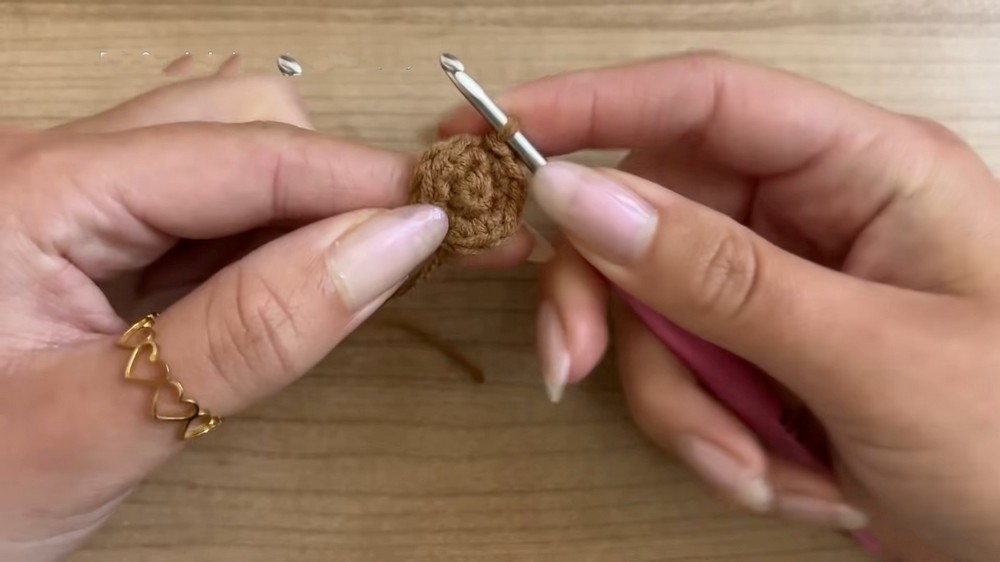
1. Starting the Base
- Begin with a magic circle. If unfamiliar, refer to the creator’s separate tutorial for a detailed demonstration.
- Work single crochets into the magic circle to form the foundation of the basket.
- Close the magic circle using a slip stitch and place a stitch marker in the slip stitch to mark the beginning of the next round.

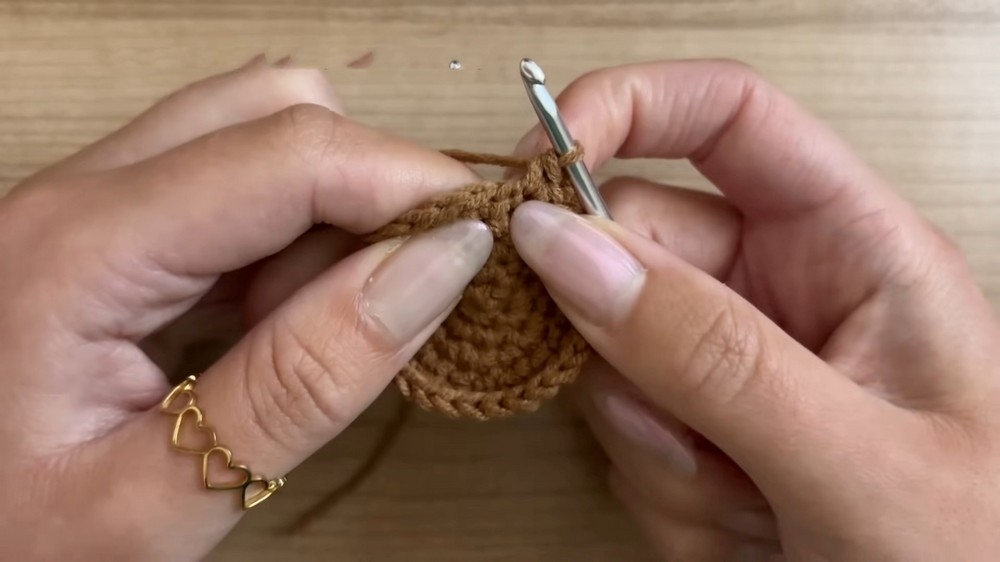
2. Building the Basket’s Base
- Chain one and work single crochet increases evenly around in successive rounds.
- Each round builds upon the previous by alternating between single crochets and increases in different patterns to gradually enlarge the circular base.
- Use slip stitches to complete each round and reposition the stitch marker accordingly.
3. Creating the Basket’s Walls
- Switch to double crochets and work into the back loops only of each stitch to create structure for the basket’s sides.
- Chain two at the start of the round and alternate between front post double crochets and back post double crochets to achieve a woven texture that mimics the appearance of a basket.
- Complete several rounds using this alternating pattern to build the basket’s height.
4. Adding Final Details
- For the final rounds, work single crochets followed by slip stitches in each stitch to create a neat, finished edge.
- Cut the yarn and pull it through to secure the stitches.
Finishing the Basket
- Turn the basket inside out and hide yarn ends using a needle. Tuck them into surrounding stitches to ensure a polished look.
- Flip the basket back to its original shape once the yarn ends are secured.

Inserting the Flower Coaster
- Fold the flower coaster in half and shape its ends to form a cross.
- Fold the cross into a “V” shape and push it firmly into the basket.
- Adjust and shape the petals to create a neat floral arrangement.
Conclusion
The completed flower basket is an elegant and functional decorative piece. Viewers are encouraged to like the video and check out other tutorials on the creator’s channel for related projects. With simple materials and techniques, this project allows beginners to create charming handmade gifts.