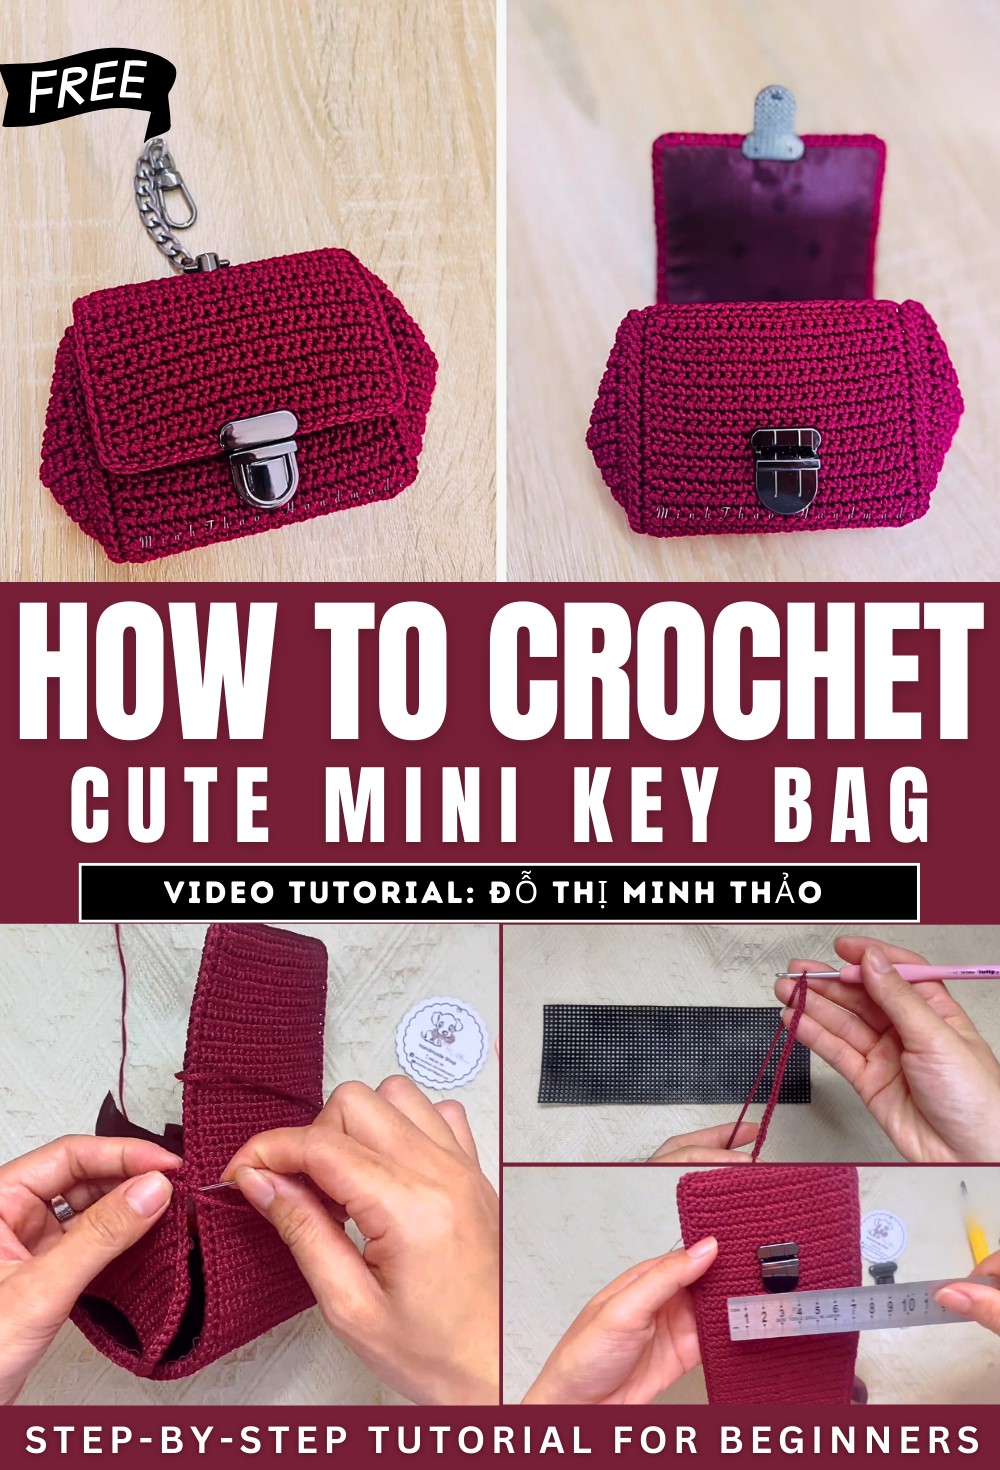
How to Crochet Clutch Wallet Mini Bag for Ladies
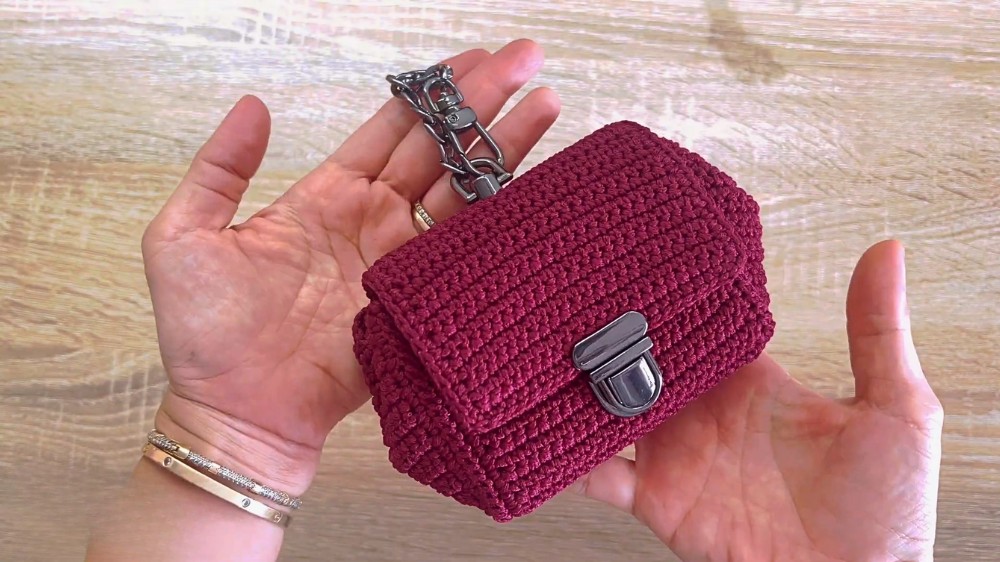
With a step-by-step tutorial, learn how to crochet a mini bag wallet with magnet buttons with chains for beginners. The finished project can be used in several ways, such as a keychain or as a small accessory to attach to a larger bag. The creator provides a detailed guide, starting with a list of all necessary materials and tools, including different types of yarn, a crochet hook, and accessories like a snap lock and a chain.
The tutorial then walks you through crocheting the main body of the bag, including the front, back, and flap. The video also covers the process of adding a fabric lining and a canvas insert for structure, crocheting the triangular side pieces, and finally, assembling all the components and attaching the snap lock to complete the project.
Materials and Tools
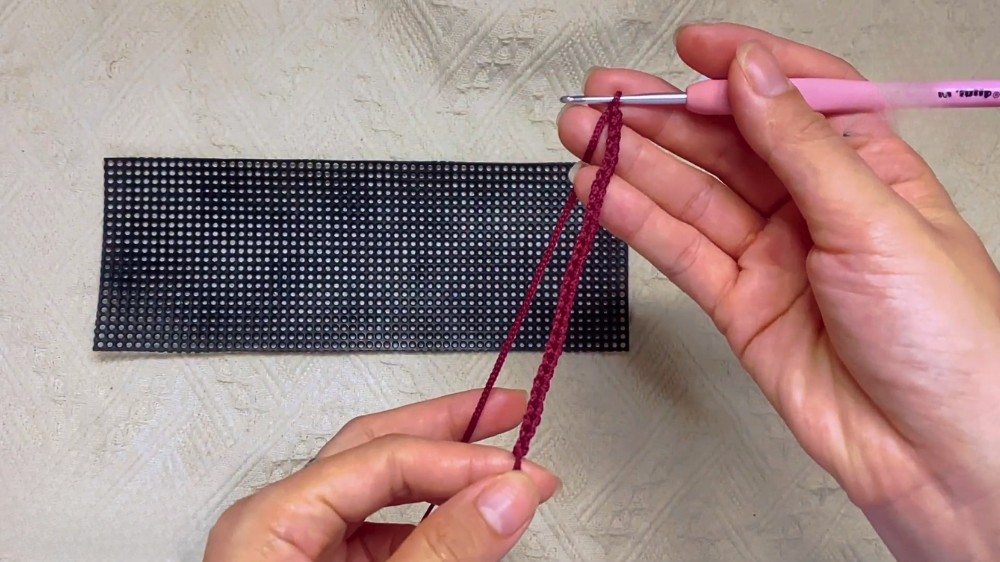
The project uses a smooth, tube-shaped yarn from Cassan Vietnam. You will also need a pre-cut rectangular canvas, a small piece of fabric for the lining, a snap lock, a small chain with a lobster clasp, and a decorative charm. The crochet hook used is a size 4 (2.5 mm). You will also need scissors, pliers, and a small screwdriver to attach the accessories.
Step-by-Step Instructions
1. Crocheting the Main Body
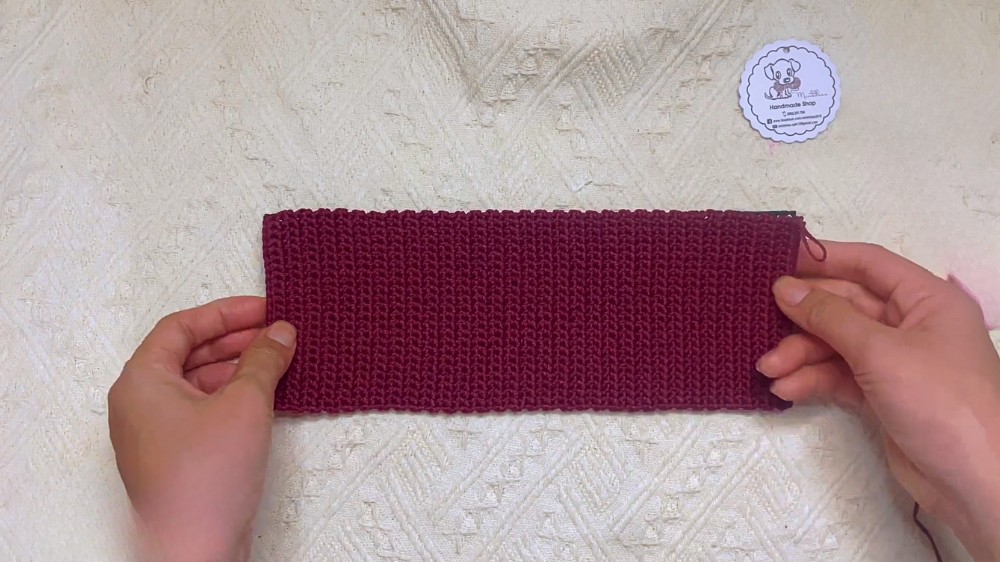
Start by crocheting a foundation chain of single crochets (sc) that matches the width of the canvas. The first row is crocheted into the back loop of each chain stitch for added stability. Continue to crochet rows of single crochet until the piece is long enough to cover the front, back, bottom, and flap of the bag
2. Attaching the Canvas and Lining
Once the main body is complete, attach the canvas to the crocheted piece using clips. Single crochet around all four sides of the canvas, working through the holes to secure it. At each corner, work two single crochets into the same stitch to create a smooth turn. After the canvas is secured, sew the fabric lining to the inside of the crocheted piece, covering the main body of the bag but leaving the flap section unlined.
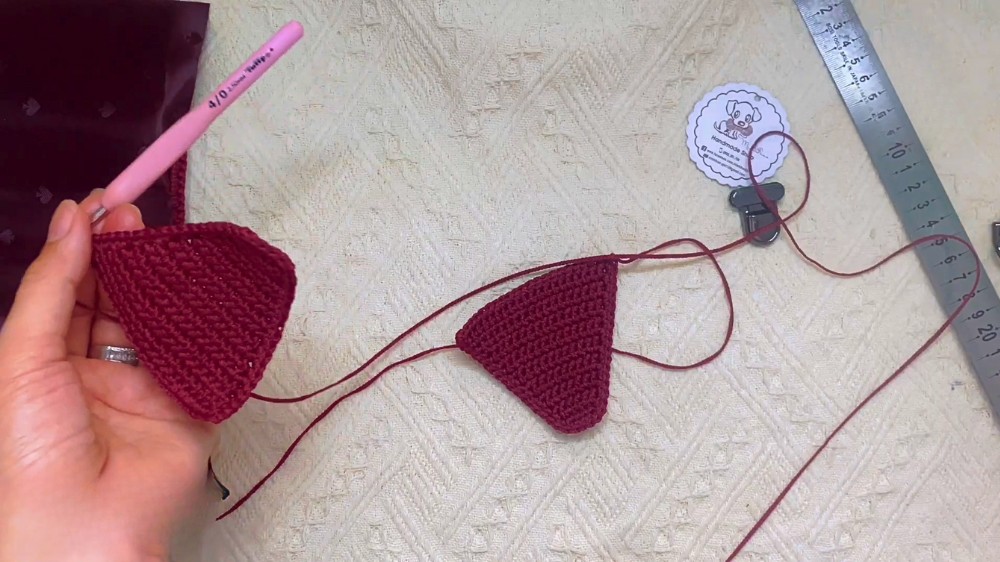
3. Adding the Side Panels
Next, crochet the triangular side panels for the bag. The pattern begins with a chain base and increases by one stitch on each row. Once the main body of the side panel is crocheted, single crochet around the edges to create a clean border. Then, use a yarn needle to sew the side panels to the main body of the bag.
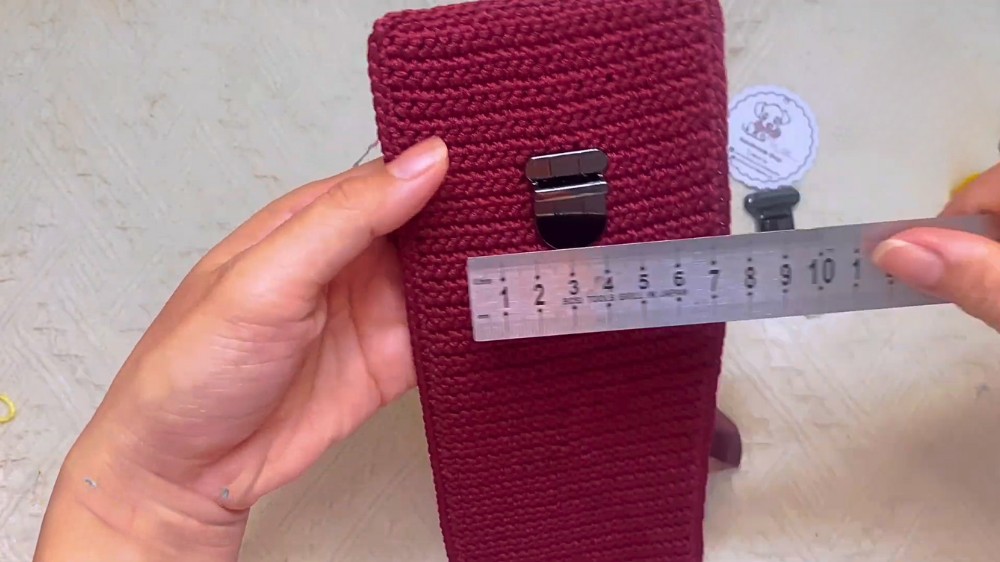
4. Finishing Touches and Accessories
Attach the front snap lock to the front of the bag, approximately 4.5 cm from the top edge and centered horizontally. Secure the post of the snap lock to the inside of the flap. Finally, attach the decorative charm to the center of the flap using a small screw. The lining of the flap is sewn on after the charm is attached to conceal the hardware.
This tutorial provides a comprehensive guide for creating a small, versatile bag that can be used as a keychain, a mini purse, or a child’s crossbody bag. The final product is a sturdy, functional, and stylish accessory.