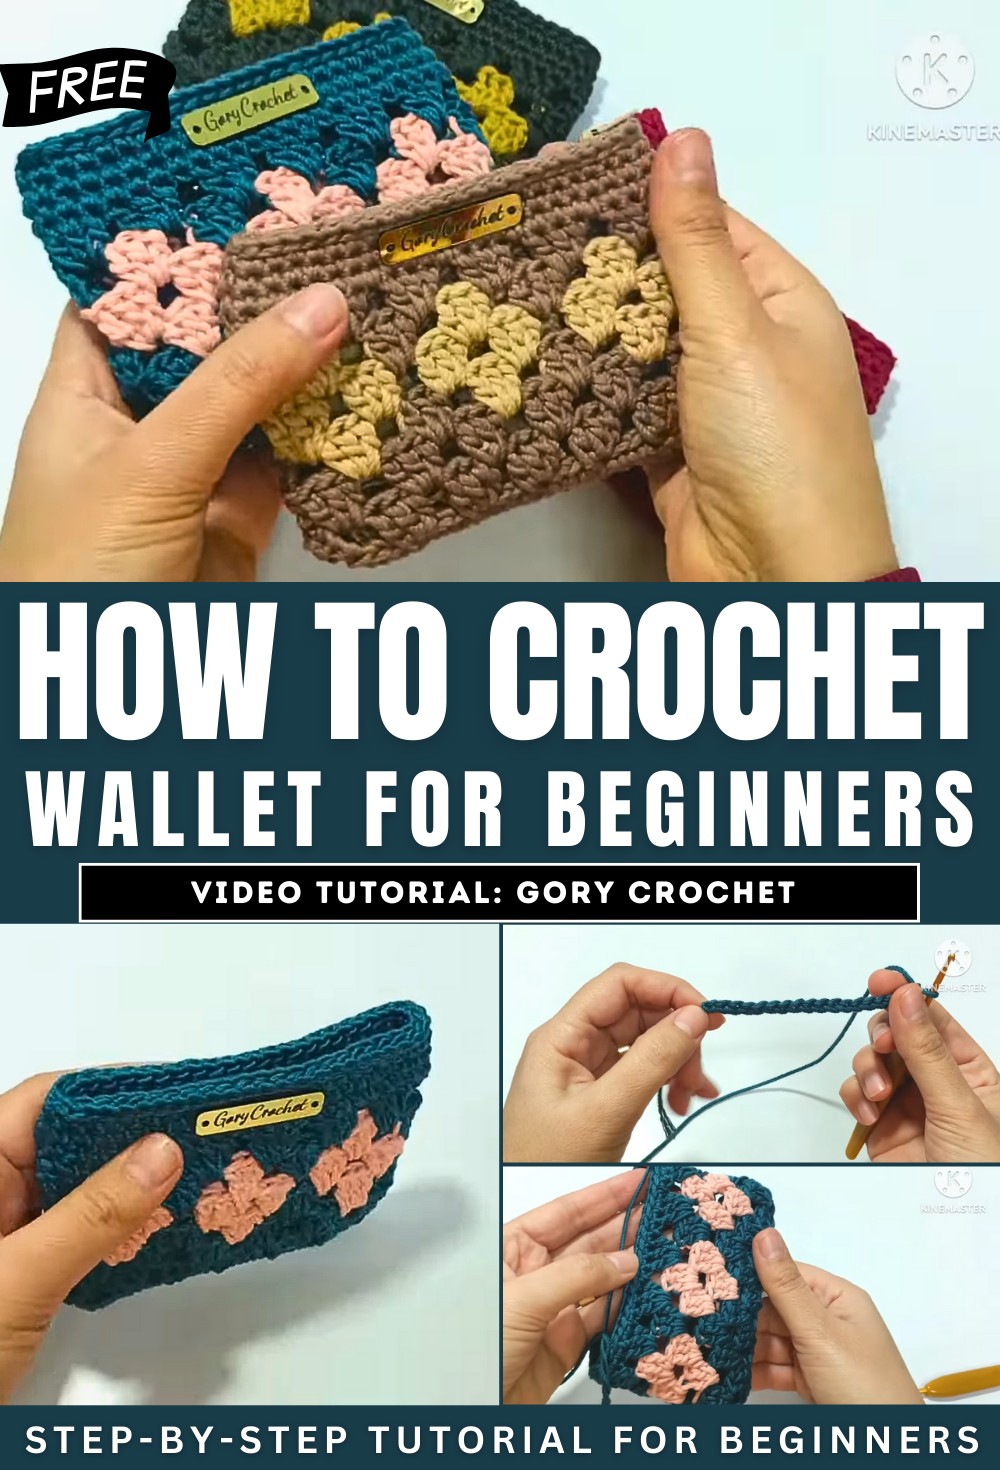
How to Crochet Granny Wallet For Beginners

In this post, you’ll learn how to crochet a simple and quick wallet in this video for beginners and experts. The project is suitable for beginners and can be completed in about 10 minutes. Using a 3mm hook and a 1.5mm cotton macrame thread, the tutorial guides you through creating the base with single crochet stitches and building the body with granny stitch clusters.
The video uses two colors but can be made with a single color. It’s an easy project that takes approximately 50 grams of thread. So, follow through with us for the complete tutorial.
Crochet wallet for beginners
This tutorial provides a step-by-step guide for crocheting a quick and easy wallet. The project is suitable for beginners and uses minimal materials, making it a great option for a fast craft. The wallet is constructed in two main sections: a base worked in single crochet and the body built using a granny stitch pattern. The tutorial also shows how to incorporate a color change and finish the piece with a neat border and woven-in ends.
Techniques and Stitches
The tutorial demonstrates a few key crochet techniques and stitches that are fundamental to the project:
- Slip Knot
- Chain Stitch: This is the foundational stitch used to create the starting chain for the wallet.
- Single Crochet (Hishh): This stitch is used to create the solid, dense fabric of the wallet’s base and the final border rows.
- Slip Stitch (Manzalaqa): This is used to join the end of a round to the beginning, creating a seamless piece and is also used for the final border.
- Double Crochet (Amoud B Lafah): This stitch is the main component of the granny stitch pattern used for the body of the wallet.

Step-by-Step Instructions
1. Creating the Base
The project begins with a slip knot and a starting chain. The base is then worked in a continuous round of single crochet stitches. The tutorial demonstrates how to work around the initial chain to create an oval shape, which forms the bottom of the wallet.

2. Building the Body with Granny Stitch
After the base is complete, the body of the wallet is created using a granny stitch pattern, which consists of clusters of double crochet stitches. The tutorial shows how to create these clusters and how to join each round with a slip stitch. The video also demonstrates how to switch yarn colors smoothly, adding a decorative element to the design.

3. Adding a Border
Once the granny stitch section is the desired height, a border is added to the top of the wallet. This border is made by working several rounds of single crochet stitches, which helps to give the wallet a more structured and finished look.

4. Finishing the Wallet
The final step involves creating a neat edge with a row of slip stitches. The yarn is then cut, and the tail is woven into the stitches to secure the work and create a clean, finished appearance.

Materials Needed
- Yarn: Macramé cotton yarn (1.5mm thickness). The project uses a small amount, about 50 grams.
- Crochet Hook: A size 3 hook.
- Stitch Marker: To help keep track of the first stitch in each round.