How to Crochet Mask Connector Free Pattern

Simplify mask-wearing routines gracefully through this Free Crochet Mask Connector Pattern offering practical strap connection combined with attractive texture.
Keeping your mask comfortable can be a challenge, but the free crochet Mask Connector Pattern makes it much easier. This handy little piece helps hold your mask straps together behind your head so they don’t pull on your ears. Designed by the creative maker at Rajutan Whita’s YouTube channel, this pattern is simple to make and great for anyone who wears masks daily.
Free Crochet Mask Connector Pattern You’ll Love
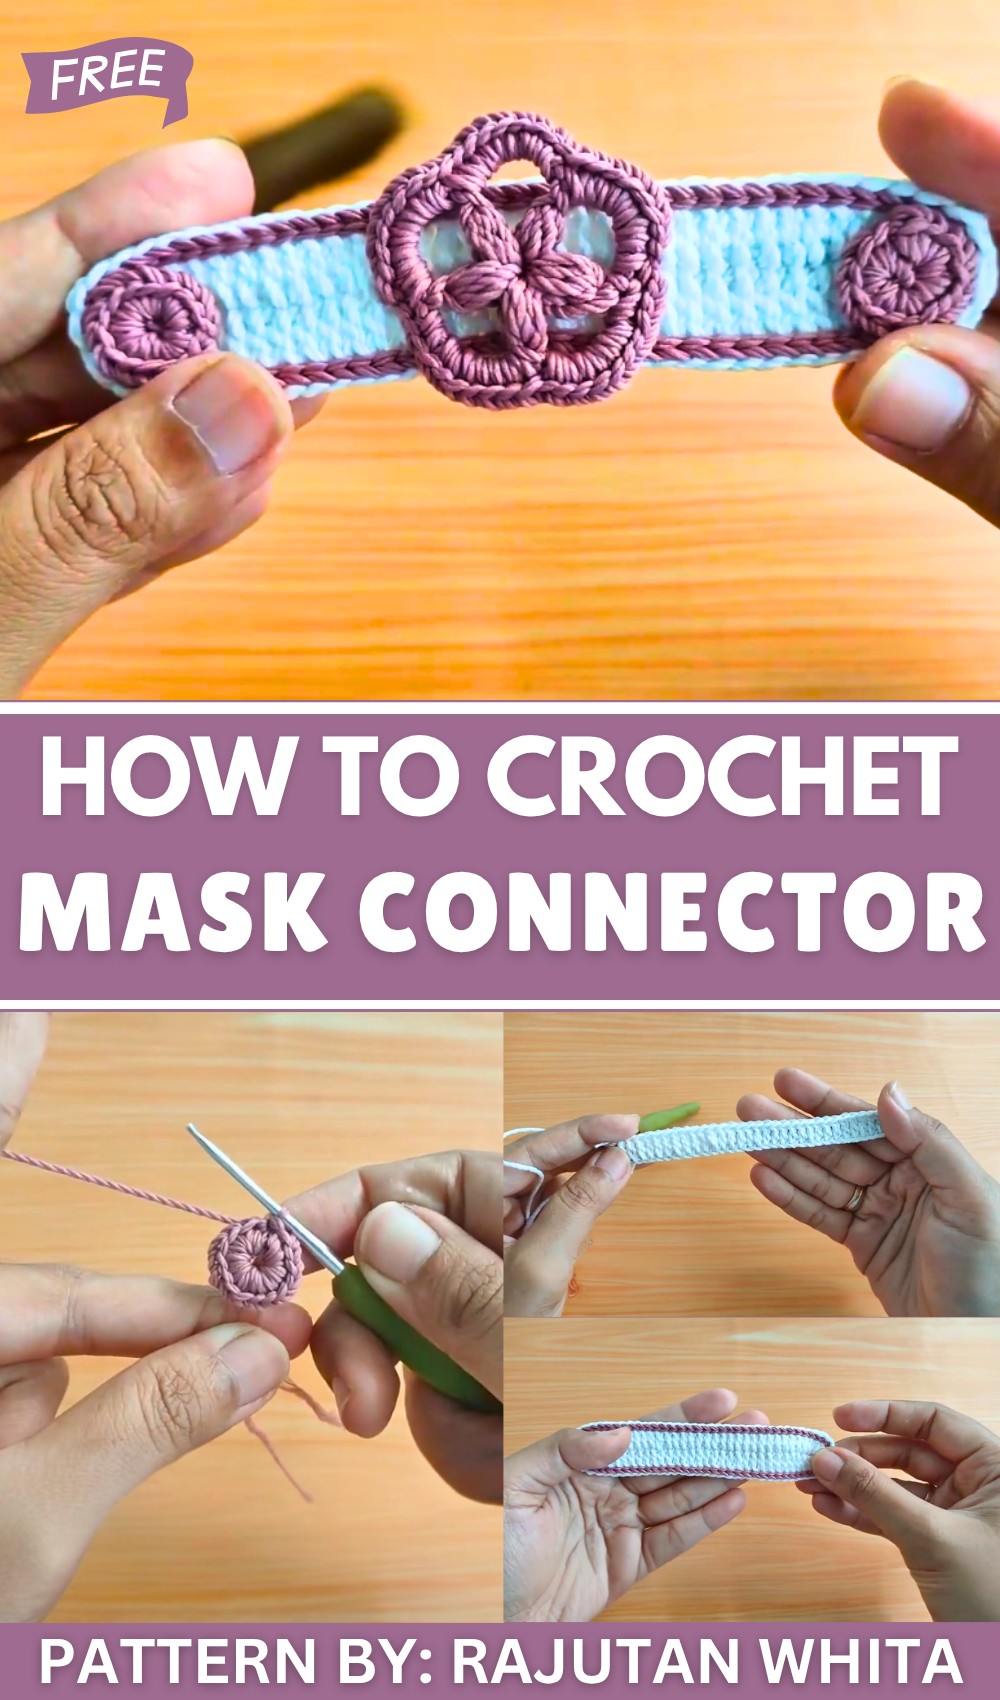
The finished mask connector is small and oval-shaped, fitting comfortably at the back of your head. Its soft crochet yarn feels nice against your skin, and the neat, tight stitches give it a clean and polished look. You can choose any color you like, making it a fun and stylish accessory that matches your outfit or mask. The connector’s style is practical but charming, adding a handmade touch to something you use every day.
This little crochet piece is not only useful but also easy to wear anywhere. It’s perfect for school, work, shopping, or any place you need to wear a mask for a long time. The connector stops your mask straps from rubbing and hurting your ears, which makes mask-wearing much more comfortable. Plus, it’s so lightweight and flexible you might forget you’re even wearing it!

People will love this free crochet Mask Connector Pattern because it combines comfort and style in a small, sweet design. It’s quick to make and even better to use, making your daily mask routine easier. If you want a cute, useful accessory that helps with mask comfort, this pattern from Rajutan Whita’s channel is an excellent project to try!
Crochet Star Pattern Mask Connector
This easy-to-follow tutorial teaches you how to crochet a beautiful star pattern mask connector. This accessory helps hold your mask straps comfortably and adds a charming handmade touch. Perfect for beginners who want to create practical and pretty mask connectors with simple stitches.
Pattern Highlights
- Simple foundation with double crochet (dc) stitches plus textured clusters.
- Decorative contrasting border to finish edges nicely.
- Handmade crochet buttons as closures.
- Comfortable size suited for children’s masks (approx. 12 cm length).
- Basic crochet stitches used with clear, step-by-step instructions.
Materials Needed
- Cherry poly yarn in Natural White (for base) and Salem (soft pink for border/buttons).
- Crochet hook size 2.0 mm (approx. size 30).
- Scissors.
- Lighter or match (for finishing yarn ends).
- Cross stitch or tapestry needle (for sewing buttons and weaving ends).
Skill Level
Beginner to Intermediate
- Knows basic stitches: chain (ch), double crochet (dc), single crochet (sc), and slip stitch (sl st).
- Can count stitches and rows carefully.
- Comfortable working in rows and rounds.
- Able to sew with needle and yarn.
Stitch Abbreviations
| Abbreviation | Stitch | Description |
|---|---|---|
| ch | Chain | Yarn over, pull through loop to form a chain. |
| dc | Double Crochet | Yarn over, insert hook, yarn over, pull through two loops twice. |
| sc | Single Crochet | Insert hook, yarn over, pull through two loops. |
| sl st | Slip Stitch | Pull yarn through stitch and loop on hook. |
Gauge
- No strict gauge required, but keep a consistent tension to maintain size and even stitches.
- Foundation of 35 chains creates the necessary width.
Measurements
- Finished connector approx. 12 cm long — ideal for children’s masks.
- Buttons approx. 3 cm diameter.
- Border adds slightly to width and neatness.
The Step-by-Step Pattern
Step 1: Make the Foundation Chain
- Using natural white yarn, chain 35 stitches.
Step 2: First Row – Create Base with Clusters and Double Crochets
- Into the 4th chain from hook:
- Work 3 double crochet (3 dc) stitches into the same chain — this creates a cluster.
- Continue Across Chain:
- Work 1 double crochet (1 dc) stitch into each of the next chains until 1 stitch remains.
- Last Chain:
- Work another 3 double crochet (3 dc) cluster into the last chain.

Step 3: Create Buttonhole Loop
- Chain 13 stitches (this forms the buttonhole loop).
- Slip stitch into the last double crochet of previous cluster to secure the loop.
Step 4: Continue Row with 3 dc Clusters and Single DC
- Work a series of 3 dc cluster, followed by 1 dc per stitch across the remaining chains to form the textured base.
- Keep a total of 30 double crochet stitches in the row excluding chains for loops.
Step 5: Second Row and Onwards – Fill and Increase
- Turn your work and work 1 dc in each stitch across the row.
- When reaching the last chain hole on the side, work 6 dc stitches into that hole to form a star-like increase doubling the stitch volume.
- Continue to work 1 dc in each stitch back along the row.
- For the last chain hole on the opposite side, work 3 dc stitches to finish the row with a nice edge.

Step 6: Finish Base and Prepare For Edging
- After completing rows to desired length (approximately 12 cm), cut yarn leaving a tail.
- Weave ends in neatly with a tapestry needle.
- Use a lighter or match to carefully seal ends, particularly if using synthetic yarn.
Step 7: Add Colorful Border
- Join Salem color yarn anywhere on the outer edge of the base.
- Work slip stitches (sl st) evenly around the perimeter of the base piece.
- Alternate slip stitching in stitch holes and body of stitches to prevent curling and keep the edge flat.
- When returning to start, cut yarn and weave in ends.
Step 8: Crochet the Buttons
- Create a magic ring with Salem yarn.
- Inside the ring, work 5 single crochet (5 sc) stitches.
- Pull ring tight to close the center gap.
- Join with slip stitch.
- Chain 1, then increase to 15 sc in the second round evenly spaced to make a flat circle.
- Join with slip stitch, cut yarn leaving a tail for sewing.
- Make 2 identical buttons.

Step 9: Attach Buttons to Mask Connector
- Using yarn tail and a tapestry needle, sew the buttons securely to each end of the white base piece.
- Sew through the center to firmly anchor the button, preventing movement.
- Tie secure knots on the back and weave in all yarn ends.

Assembly and Finished Size
- The finished mask connector measures about 12 cm long, suitable for children’s masks.
- The white base with pink Salem border gives a neat, polished look.
- Handmade crochet buttons serve as closures securing mask straps comfortably.
- Flat, textured base with reinforced edges ensures durability and wearability.

Conclusion
This star pattern mask connector is a wonderful beginner-friendly project that combines simple stitches into a functional and beautiful accessory. You will learn how to create stitch clusters, buttonholes, and round crochet buttons, perfect for customizing your mask-wearing experience. The neat contrasting border adds a clean finish that keeps your work flat and durable. With practice and patience, this charming project can be modified for adults or other uses by adjusting size and yarn.