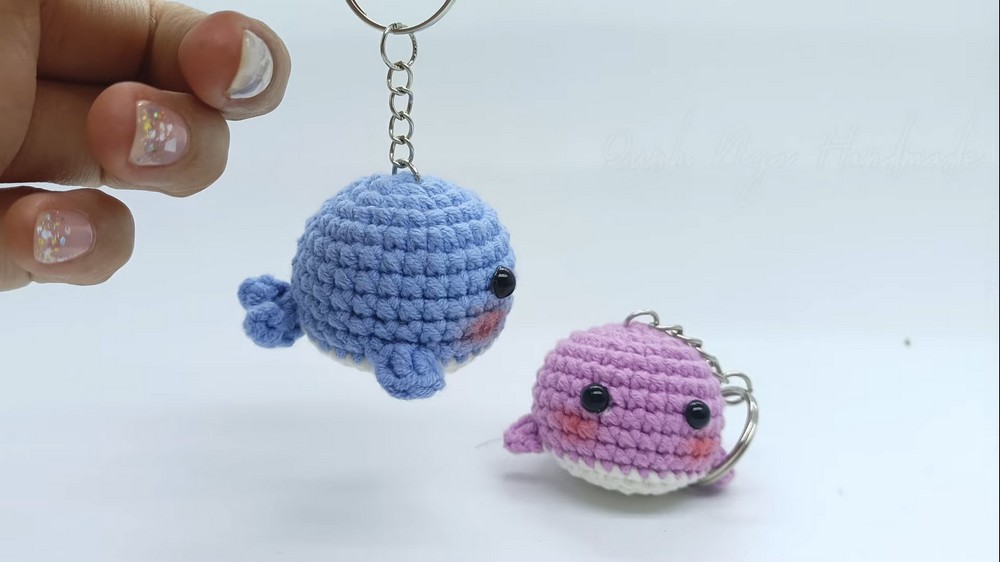
How to Crochet Whale Keychain for Beginners

Learn how to crochet an adorable little whale with a step-by-step tutorial for beginners and experts. Using a 2.5mm crochet hook, you’ll start with a magic ring to form the whale’s body, gradually shaping it by alternating single crochets and increases. The detailed instructions guide you through creating fins, a tail, and a color switch for added charm. You’ll also learn techniques like working in front and back loops for finer details.
The final touches include securely adding safety eyes and applying blush for a cute finish. Follow along to crochet a plump, lovable whale that’s perfect as a gift or keepsake> SO, follow through with us for the

Crochet Whale Tutorial
This tutorial provides a detailed, step-by-step guide to making a cute, plump crochet whale. With the use of basic crochet techniques and minimal materials, users can create an adorable whale perfect for gifts, decorations, or personal keepsakes. Below is a breakdown of the tutorial.
Materials Needed
- Yarn: Purple and white yarn (or any colors of your choice).
- Crochet Hook: 2.5mm crochet hook.
- Accessories: 6mm plastic safety eyes, fiberfill for stuffing, hot glue, and optional blush for detailing.

Steps to Crochet the Whale
Creating the Whale’s Body (Rounds 1–6)
- Start with a magic ring using purple yarn.
- Work single crochets and carefully follow instructions for increases to gradually shape the whale’s rounded base.
- End each round with a slip stitch and chain one to start the next round.

Shaping the Body (Rounds 7–9)
- From round 7 to round 9, single crochet in each stitch to stabilize the whale’s body and maintain a consistent shape.
- The body becomes rounder and more defined by maintaining this repetitive pattern.

Adding Tail and Fins (Round 10)
- Crochet the Tail:
- Start by chaining a small number of stitches and crocheting into individual chains.
- Work slip stitches into the front loops only to shape the tail sections.
- Crochet the Fins:
- Chain and work double crochets to create the fins.
- Attach the fins symmetrically on both sides of the body using slip stitches.
- Smoothly transition to white yarn to create the underside of the whale, maintaining even stitching.

Detailing and Stuffing (Rounds 11–14)
- Work into both the front and back loops to incorporate detailing around the fins. Back-loop stitches help shape the underside of the whale.
- Gradually decrease stitches to taper the body’s bottom.
- Stuff the body firmly with fiberfill to give it a plump and round shape.

Closing the Whale (Round 15)
- Perform decreases in the final round to close the body completely.
- Cut the yarn, sew the hole shut, and weave in any loose ends for a polished finish.
Finishing Touches
- Attach Safety Eyes: Position the 6mm safety eyes between rounds 7 and 8, keeping a small space between them. Use hot glue for extra security if needed.
- Add Blush: Apply a touch of blush to the cheeks for a playful and cute appearance.
Final Result
By following these steps, you’ll have a completed crochet whale that’s both adorable and personalized. This project is ideal for crocheters of all levels and allows for creative freedom in choosing colors and adding unique details. The tutorial emphasizes precision and practice for achieving the best results.