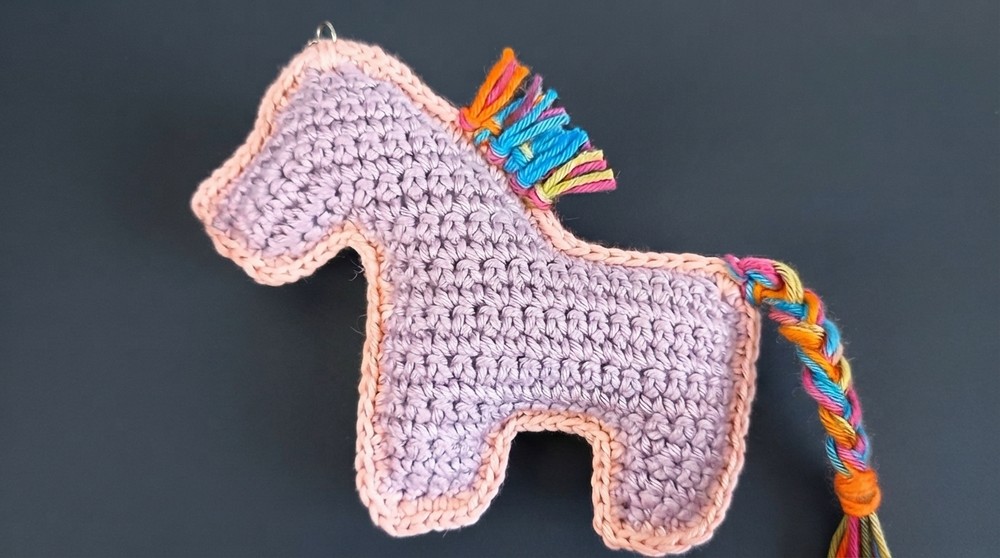
Mini Crochet Horse Keychain Free Pattern with Easy-to-Follow Instructions

Start making a unique crochet horse keychain with this easy and fun project that adds a charming and personalized touch to your keys or bags.
Add a touch of handmade charm to your daily life with a keychain. This cute crochet horse keychain small and lightweight accessory is perfect for decorating your keys, bags, or even giving as a thoughtful gift to friends and family. Its charming design makes it a lovely way to personalize your belongings.
Cute Crochet Horse Keychain Free Pattern for Bags
The crochet horse is made using basic stitches, making it an ideal project for beginners or anyone who wants a quick and enjoyable craft. Soft yarn gives the horse a gentle feel, making it pleasant to touch and carry around. The size of the keychain is just right—not too big or heavy—so it’s comfortable to hang on your keys or backpack.
Pattern Credit:
This pattern is based on the original YouTube tutorial by Crochet Mania. Please visit their channel to watch the full video (Link is below) and support the creator!

You only need a few simple materials to get started: yarn, a crochet hook, stuffing to give the horse shape, and a keyring to attach it to your items. The process is straightforward and perfect for anyone wanting to practice crochet skills without complicated steps.
This cute crochet horse keychain is a fun and practical project that brings a handmade touch to everyday items. It also makes a meaningful gift that shows you care. Whether for yourself or someone special, it’s sure to be cherished.
Crochet Horse Keychain Pattern
A cute horse keychain. This project is easy, quick to make, and requires just a small amount of yarn, making it perfect for beginners or for using up leftover thread. Each step is simple and fun, resulting in a beautifully braided horse charm for your keys, bags, or gifts.
Pattern Highlights
- Flat/Two-Piece Construction: The horse is made by working two symmetrical flat pieces and joining them for sturdiness.
- Customizable Colors: Use any combination of yarn shades for a personalized look.
- Braided Mane and Tail: The added yarn fringe can be left loose or braided for extra detail and durability.
- Minimal Assembly: The structure is assembled simply by crocheting or sewing around the edges.
- Quick Make: Ideal for fast gifting, selling, or stash-busting.
Notes
- The instructions are for a flat figure; no complex shaping is required.
- You can easily adjust the horse’s size: simply add or omit rows as needed.
- The mane and tail are crafted from yarn strands; use contrasting colors for visual interest.
- Optional: add safety eyes or embroider facial features for added character.
- Stuffing is minimal; light filling provides dimension without bulk.
Skill Level
Beginner
All stitches are basic, and the structure is straightforward. Some simple assembly and optional braiding are included.
Materials
- Yarn: Assorted colors (main body, mane, tail, and fringe). Use leftover or scrap yarn.
- Crochet Hook: Size appropriate for yarn, typically 2–4 mm.
- Yarn Needle: For joining and weaving ends.
- Scissors
- Fiberfill (optional): Small amount for stuffing.
- Keyring: For finishing; attach at the top of the head or neck.
- Safety Eyes (optional): Or thread for embroidery.
- Stitch Markers: Helpful for keeping track on increases and decreases.
Measurements / Sizing (Optional Schematic)
- Height: Approximately 7–9 cm (with mane).
- Width: About 6–8 cm.
- Mane/Fringe: 10–20 cm strands, braided or trimmed as desired.
- (Optional schematic would show a flat horse shape, with a neck, two legs, body, and a braided tail/mane.)
Gauge
- Not critical. Stitches should be tight enough to hold a small amount of stuffing if used.
- Typical: 4–5 sc = 1 inch, depending on yarn.
Stitch Abbreviations
- ch: chain
- sc: single crochet
- inc: increase (2 sc in same stitch)
- dec: decrease (sc 2 together)
- sl st: slip stitch
Special Stitches
- Increase (inc): Work 2 sc in one stitch.
- Decrease (dec): Work sc 2 together over two stitches.
- Braid: Divide strands and plait in groups of three or four.
Crochet Horse Keychain Pattern
Body Piece (Make 2)
First Leg
- With chosen yarn, slip knot, ch 5.
- Row 1:
- Skip first ch, sc in next 4 chains. (4 sc)
- Turn.
- Row 2:
- Ch 1, sc in first, inc in next, sc in last two. (5 sc)
- Turn.
- Rows 3-4:
- Ch 1, sc in each stitch. (5 sc each row)
- Turn.
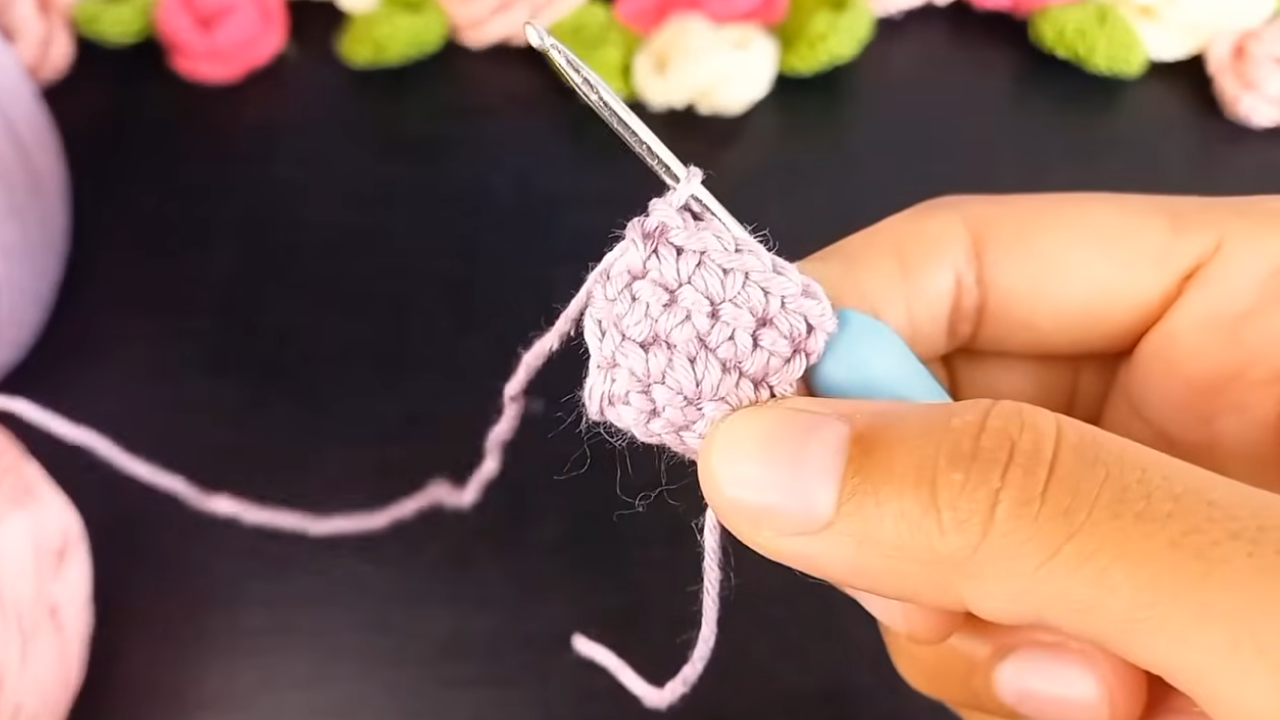
Make another identical piece for the second leg.
Joining Legs and Main Body
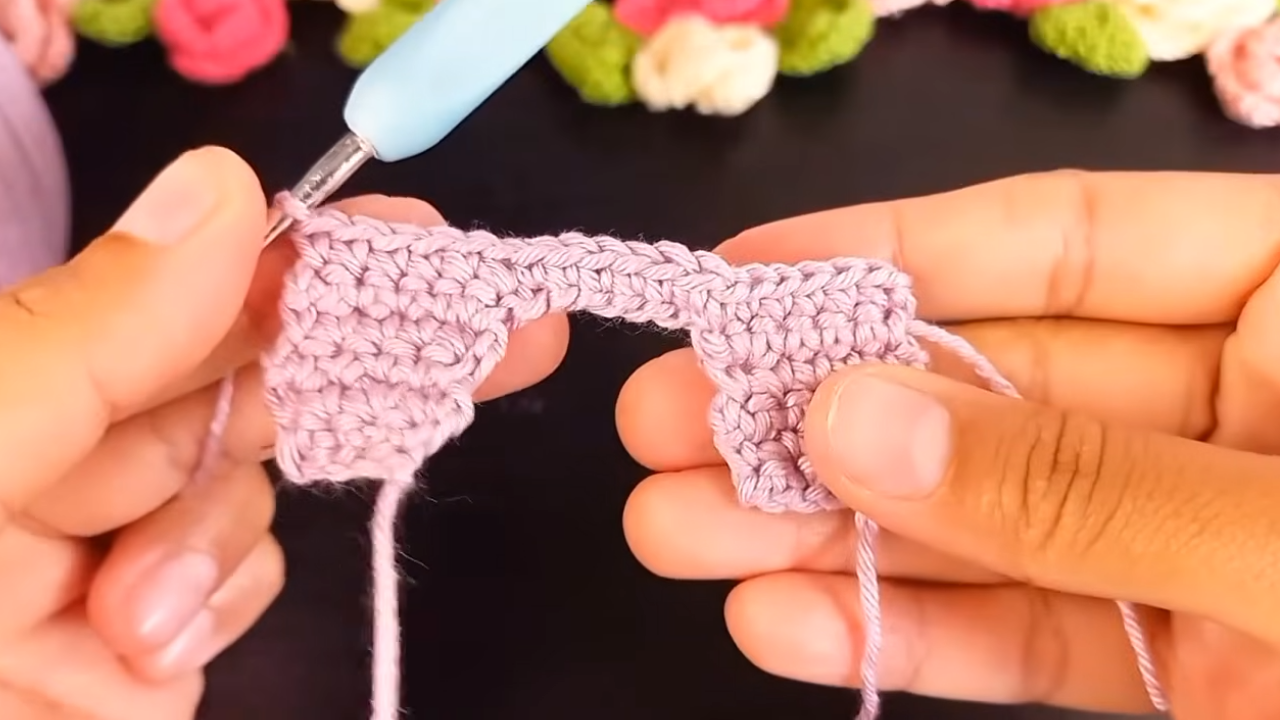
- On the last row of second leg:
- Ch 1, turn, sc in first four, inc at last stitch. (6 sc)
- Ch 6 (for joining legs).
- Place the second leg to align alongside the first.
- On the first leg:
- At first stitch, inc, then sc in next four. (6 sc)
- This joins both legs together via the chain bridge.
Body Rows
- For rounds 6–11:
- Ch 1, turn, sc in each stitch. (18 sc per row)
- Work as follows:
- 6 sc across first leg,
- 6 sc into the chains,
- 6 sc across second leg.
Work even until you end round 11.
Shaping the Head and Neck
- Row 12:
- Ch 1, turn, sc in first 16 stitches.
- In last two stitches, dec (sc 2 together).
- (17 sc)
- Row 13:
- Ch 1, turn, dec in first two stitches, sc in next 14, inc at last stitch.
- (17 sc)
- Row 14:
- Ch 1, turn, inc in first stitch, 6 sc, dec, 1 sc, inc at last stitch.
- (9 sc)
- Row 15:
- Ch 1, turn, dec, 6 sc, inc at last stitch. (9 sc)
Shaping the Ears and Head
- Row 16:
- Ch 5, turn, skip first ch, sc in next 4, sc across neck/head.
- (5 sc from chain, then continue sc, inc, sc, dec).
- Row 17:
- Ch 1, turn, dec, 5 sc, inc, 5 sc. (13 sc)
- Row 18:
- Ch 1, turn, sc across 5, inc, 5 sc, dec. (13 sc)
- Row 19:
- Ch 1, turn, dec, 5 sc, inc, 5 sc. (13 sc)
- Row 20:
- Ch 1, turn, sc in 6, inc, 4 sc, dec. (13 sc)
- Row 21:
- Ch 1, turn, dec, 4 sc, dec. (6 sc)
- Row 22:
- Ch 1, turn, dec, 2 sc, dec. (4 sc)
- Row 23:
- Ch 1, turn, 2 dec, fasten off and cut yarn.

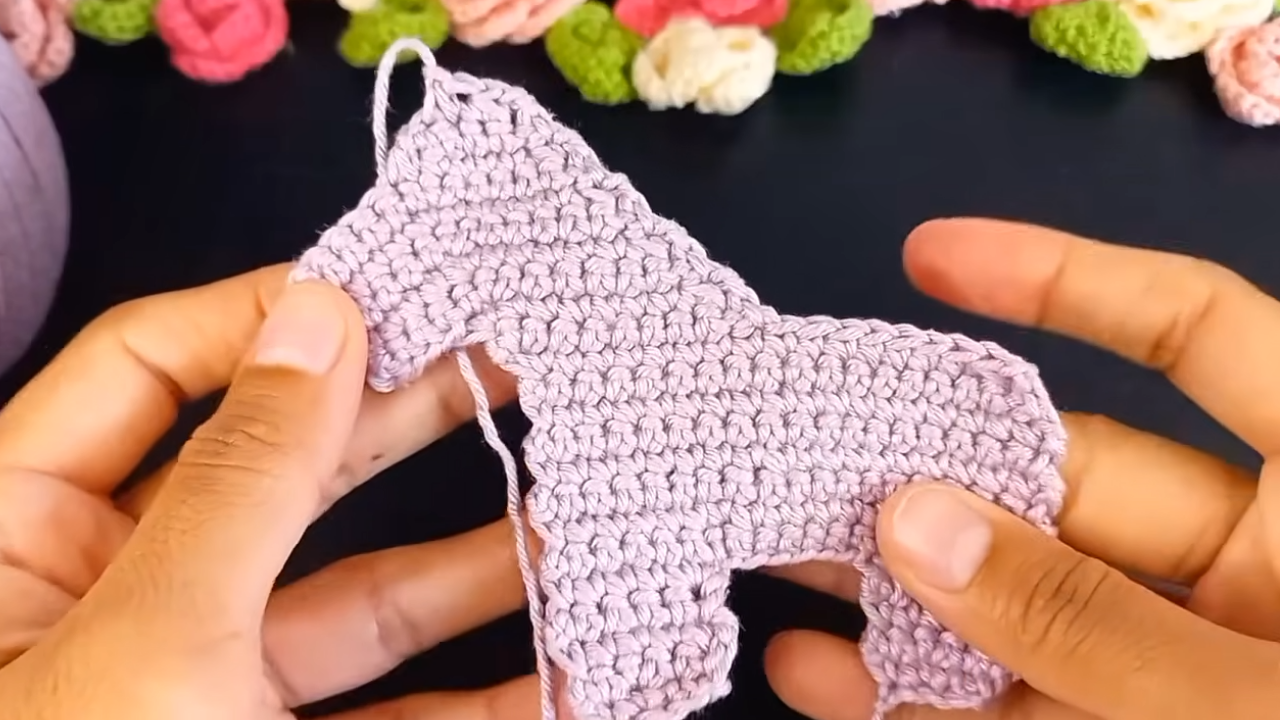
Joining the Two Pieces
- Place pieces together.
- With contrasting or matching yarn, join the pieces using sc all around the perimeter.
- Work 2 or 3 sc at corners.
- Make decreases at corners as needed for clean shaping.
- Stuff lightly as you close.
Fringe (Mane and Tail)
- Cut strands of yarn, 10–20 cm long.
- Fold in half, use crochet hook to pull folded strand through neck and tail positions.
- Pull through, create a knot or tighten for security.
- Make several fringes (suggested: 3 per side for mane, 3 for tail).
- Divide into groups for braiding or leave loose.
- Optionally, braid and tie securely at the end with a wrap and pull knot.
Assembly & Finished Size
- Keyring: Attach ring at head or neck position before closing the last stitches.
- Fringe: Attach fringes, braid or trim as desired.
- Eyes: Attach safety eyes or embroider with thread for a cute face.
- Final trimming: Adjust fringe, trim excess yarn, and shape the horse.
- Finishing touches: Use leftover yarn for additional features or color accents.

Conclusion
Your adorable crochet horse keychain is now complete! With a flat, durable structure and whimsical braids for the mane and tail, this piece is ready to brighten up any set of keys, bags, or gifts. It’s fast to make, highly customizable with colors and fringe, and requires very little yarn. You can add safety eyes, vary the mane/tail, or personalize further.