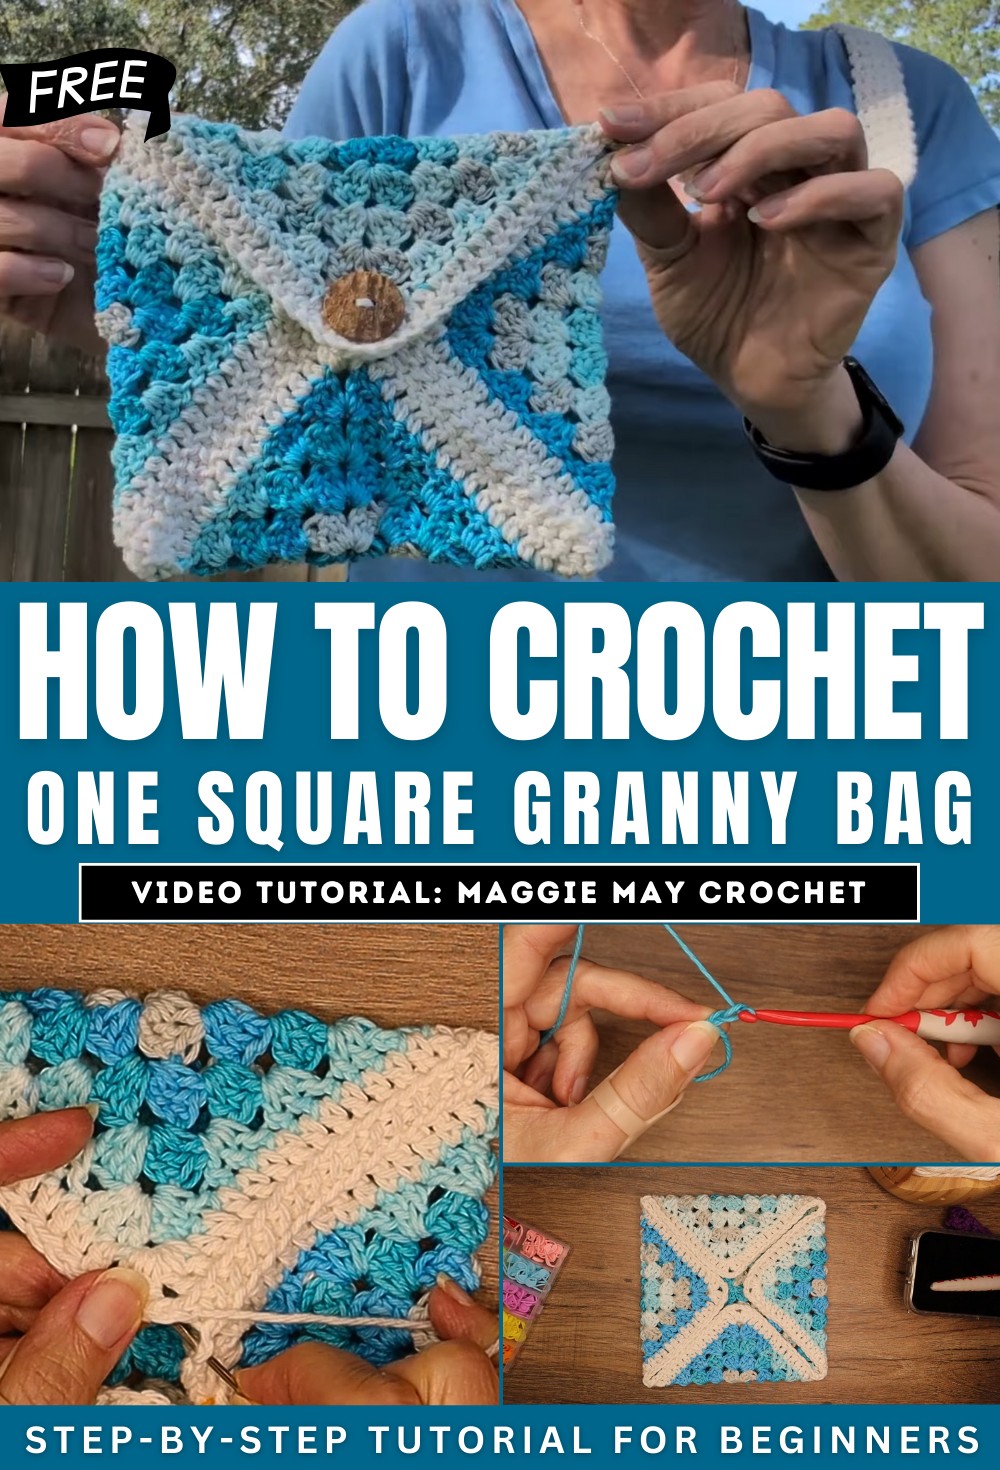
How to One Square Mini Granny Bag – Step by Step for Beginners!
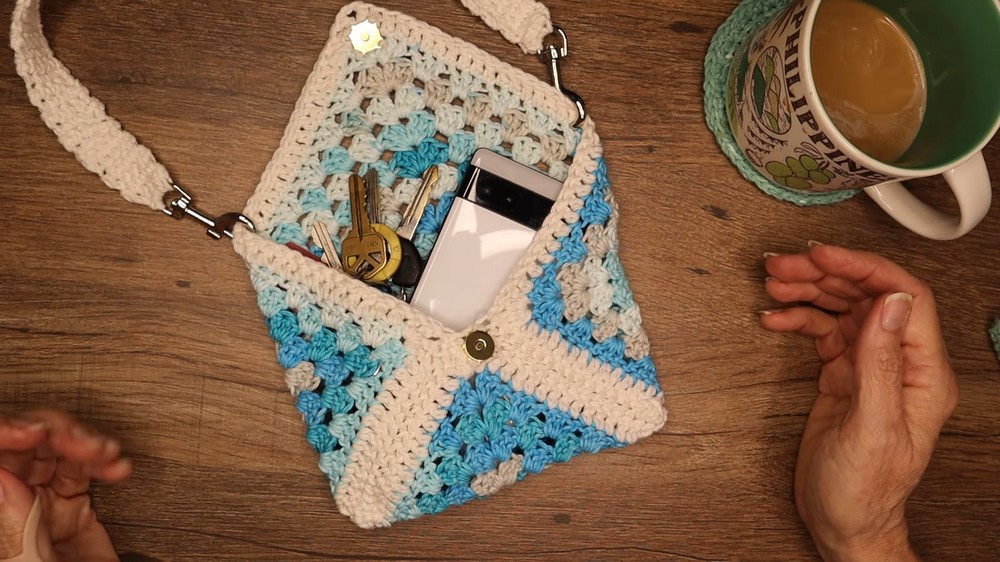
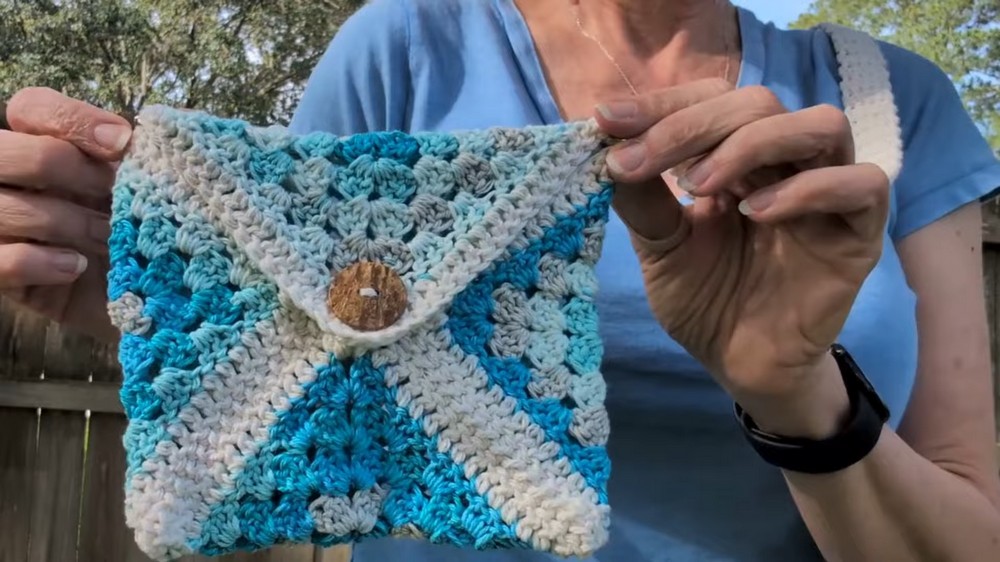
Learn how to crochet a stylish and functional crossbody bag using 100% cotton yarn with a tutorial for beginners. The bag is designed as a compact accessory ideal for carrying essentials, while its hands-free design makes it perfect for errands or sightseeing. The project begins with creating a 10-round granny square, followed by adding a double crochet border for structure. The square is folded into an envelope-style shape, and seams are stitched together neatly.
The adjustable single crochet strap is attached using spring snap clasps, and a magnetic snap is added for closure. This beginner-friendly design is both practical and visually appealing. So, follow through with us for the complete tutorial.
Crochet Crossbody Bag Tutorial
This detailed video tutorial demonstrates how to crochet a crossbody bag using a simple granny square pattern. The instructor breaks the process into clear, easy-to-follow steps, making it ideal for both beginners and experienced crocheters. The crossbody bag is a compact yet functional accessory, designed to hold essentials such as a phone, keys, and cards while keeping hands free for errands or sightseeing. Below is a step-by-step breakdown of this tutorial.
Materials Needed
- Yarn: 100% cotton yarn (Peaches & Cream in the Spring Blue Stripes colorway). A #4-weight yarn is recommended.
- Hook: A 5mm crochet hook.
- Additional Tools: Stitch marker, darning needle, scissors.
- Optional: Magnetic snaps or other closures for the bag.
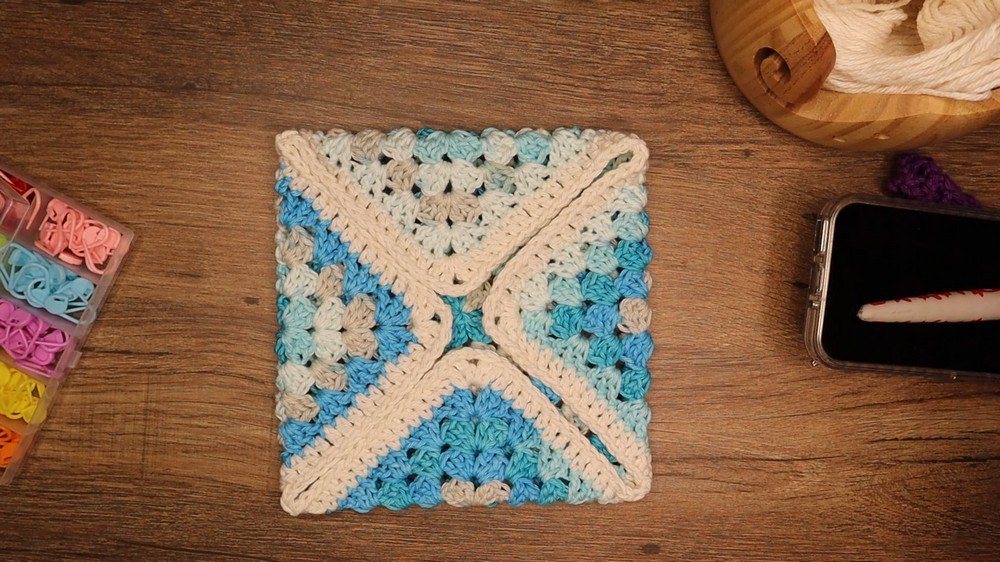
Creating the Granny Square
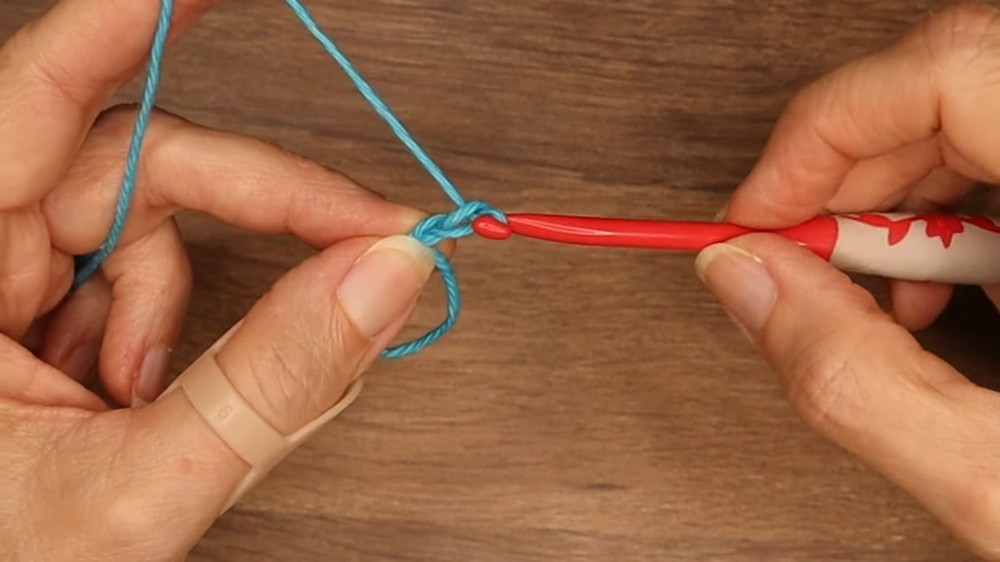
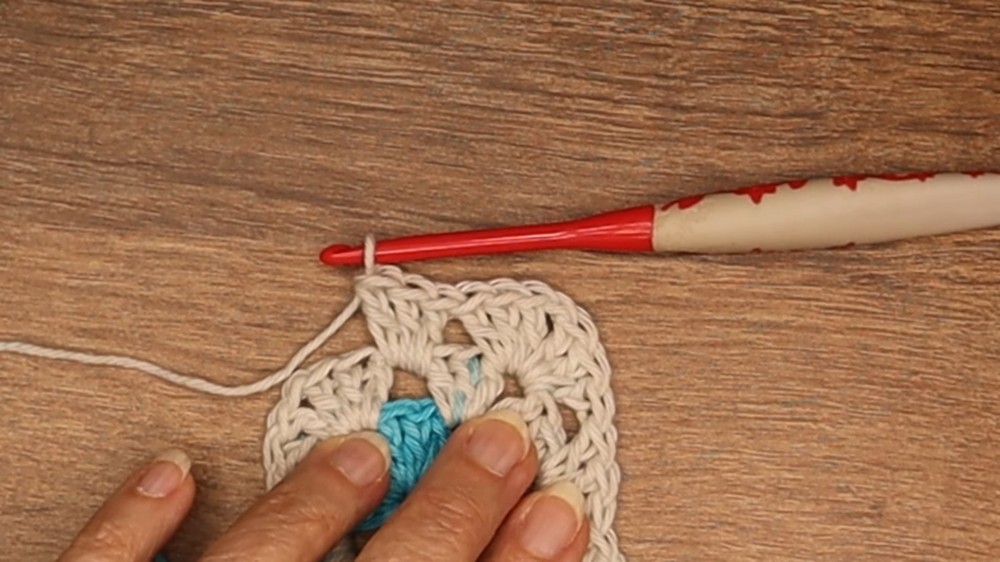
- Starting the Magic Ring:
- Begin with a magic ring or, alternatively, chain four and form a loop. The tutorial explains the magic ring method in detail.
- Building the Rounds:
- Start with double crochet clusters and chain spaces to form the granny square.
- Work four clusters of three double crochets to create the inner square. Corners are defined by chain spaces that separate these clusters.
- For subsequent rounds, additional clusters are created between the existing clusters while maintaining the same corner pattern
-
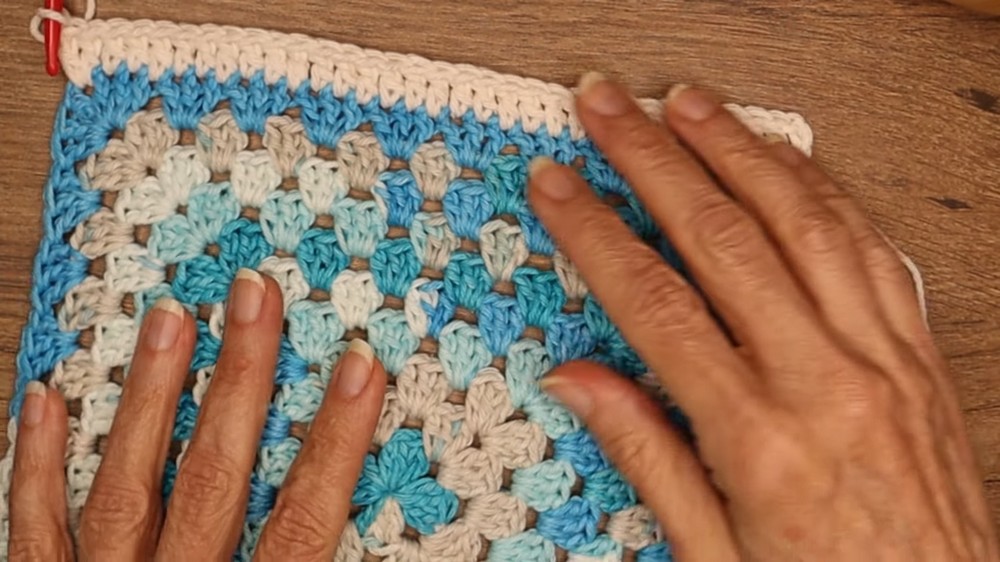
- The granny square is worked for 10 rounds in total, with no extra chains in the middle of rows.
- Adding a Border:
- After completing 10 rounds, attach a contrasting ecru-colored yarn to create a border.
- Use double crochet stitches around the entire square, adding two double crochets in each corner and chaining between them for consistency.
Shaping and Assembling the Bag
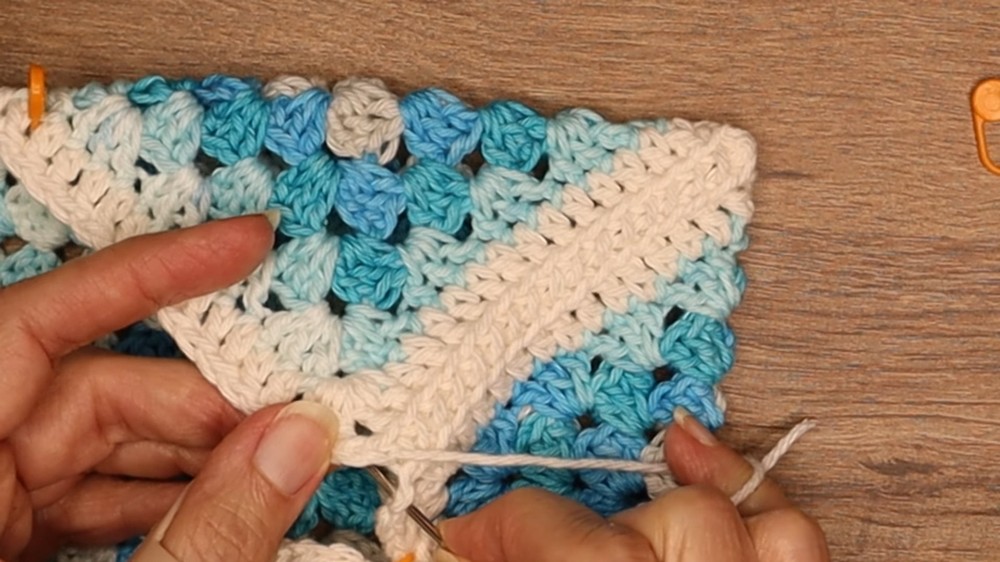
- Folding the Square:
- Turn the square to the wrong side (inner side up) and fold it into an envelope shape by bringing the corners to the center.
- The folded square should form the base and sides of the bag.
- Seaming the Sides:
- Secure the side folds with stitch markers or safety pins for alignment.
- Using a yarn needle, seam the sides with a secure stitch, working through the inside loops of the stitches for a clean and durable finish.
- Once the seaming is complete, weave in any leftover threads for a polished look.
Creating the Strap
- Attaching to the Rings:
- Attach the yarn to a clasp or ring for the strap using single crochet stitches.
- Ensure the ring is securely attached as this will hold the weight of the bag when used.
- Crocheting the Strap:
- The strap is worked using single crochet stitches, creating a simple but strong design.
- Adjust the length of the strap as desired by continuing the single crochet rows until the desired length is achieved.
- Securing the Strap:
- Attach the other end of the strap to the second ring or clasp by crocheting directly into the single crochet stitches.
- Weave in the ends securely.
Adding Finishing Touches
- Adding a Closure:
- Magnetic snaps or other closures can be sewn onto the inside flap of the bag for secure fastening.
- Final Adjustments:
- Check all seams, weave in any loose ends, and ensure that the bag is structured properly before use.
Conclusion
This crossbody bag project is simple, practical, and versatile. The tutorial provides clear guidance on every step, from making a granny square and assembling the bag to creating the strap and optional closures. With endless possibilities for color and design, it’s a perfect accessory for on-the-go use.