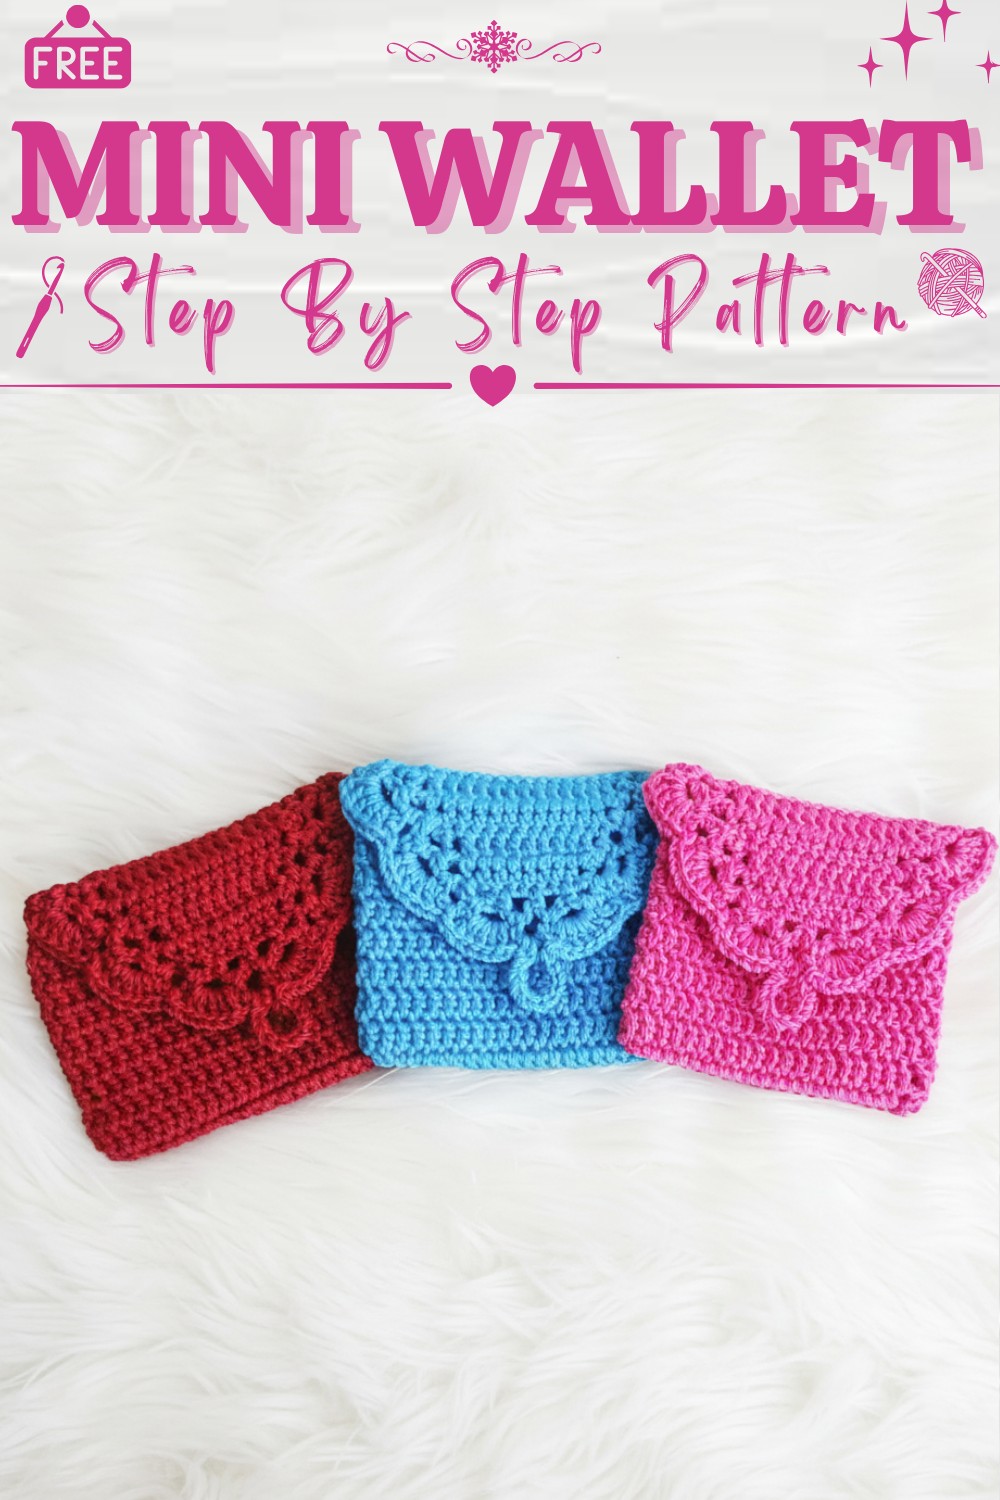
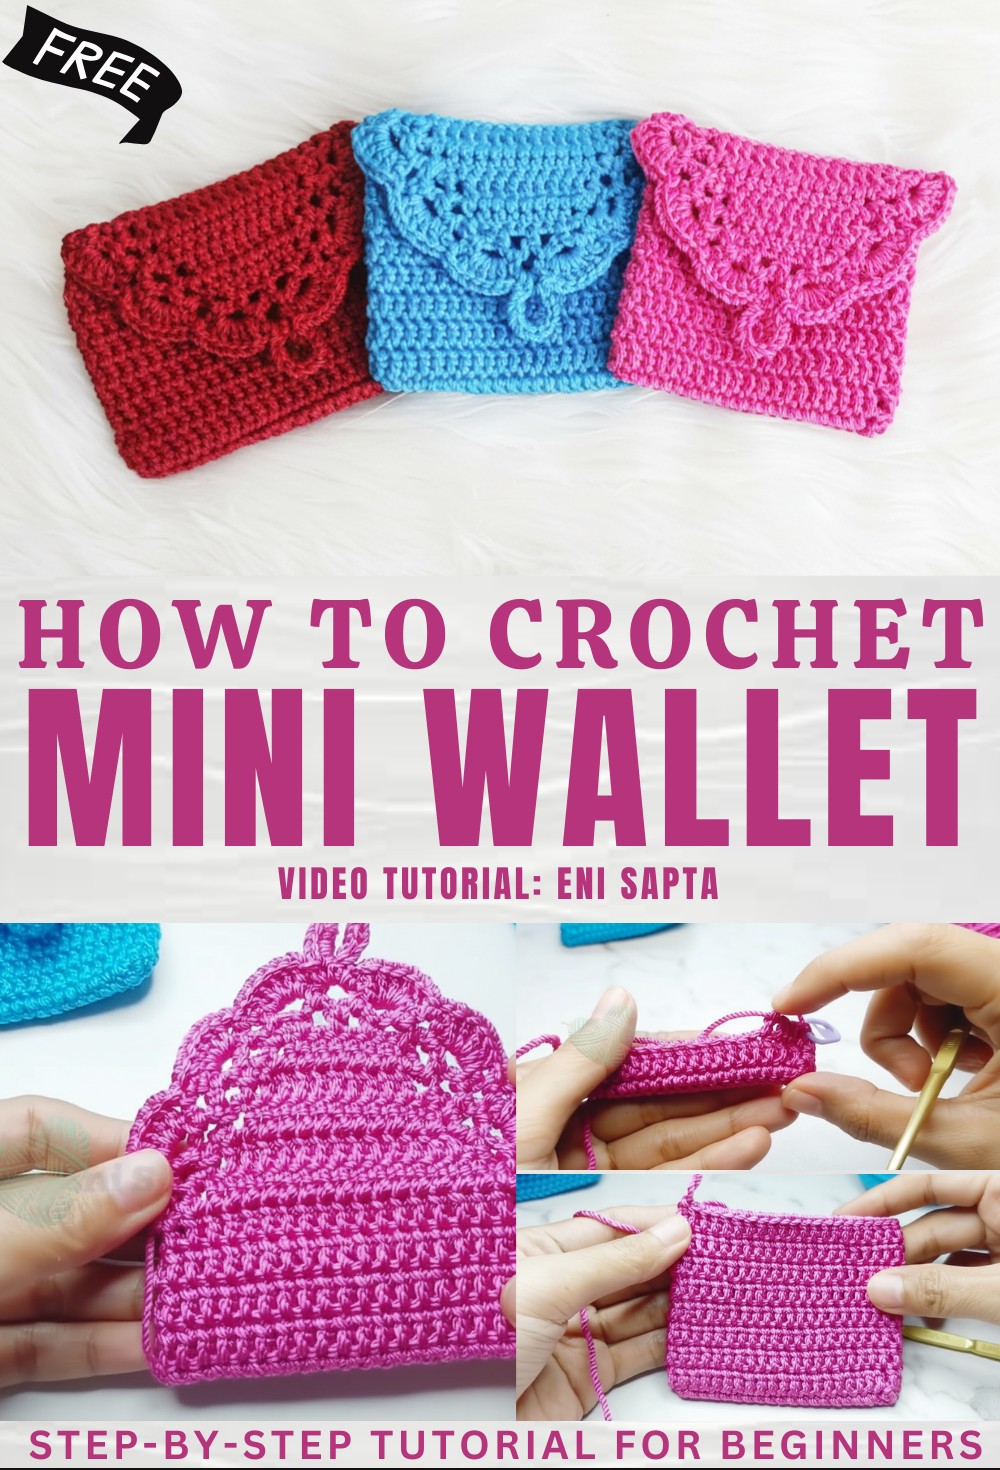
Practical Crochet Mini Wallet Pattern for Minimalist Living
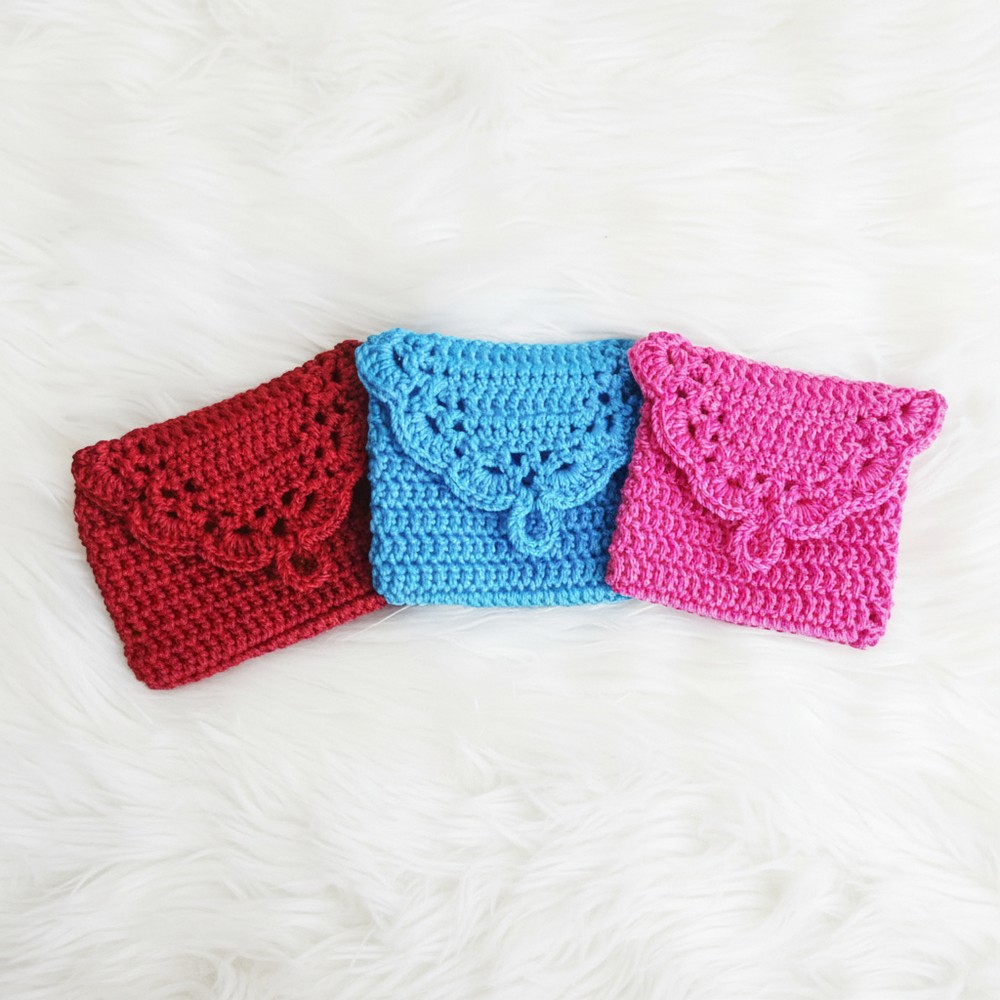
Compact and functional creations in the world of crochet offer a delightful mix of utility and style, and one such accessory stands out for its charm and convenience. Perfect for carrying small essentials like coins, cash, or cards, this handcrafted item is a sustainable alternative to bulky wallets while showcasing your artistry.
Fun Crochet Mini Wallet Pattern Perfect for Quick Gifts
Its compact size makes it versatile, fitting effortlessly into pockets, handbags, or even clutches, ensuring you stay organized without compromising style. The true beauty lies in its customizability, you can choose colors, patterns, and embellishments to suit your personality or mood.
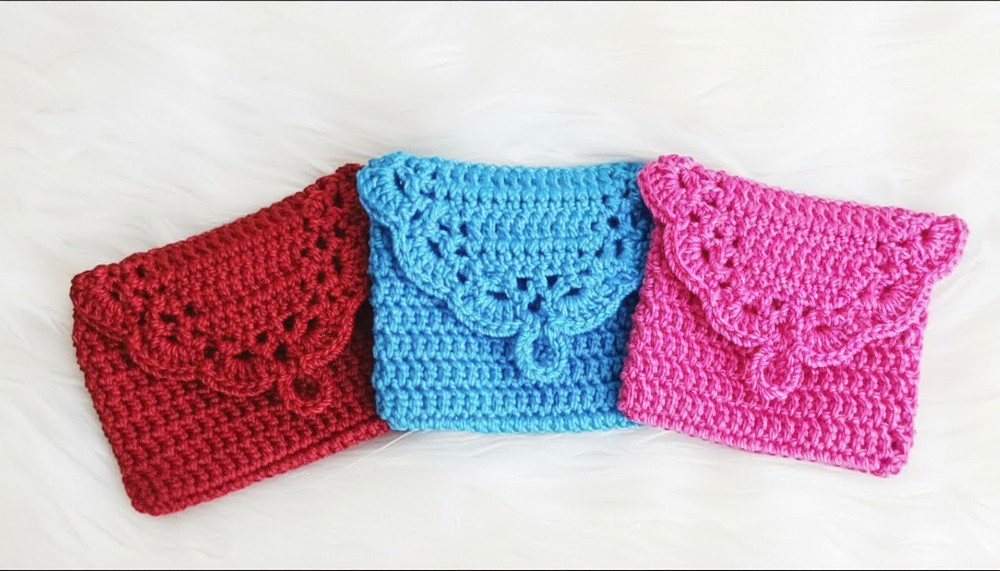
Moreover, it’s an eco-friendly option compared to mass-produced items, created with love and care using minimal materials. Ideal for gifting, it reflects thoughtfulness and creativity. Perfect for everyday errands, travel, or when attending minimalist events, this mini wallet exemplifies how small items can make a big statement. Durable, lightweight, and unique, it’s a must-have accessory for every crochet lover.
Materials Needed
- Yarn: Lightweight yarn or cotton yarn (choose your preferred color).
- Hook Size: 4/0 (2.5mm – depending on yarn type).
- Optional Items:
- Buttons, beads, or snaps for fastening.
- Yarn needle for weaving in ends.
- Stitch marker (optional for marking rounds/rows).
Skill Level
Intermediate to Advanced
Key Abbreviations
- ch: Chain
- sc: Single Crochet
- dc: Double Crochet
- sl st: Slip Stitch
- st(s): Stitch(es)
- rnd: Round
- sp: Space
Special Notes
- The project works in the round and involves shaping for the base, the wallet body, lid, and decorative edging.
- A stitch marker may be used to track the beginning or specific points in the rounds.
- Keep tension consistent for a neat finish.
- Optional embellishments such as buttons or snaps can be added for a professional touch.
Pattern Steps
Base of Wallet
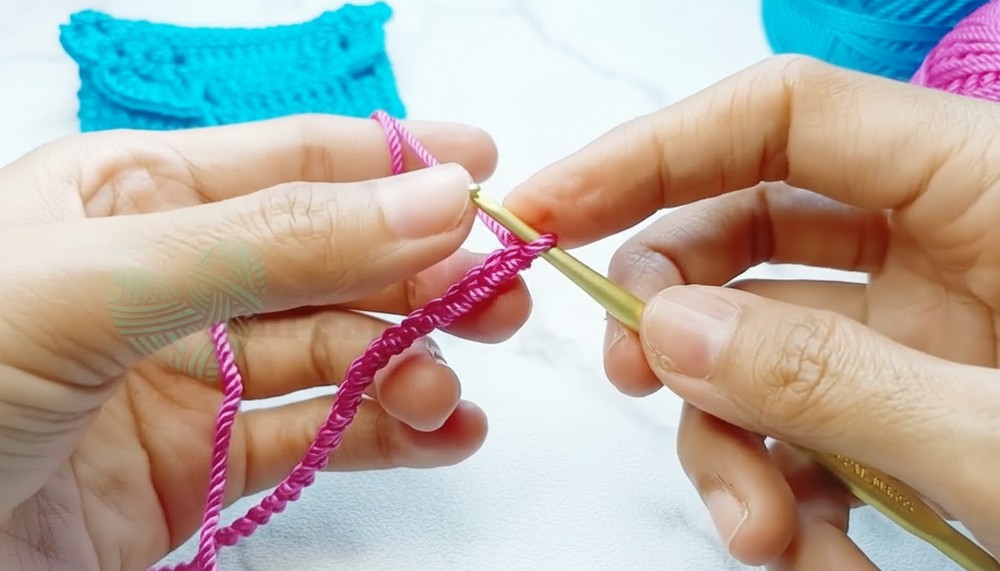
- Begin by making a slip knot on your hook.
- Ch 20.
- Starting from the 2nd ch from the hook, work:
- 19 sc (one sc in each ch).
- In the last ch, add 2 sc (increase to form a corner).
- Working along the bottom side of the foundation chain, repeat:
- 19 sc.
- At the end stitch, add another 2 sc.
- Join the round with a sl st to the first sc.
- Total stitches for the base: 42 sc.
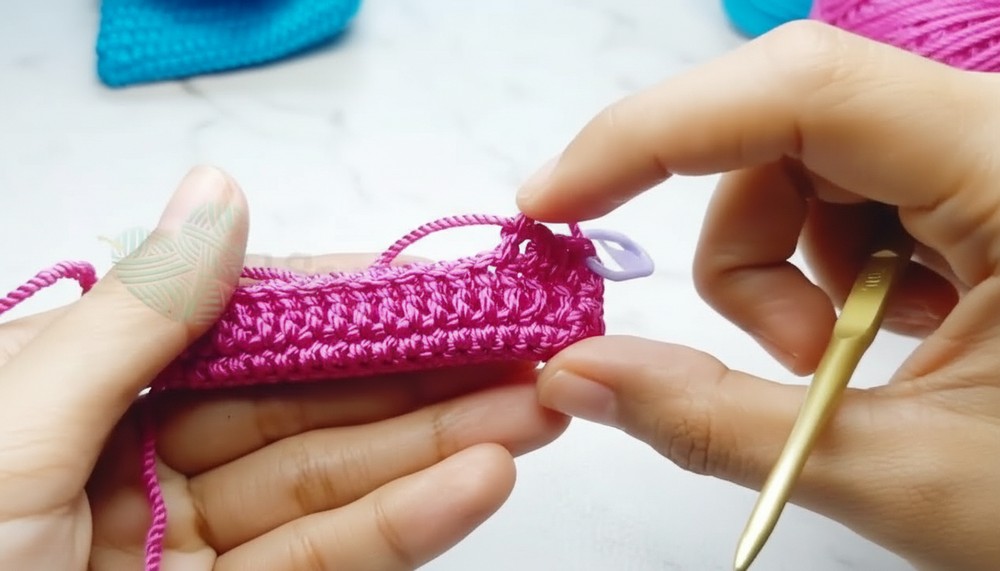
Body of Wallet
- Row 1:
- Ch 2 (counts as part of the first dc).
- Work 1 dc in the same st.
- Continue with 1 dc in each st around (total: 42 dc).
- Join with a sl st to the first dc.
- Rows 2 to 8:
- Start each row with 2 ch, and make a dc in the same st.
- Continue with 1 dc in each st around.
- Each round ends with a sl st to the starting dc.
- Make a total of 8 rows of dc, ensuring the shape is consistent.

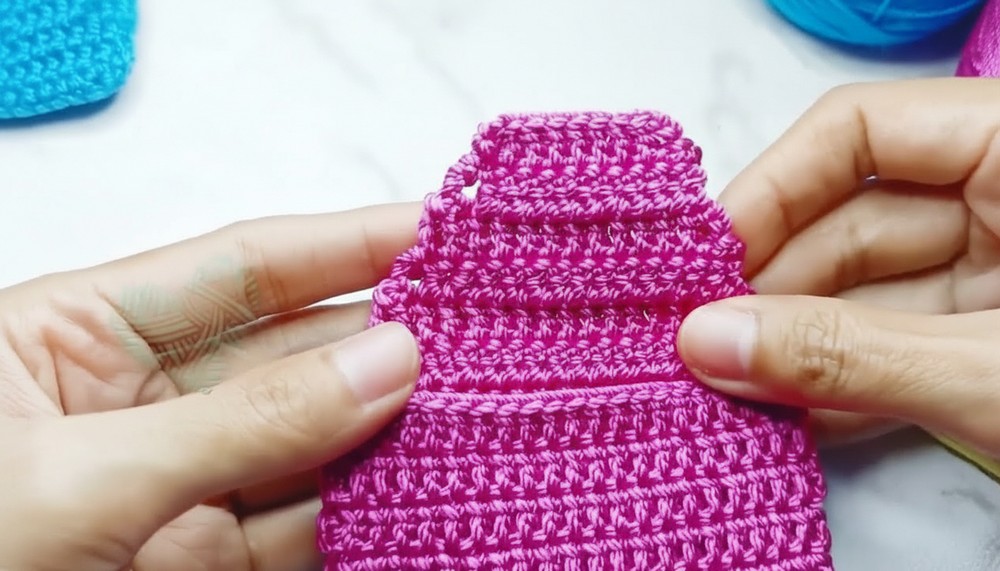
Lid/Flap
- Row 1:
- From the last round of the wallet body, work only across 19 stitches.
- Ch 3 (counts as the first dc).
- Work 1 dc across 19 sts.
- Turn the work.
- Row 2:
- Start with ch 3.
- Work 1 dc in each of the next 17 sts (reduce 2 sts).
- Total for row: 17 dc.
- Row 3:
- Repeat as Row 2, start with ch 3, with an additional 2 st dec.
- Total for row: 15 dc.
- Rows 4 to 6: Continue reducing 2 dc per row in the same manner:
- Row 4: 13 dc.
- Row 5: 11 dc.
- Row 6: 9 dc.
- Fasten off and weave in ends.
Decorative Edging
- Start from the back center of the wallet at the edge of the body.
- Row 1:
- Work a single crochet edging around the open edge of the wallet, ensuring even spacing.
- Add chain loops (e.g., ch 3 to ch 5) as decorative arches at regular intervals.
- In total: 13 chain loops around the edge, with 5 loops on each side and 3 loops at the front.
- Row 2:
- Into each ch loop, work:
- 1 sc, followed by 3 ch, then another 1 sc.
- Into each ch loop, work:
- Row 3 (Optional):
- Enhance the decorative loops further by adding 5 dc in each arch and finishing with 1 sc into the next loop.
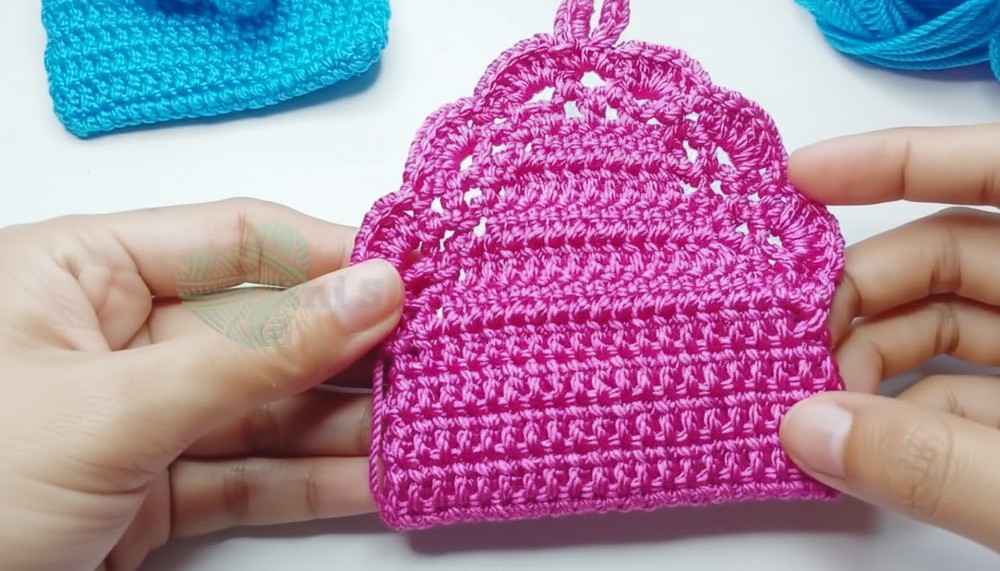
Adding a Button or Fastener
- At the front middle of the wallet, sew on a button, bead, or add a snap fastener for closing the wallet.
- For buttons, ensure the decorative chain arch aligns for the closure.
Conclusion
You now have a beautiful 8 x 9 cm mini wallet, complete with a functional lid and decorative edging. This project makes a charming gift or accessory, and with practice, you can customize it with different yarn colors, embellishments, or closures.
Pattern Correction and Tip
- When reducing double crochets for shaping (e.g., on the lid), count your stitches at the end of each row to ensure accuracy.
- If you notice gaps during edging, adjust your chain arches slightly for a snug fit.
- Tip: Use a steamer or light blocking technique to maintain the wallet’s shape.