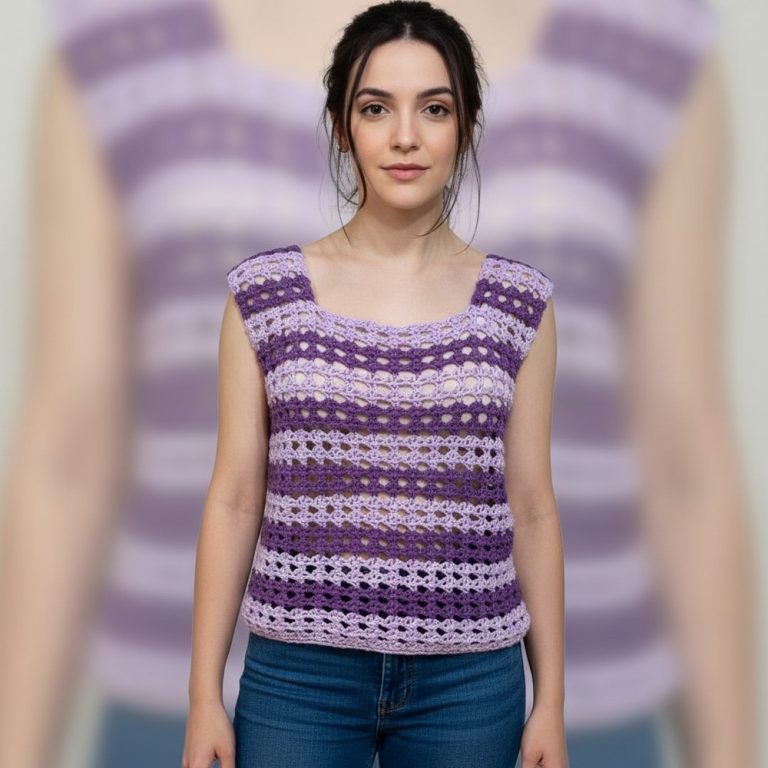
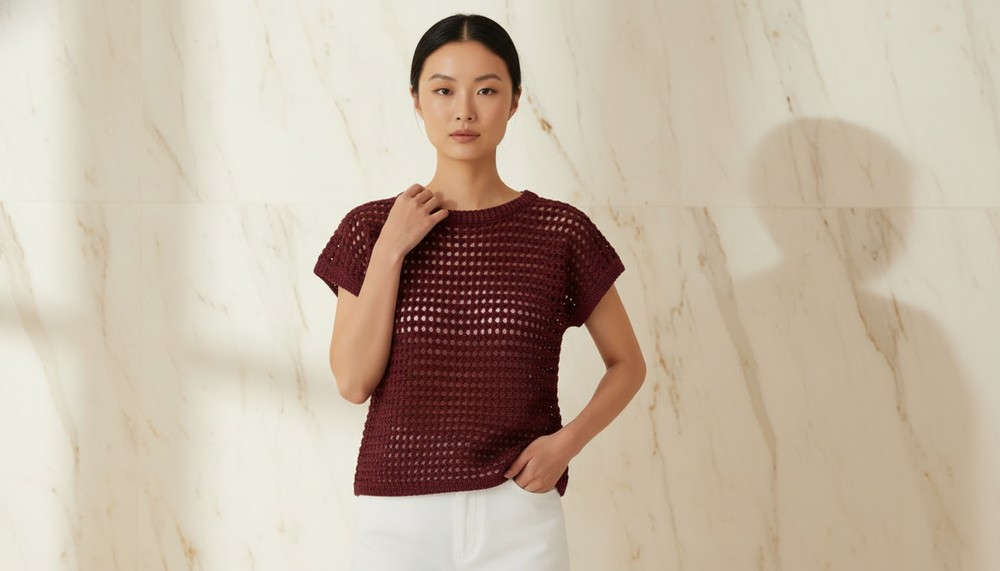
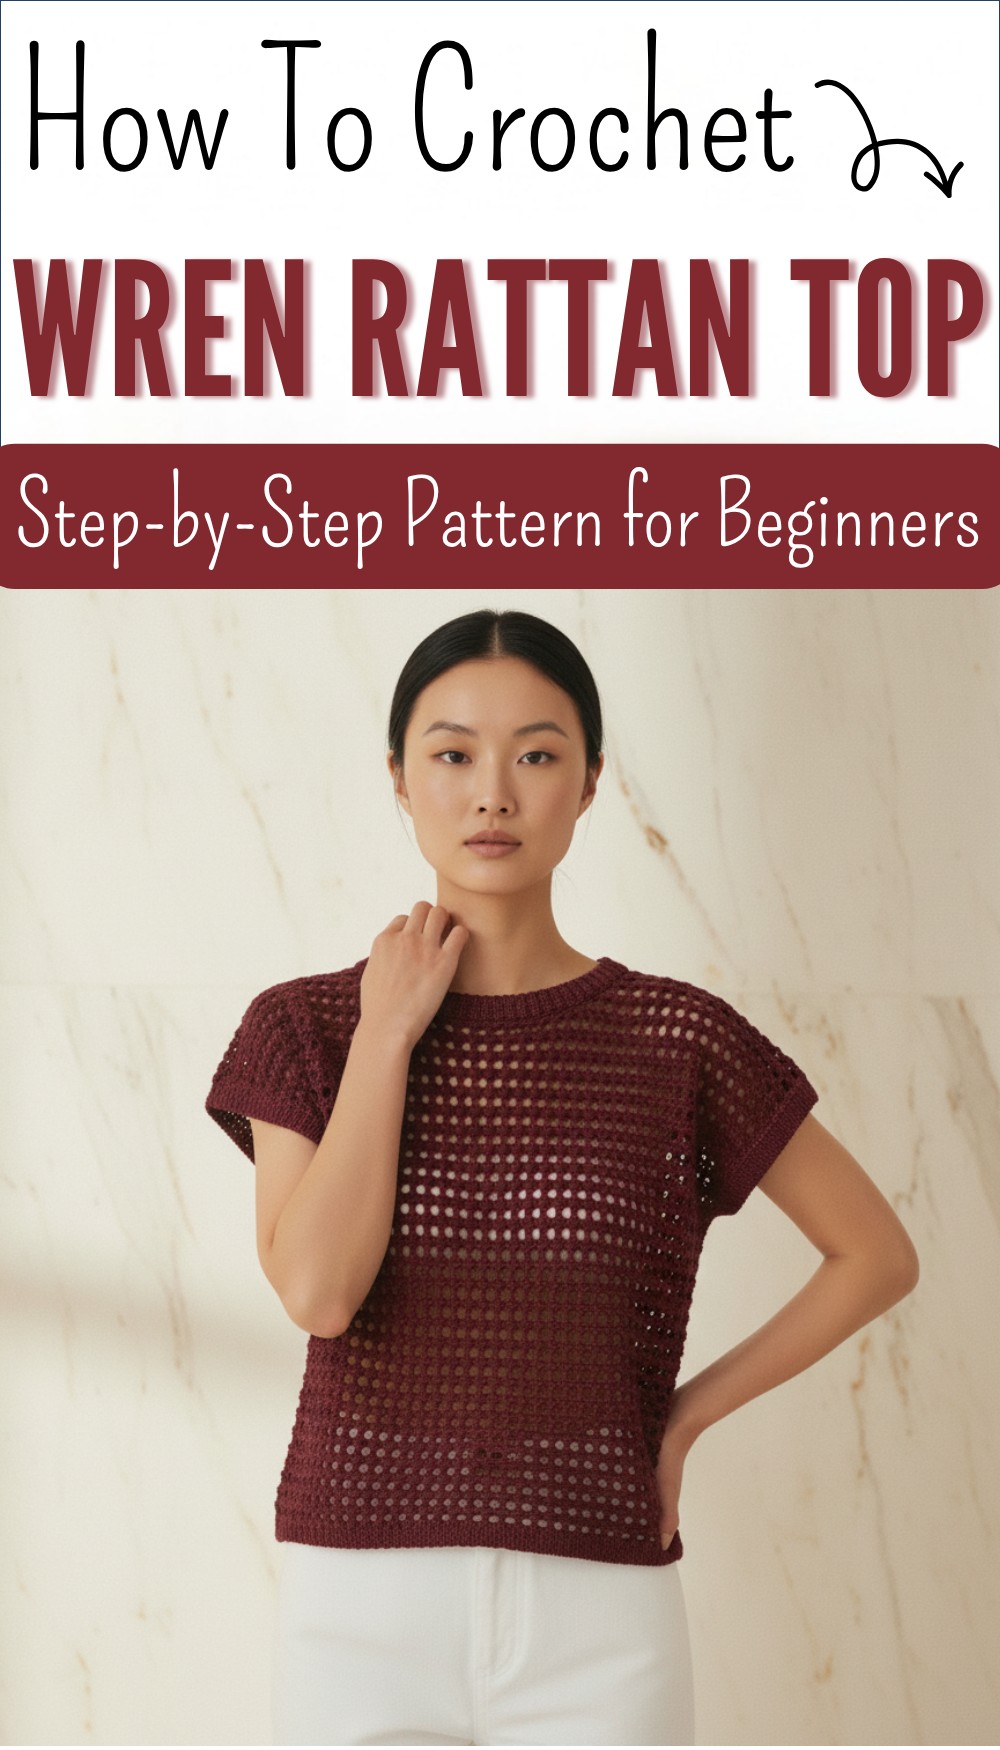
Simple Wren Rattan Top Free Crochet Pattern
Relax with this Free Crochet Wren Rattan Top Pattern, as you create a unique & stylish top with a soft feel and natural look everyone loves.
There’s something joyful about creating a piece that brings both beauty and comfort into life. A handmade treasure crafted with the Crochet Wren Rattan Top pattern lets you enjoy the charm of nature indoors and adds a stylish touch to any outfit or room décor. This pattern combines a lovely woven look with a light yet sturdy finish, making it perfect for wearing as a breezy top or using as a decorative cover or table runner.
Free Wren Rattan Top Pattern for Crochet Lovers
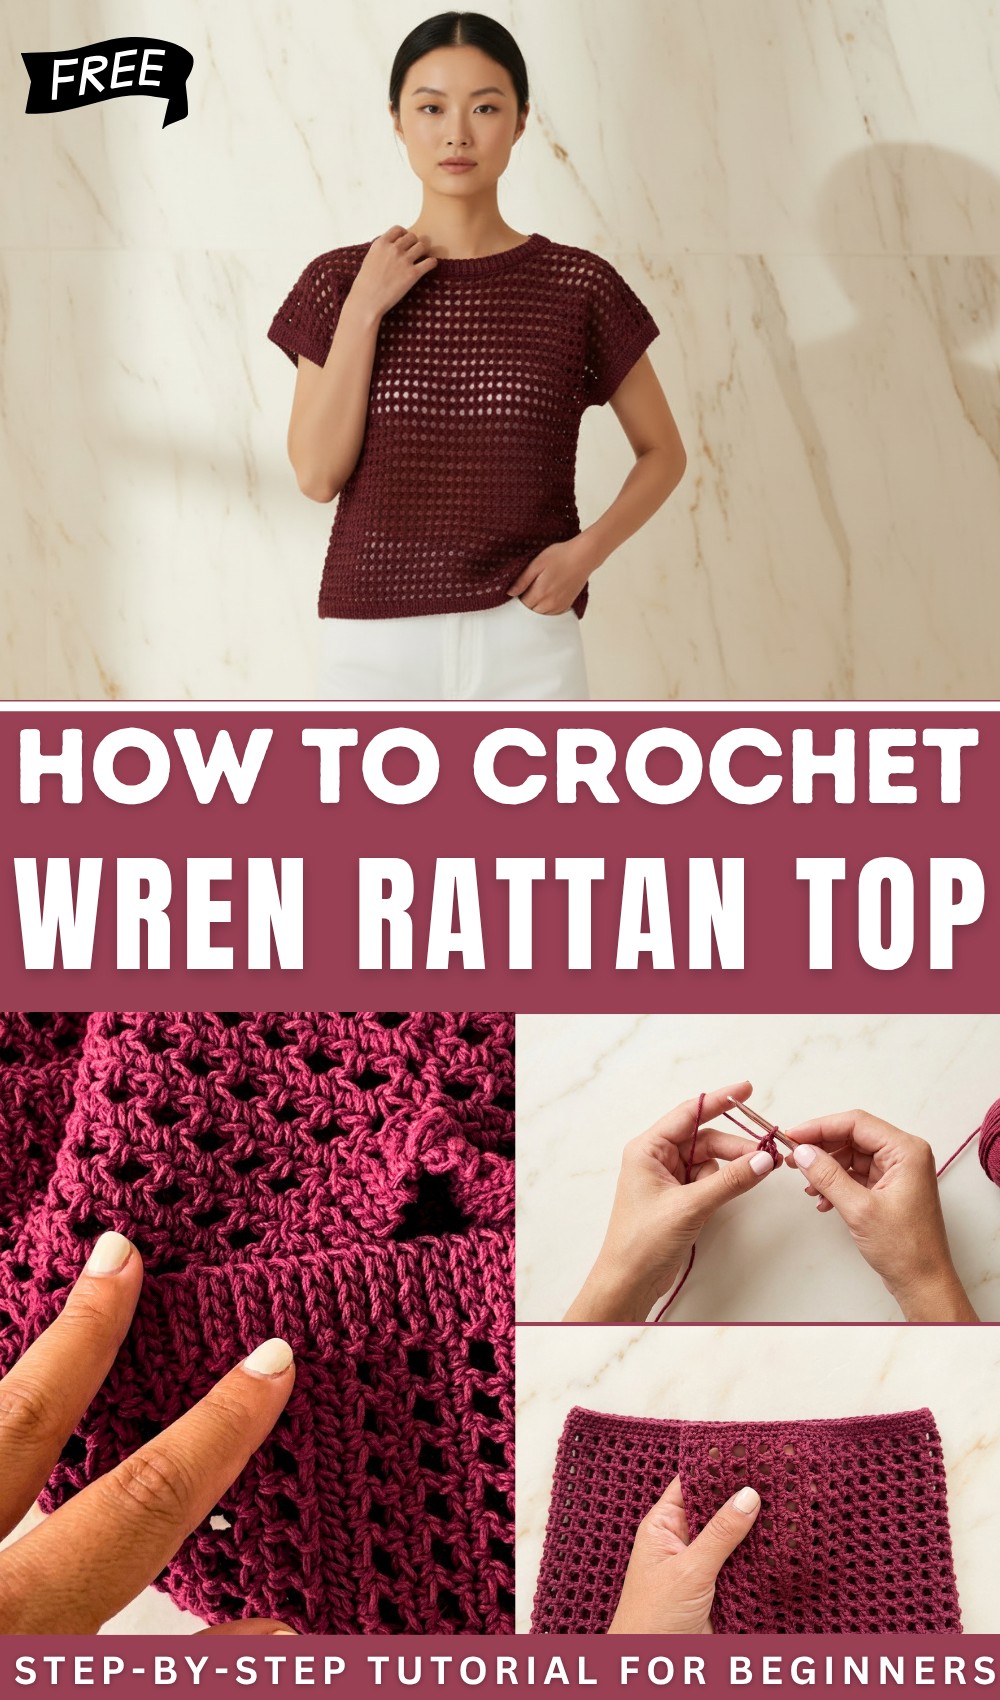
The special design shines with its pretty lines and soft feel, so it easily brightens up any space or wardrobe. Each project turns into a unique masterpiece since you can play with different yarn colors and finishes. People love using the Crochet Wren Rattan Top pattern because it’s simple to follow and doesn’t need complicated skills—just basic steps that anyone can do. Best of all, this handmade creation brings warmth and personality into your home or closet, turning every stitch into something meaningful and lasting.
Ren Crochet Top Pattern
Materials
- Yarn: Lion Brand 24/7 Cotton, or similar worsted weight cotton yarn (acrylic is suitable as an alternative; yardage varies by size)
- Hook: 5 mm (US H-8)
- Darning Needle: For seaming panels and weaving in ends
- Scissors
- Stitch Markers: (Optional) for marking armholes, panel edges, or rows
Key Abbreviations (US Terminology)
- ch – chain
- sc – single crochet
- hdc – half double crochet
- sl st – slip stitch
- st(s) – stitch(es)
- RS/WS – right side/wrong side
Special Notes
- The written pattern is required for complete details: refer to lakesideloops.com.
- Pattern is size-inclusive (XS–5X); adjust beginning chains as directed in the original written pattern.
- Front and back panels are identical.
- Maintain loose tension for ribbing sections to aid in ease and stretch.
- All trim is worked in back loops only for definition.
Construction Overview
- Work front and back panels flat.
- Shape shoulders, following unique shaping method on both sides.
- Seam panels together at shoulders and sides, leaving space for armholes.
- Add hem, sleeve, and neck ribbing for a neat, cuffed finish.
Pattern Instructions
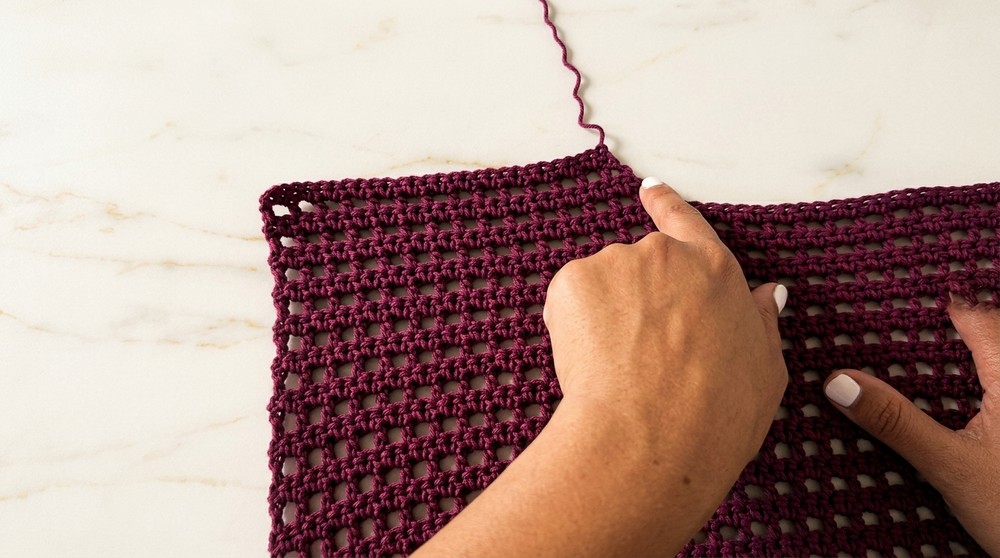
Main Panels (make 2; Front and Back)
Foundation Row:
- Ch required number (84–151, according to chosen size; see written pattern).
- Row 1 (RS): Sc in 2nd ch from hook and in each remaining ch across; turn.
- Row 2 (WS): Ch 2, turn. Hdc in first st, ch 1, skip next st, hdc in next st; repeat from * to end.
- Row 3 (RS): Ch 1, turn. Sc in first hdc, sc in ch-1 space, sc in next hdc; repeat from * to end.
- Repeat Rows 2 and 3 until the panel measures desired length per pattern.


Fabric will have an airy, woven look with openwork rows.
Shoulder Shaping
Left Shoulder
- Continue from where you left off.
- Work across prescribed number of sts for left shoulder with hdc and ch 1 pattern, ending with a decrease by skipping a st (follow written pattern for specific counts).
- Row 2 of shoulder: Turn, ch 1, skip 1st st (tapers neckline), work sc across.
- Alternate rows as directed for number of times/rows for gradual neckline shaping.
Right Shoulder
- Attach yarn at indicated st on opposite side.
- First row: Ch 2, turn work, skip first st, resume hdc and ch 1 pattern.
- Continue as for left shoulder, working decreases at neck edge as instructed.
Construct the Top
- Seam shoulders: Align panels with RS facing out; use darning needle to whip stitch through both loops of each stitch.
- Align both panels so chain-2 sides are at opposite ends for a consistent finish.
- Seam sides: Starting from the bottom hem, whip stitch up to the armhole, aligning rows as you go. Leave armhole opening (row counts for armhole per written pattern).
- Tip: Join “chain-2” edges to “hdc” edges as described for an invisible seam.
Hem Ribbing (Bottom Edge)
- Attach yarn to the bottom edge.
- Ch 5.
- Row 1: Working into back loops only, sl st in 4 ch, then sl st into next st on bottom edge.
- Row 2: Turn, skip first st on body, sl st in each back loop of rib strip.
- Continue: For every other row, skip a st on the body to create a gentle taper (ribbing will be slightly “pulled in” at the hem).
- Continue working in back loops only until hem ribbing is complete; join edges neatly with sl st or needle.
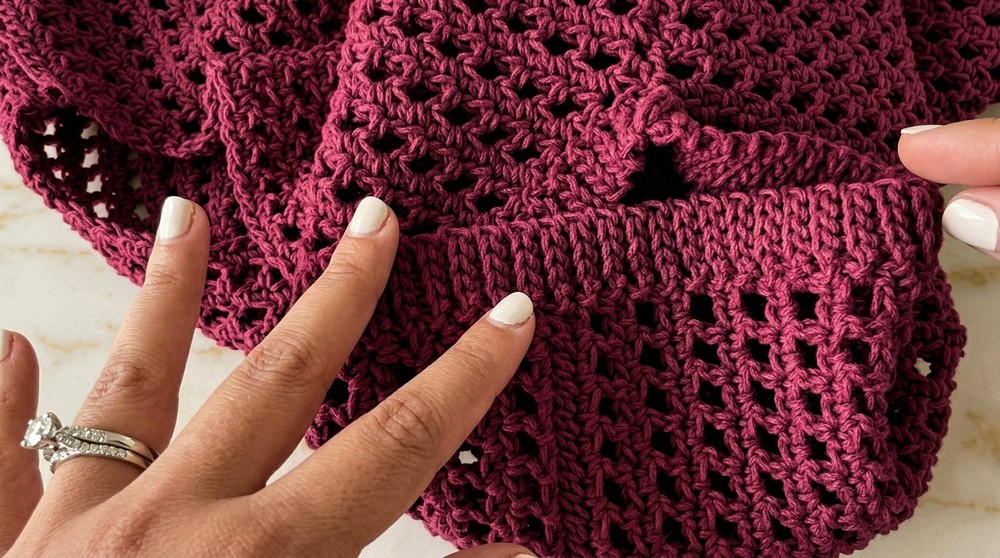
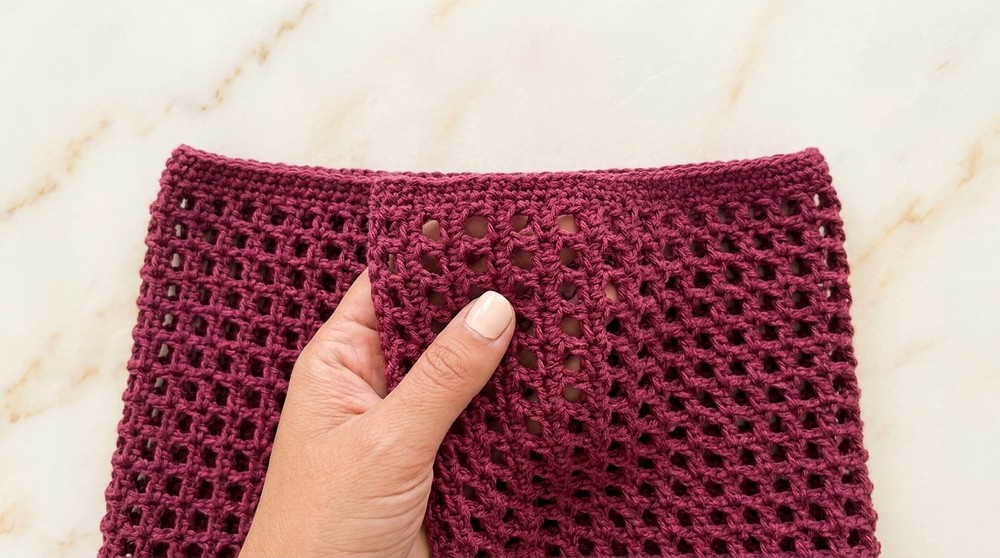
Sleeve Ribbing
- Repeat the hem ribbing, but work around armhole opening into row ends, not stitches.
- Attach yarn at underarm seam.
- Ch 5, sl st in each back loop of rib, sl st into next row edge on body, as for hem ribbing.
- Work ribbing all the way around, ensuring slight taper if desired.
- Repeat for both sleeves.
Neckline Ribbing
- Attach yarn at center back neck (aligning with hem start point for hidden seam).
- Work ribbing as for hem, but alternate between working into sts (across neck edge) and into row edges (up and down neck “sides”).
- Join ends seamlessly.
Finishing
- Weave in all loose ends with darning needle.
- Steam or block body and ribbing gently for best result.
Conclusion
This top combines an airy, woven texture with classic ribbed edging, making it versatile for both summer and transitional weather. The easy construction of mirrored panels, along with forgiving seaming and stretchy ribbed trim, results in a comfortable, stylish garment.
Pattern Corrections
- Double-check row/chain counts for your chosen size in the written pattern to ensure proper fit, especially for armhole opening.
- Accidentally tight ribbing can restrict movement—verify slip stitches are loose.
Additional Tips
- Always begin neck and hem ribbing on the same side of the garment for matching seams.
- For flawless assembly, frequently check that rows are aligned while seaming.
- Use stitch markers to mark armholes and where ribbing should begin/end.
- Use a contrasting yarn for initial seaming, then switch to main color for ease in future adjustments, if needed.