Tiny Crochet Coin Purses Pattern That Pack Big Style

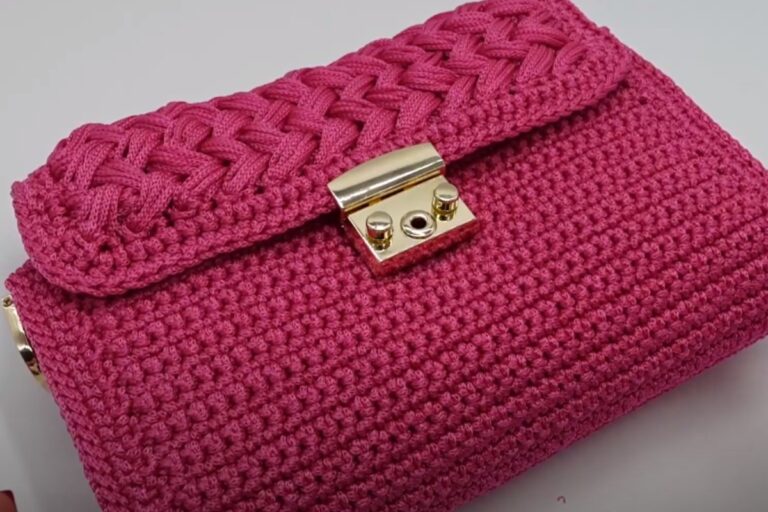
Struggling with loose change scattered everywhere can be frustrating, but a free crochet coin purse pattern offers a delightful solution. These charming and functional little pouches are perfect for keeping coins, keys, or other small essentials in one place. Whether you love minimal designs or eye-catching styles with zippers, buttons, or playful colors, these purses can be customized to suit your taste.

Charming Crochet Coin Purse Patterns for Daily Use
Not only are they practical and stylish, but they’re also beginner-friendly and quick to make, making them an ideal project for crafters of all levels. Create something beautiful, functional, and truly unique with these simple crochet patterns!

Materials Needed
- Yarn:
- Polyester thread (brand: Poly Gloss).
- Colors demonstrated: Red, Pink, and Green (you may select your own color palette).
- Crochet Hook:
- Hook Size: 3 mm (Tulip #3).
- Optional Items:
- Stitch markers: For tracking rounds, starting points, and specific stitches.
- Measuring tape: To ensure the correct dimensions.
- Scissors: For cutting yarn.
- Tapestry needle: To weave in ends and tidy up the final product.
Skill Level
- Intermediate: Familiarity with working in rounds and creating increases or motifs.
- Advanced Beginner options: You may follow the base pattern but without additional color changes.
Key Abbreviations
(All terms are in US Crochet Terminology.)
- CH: Chain
- DC: Double Crochet
- SC: Single Crochet
- SL ST: Slip Stitch
- MR: Magic Ring
- SP: Space
- ST: Stitch
Special Notes
- Gauge: The diameter of the base is approximately 6 cm, adjustable by increasing or decreasing rounds. Ensure your hook and tension align with this dimension.
- This pattern includes color changes, designated for three rows of motif work. Customize as needed.
Pattern Instructions
The pattern is divided into three key parts: Base foundation, bottle sheath body (with motif work), and handle/strap-making.
1. Base Foundation
- Magic Ring (MR):
- Begin with Red Yarn.
- Create a Magic Ring.
- CH 2 (does not count as a stitch). Work 12 DC into the MR.
- Pull the ring tight, SL ST into the first DC to close (12 ST total).
- Round 2:
- CH 2 (does not count as a stitch). Work 2 DC in each stitch around, starting at the SL ST.
- Total ST for this round: 24 DC.
- SL ST into the first DC to complete the round.
- CH 2 (does not count as a stitch). Work 2 DC in each stitch around, starting at the SL ST.
- Round 3:
- CH 2. Work 1 DC, 2 DC in the next ST; repeat this pattern (1 DC, 2 DC) around.
- Total ST: 36 DC.
- SL ST into the first DC.
- CH 2. Work 1 DC, 2 DC in the next ST; repeat this pattern (1 DC, 2 DC) around.
- Round 4 (Optional, if needed for larger bottles):
- CH 2. Work 1 DC in the next 2 ST, 2 DC in the following ST; repeat around.
- Total ST: 48 DC.
- SL ST into the first DC.
- CH 2. Work 1 DC in the next 2 ST, 2 DC in the following ST; repeat around.
- Measure your base: The base should be ~6 cm in diameter. If your bottle is larger, add additional increasing rounds by following a consistent incremental pattern (e.g., 3 single DC, 2 DC in next ST for Round 5).


2. Bottle Sheath Body with Motif
Body Foundation:
- Round 5:
- CH 2. Without increasing, work 1 DC in each ST around (1 DC per ST from the previous round).
- Total ST: Same as the last round (e.g., 36 DC).
- SL ST into the first DC.
- CH 2. Without increasing, work 1 DC in each ST around (1 DC per ST from the previous round).
- Change Yarn (Optional):
- Start Pink Yarn. Knot securely, then SL ST into the top of the first DC in the round.
- CH 2 and proceed to the motif section.

Creating the Motif:
- Round 6: First Motif:
- Work DC clusters:
- Work 1 DC in the first ST, then 1 DC in the next ST.
- CH 1, skip 1 stitch. Repeat this pattern (2 DC, CH 1, skip 1 ST) all around.
- End the round with a SL ST into the top of the first DC.
- Work DC clusters:
- Round 7: Second Motif:
- CH 2. Work 2 DC in the next CH SP (from previous round), CH 1, and skip 2 ST. Repeat this pattern around.
- SL ST into the first DC at the end.
- Continue the motif rounds, repeating Round 7 until the bottle sheath reaches the height of your bottle (approximately 13 cm for the sample).
- Color Changes (Optional):
- Alternate every 2-3 rounds with Green and Pink threads for a vibrant design.
- In the final motif row, switch back to Red Yarn for the top finishing rows.

3. Top Edging
- SC Border Rows:
- Work 1 SC in each stitch around for a neat finishing border.
- Repeat for 4 rows.
- End the final round with a SL ST. Fasten off and weave in the ends.
4. Handle/Strap
- Strap Foundation:
- Attach Red Yarn. CH 1.
- Work 5 SC stitches into 5 consecutive stitches.
- Building the Strap:
- CH 1, turn.
- Work 5 SC stitches across. Repeat until the strap measures ~30 cm, or longer if required.
- Attaching the Strap:
- Fold the strap ends to the opposite side, aligning it symmetrically.
- With SC stitches, sew the strap ends onto the sheath, ensuring the strap is secure.
Pattern Correction
- Verify stitch counts after each round in the base to avoid lopsided shaping.
- Ensure a snug Magic Ring to avoid holes in the center of the base.

Tips
- Tension Control:
- Maintain even tension for uniform stitches. Test a swatch initially if unsure.
- Colorwork:
- Tuck tails from color changes neatly during SC rows for a clean finish.
- Strap Adjustment:
- For heavy bottles, consider using thicker yarn for the strap or doubling it for extra durability.
Conclusion
This bottle bag sheath is a functional yet charming project perfect for holding bottles, small personal items, or even for decorative use. The simple motifs make it easy to customize for various sizes and color palettes. Add your creative touch by experimenting with additional motifs, color changes, or decorative embellishments like tassels.