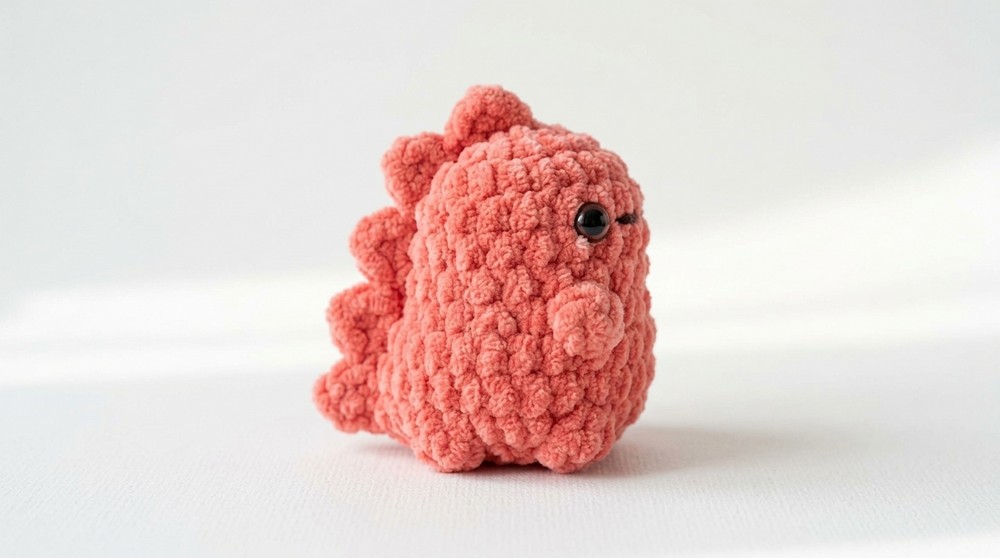
Adorable Free Crochet Baby Dinosaur Pattern for little hands
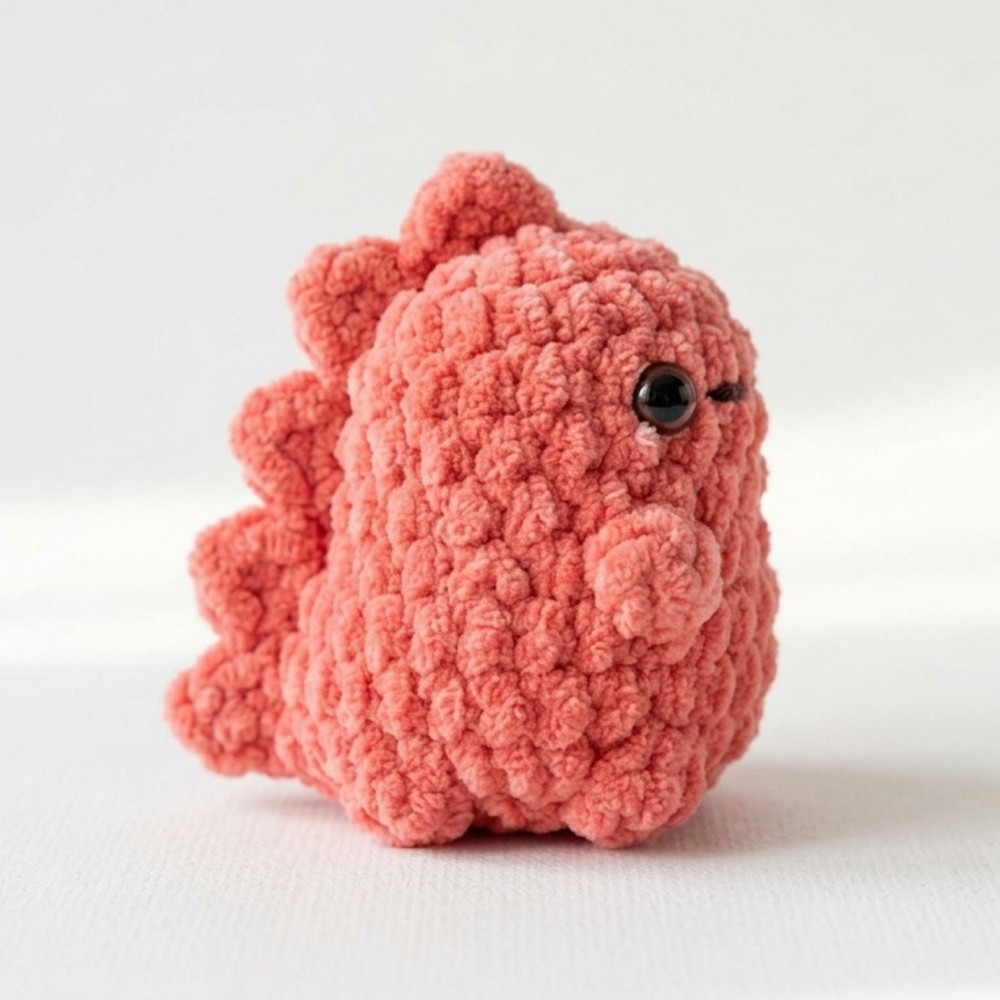
Charm little ones with a free crochet baby dinosaur pattern that is soft adorable and perfect for gifts, nursery decor and playful keepsakes.
Soft body and little legs make this tiny dinosaur easy to hold and fun to play with. When you try a crochet BABY DINOSAUR pattern, you can make a cute dinosaur using yarn and simple stitches. The big eyes and small smile make this dinosaur look kind and friendly. Children love to carry this small friend around or keep it close when they sleep. You can make the dinosaur in any color you like, so each one is special and unique.
Cute Free Crochet Baby Dinosaur Pattern perfect for baby gifts
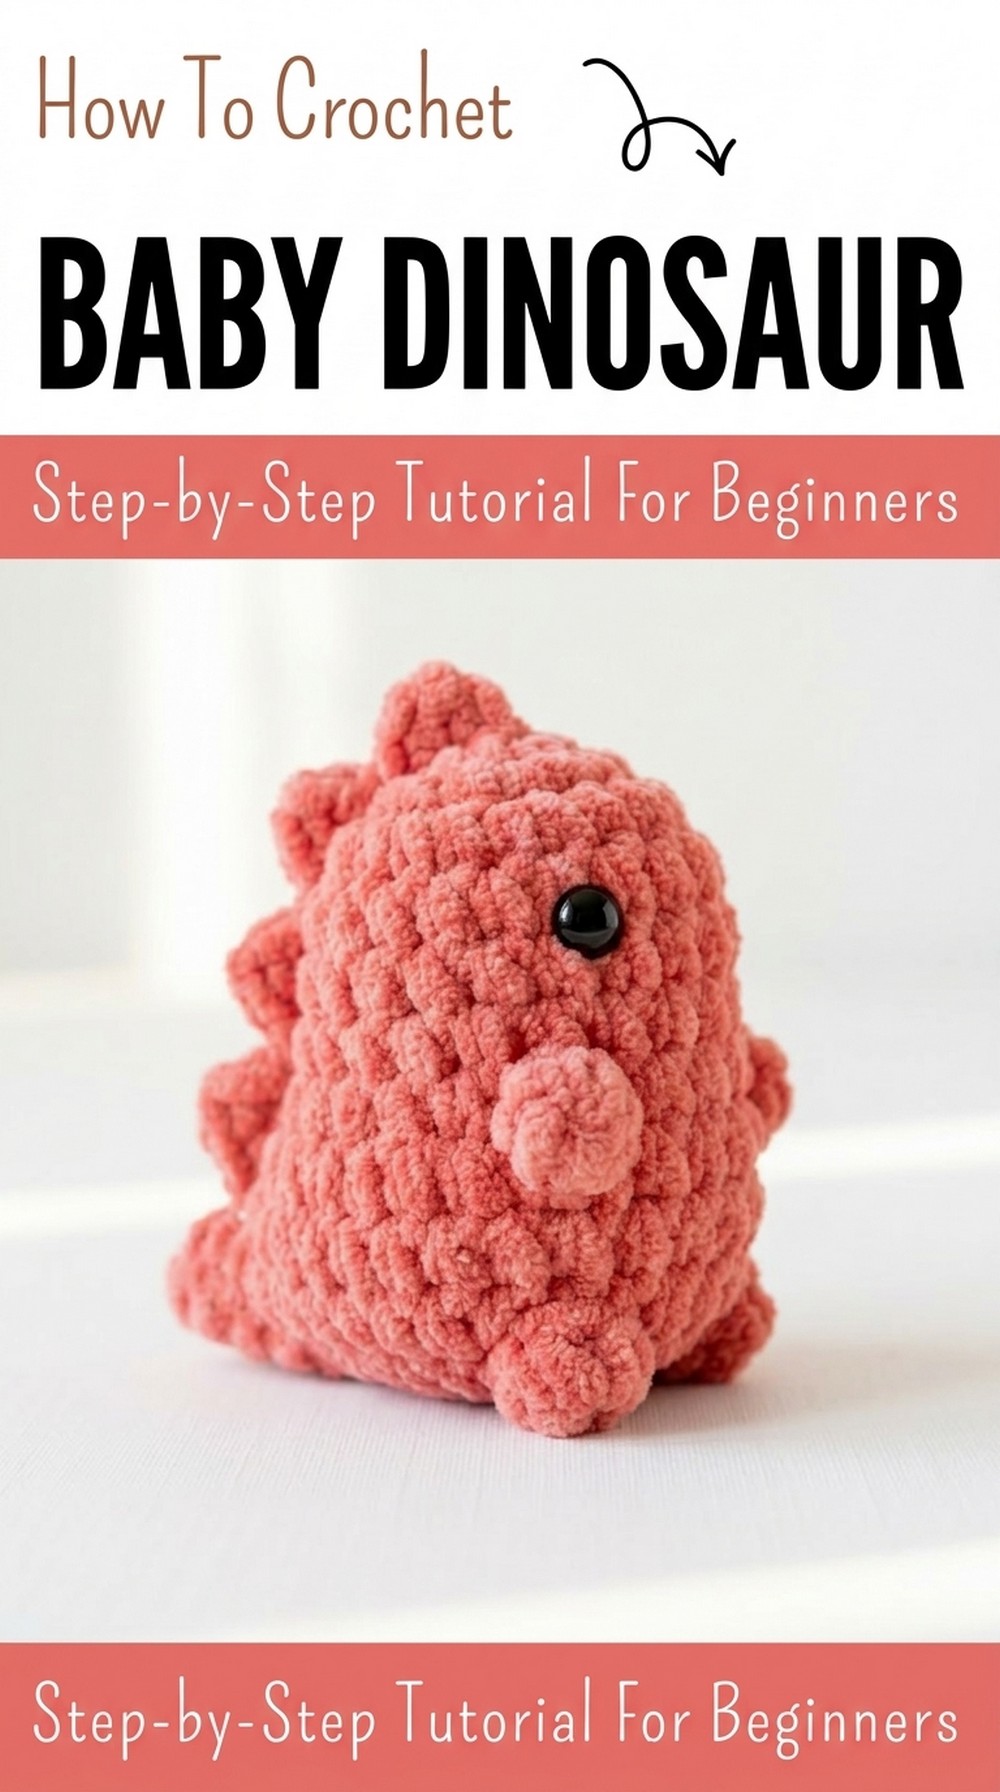
Even if you have never made a toy before, you can follow the easy steps without any trouble. The pattern guides you so you do not miss any part. This crochet dinosaur is nice for giving as a gift, keeping on your shelf, or holding in your hands when you want to feel happy. Making a soft dinosaur brings joy to everyone, young or old.
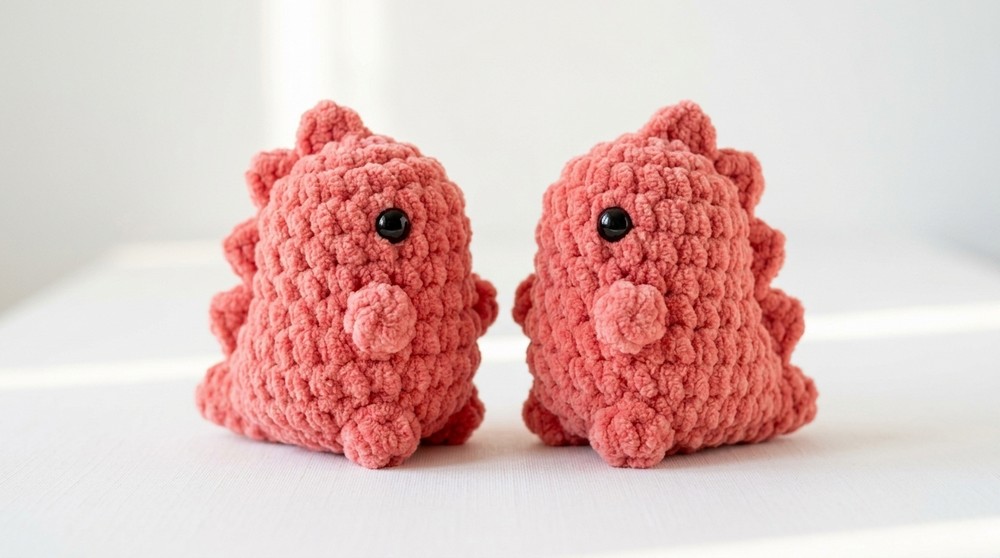
Mini Dinosaur Amigurumi Pattern
Materials List
- Yarn: Velvet yarn in your preferred color (e.g. Himalaya Dolphin Baby)
- Hook: 3.5mm crochet hook (adjust for your yarn thickness if needed)
- Safety Eyes: 8mm or 10mm (black plastic)
- Stuffing: Polyester fiberfill
- Accessories: Different color yarn or stitch marker for marking rounds
- Notions: Yarn needle, scissors
- Optional: Lighter for safely securing safety eyes; keychain hardware
Key Abbreviations (US Terms)
- ch: chain
- sc: single crochet
- inc: increase (2 sc in same stitch)
- dec: decrease (single crochet 2 together)
- st(s): stitch(es)
- Rnd: round
Special Notes
- For velvet yarn, tension may be loose; keep stitches snug.
- For marking rounds, use contrasting yarn or a stitch marker.
- Pattern is worked in the round; do not join rounds unless specified.
- Secure safety eyes before closing the head.
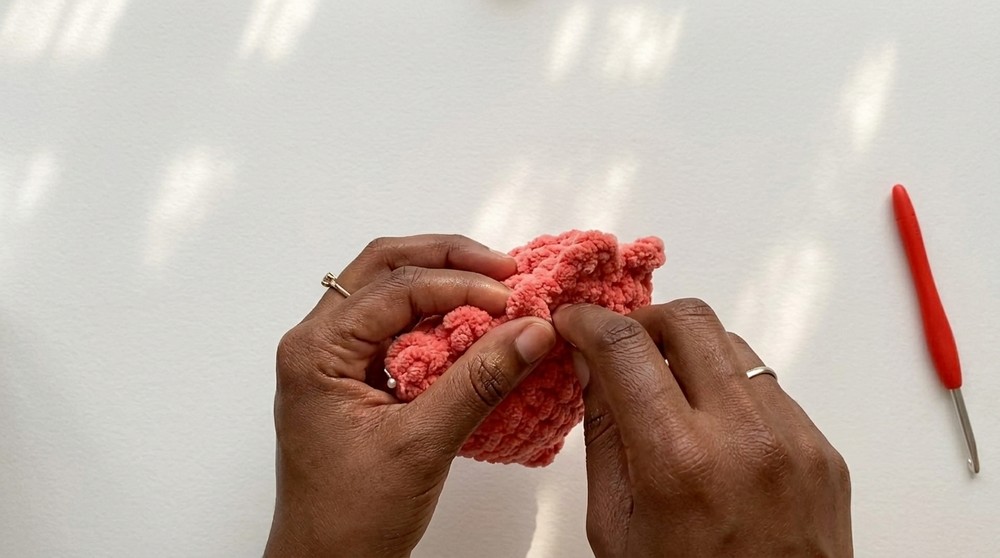
Pattern Instructions
Start with Head/Body
Step 1:
Make a slip knot. Ch 3.
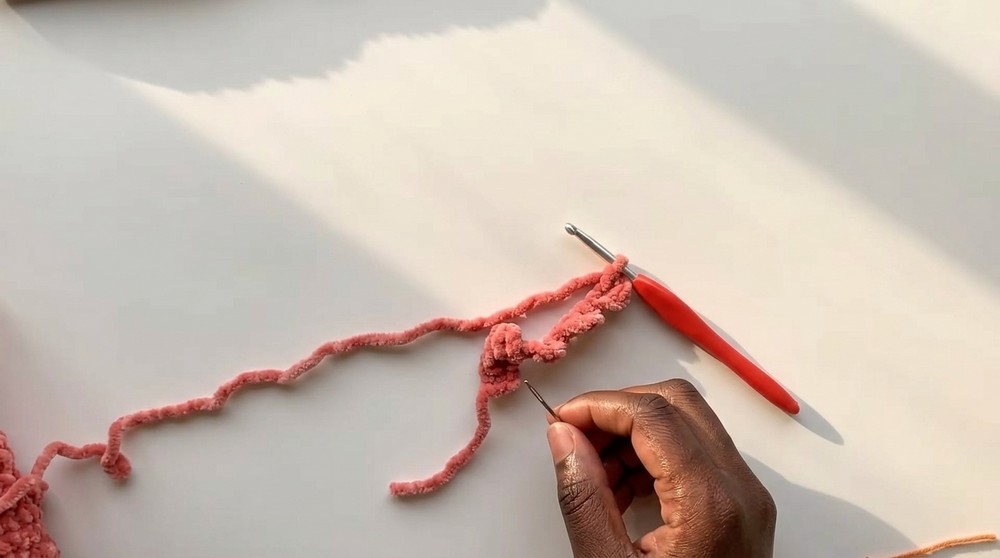
Step 2:
Insert your hook into the middle chain to form a “magic ring”:
- Or use a classic magic ring technique.
Step 3:
Rnd 1: Work 6 sc into the ring. (6 sts)
Step 4:
Mark the end of your round using a contrasting thread or stitch marker.
Step 5:
Rnd 2: Inc in each st around: 2 sc in each st. (12 sts)
6:
Rnd 3: Work [1 sc, inc] around (1 sc in next st, 2 sc in next st; repeat).
(18 sts)
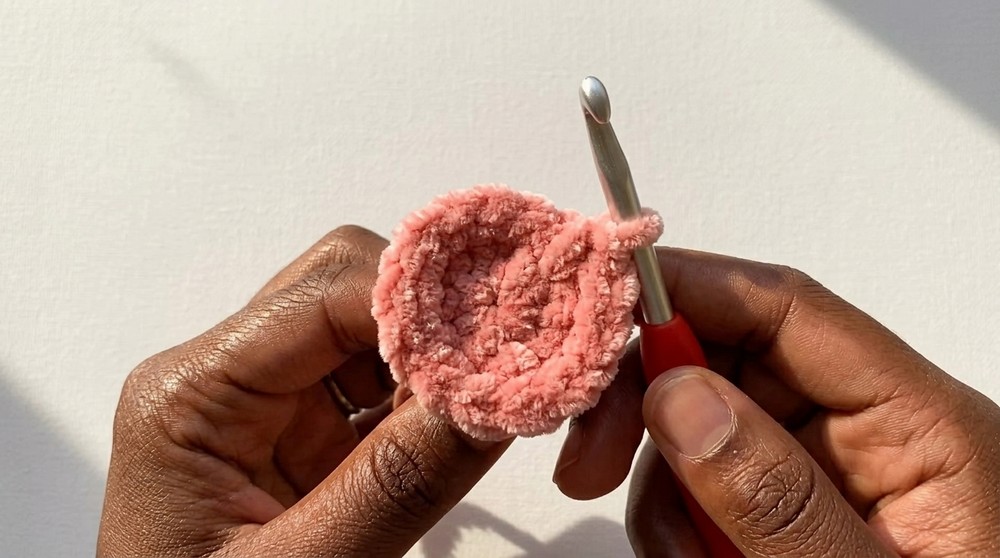
7:
Rnd 4–6: Sc in each st around for 3 rounds. (18 sts each round)
- You should now be at the end of Rnd 6.
8:
Rnd 7:
- Inc in first st (2 sc in same st).
- Sc in next st (1 sc).
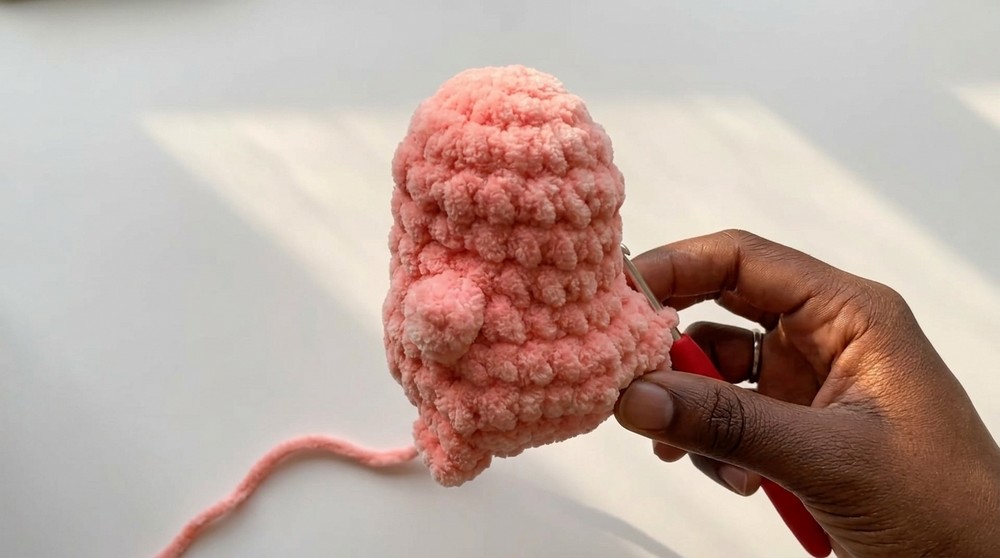
- Repeat: [bobble st, sc] for small arms:
- To make a bobble stitch:
- Yarn over, insert hook into stitch, pull up a loop, yarn over, pull through 2. Repeat this process three times in the same stitch (for a total of 4 loops). Yarn over and pull through all 4 loops on hook.
- To make a bobble stitch:
- Continue alternating increase and bobble stitches to form “little buns” (arms or bumps).
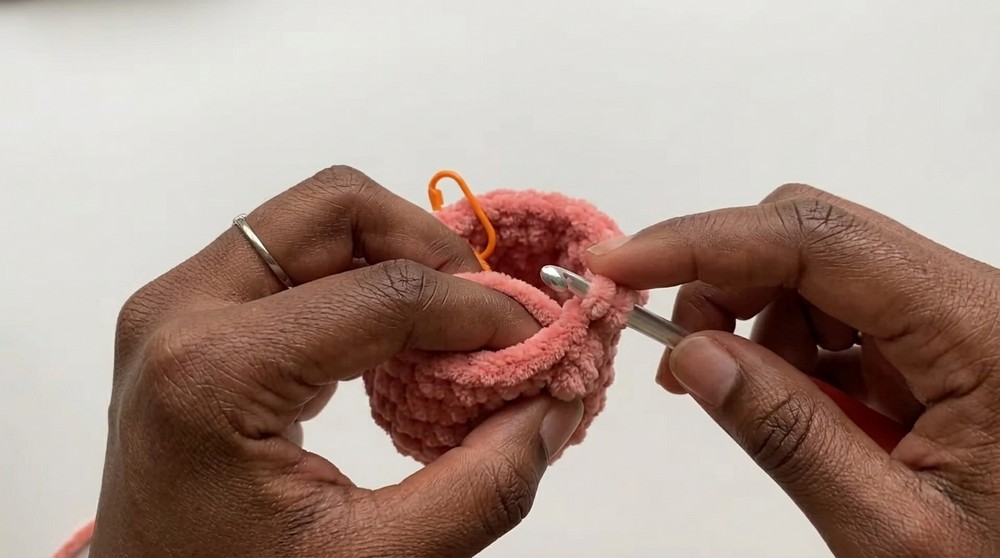
9:
Rnd 8:
Work 14 sc straight. (14 sts)
- Placement for eyes: insert safety eyes between stitches 4–5 stitches apart.
10:
Rnd 9:
Sc in each st around. (20 sts)
11:
Rnd 10:
- Inc 2 times at start ([2 sc in each of next 2 sts]).
- Sc in remaining sts.
12:
Attach safety eyes securely. For added security, slightly melt the back with a lighter if you wish (adult supervision required).
13:
Rnd 11:
- Begin decreases and bobble stitches alternately ([sc, bobble st, dec, sc, bobble st, dec]).
- Repeat the decrease pattern to gently shape the bottom.
14:
Rnd 12:
Work decreases all around to close the body.
- [sc, dec] to end of round.
15:
Stuff body firmly but not excessively.
16:
Continue decreasing until only a few stitches remain; fasten off, leaving a tail for sewing.
- Using crochet hook or yarn needle, weave tail through remaining stitches and pull tight to close.
Tail
17:
With yarn, ch 3.
18:
Insert hook into first chain; pull up and make 4 chains total.
Stp 19:
Repeat chaining and joining to form a flexible tail, up to 7 segments.
Stp 20:
Fasten off, leaving a tail to sew. Pin and sew the tail to the back center of the body.
Final Assembly & Face
- Embroider a small mouth with black yarn under eyes.
- Sew tail, secure arms and feet as bobble stitches if not already included in the rounds.
- Attach keychain hardware (optional).
Conclusion
You have now completed your mini velvet dinosaur! Fast, beginner-friendly, and perfect for gifts or keychains.
Pattern Correction
- Bobble stitch placement may require adjustment for symmetry; reference video for exact locations.
- Double-check safety eyes are secured before closing head.
Tip
For velvet yarn, work slowly and check your tension—loose stitches can cause gaps and stuffing leaks. If eyes are for children’s toys, secure the backs especially well. For the tail and other features, adapt length and thickness as you prefer.