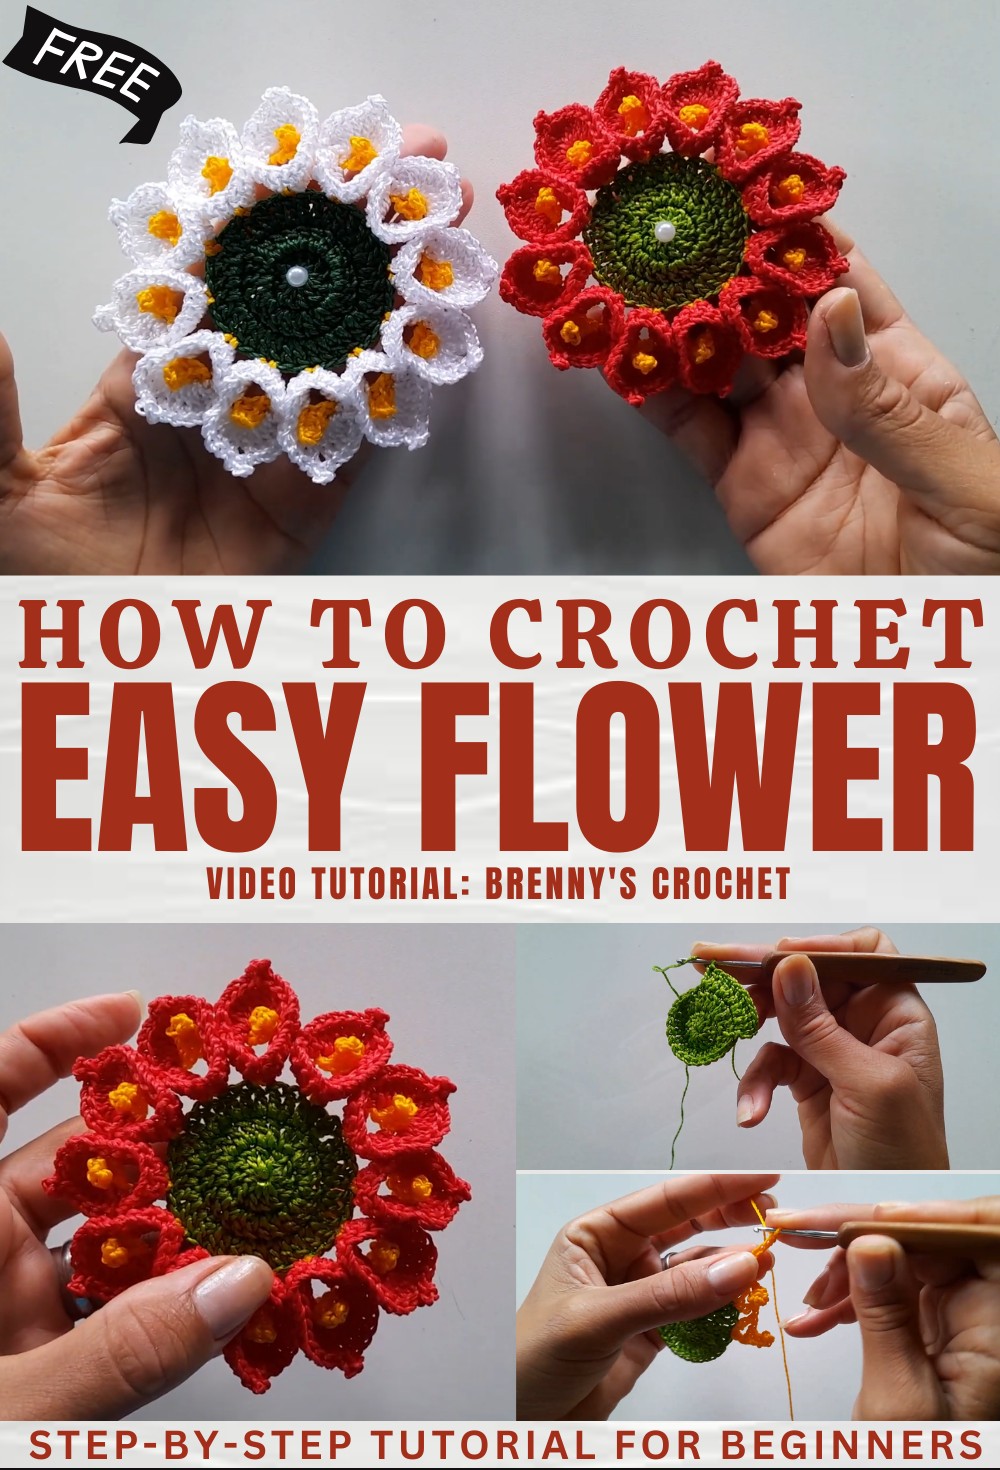
Gorgeous Free Crochet Flower Pattern perfect for accessories
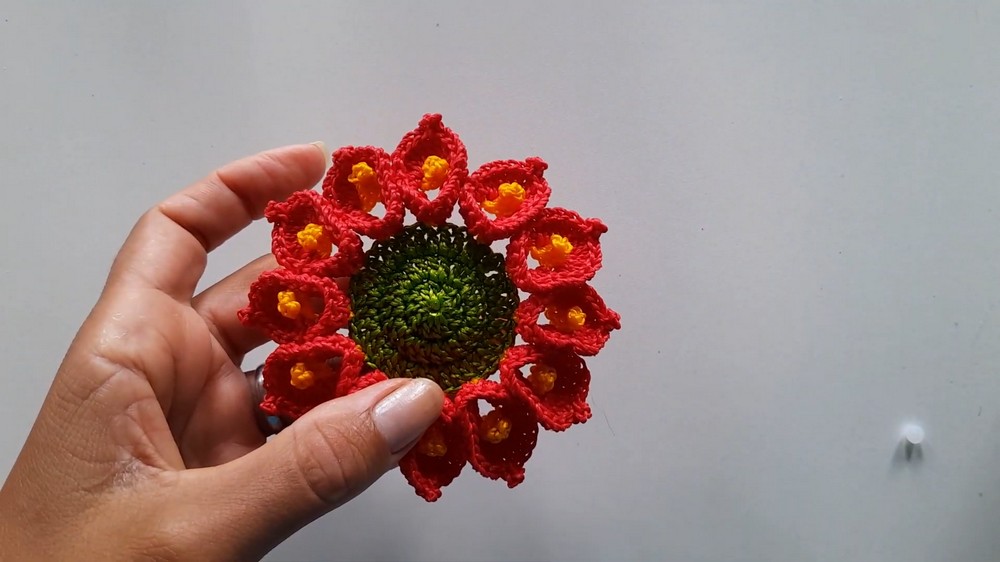
Bring beauty to home decor and accessories with this free crochet flower pattern that is simple vibrant and perfect for gifts decorations.
A tiny loop of yarn forms a beautiful flower, bursting with color and joy. Using a crochet flower pattern, you can make a bright little bloom that is soft to the touch and easy to finish. Choose any color you like for the petals and center, and soon you will have a flower that never wilts or loses its shape. This cheerful addition looks lovely on a shirt, hairband, or your favorite bag.
Tiny Free Crochet Flower Pattern to brighten any project
It can also become a sweet gift for someone special. No fancy tools or advanced skills are required—just some yarn and your hands. Making this flower is simple and fun, bringing a touch of brightness and charm to your everyday life.

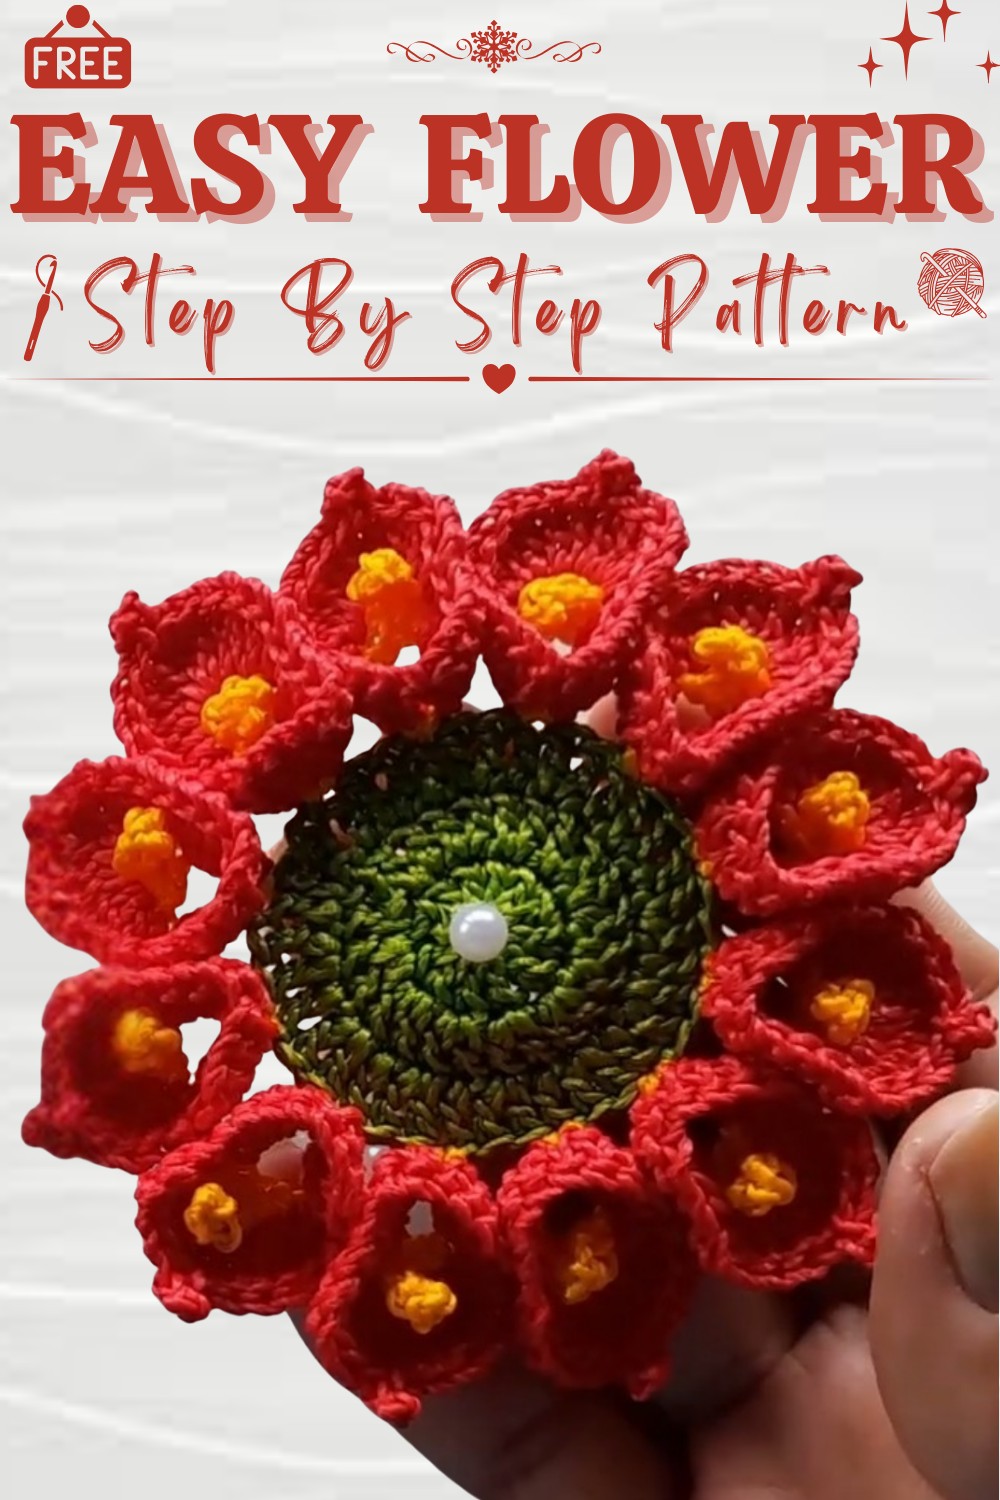
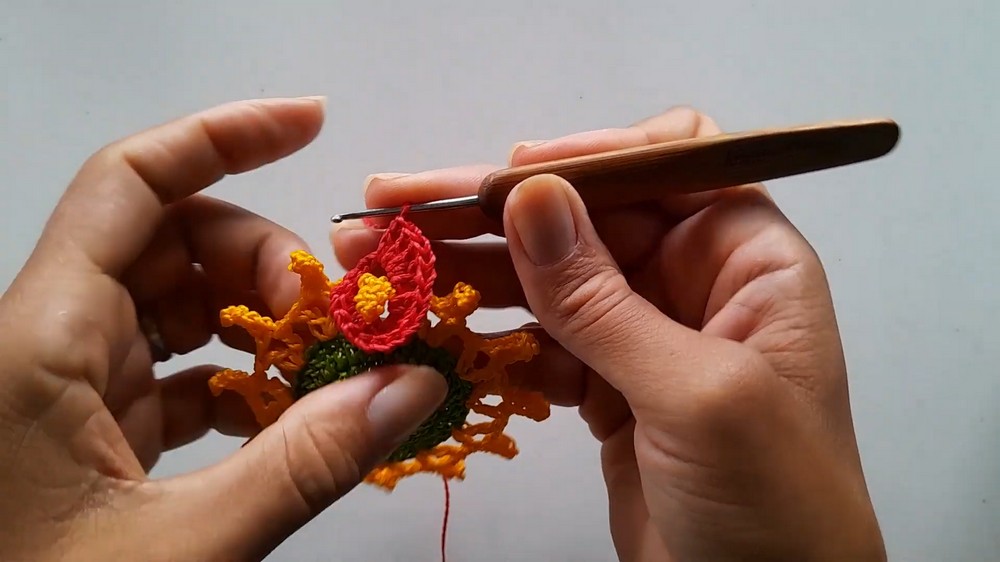
Crochet Large Flower Pattern
Materials
- Yarn: Medium weight cotton yarn in Red, White, Golden Yellow, Green (choose colors as desired for flower, center, and leaves)
- Crochet Hook: Size 1.75 mm
- Scissors
- Tapestry Needle
- Half Pearl Bead (for flower center, optional)
- Silicone Glue (for attaching bead, optional)
Abbreviations (US Terminology)
- ch: chain
- sc: single crochet
- sl st: slip stitch
- dc: double crochet
- beg: beginning
- sp: space
- st(s): stitch(es)
- rep: repeat
Notes
- Pattern is worked in the round.
- The center of the flower uses a magic ring.
- For a neat finish, weave in all ends with a tapestry needle.
- The flower can be used as a doorstop, dish towel holder, or decorative accent.
Pattern Instructions
Flower Center (Base)
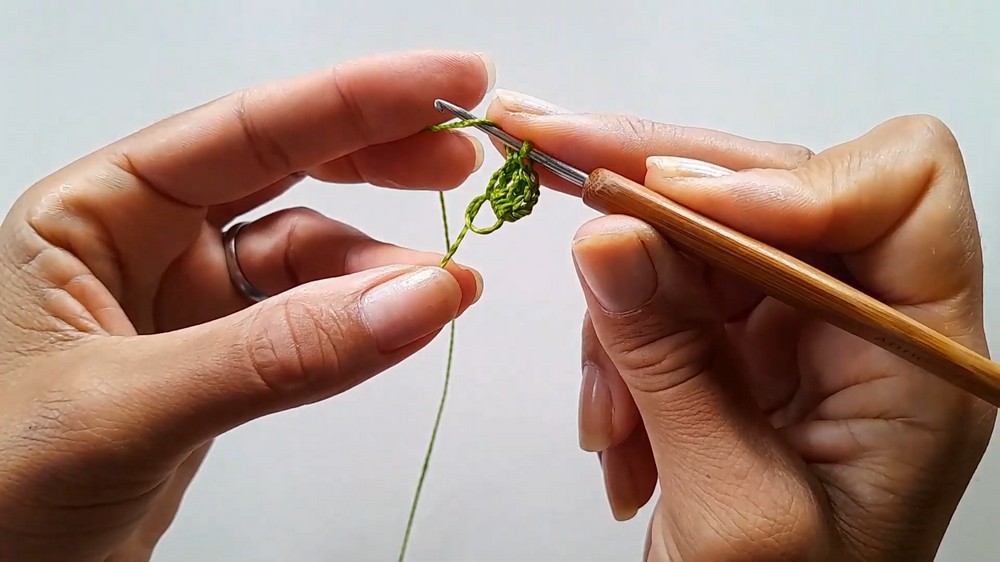
With Green Yarn:
- Magic Ring: Create a magic ring.
- Round 1: Ch 3 (counts as first dc), 11 dc in ring. Join with sl st to top of beg ch-3. (12 dc)
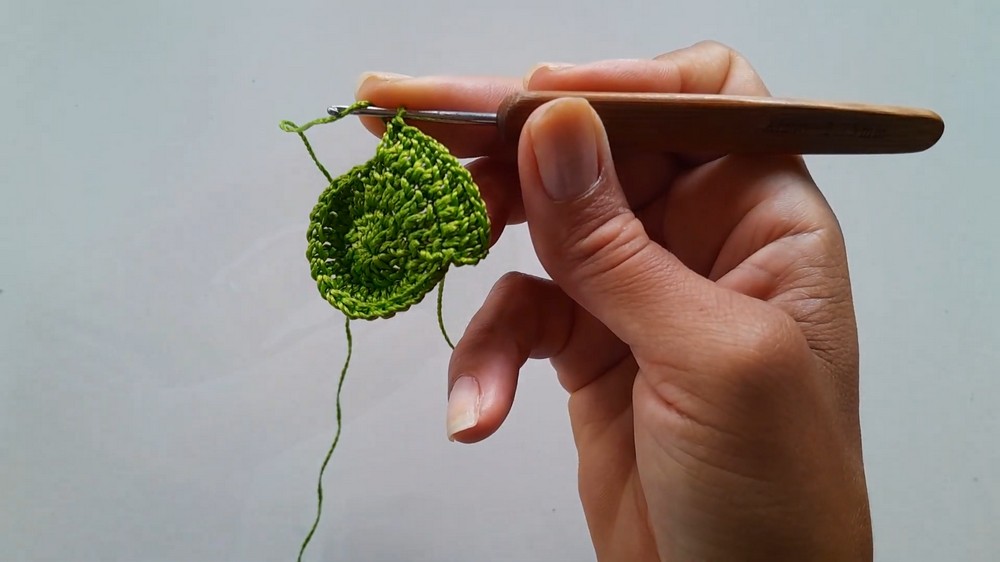
- Round 2: Ch 3, dc in same st, 2 dc in each st around. Join with sl st to top of beg ch-3. (24 dc)
- Round 3: Ch 3, dc in same st, dc in next st, 2 dc in next st; rep from * to * around. Join with sl st to top of beg ch-3. (36 dc)
(This establishes the flower base.)
Petal Rounds
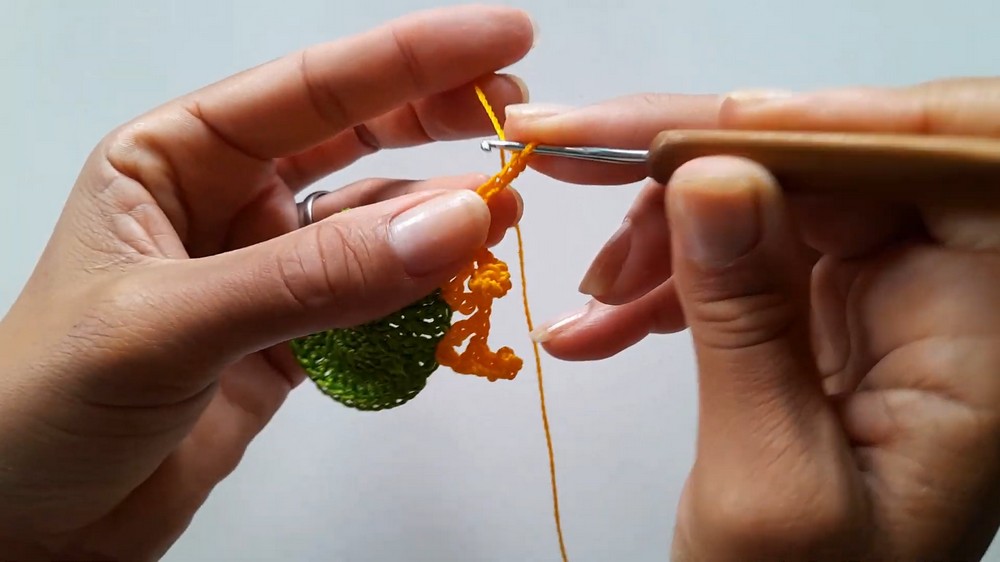
Switch to Golden Yellow Yarn:
- Setup for Petals: Join yarn in any stitch. (For each petal:)
- Ch 8, turn, 4 sc (one in each of next 4 ch), ch 1, turn.
- In same sp at base, work 1 dc.
- Ch 1, skip 2 sts, dc in next st, ch 5, turn.
- 4 sc in ch-5 loop, ch 1, dc in same sp.
- Continue around, forming a loop for each petal.
- At end of round you should have 12 petals.
- Join with sl st to base of first ch-8.
Petal Shaping
Switch to Red Yarn:
- Petal Formation: Join red in any dc at top of yellow petal base.
For each petal:- Ch 5, sl st in same space.
- Side 1: 5 dc in next petal space.
- Sl st at next petal base, Side 2: 5 dc in next petal space (working around the petal).
- Sl st back to base at side.
- Ch 5, sl st in the next petal space to start the next petal.
- Continue around all 12 petals.
- At the top of some petals, ch 3 to create a picot for extra detail.
- After all petals are formed, sl st to beginning to close.
Finishing
- Cut yarn, fasten off, and weave in all yarn ends securely.
- Attach Half Pearl Bead (If using): Use silicone glue to affix the half pearl to the flower center.
Optional:
- For an extra touch, create small green leaves and attach behind the flower, or use the base as a ring to hang the flower as a doorstop or towel holder.
Conclusion
This easy and beautiful flower pattern can be used for many craft projects such as decorative flowers, doorstops, or towel holders. Choose your favorite colors and enjoy making a large, cheerful flower for your home or as a thoughtful gift.
Pattern Correction & Tips
- Correction: Ensure the ch 3 at the start of each dc round counts as a dc.
- Tip: Keep stitches loose for easier petal formation and a softer, larger flower. If your petals curl too much, increase the number of dc on each side for a fuller look.
- Tip: For beginners, mark the beginning of each round to keep track.