Bag Free Crochet Pattern with Sturdy Handles

• Carry your essentials in style by completing this free crochet bag pattern that suits every occasion from beach trips to market runs.
Finding the perfect everyday bag can be a fun challenge. Now you can make your own stylish accessory with this wonderful Free crochet Bag pattern. This item is a beautiful and functional tote bag that you can personalize with your favorite colors. It makes an amazing gift for a friend’s birthday or a special treat for yourself. This fantastic design is shared by the accessory specialist at @marciamagalhaesbags.
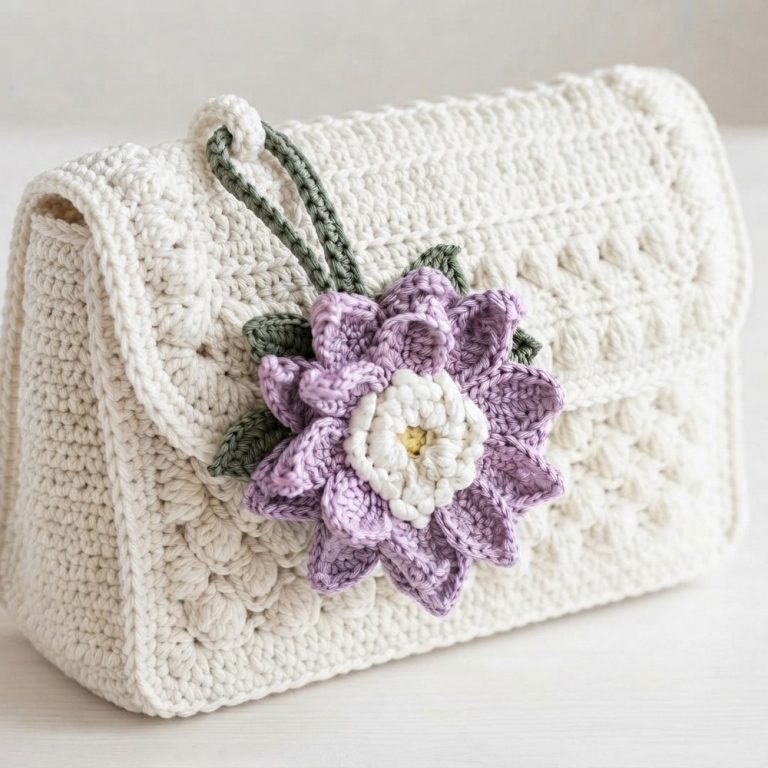
This handbag features an amazing textured body. The entire bag is covered in a beautiful stitch pattern that gives it a woven, geometric look. This rich texture makes the bag look very high-end and luxurious. It has a classic rectangular tote shape and two sturdy, comfortable handles that are the perfect length for carrying over your shoulder or by your side.
Free Crochet Bag Pattern with Classic Shape

The style of this bag is incredibly chic and versatile. Its clean lines and sophisticated pattern allow it to match almost any outfit, from casual jeans and a t-shirt to a more dressed-up look for an afternoon out. The charm comes from its understated elegance; it doesn’t need loud colors or flashy additions to stand out because the quality of the design speaks for itself.

This tote is the perfect companion for so many activities. It’s spacious enough for your daily essentials, like a wallet, phone, keys, and a little makeup. You can take it to the farmer’s market, use it as a book bag for the library, or carry your current yarn project in it. It’s sturdy, practical, and a truly fashionable piece you will be so proud to say you made yourself.
Medium-Sized Crochet Bag Pattern (Approx. 29 cm x 18 cm)
This detailed crochet pattern guides you through making a contemporary and stylish medium-sized bag using nautical cord and a few key notions for a polished finish. The finished bag measures approximately 29 cm wide and 18 cm tall, perfect for everyday use. This step-by-step tutorial covers everything from working the base to shaping the sides, assembling, finishing, and creating a sturdy strap with attached hardware.
Pattern Highlights
- Constructed using 5 mm nautical cord in chestnut color for durability and texture.
- Worked with a 6 mm crochet hook, optimizing tension and stitch size.
- Features a structured base with slip stitches and single crochets creating a firm foundation.
- Includes side shaping via decreases for a tapered silhouette.
- Finished with magnetic button closure for convenience.
- Equipped with a circular strap attached by articulated metal rings for strength and style.
- Utilizes simple assembly techniques including folding, stitching, and edge finishing for a professional look.
Notes
- The nautical cord requires larger hook size (6 mm) to ensure comfortable stitching.
- Leave long yarn tails as indicated to allow for neat lateral stitching.
- Pay special attention to edge slip stitches which frame the bag and maintain structure.
- Decreases in the side shaping add an elegant taper—follow stitch counts carefully.
- The circular strap is worked continuously in the round for even, strong texture.
- Use a lighter to seal cord ends safely and avoid fraying.
- Hardware like articulated rings and magnetic buttons should be securely fastened.
- This project benefits from intermediate crochet skills and basic sewing ability.
Skill Level
Intermediate
Skills required include:
- Chain stitch (ch)
- Slip stitch (sl st)
- Single crochet (sc)
- Decrease stitch techniques (dec)
- Working in rows with turning chains
- Assembly sewing
- Attaching hardware components
Materials
- 5 mm Nautical Cord (Chestnut color recommended)
- Crochet hook: 6 mm
- Two articulated rings (for strap attachment)
- Magnetic button (18 mm diameter)
- Personalized label (optional)
- Lighter (for sealing cord ends)
- Scissors
Measurements / Sizing
- Finished dimensions: Approximately 29 cm (width) x 18 cm (height)
- Strap length: Approximately 40 cm (adjustable)
Gauge and Stitch Pattern
- Stitch tension balanced for a firm fabric that holds shape with slight flexibility.
- Pattern primarily composed of rows of slip stitches framing rows of single crochets for texture and durability.
Stitch Abbreviations
| Abbreviation | Meaning |
|---|---|
| ch | Chain |
| sl st | Slip Stitch |
| sc | Single Crochet |
| dec | Decrease Stitch |
Special Stitches
- Decrease stitch (dec): Worked by crocheting two stitches together to reduce stitch count and shape the bag sides.
- Back loop only (BLO): Working into the back loop of the chain to create a defined ribbed edge (used in base rows).
Detailed Step-by-Step Crochet Pattern
Step 1: Base & Body Construction
- Begin by preparing your yarn: leave a 50 cm tail at the start; this will be used later for lateral stitching.
- Chain (ch) 46 stitches to establish the bag’s width.
- Work base rows into the back loop of the chain for defined edge:
- In each row, work sequentially 5 slip stitches (sl st) as the edge,
- Followed by 36 single crochets (sc) in the middle stitches for structure,
- End with 5 slip stitches (sl st) on the other edge.
- At the end of each row, chain 1 and turn your work.
- Repeat this sequence for a total of 34 rows, maintaining the pattern of edge slip stitches and central single crochet stitches.
- This solids the base and body, establishing a rectangular fabric panel with crisp vertical edges.


Step 2: Shaping the Sides
- For tapering sides, integrate decrease rows while preserving the 5 slip stitches on each edge:
- Decrease Row 1:
- Start with 5 slip stitches as the edge,
- Work 17 single crochet stitches,
- Perform 1 decrease stitch (dec) (join two stitches together),
- Continue with 17 single crochet stitches,
- Finish with 5 slip stitches.
- Decrease Row 2:
- Start with 5 slip stitches,
- Work 16 single crochets (sc),
- Perform *1 decrease stitch (dec) worked over 3 stitches (a more gradual decrease),
- Work 16 single crochet stitches,
- Finish with 5 slip stitches.
- Complete the shaping by working one final row of slip stitches (sl st) evenly across the edge stitches, ensuring a smooth finished side.
- This shaping narrows the fabric neatly, giving the bag its tapered sides.

Step 3: Assembly & Finishing Touches
- Fold the rectangular crochet panel with right sides facing; use the leftover stitch tails to sew the sides together neatly.
- Repeat the side-shaping decrease instructions symmetrically on the second side panel for a uniform shape.
- Once the sides are sewn, sew the magnetic button closure to the center interior of the bag, ensuring alignment for proper closure.
- Optional: Attach a personalized label at your preferred spot on the bag for a custom look.

Step 4: Strap Creation and Attachment
- To make the bag strap:
- Chain 3 stitches, then join into a ring with a slip stitch (sl st).
- Work in a continuous spiral of slip stitches (sl st) into the back loop only (BLO) of every stitch.
- Continue this spiral until the strap measures approximately 40 cm (or desired length).
- Fasten off and weave in yarn ends securely.
- Attach the strap ends to the bag using the two articulated metal rings for durable and elegant hardware support.
- Use a lighter carefully to melt and seal cord ends, preventing fraying for longevity.


Assembly & Finished Size
- The finished bag measures roughly 29 cm wide and 18 cm tall — medium size ideal for casual or formal occasions.
- The circular strap, attached with metal rings, measures about 40 cm to rest comfortably on your shoulder.
- Magnetic button provides easy closure without bulk.
- The firm stitch pattern provides structure while the tapered sides create a pleasing shape.

Conclusion
This medium-sized crochet bag pattern offers a balanced combination of texture, structure, and practicality. Working with nautical cord and a 6 mm hook, this project creates a tough yet elegant bag ideal for everyday use or gifting. The detailed shaping and finishing steps, including side decreases and a secure circular strap with metal rings, ensure a polished final product. Whether you’re an experienced crocheter or looking to expand your skills, this pattern guides you through achieving professional results while enjoying the creative process.