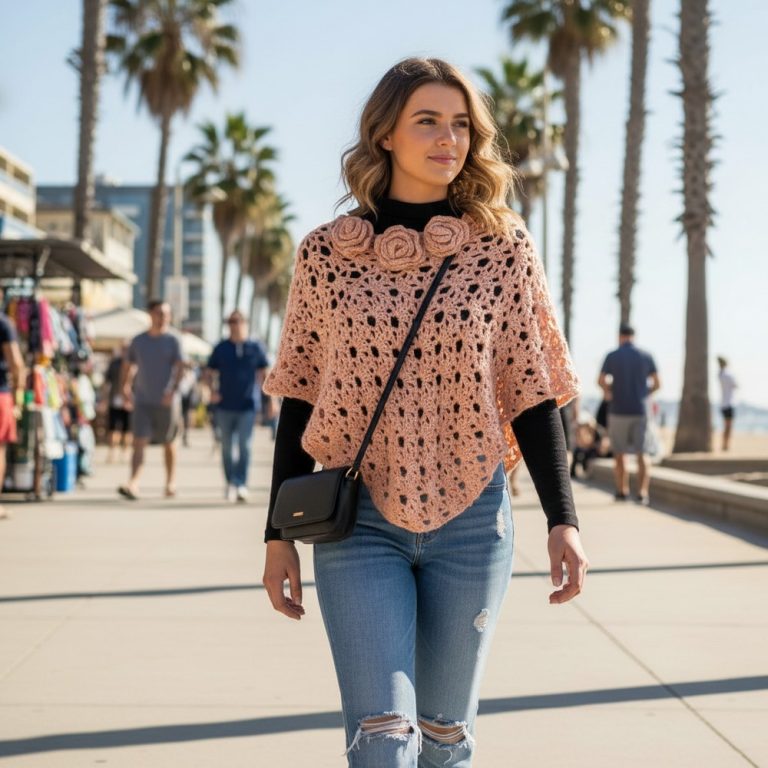
Comfy Free Crochet Poncho Pattern to Snuggle Up In

Warm up effortlessly with this Free Crochet Poncho Pattern that helps you look stylish, elegant and feel cozy on any day indoors or outdoors.
A lovely wrap sits nicely over your clothes bringing warmth and a touch of beauty wherever you go. Bright shades and pretty patterns make every piece stand out and can turn even simple outfits into something special. With a crochet poncho pattern you can create clothing that shows favorite colors and creative styles. Some designs have open spaces that let air flow while others are made to keep you extra warm on chilly days.
Free Crochet Poncho Pattern with a Modern Twist

It slides easily over your head so there is no need for buttons or zippers. Perfect for walking outdoors or relaxing at home each piece offers comfort in an easy way. Combining fashion and function a crochet poncho pattern helps you make something unique that always gets noticed.

Crochet Mesh Stitch Poncho Step-by-Step Pattern
Materials List
- Yarn: Rayon bamboo or similar DK/#3 weight yarn
- Hook: 4 mm crochet hook
- Notions: Scissors, measuring tape, [optional: stitch markers]
Key Abbreviations
| Abbreviation | Meaning |
|---|---|
| ch | Chain |
| dc | Double Crochet |
| sl st | Slip Stitch |
| st(s) | Stitch(es) |
| rep | Repeat |
Special Notes
- This pattern is made to measure, customizable for any size and length.
- The mesh stitch is: dc, ch 1, skip one st, dc in next st.
- Increase points are placed at two points opposite each other around your neck chain.
- Pattern is joined and worked in rounds, turning after every round.
- Each round is joined with a sl st, begins with ch 3 (counts as dc, ch 1), and is turned before continuing.
Pattern Instructions
1. Foundation Chain & Setup
- Make a slip knot.
- Ch an odd number of stitches to your desired neck opening size.
- Example: Ch 137 for a 33″ neckline (adjust for fit).
- Ensure your foundation chain is not twisted.
- Sl st to first chain to form a ring.

2. First Round
- Ch 3 (counts as your first dc, ch 1).
- Skip next ch, dc in next ch.
- Repeat:
- Ch 1, skip 1 ch, dc in next ch
- Continue around.
- At end of round, ch 1, sl st to the 2nd chain of starting ch-3.
- Check for twists.

3. Marking Increases
- Count the number of “mesh boxes” (each dc-ch1 forms a box).
- Divide the total boxes in half.
- Place stitch markers at the two points directly across from each other (e.g., after 34 boxes and after the next 34 if 68 boxes).
- If you have an odd number, put the extra box at the front.
4. Row 2 (and All Subsequent Rounds With Increases)
- Ch 3 (counts as dc, ch 1), turn.
- Mesh stitch (dc in each dc, with ch 1 spacing):
- Skip a ch, dc in top of next dc, ch 1; continue until a stitch marker.
- At marker:
- (Dc, ch 1, dc, ch 1) into marked stitch (increase made).
- Replace stitch marker in between these two dc.
- Continue mesh stitch pattern to next marker; repeat increase there.
- Finish round; sl st to 2nd ch of starting ch-3.
- Continue to check stitch counts and adjust marker positions as needed (always in the midpoint of each increase).

5. Row 3 and Beyond (Body of Poncho)
- Ch 3, turn.
- Dc in dc, ch 1, repeat mesh pattern around.
- At each increase space (marked):
- Dc, ch 1, dc, ch 1 in that space.
- Mark between increases so you know where to increase next round.
- Continue pattern, always increasing at marked spots.
- Try on your poncho as you go.
- For a standard length (hip/waist): ~31 rows (can be more or less to your preference).

6. Finishing
- Once desired length is achieved, fasten off:
- Complete final round as normal.
- Sl st to join.
- Ch 1 and pull yarn through, leaving a tail.
- Weave in all ends with a yarn needle.

7. Tassels (Optional, Recommended!)
- Cut yarn lengths (about 7″ each).
- Use a 3.5″ object to wrap yarn, cut both ends.
- For each dc at the poncho edge:
- Insert hook into the bottom of a dc, grab a tassel (several strands together folded in half), pull loop through dc.
- Pull yarn ends through loop to form fringe.
- Repeat for each dc around poncho edge.

Conclusion
This easy, customizable mesh stitch poncho is breezy, modern, and wearable in a variety of styles (off-the-shoulder, classic point front, or wide boat-neck). The pattern is size-inclusive and beginner friendly, relying on basic stitches and marker placement. Add tassels for a trendy finish!
Pattern Corrections & Tips
- Stitch Markers: Always move markers to the center of the increases with each round for symmetrical shaping.
- Chain Length: Double-check by wrapping chain around your neck before joining.
- Twist: Avoid when joining foundation chain.
- Turning: Turn your work at the start of every round for a neat edge pattern.
- Try On: The poncho’s modular shape allows you to try it on before finishing to adjust length or fit.
- Tassel Uniformity: Use a ruler or book for consistent tassel lengths.