Compact Crochet Bag Pattern For Brighten Up Any Look

Update your summer wardrobe with this free crochet bag pattern that allows you to make a light and airy tote for trips to the beach or park.

Practical Crochet Bag Ready for All Your Essentials
The overall silhouette feels timeless, pairing well with modern wardrobes as well as classic styles. Beyond appearance, this pattern supports organization and convenience, keeping items secure without sacrificing elegance. Each element works together to produce a bag that feels polished yet approachable, blending artistic detail with everyday usefulness in a way that enhances both style and confidence.
Special Features
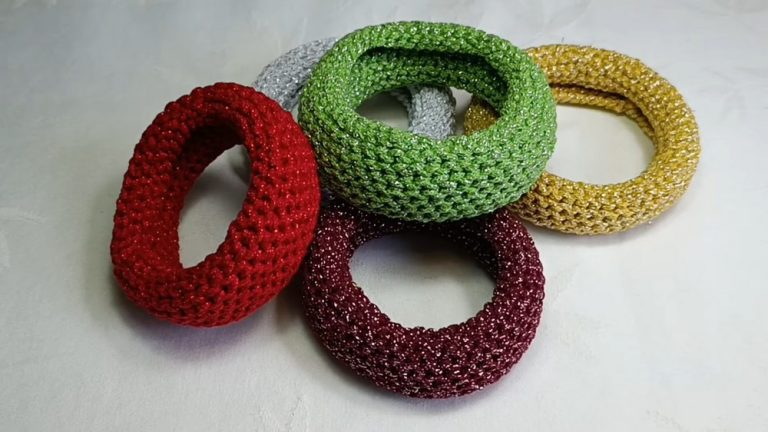
- Eye-catching metallic thread (Euroroma Brilho) for glamorous sparkle.
- Structured, round shape with dense stitches for sturdiness.
- Secure, professional finish using a clasp, snap or button.
- Wide, comfortable, detachable strap (with lobster clips).
- Cute openings and details for hardware.
- Easily adjustable size: make yours bigger or smaller as you wish!
Level of Difficulty
Advanced Beginner / Easy Intermediate
- You’ll use basic stitches (double crochet, front post double crochet, single crochet) and need to work increases and neat, even joins.
- Ideal if you’ve made bags or hats before, but adventurous beginners can follow with care.
Tutor’s Suggestions
- Use robust, structured yarns to keep your bag firm.
- Feel free to mix metallics or add a contrasting border.
- Mark rounds and stitch counts—symmetry keeps this piece looking neat.
- Try your bag on as you go (or compare with a favorite) to check strap length.
Uses
- New Year’s Eve party bag
- Stylish crossbody for nights out
- Gift idea for friends/family
Materials
- Yarn: Metallic string/yarn (Euroroma Brilho, ~340g)
- Hooks: 3.5 mm (mainly) and sewing/yarn needle (finishing)
- Clasp: Push-lock, snap, or decorative button (with hardware)
- 2 metallic rings or lobster clasps (for detachable strap, optional)
- Scissors, stitch markers, measuring tape
- Optional: Other colored yarn for detail
The Pattern
1. Make the Two Bag Bases (Make 2 panels)
Start:
- Magic ring.
- Ch 2 (acts as first dc); work 15 dc into the ring (counts as 16 incl. chains).
- Sl st into top of beginning ch to join. Tighten loop to close center.

Round 2:
- For each dc from previous round: alternate front post double crochet (fpdc) around post of dc and 1 dc into space between stitches.
- Continue all the way around.
- Close w/sl st into top of beginning chain.
Round 3:
- Begin with fpdc as before: bring up a loop in the first stitch, ch 1, then ch 1 more for height.
- For each space between fpdc, make 2 dc into same space; fpdc around each fpdc.
- Continue: [fpdc, 2 dc in next space] around.
- Sl st to join round.

4 (and onwards):
- Start each round w: [Front post sc in fpdc, ch 1 for height, ch 1 for separation].
- For each chain space, work 2 or more dc (number of dc increases by round—see below). Continue:
- In each “space,” place two or more dc (as instructed below)
- Around fpdc, work a new fpdc each time; ch 1 between fans/sections.
- With each new round, increase the number of dc fans in each chain space (as follows):
Round Number of DC Between FPDCs 1 1 2 2 3 3 4 3 5 4 6 5 - Continue until your circles are your desired width (sample is 24–26 cm diameter, approx. 8 rounds).
Final Round:
- Work 1 sc in every dc and in every fpdc, including 1 sc in each chain space.
- Fasten off first piece completely; on the second, do NOT cut yarn.

2. Join the Two Bases
- Mark 5 fpdc “ridges” on each circle for alignment.
- Place circles together, wrong sides touching, so ridges line up.
- At the marked “joining” spots (on 4th or 5th fpdc from top), begin joining:
Side/Gusset Procedure (“Accordion” band):
- Ch 12; sl st to matching spot on other base. Turn.
- Return along ch with 3 sl st, 6 sc, 3 sl st (11 sts back). Sl st to next st in circle edge.
- Repeat: [Turn, 3 sl st, 6 sc, 3 sl st in BLO, sl st join to next st in base] — work across marked join section.
- Repeat for each gusset section until all marked join sections are completed.
3. Create Handle Attachment Loops
- In the gusset/joining section, leave or make two 2-ch spaces (top left/right) for rings/lobster clasps.
- On other side, do the same.
4. Outline Bag Edges
- Work a round of sc along entire oval opening (front, back, both sides), making 1 sc in each st, and placing 2 ch for each strap opening you want.
- Work back-and-forth on top edge for extra strength.
- End with a seamless invisible join (yarn needle).
5. Make the Strap
- With 5 sc, make a “strip” in back loop only (for a ribbed effect), long enough for a comfy crossbody fit (typically 1 m).
- Attach clasp/rings as you work final few rows on both ends (work last row through hardware).
- Fasten off, weave in ends.
6. Sew/Hanrdware Attachment (Clasp/Closure)
- Make a rectangle from the center upper part using rows of dc to fit your clasp/closure hardware:
- Attach in the center (either sewing or with the screws of your push-lock).
- For a button, create a buttonhole with ch spaces.
- For a snap or push lock, follow hardware instructions for proper fit.

7. Finishing
- Stitch in place hardware tabs if needed.
- Weave in all ends and block lightly if needed.
- Add any desired labels, tassels, or charms.
TIP
For a pro look: When working the side/gusset join (the band connecting your two circles), always pick up the back loop only and keep stitches loose to maintain shape and flexibility.
Conclusion
You’ve now made a glamorous, sturdy, and beautiful bag—perfect for New Year’s Eve or any sparkling occasion! Adjust size, color, or adding details to personalize your piece. Enjoy, show it off, and have a fantastic celebration.