Polished Crochet Top Down Pattern for Everyday Wear

Move in comfort and style with this Free Crochet Top Down Pattern that’s for soft and cozy feel, flattering fit and elegant everyday wear.
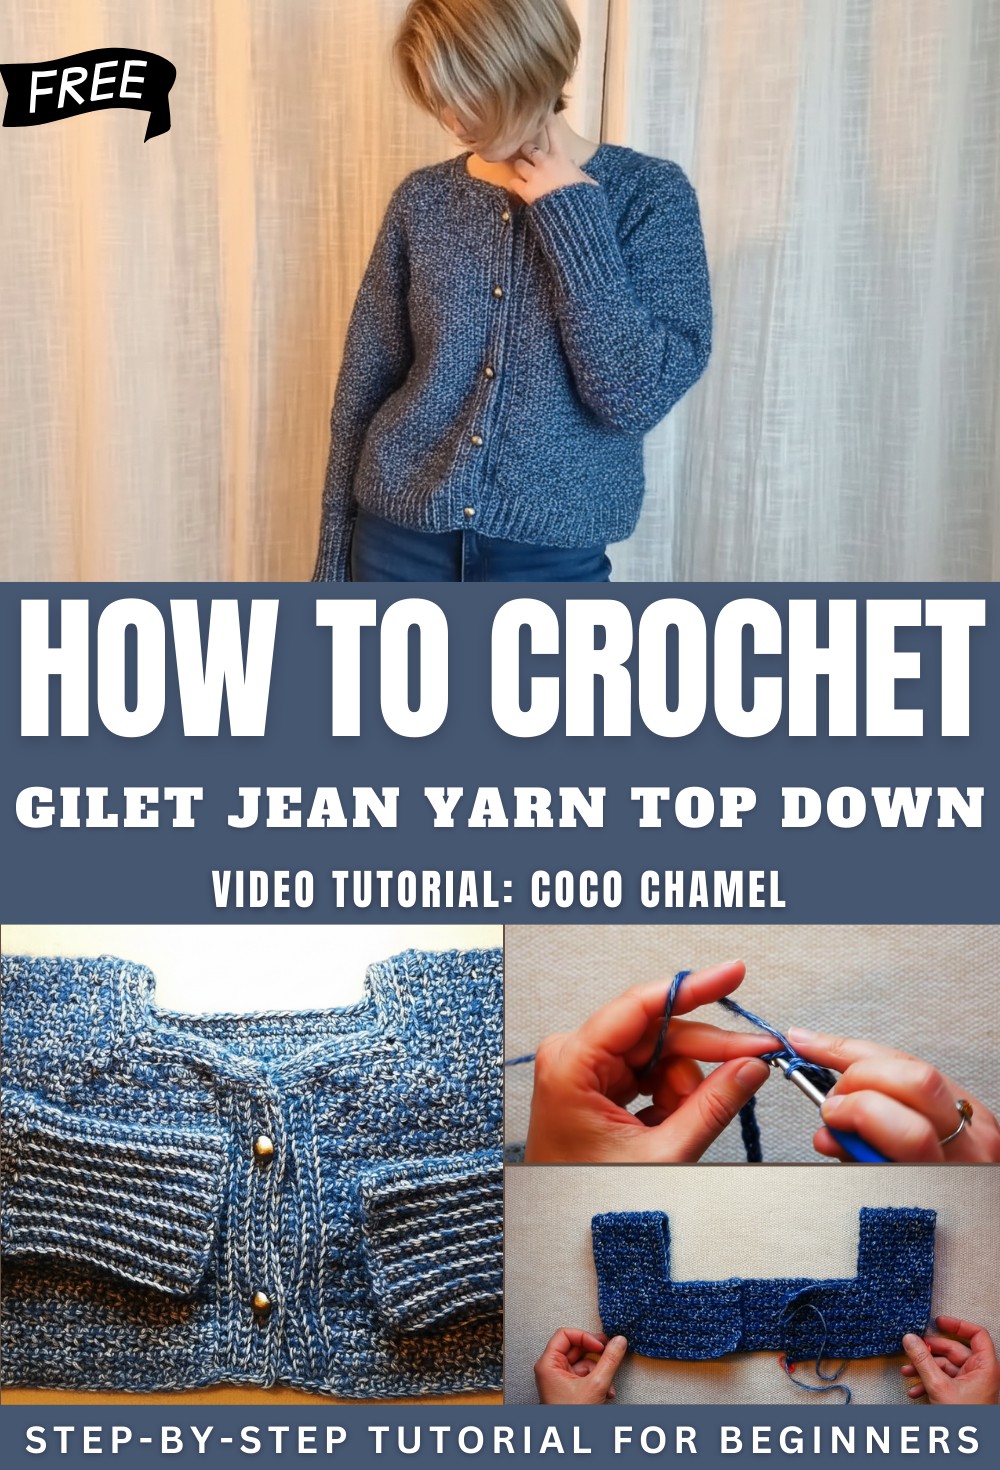
Flowy Crochet Top Down Pattern That Moves with You
Upgrade your wardrobe with a versatile garment that effortlessly combines style and comfort. Designed to offer a flattering fit and smooth drape, this piece adapts gracefully to different body shapes while remaining lightweight and breathable for year-round wear. The Crochet Top Down Pattern features a seamless construction that begins at the neckline and flows naturally toward the hem, allowing easy adjustments in both length and size. The carefully designed stitches and graceful shaping give it a chic, sophisticated appearance that complements everything from relaxed everyday wear to more polished ensembles.
Perfect for layering or wearing solo, this pattern showcases the beauty of crochet while offering practical advantages, including easy construction and minimal finishing. Adding a timeless piece to your wardrobe or crocheting a thoughtful handmade gift, this design blends elegance, practicality, and versatility, appealing to both beginners and experienced makers alike.
Special Features
- Top-down, seamless yoke construction: adapt length and width as you go
- Subtle textured stitch: alternating front and back loop single crochet for a denim look
- Button band and ribbed edges: for modern, clean finishing
- Custom fit: pause to try on as you go, easily adjust body or sleeve length
- No seaming at the yoke: only minimal sewing for buttons and ribbing at the end
Level of Difficulty
Confident Beginner / Advanced Beginner
If you are comfortable with single crochet, front/back loop work, simple decreasing, and working in the round, you can master this project!
Tutor’s Suggestions
- Place markers at all corners for crisp increases and clear shaping.
- Count stitches faithfully; note stitch numbers for sleeves and decreases for symmetry and a neat finish.
- When making the sleeves, write down your decrease placement and number for the second sleeve.
- Use a finer hook for the ribbing or bands to avoid flaring.
Uses
- A perfect light layering vest for transitional seasons
- Works as a casual office or everyday piece
- Easy gift project—adapt any size!
Materials
- Yarn: Ziman’s Tap Brush (100g/230m, 80% cotton, 15% acrylic, 5% wool) or similar DK/light worsted weight
- Hooks: 5 mm (main body), 4.5 mm (ribbing), 4 mm (button band, collar)
- Yarn/tapestry needle & scissors
- Lots of stitch markers
- Buttons (5–6, according to personal preference)
- Measuring tape
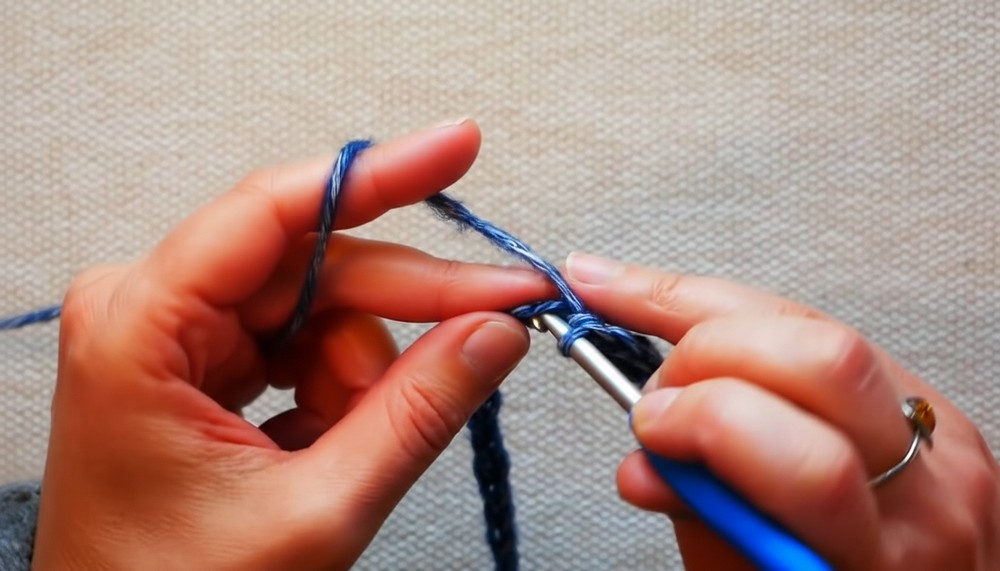
Step-by-Step Pattern
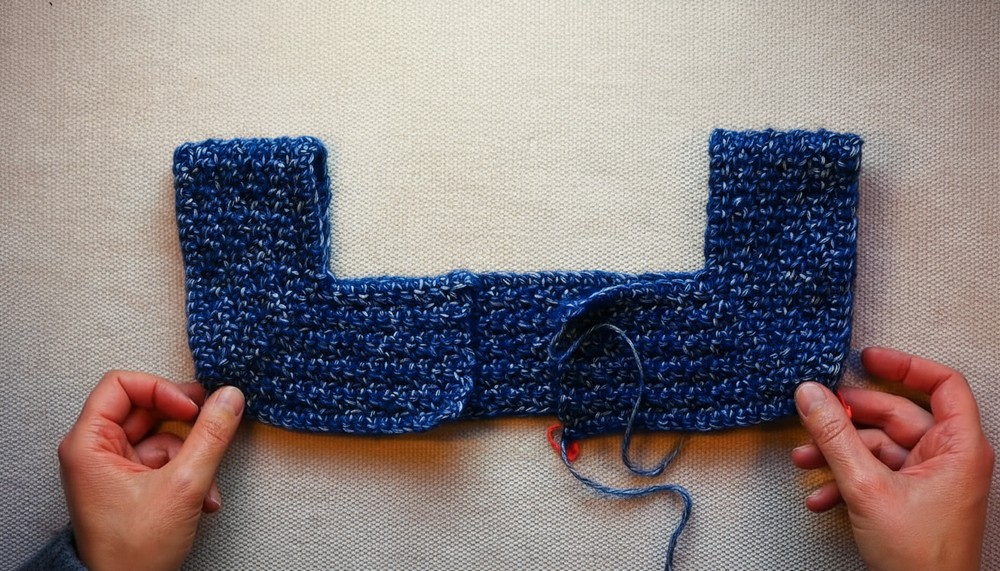
1. Yoke Foundation – Top Down
With 5 mm hook:
- Ch 90.
- Row 1:
- Sc in 2nd ch from hook and in next 9 ch (10 sc).
- 3 sc in next ch (mark center sc for corner),
- Sc in next 20,
- 3 sc in next ch (mark center for corner),
- Sc in next 26,
- 3 sc in next ch (mark center for corner),
- Sc in next 20,
- 3 sc in next ch (mark center for corner),
- Sc in last 10. (Double-check sections: Front – 10, Side – 20, Back – 26, Side – 20, Front – 10)
- Ch 1, turn.
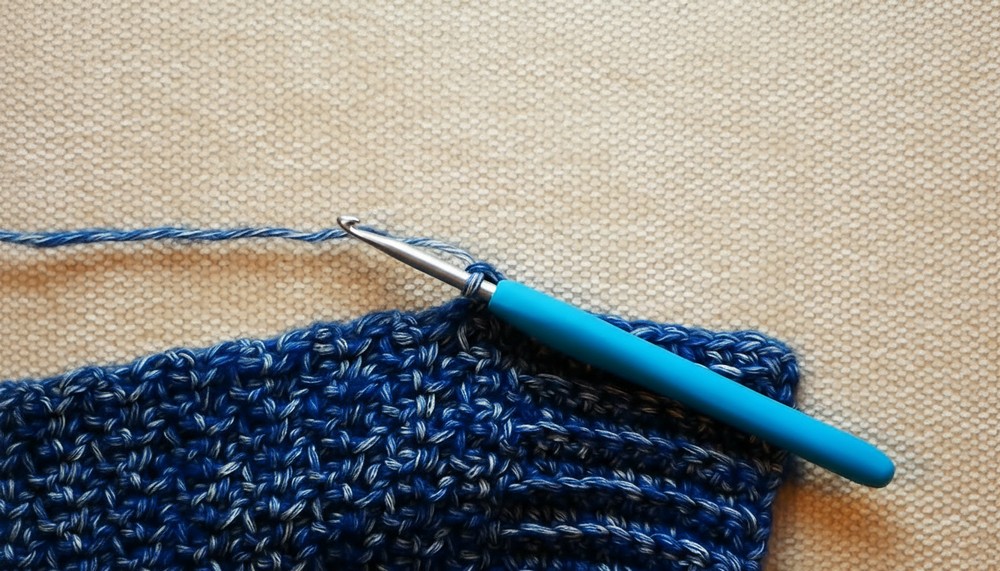
2. Yoke Shaping (Increase Rows)
- Work in rows (not joined).
- Work alternating single crochets: 1 in back loop, 1 in front loop.
- (Tip: Start with back loop on each row.)
- In each corner marked st: 3 sc (place marker in new center sc).
- Repeat: Work each row, maintaining alternation, placing 3 sc at each marked corner every time. Move markers up to new center st.
- Repeat until yoke depth fits from neckline to underarm (on average, around 18–22 rows, but try on; for most, a 20 cm armhole opening is sufficient).
- End with a WS (wrong side) row.
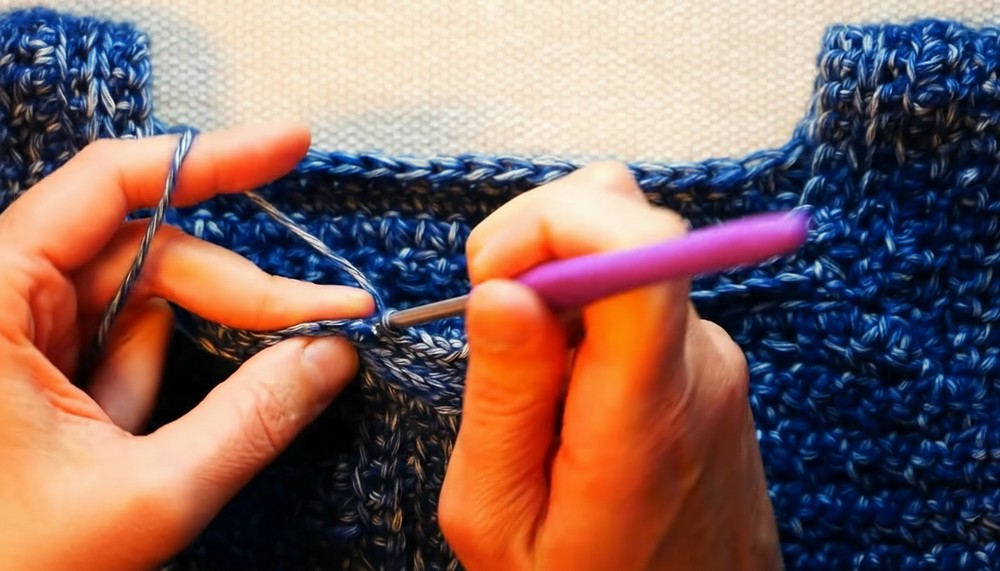
3. Body Separation (Join Armholes)
- On next RS row:
- Continue until first corner marker, then sc together into both front and back body at underarm (joining front and back at armhole; see transcript for cheat/fix if stitch pattern doesn’t align perfectly).
- Repeat for each armhole.
- Continue to end of the row. Ch 1, turn.
- Resume working in rows, following established pattern (front/back loop alternation).
4. Main Body
- Continue pattern (alternating single crochet, no increases), making the vest as long as you wish (recommend 40–45 cm from join; try on or measure favorite garment).
- You can work until just below the hip for a standard vest length, or adjust per your style.
5. Bottom Ribbing / Elastic Stitch
- Switch to 4.5 mm hook.
- Attach yarn to bottom corner.
- Ch 10 (or to desired rib depth).
- Foundation: Sc in 2nd ch from hook and across (10 sc).
- Ribbing Row:
- Sl st in next 2 body sts, turn;
- Working back up the rib, sc in back loop only (except last st, both loops).
- Ch 1, turn, sc in both loops of first st, then back loop only to end (10 sc).
- Continue: Sl st in next 2 body sts, repeat ribbing row.
- Continue along the bottom edge.
- To finish: work last row, then sl st short ends together to join.
6. Front Bands and Button Bands
- With 4 mm hook, join yarn at lower hem edge (RS facing).
- Work 1 row sc up along the edge, picking up about 59 sc (count to match both sides).
- Border rows:
- Row 1: Start with regular sc (both loops at start/end), then sc in front loop only for a purl ridge look.
- Row 2: On RS, sc in back loop only.
- Row 3: Repeat as established (front/back loop alternation).
- For button band: Sew buttons on one side, before placing button holes on the other.
- Buttonhole band:
- Place markers for buttonholes (determine locations to match buttons).
- In each buttonhole, work “sc, [ch 1 or 2 depending on button size], skip 1 or 2 sts, sc in next.”
- Next row: sc in each st and ch-sp (work across as plain sc).
- Finish both bands with a row of slip stitches (RS).
7. Collar
- Place markers at all neckline corners.
- With 4 mm hook, sc evenly around collar, working decreases at markers (sc3tog at each corner for shaping).
- Work collar rows:
- Continue in front/back loop sc for 3–4 rows (or to desired width), making decreases at markers as before.
- Finish with a RS row of slip stitch in each st (both loops).
8. Sleeves
- With 5 mm hook, join yarn at underarm, working into real stitch (not join).
- Round 1: Work in established pattern (front/back loop alternation) evenly around (aim for even number of stitches, e.g., 68). Join with slip st, ch 1, turn.
- Round 2 and beyond: Continue as established, alternating front/back loop sc, counting stitches every round for consistency (especially after decreases).
- Shaping:
- For a tapered look, decrease occasionally by sc3tog (3-st decrease) over three front-loop or back-loop sts, placing a marker for later reference.
- Space decreases irregularly for natural shaping; write down each decrease/marker position for sleeve matching.
- Continue sleeve to desired length, ending with a decrease round if needed for a snug cuff.
9. Sleeve Ribbing
- With 4.5 mm hook, at sleeve edge:
- Ch 20 (or desired depth), sc in 2nd ch from hook and across.
- Sl st in next 2 sleeve sts, turn, sc in back loop only to end, last st both loops.
- Ch 1, turn, sc in both loops, rest in back loop only.
- Continue till end; join ribbing into a ring at the cuff with slip/lined-up slip stitches.
10. Finishing
- Sew buttons on marked side.
- Weave in all ends.
- Block delicately for best drape and edges.
Tip
Use plenty of markers and write everything down! This top-down vest is easily adjustable, but keeping track of increases, decreases, and special stitch placements with markers and notes ensures both symmetry and sanity—especially when making the second sleeve or band.
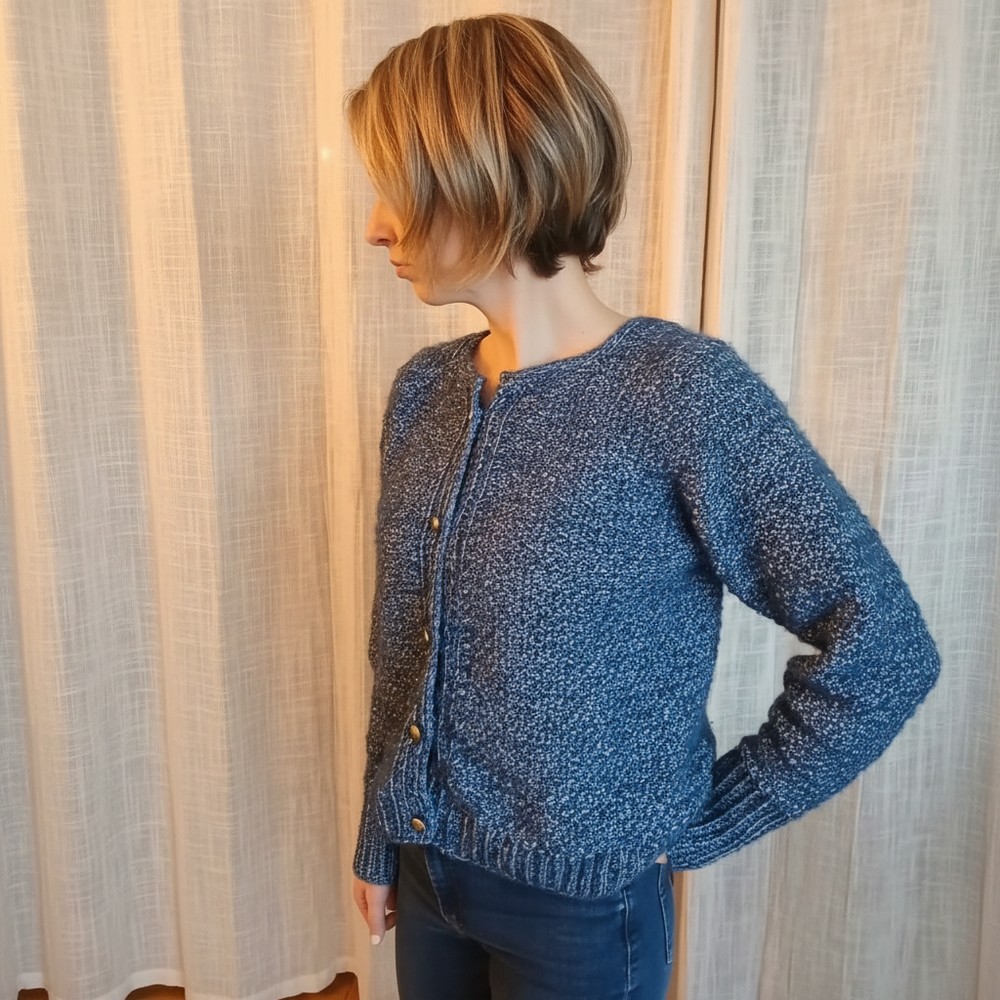
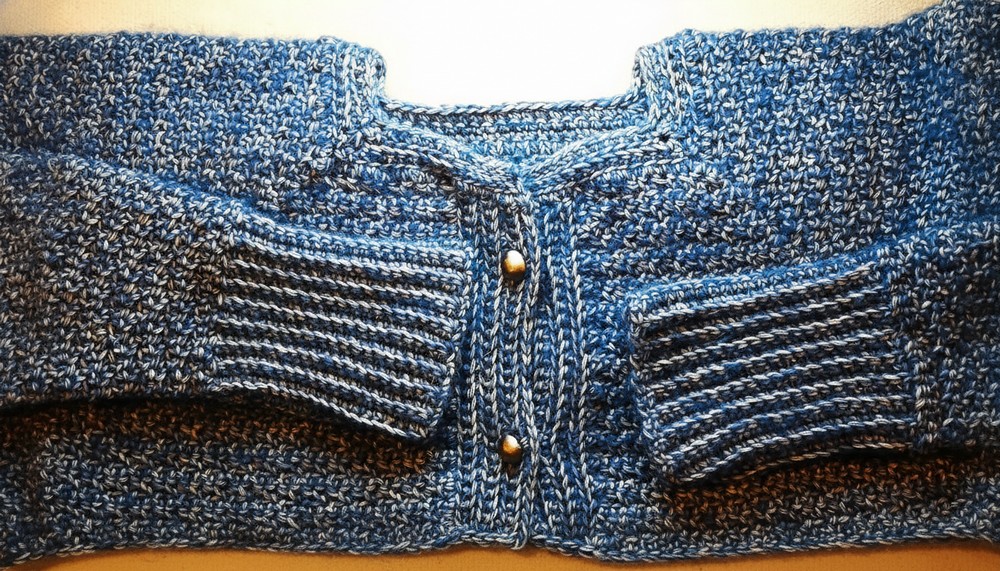
Conclusion
Your top-down, denim-inspired vest is complete! With its chic stitch detail, truly custom sizing, and practical touches, it’s bound to become a staple piece. Layer it over tees or shirts for all-season style, or use it as a base for creative color and button play in future projects. Enjoy your accomplishment and happy crocheting.