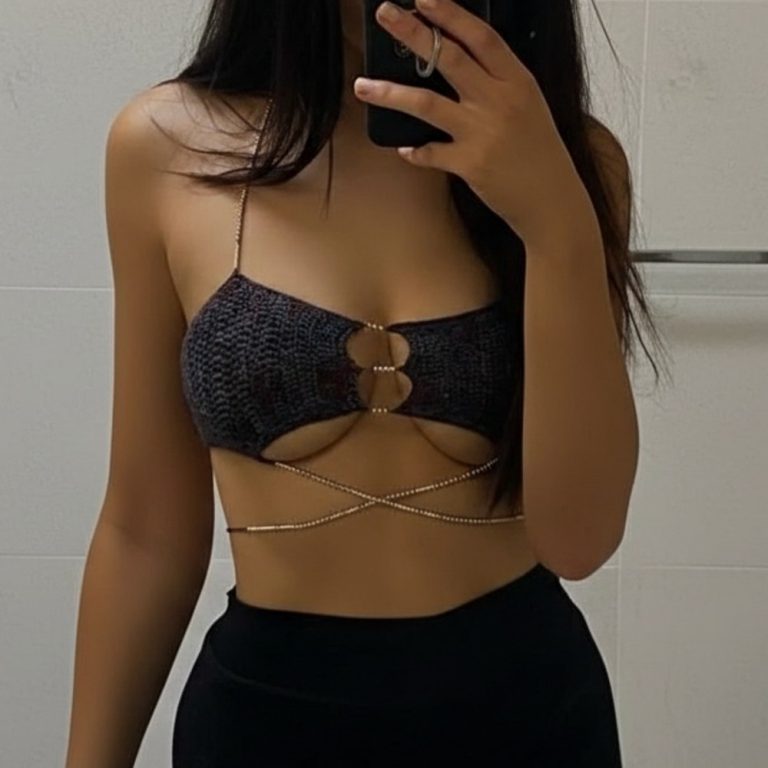
Confident Crochet Crop Top Pattern Ready for Sunshine

Boost your wardrobe with this Free Crochet Crop Top Pattern that’s delivering a flattering fit, breezy comfort, and a confident modern vibe.
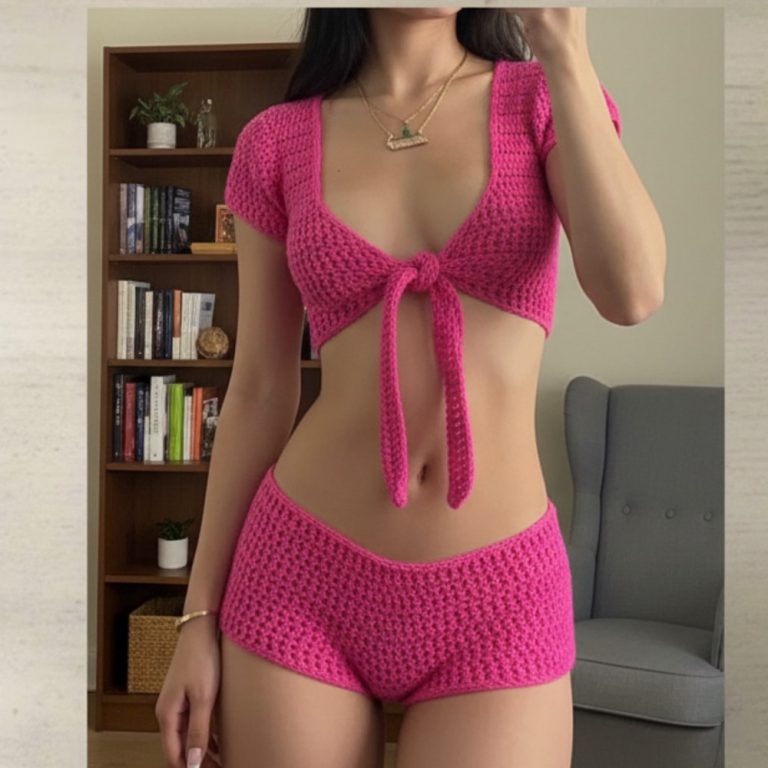
Minimal Crochet Crop Top Pattern With Clean Style
Youthful energy and intricate detail shine through in this design, offering a chic addition to any warm-weather wardrobe. The crochet crop top pattern showcases a blend of delicate stitches that enhance its visual appeal and provide a light, breathable fit, perfect for sun-filled days. Versatile in styling, this top pairs beautifully with high-waisted pants, flowy skirts, or layered under a jacket, adapting effortlessly to different occasions from beach outings to casual gatherings.
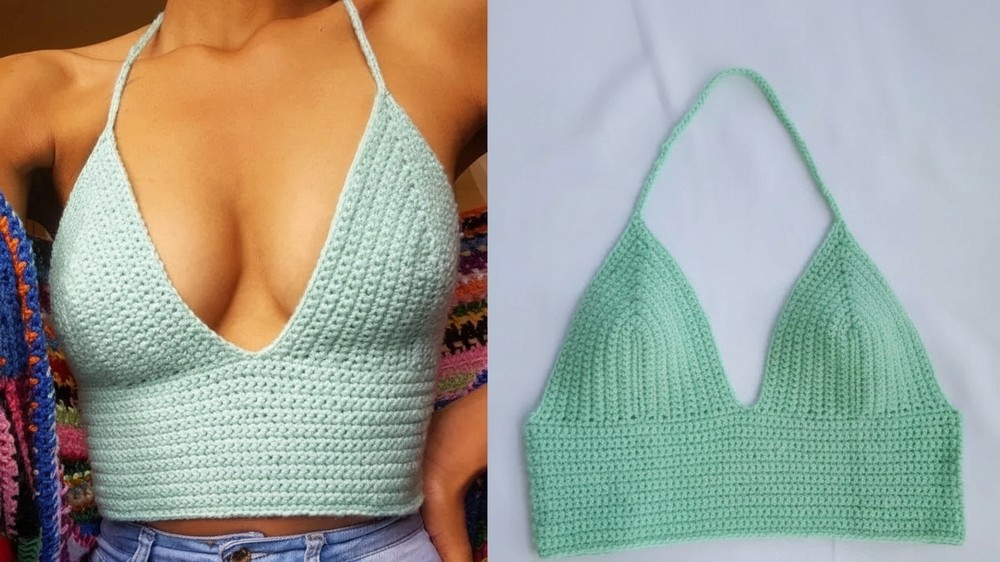
The pattern’s customizable features allow for adjustments in color, length, and fit, ensuring a piece that reflects individual style preferences. As a fashionable staple, it brings a sense of artistry and satisfaction to those who enjoy working with crochet while offering comfort and modern flair to whoever wears it. Making a statement with its minimalist silhouette, this pattern is an ideal option for anyone seeking a fresh, playful twist on classic crochet fashion.
Materials Needed
-
Yarn: Size 3 Acrylic Yarn (approx. 100g for size Small).
-
Hook: 3.5 mm crochet hook.
-
Tools: Stitch markers, measuring tape, scissors, and a darning needle.
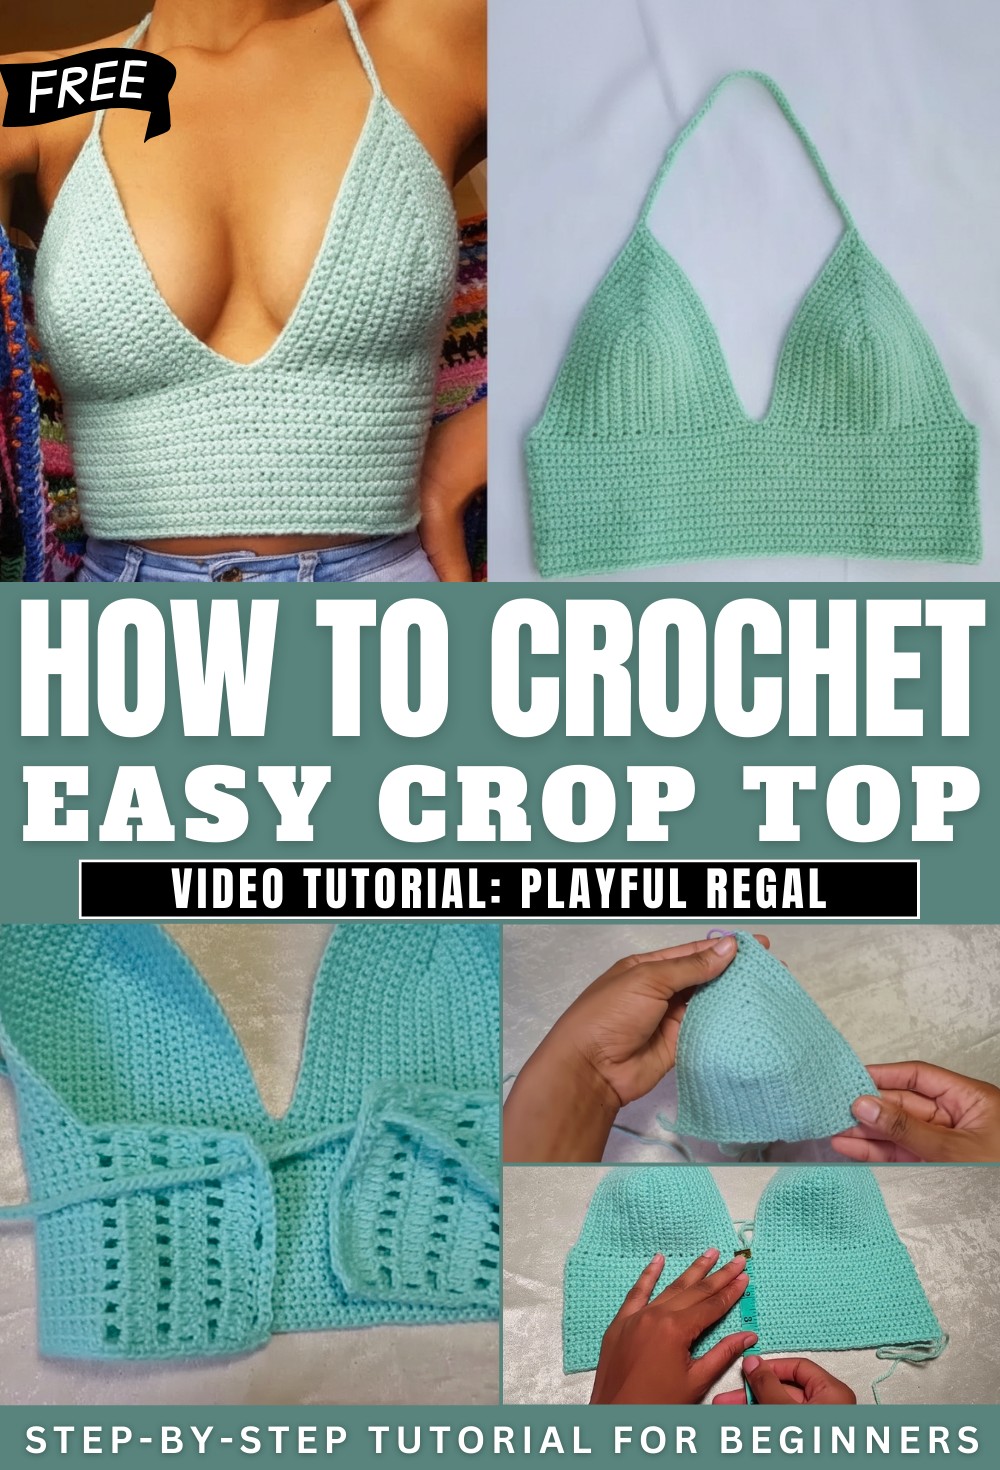
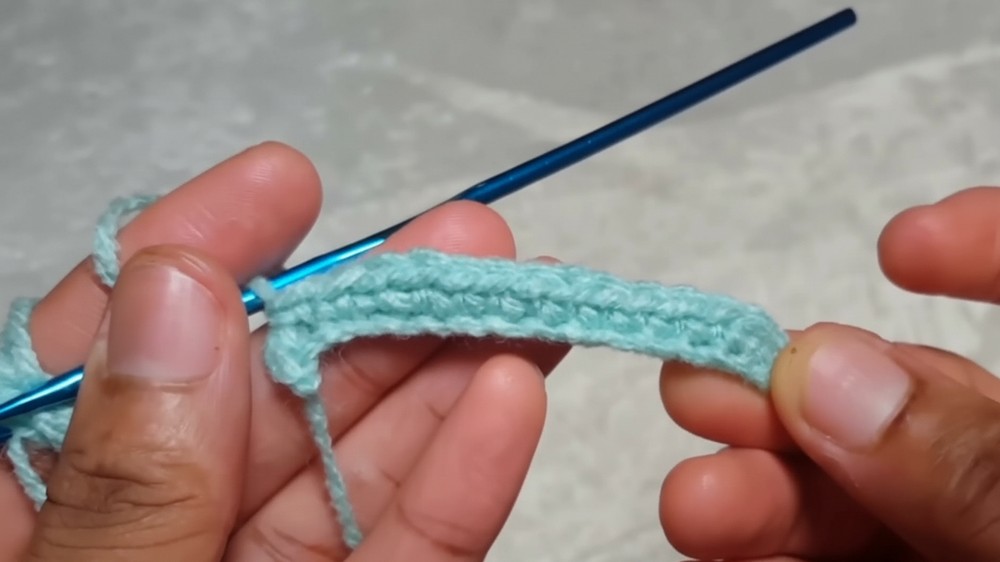
Part 1: The Bra Cups (Make 2)
Round 1 (Foundation)
-
Foundation: Chain a length that reaches from your underbust to your nipple. For a size Small (B cup), chain 16 (approx. 3 inches).
-
Base: Single crochet (sc) in the 2nd chain from the hook and in each chain across until 1 chain remains.
-
Peak: In the last chain, work 5 sc. Place a stitch marker in the 3rd stitch (the middle stitch) of this 5-sc group.
-
Opposite Side: Work 1 sc in each of the opposite foundation chains until you reach the end.
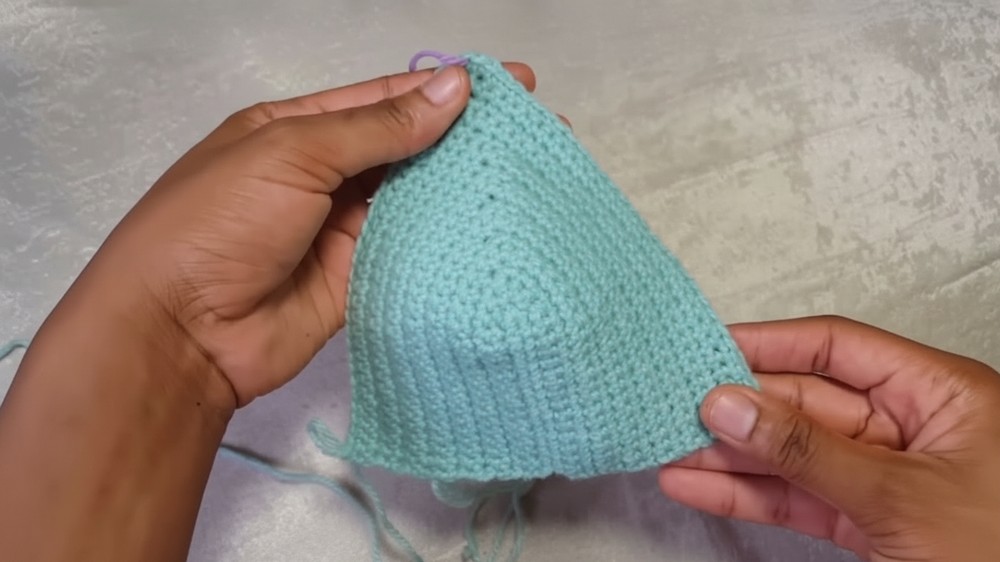
Round 2 (Growth)
-
Row 2: Chain 1 and turn. sc in the first stitch and in each stitch across until you reach the marked middle stitch.
-
Middle Increase: Remove marker. Work 3 sc in the middle stitch. Replace the marker in the 2nd stitch of this new 3-sc group.
-
Finish Row: Continue with 1 sc in each remaining stitch to the end.
Repeat: Repeat Round 2 until the cup provides enough coverage for your bust. (Example: 15 rows total for a base width of 6 inches).
-
Note: For Cup 1, fasten off with a long tail. For Cup 2, do not fasten off.
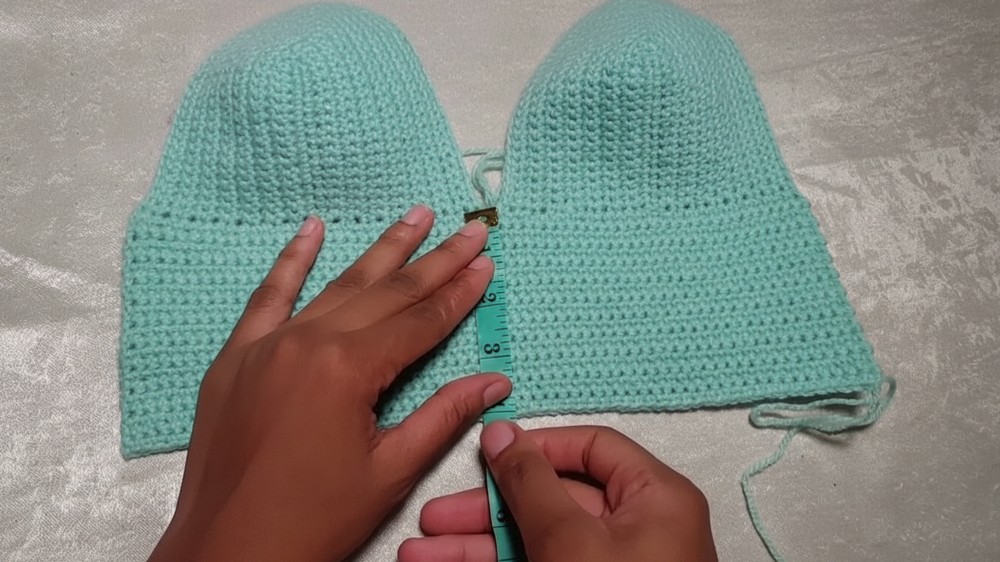
Part 2: The Body Base
-
Join Cups: With the loop from Cup 2, chain 1 and slip stitch (sl st) into the first stitch of Cup 1 to join them.
-
Row 1 (Foundation of Base): Chain 1. Work 1 sc into the end of every row across the bottom of both cups. Work 1 sc in the center join space.
-
Growth: Chain 1, turn. Work 1 sc in every stitch across. Repeat this for a total of 21 rows (or your desired length). Ensure you end on an odd-numbered row.
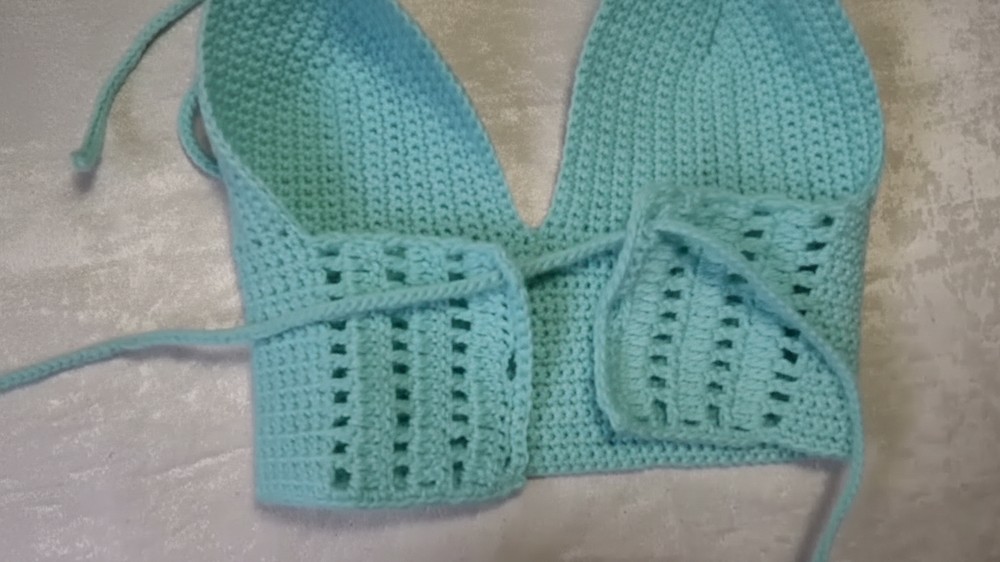
Part 3: Side Mesh Panels & Loops
Work these steps on both the left and right sides of your body base.
-
Row 1 (Mesh Setup): Turn work to the side edge. Chain 4 (counts as 1 dc + ch 1). Skip 1 row, work 1 dc in the next row, ch 1. Repeat until you reach the bottom edge.
-
Row 2 (Solid): Chain 3 (counts as 1 dc). Work 1 dc in every ch-1 space and every dc stitch across.
-
Growth: Alternate Row 1 (Mesh) and Row 2 (Solid) until the side panel measures 3 inches. End with a solid dc row.

The Lacing Loops (Final Panel Row)
-
Loops: Chain 3, turn. Skip 3 stitches. Work 5 sc, chain 3, skip 4 stitches. Repeat across and end with 1 sc in the last stitch.
-
Finishing Edge: Chain 1, turn. Work sc across, placing 2 sc into every ch-3 loop to reinforce them. Fasten off.
Part 4: Straps & Assembly
-
Neck Straps: Attach yarn to the peak of each cup. Chain 120. sl st into the 2nd chain from hook and back down the chain. Anchor to the cup peak and fasten off.
-
Back Tie: Chain 300. sl st into the 2nd chain from hook and in every chain across.
-
Base Border: Work a final row of sc along the entire bottom edge of the top for a clean finish.
-
Lacing: Criss-cross the long back tie through the ch-3 loops on the side panels.
Conclusion
Finishing this crop top provides you with a versatile, high-end summer garment that showcases your ability to combine structured cup work with breathable mesh panels. By mastering the center-peak increase and the reinforced lacing loops, you’ve created a piece that is as supportive as it is stylish. Once you weave in your final ends, your unique handmade top is ready to wear.
Pro Tip: To prevent the back tie from stretching or digging in, ensure your slip stitches are not too tight. Maintaining a consistent, moderate tension during the strap-making phase ensures the ties stay flat and comfortable against your skin.