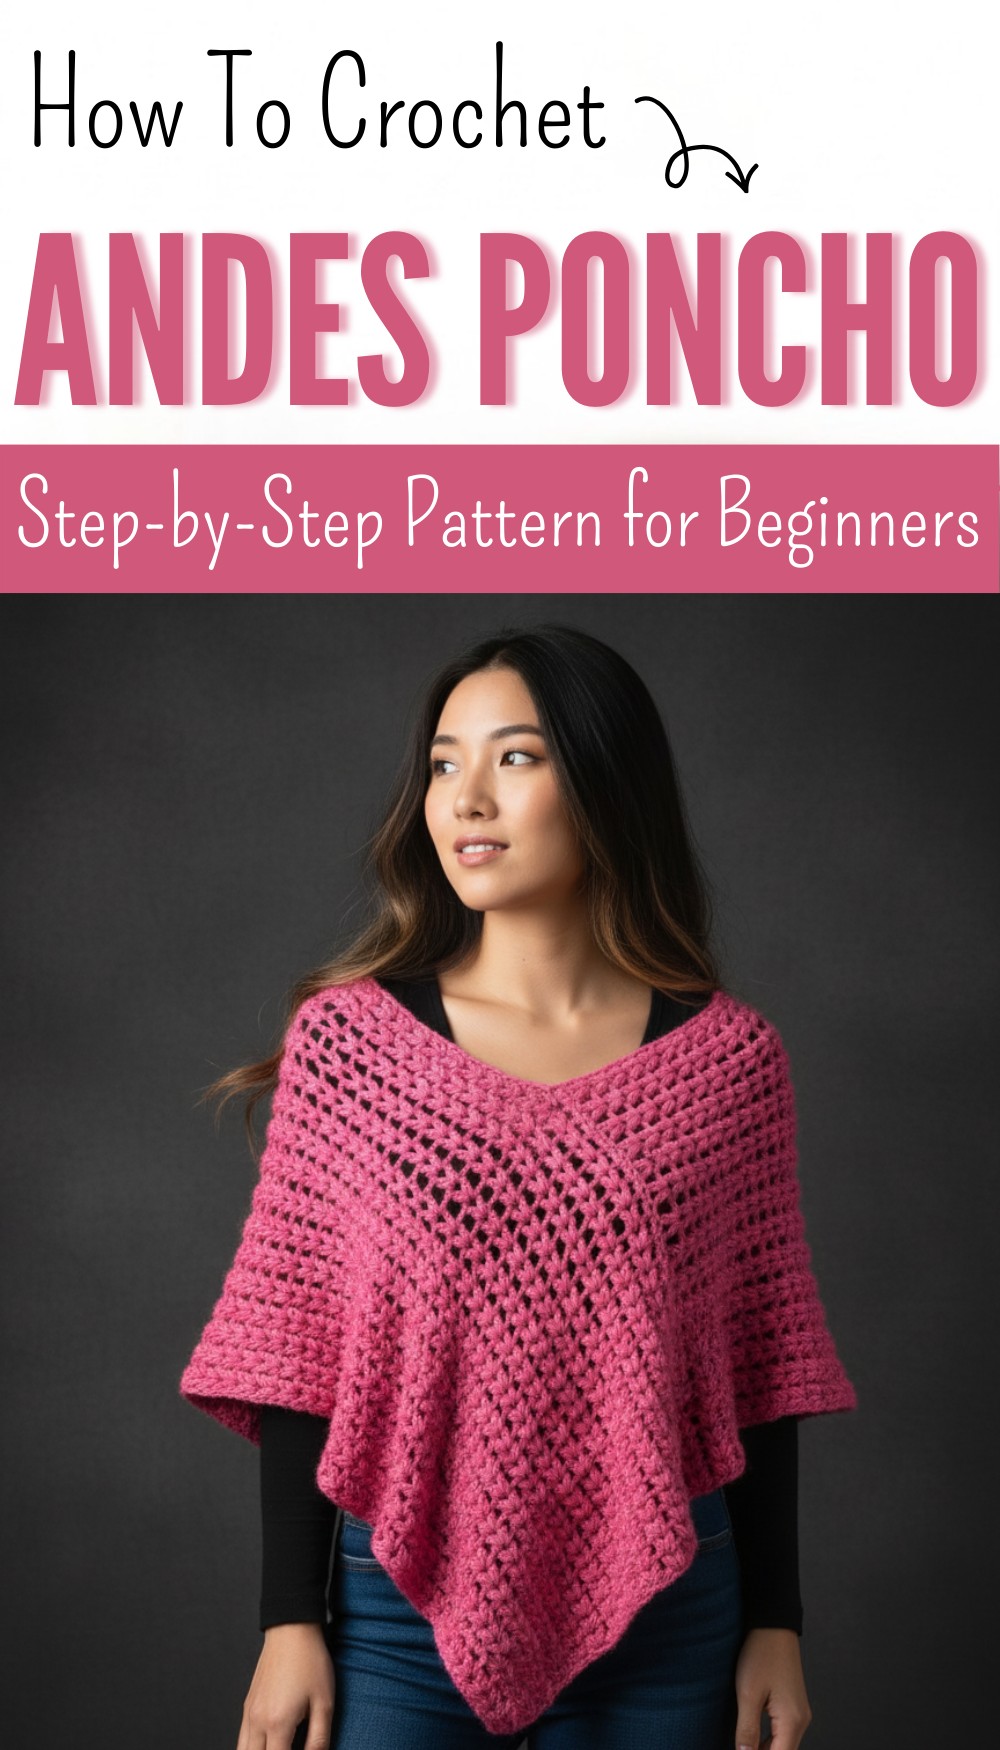
Cozy Free Crochet Andes Poncho Pattern to Keep You Warm
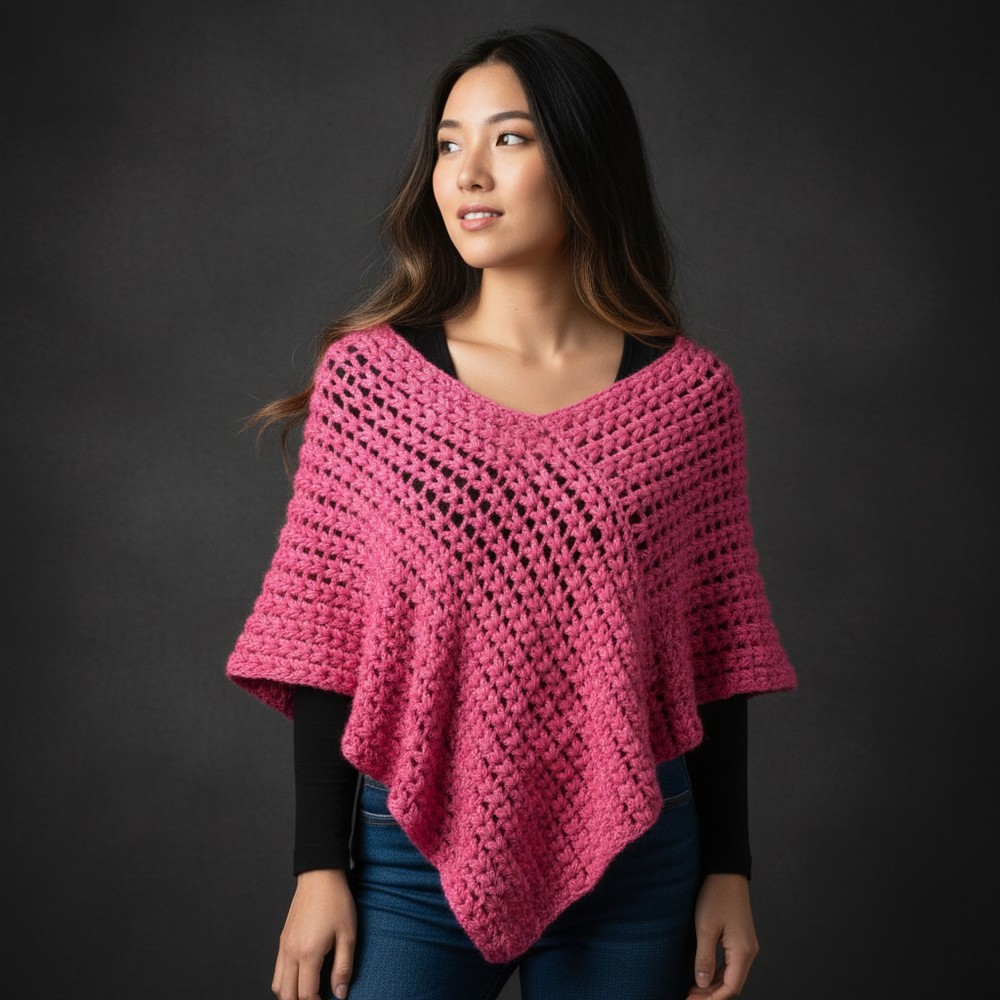
Shine with this Free Crochet Andes Poncho Pattern that’s featuring unique versatile style, delightful colors, and cozy comfort for cool days.
wrapping yourself in something warm and colorful that makes you smile every time you put it on. The Crochet Andes poncho pattern brings life to your style with its beautiful patterns and mountain-inspired looks. Each poncho uses simple stitches yet creates a design that feels special and looks amazing on anyone. You can wear this poncho when it gets chilly or just to make your outfit pop with color.
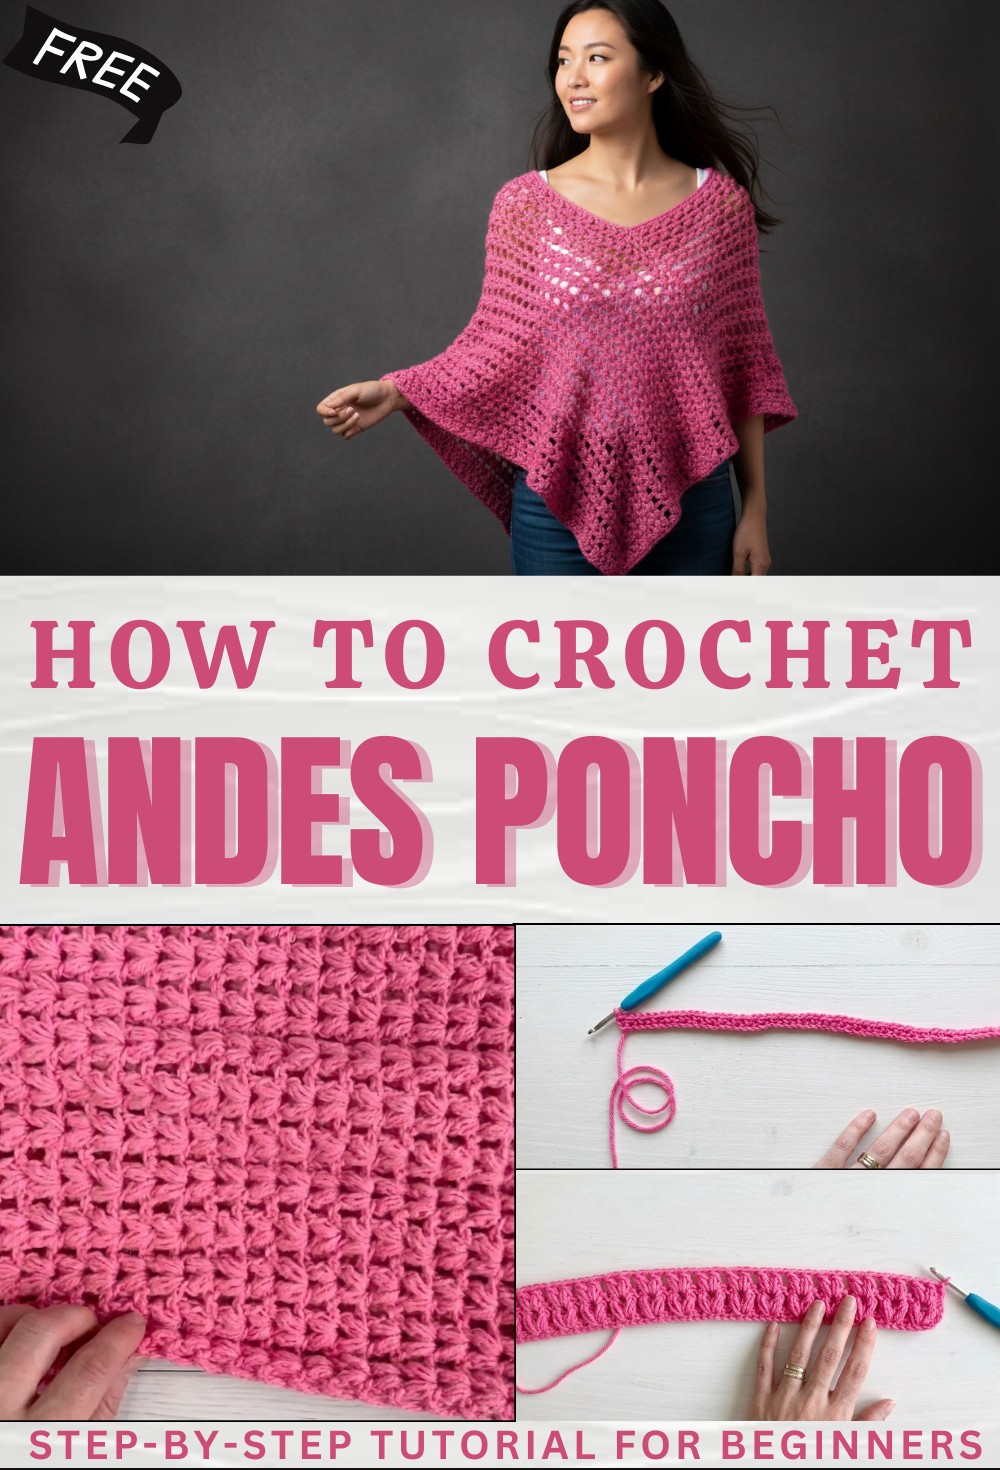
Trendy Free Crochet Andes Poncho Pattern for Fall Fashion
It is soft and flows around your body, fitting easily over your clothes so you stay comfortable all day. Even if you are new to making clothes, following the pattern is simple and won’t take long. What makes the Crochet Andes poncho pattern special is how it can turn any plain outfit into something eye-catching and useful, so you feel both stylish and cozy wherever you are.
Simple Rectangle Puff Stitch Poncho
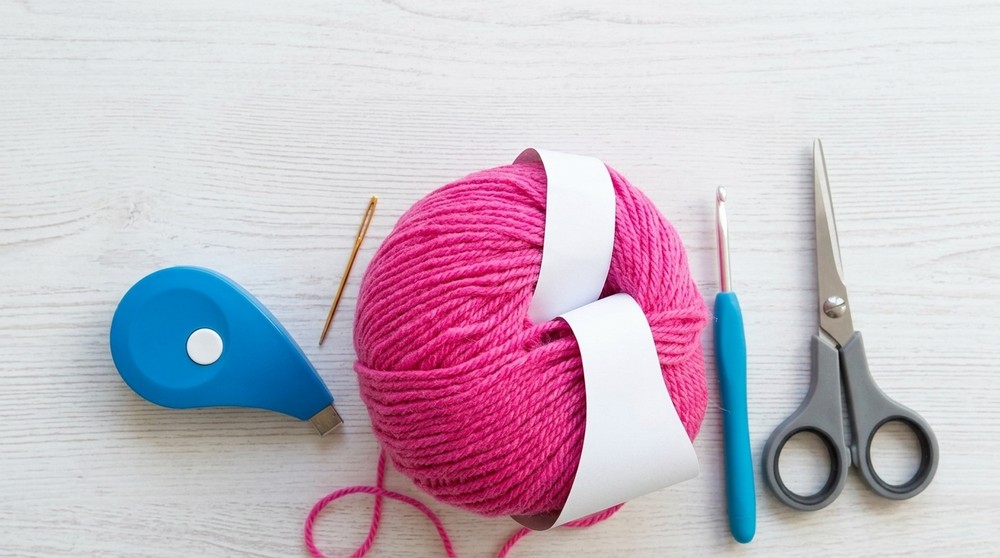
Materials
- Yarn: DMC Alpaca Wool Blend (or similar: Approx. 130m per 50g skein)
- Small/Medium (S/M): 5 balls
- Large/XL: 5 balls
- XXL or plus: 6 balls
- Fiber Content: Alpaca/Acrylic blend; soft, warm
- Hook: 5.0 mm (H/8) crochet hook
- Notions:
- Tapestry/yarn needle (for sewing and weaving in ends)
- Scissors
- Measuring tape or ruler
- Stitch markers (optional)
Key Abbreviations (US Terms)
| Abbreviation | Meaning |
|---|---|
| ch | chain |
| st(s) | stitch(es) |
| sc | single crochet |
| puff st | puff stitch (3-yarn over) |
| dc | double crochet |
| rep | repeat |
| RS/WS | right/wrong side |
Puff Stitch:
Yarn over, insert hook in indicated space, yarn over, pull up a loop to height of dc repeat 3 times (total 7 loops on hook), yarn over, pull through 6 loops, yarn over, pull through last 2 loops.
Special Notes
- To resize, adjust your foundation chain in multiples of 12 (as per size instructions).
- Three sizes:
- S/M: ch 60, work to 120 cm length
- L/XL: ch 72, work to 130 cm length
- XXL: ch 84, work to 140 cm length
- Finished piece is a single rectangle, then folded and joined to form the poncho.
- Work with a relaxed tension.
Pattern
1. Foundation Chain
- For S/M: Ch 60
- For L/XL: Ch 72
- For XXL: Ch 84
- (Adjust multiple as needed for desired width.)
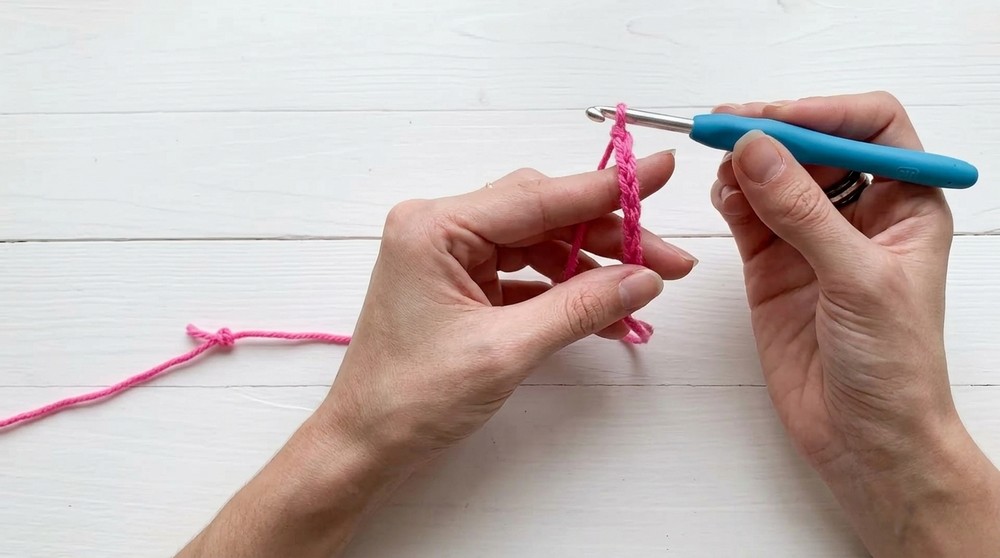
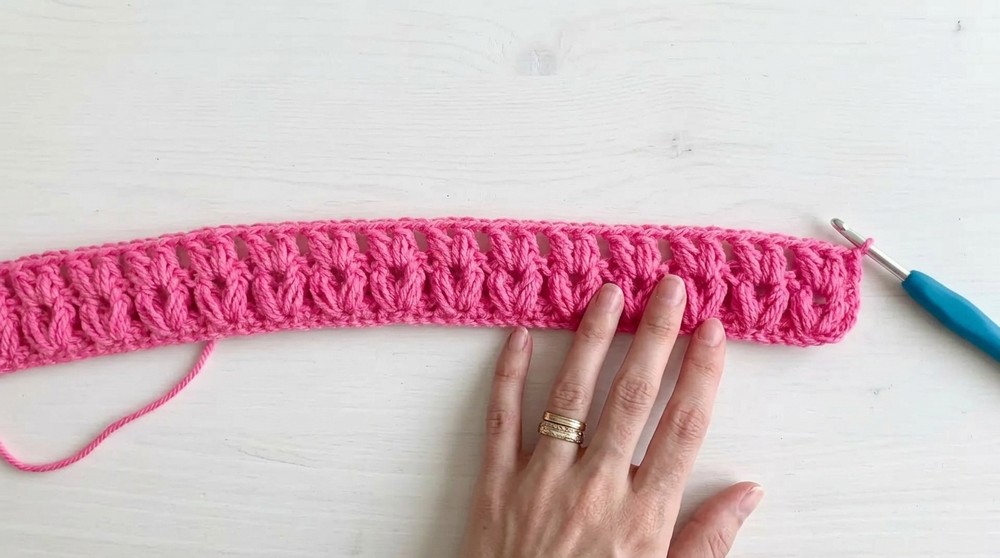
2. Row 1 (Foundation Row)
- Sc in 2nd ch from hook.
- Ch 1, skip next ch, sc in next ch.
- Rep from * to last 3 ch, ch 1, skip 1 ch, sc in each of last 2 ch.**
- Turn.
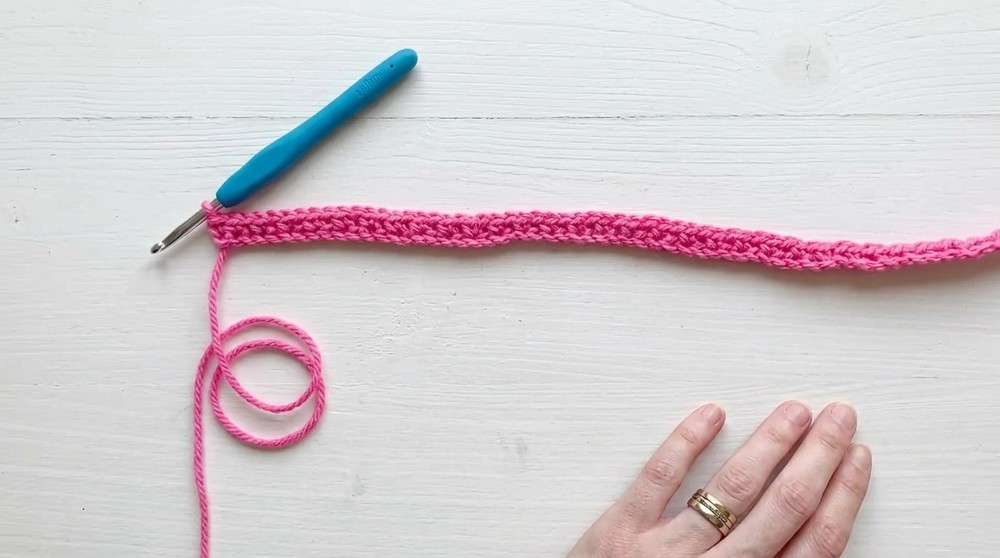
3. Row 2 (Puff Stitch V-Stitch Row)
- Ch 4 (counts as dc, ch 1). Turn.
- (In first ch-1 sp): (Puff st, ch 1, Puff st) all in same sp.
- Ch 1, skip next sc, (in next ch-1 sp, work (Puff st, ch 1, Puff st) all in same sp).
- Continue across each ch-1 sp to end.
- After last puff st group, dc in last st (top of turning ch or sc).
- Turn.
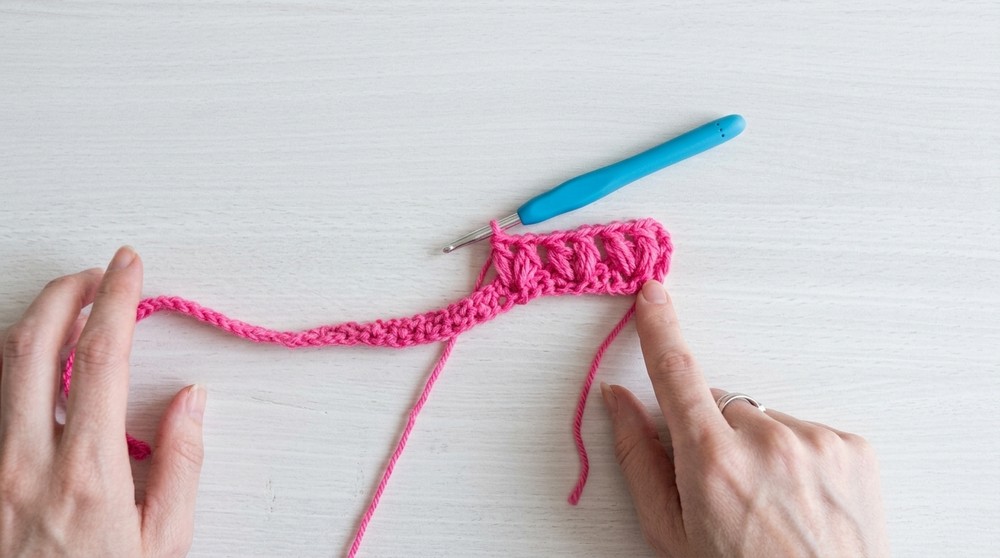
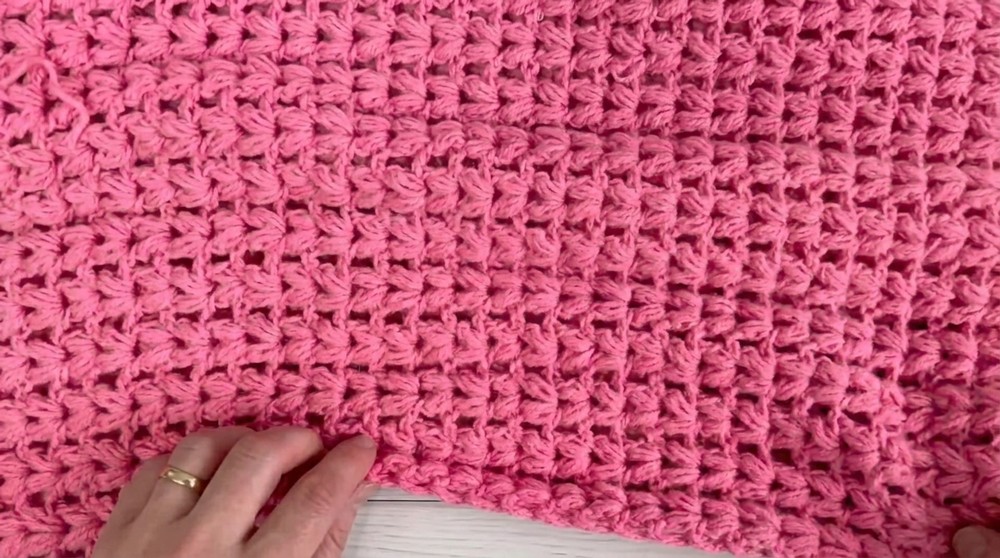
4. Row 3 (Repeat Puff Rows)
- Ch 4 (counts as dc, ch 1). Turn.
- In space between each puff st pair and ch-1 from previous row,* (Puff st, ch 1, Puff st) all in the space.**
- Repeat (ch 1 between each cluster) across the row.
- At end: dc in top of turning ch.
- Turn.
5. Repeat
- Repeat Row 3 until your rectangle measures:
- S/M: 120 cm (approx. 47″)
- L/XL: 130 cm (approx. 51″)
- XXL: 140 cm (approx. 55″)
- Tip: Always end with a row completed, leaving enough yarn for sewing.
6. Fasten off
- Leave a long tail for seaming (about 3 ft / 1 m, or enough to sew your seam).
7. Assembly
- Lay rectangle flat with RS facing up and short ends at top/bottom.
- Fold the rectangle in half, bringing the short ends together to form a long rectangle.
- With tapestry needle and yarn tail, sew along the side starting at one edge, sewing about half the length to form the shoulder/neck opening (you’ll create the classic asymmetric point-front poncho by sewing approx. half the short side to a long edge).
- Weave in ends.
- Turn RS out.
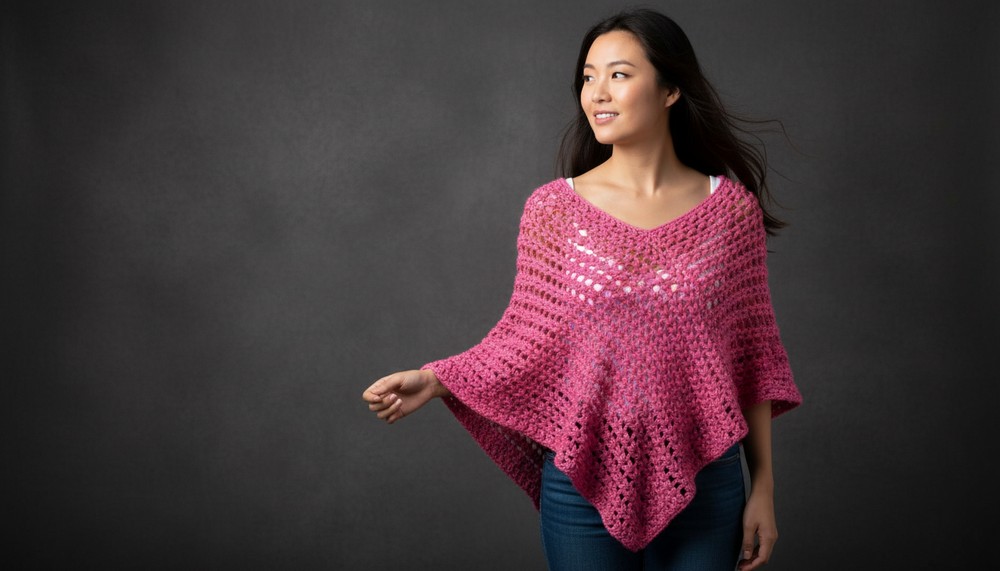
Conclusion
Congratulations! You now have a contemporary rectangle poncho with beautifully textured puff stitches. The construction is simple, and the final drape is modern and flattering.
Pattern Corrections & Tips
- Pattern Correction: Ensure every ch-1 sp from the previous row gets a puff st V in the next row; always end with a dc in the last st.
- Tips:
- Use stitch markers to help identify first/last st and seam placement.
- Lay the piece flat to measure for even seaming.
- Block gently to open up stitch pattern.