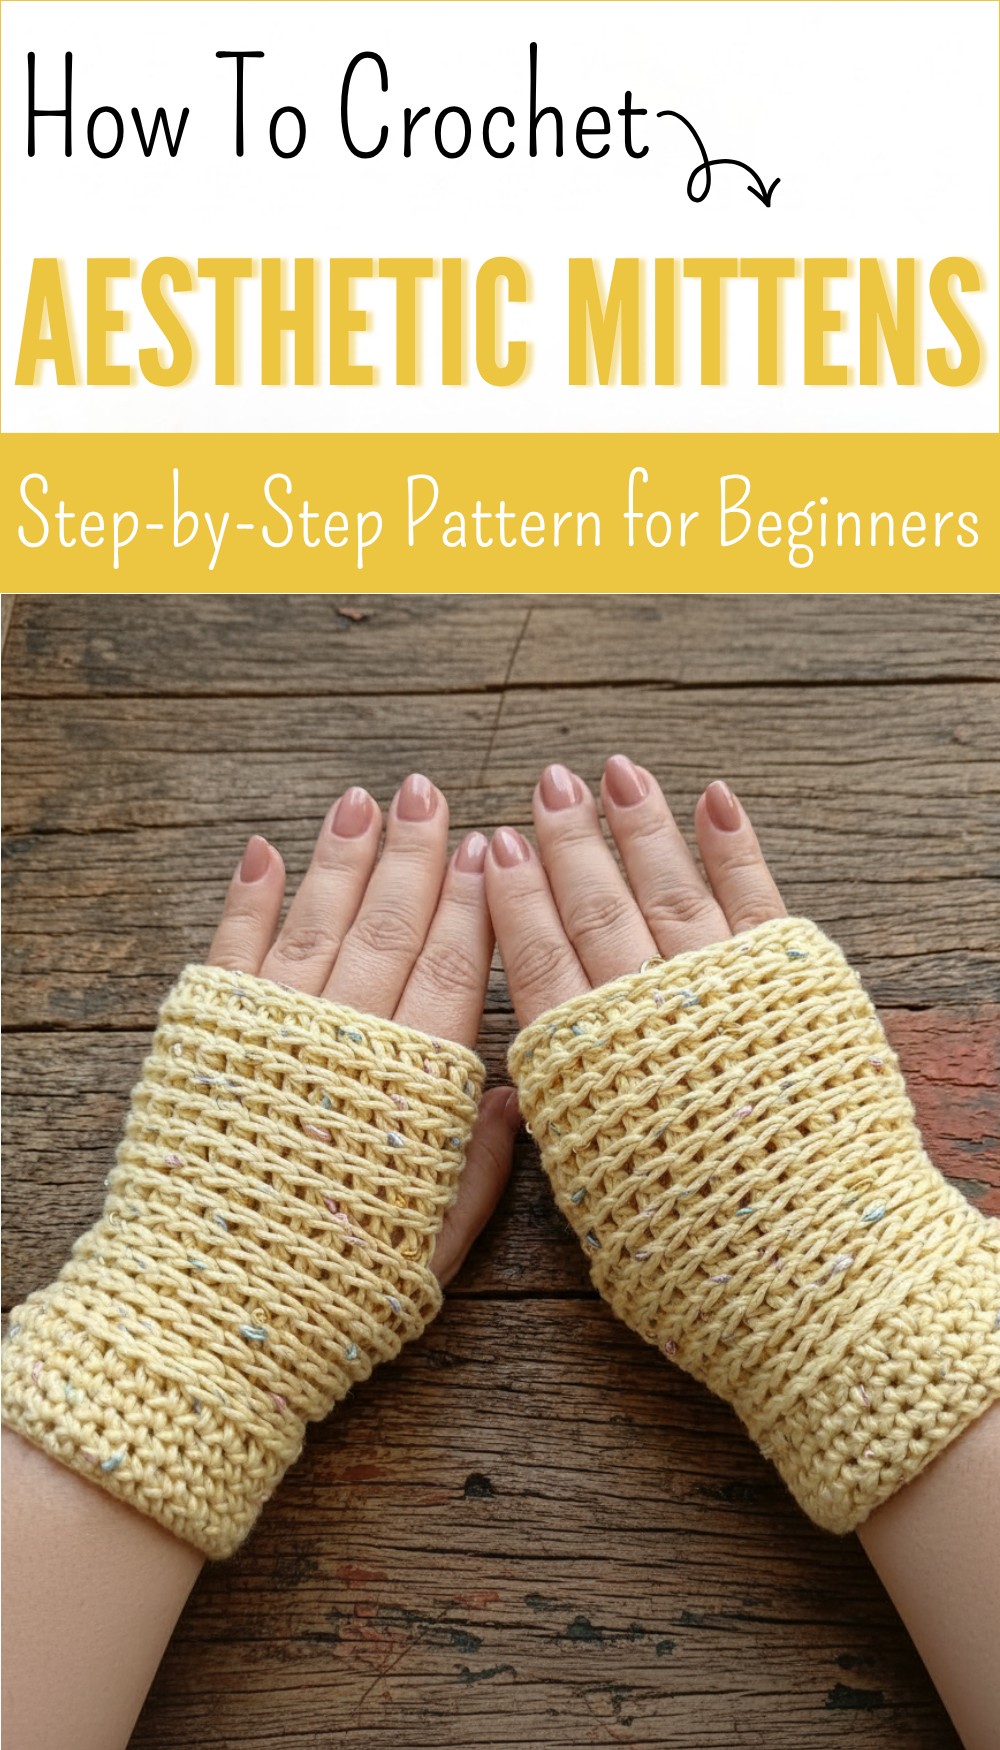
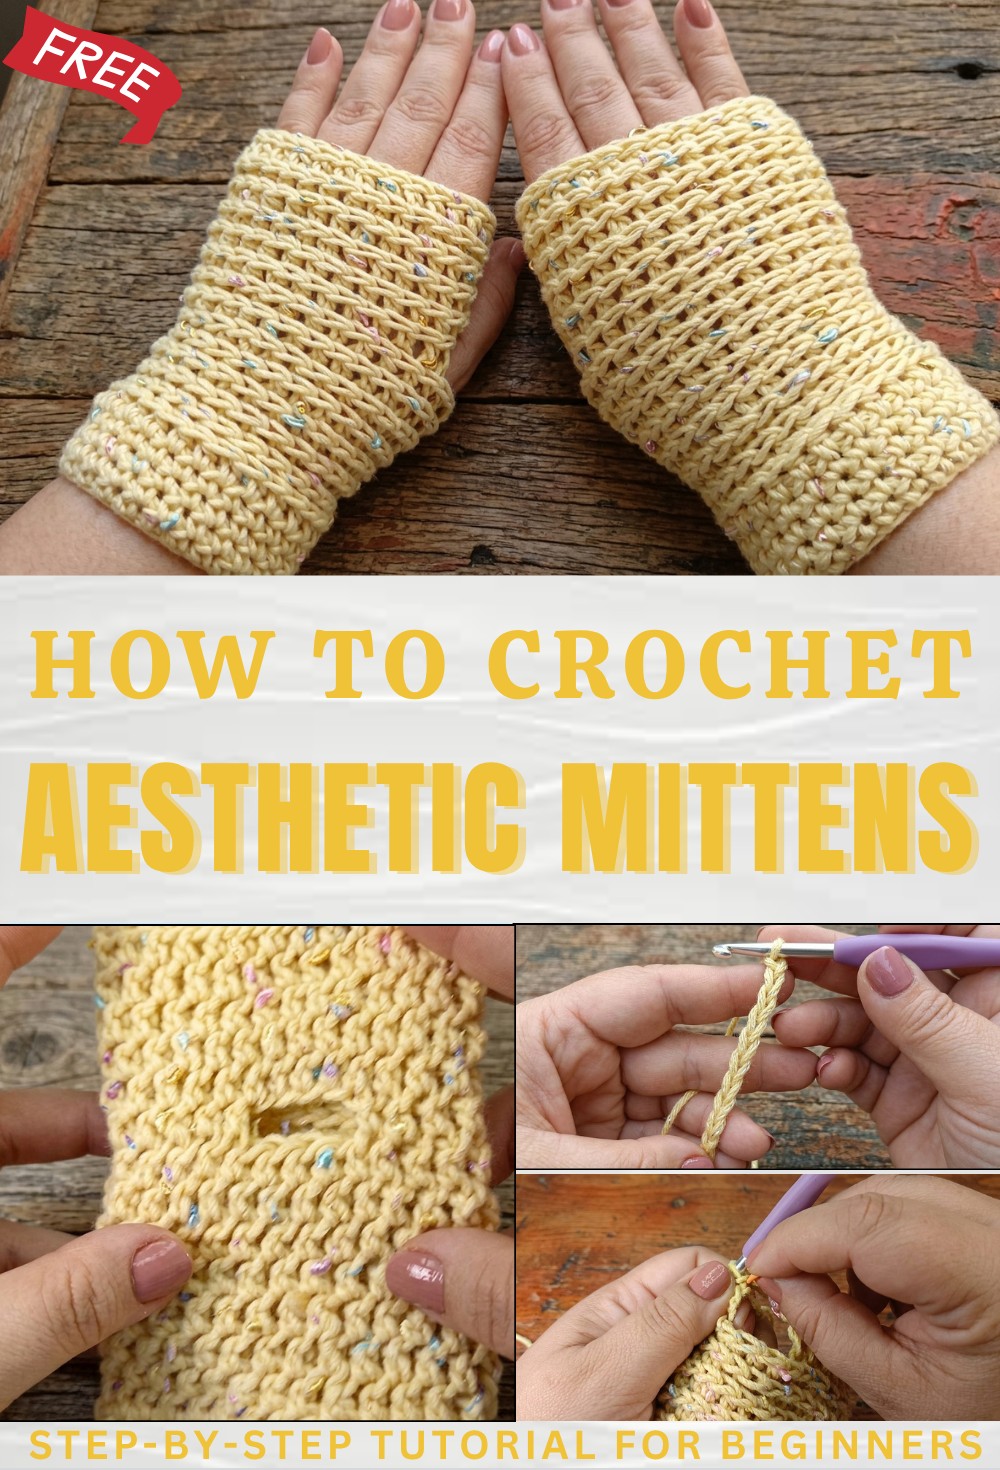
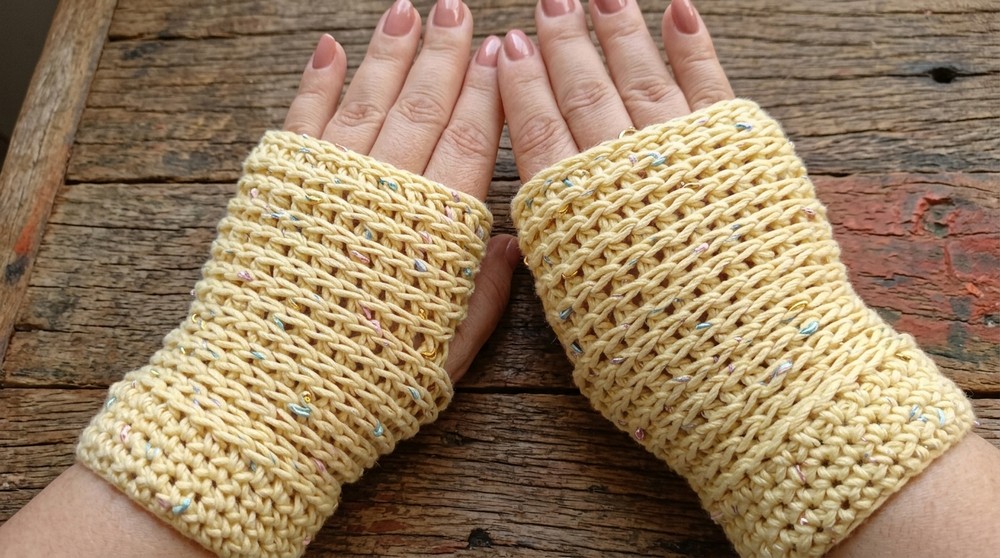
Cozy Free Crochet Mittens Pattern for Winter Warmth
Warm your hands in style with a free crochet mittens pattern featuring easy instructions for cozy creations everyone in the family will love.
Cold hands can make winter days feel even longer and less enjoyable, but beautifully designed mittens turn that around with their cozy charm and vibrant appearance. Using a crochet mittens pattern allows anyone to crochet these warm protectors in their favorite colors, bringing style and functionality together. These mittens are easy to make even for beginners, wrapping hands in soft comforting yarn that keeps the chill away throughout the season.
Free Crochet Mittens Pattern with Step-by-Step Guide
Each pair fits comfortably, making it easy to play outside, walk to school, or just enjoy a cup of tea by the window. They’re not just about keeping you warm; they’re also perfect for thoughtful gifts or for adding a touch of handmade love to your outfit. The simple steps in the crochet mittens pattern make every creation feel like a personal work of art—a beautiful way to care for yourself and others, no matter the weather.
Crochet Mittens Pattern (Adult Size)
Materials List
- Yarn: Approx. 43g of yarn, 2mm strand thickness (light worsted/DK)
- Hook: 5mm crochet hook
- Stitch markers
- Tapestry needle
- Scissors
Key Abbreviations
| Abbreviation | Meaning |
|---|---|
| ch | chain |
| sl st | slip stitch |
| hdc | half double crochet |
| BLO | back loop only |
| st(s) | stitch(es) |
| FO | fasten off |
Special Terminology
- Third Loop: The horizontal bar behind the hdc (for relief rows).
- Relief hdc: Half double crochet worked into the third loop of the hdc from the previous round.
Special Notes
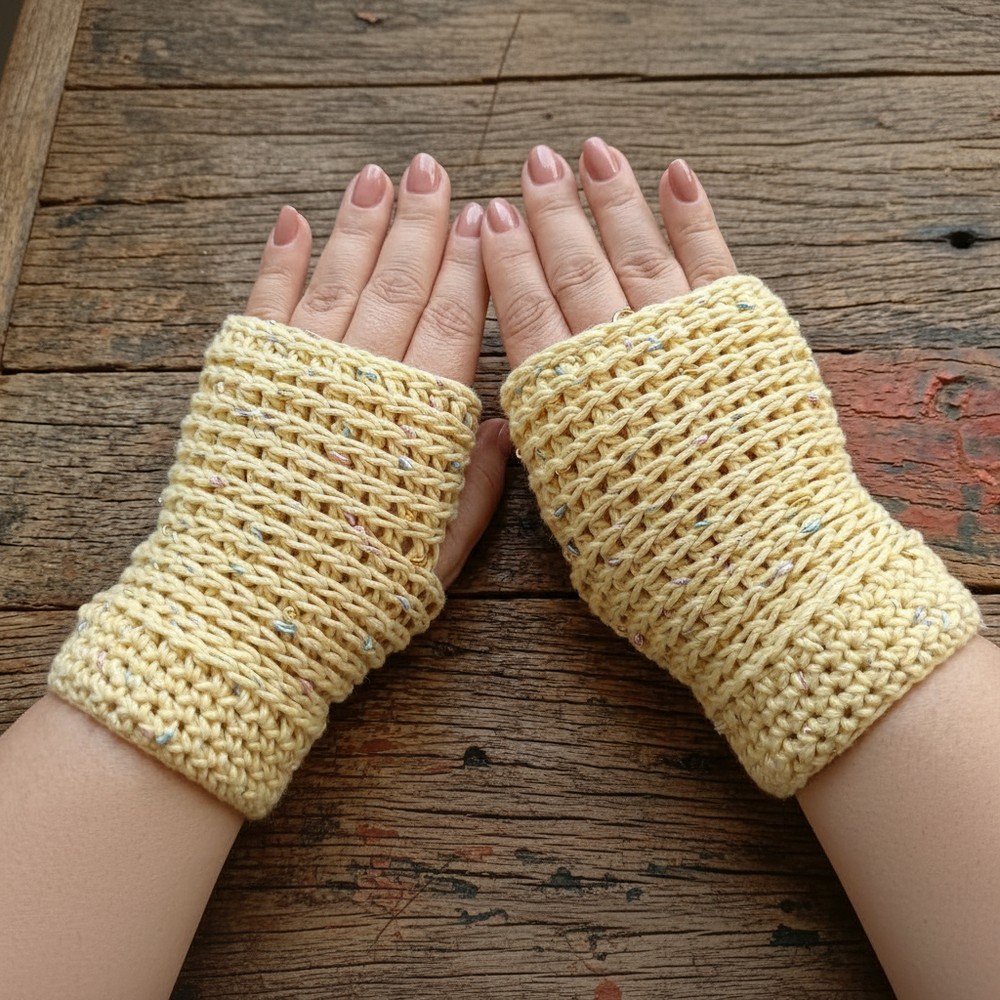
- Measurements: Adult women’s size, fits wrist circumference approx. 10 cm across (flat), 15 cm length total, 5 cm from cuff to base of thumb opening, finger space 10 cm, remaining glove 9.5 cm.
- Mittens are symmetrical; create two, reversing thumb opening location for left and right hand.
Instructions
Cuff
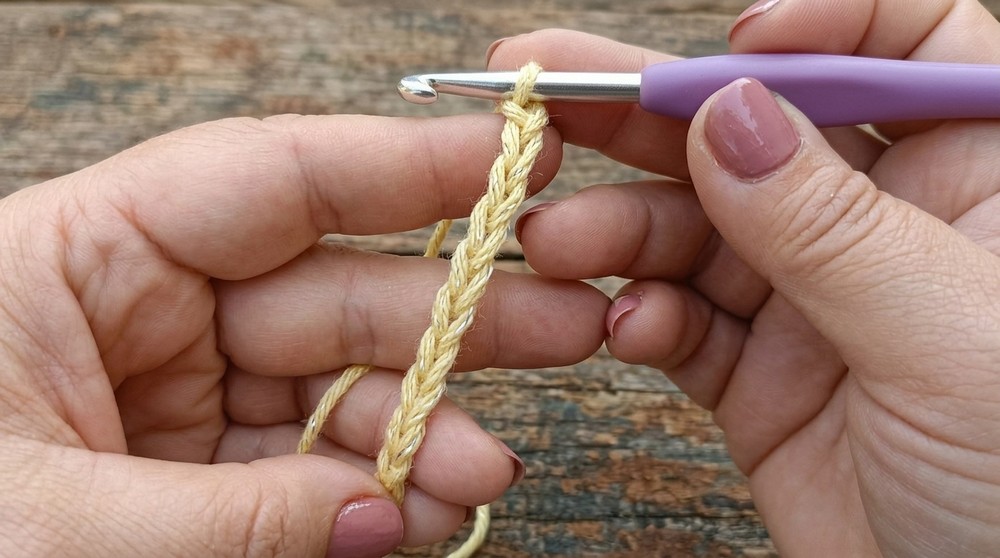
- Make a slip knot and ch 26.
- Check: The chain should wrap snugly but not tightly around your wrist.
- Join in the round:
Ensuring not to twist, join last ch to first ch with a sl st to form a ring. - Round 1:
- Ch 1 (does not count as st).
- Hdc in the third loop (the back “bump” on the underside of the chain) of each ch around (26 sts).
- Join with sl st to first hdc.
- Rounds 2–4:
- Ch 1 (not a st).
- Hdc in each st around.
- Sl st to first hdc to join.
- [Total: 4 rounds for cuff. For a longer cuff, add more rounds as desired.]
Mittens Body (Relief HDC Section)
- Round 5 (relief hdc):
- Ch 1 (not a st, make loosely).
- Hdc in both loops of each st around.
(Preparing for relief texture.) - Sl st to first hdc.
- Rounds 6–12 (relief rows):
- Ch 1 (not a st, loosely!).
- Hdc into the third loop (the horizontal bar behind the stitch) of each st around.
(This creates the relief/ribbed look. See special notes.) - At end of each round, remove hook from working loop, insert hook from back to front in first st, pull working loop through, and gently snug.
- Repeat for 7 rounds (or until piece measures about 7cm from cuff).
Thumb Opening (Round 13)
- Right Mitten: Position thumb opening at the end of round.
- Left Mitten: After working 6 hdc, make thumb opening.
Instructions (for one mitten, adapt for other side):
- Ch 1, hdc in the third loop of next 6 sts.
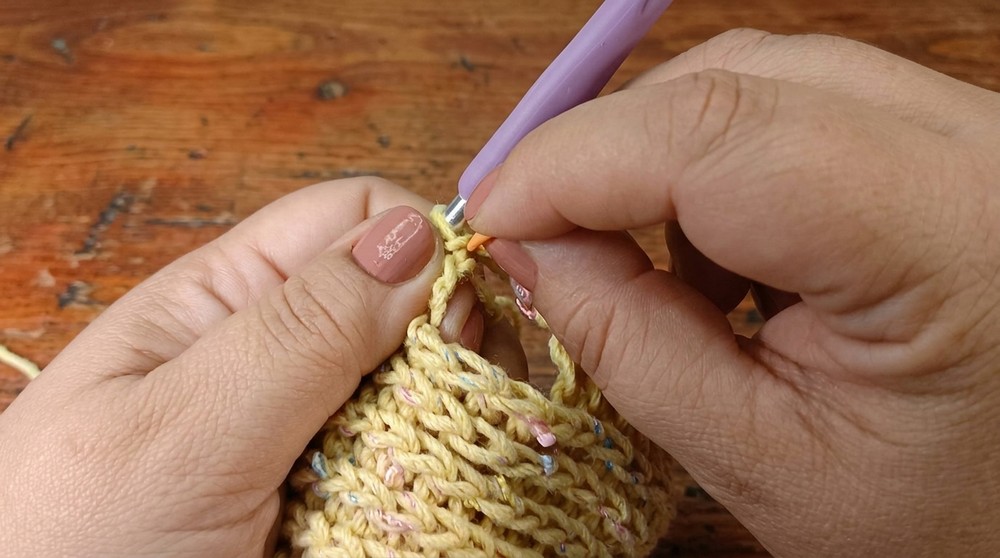
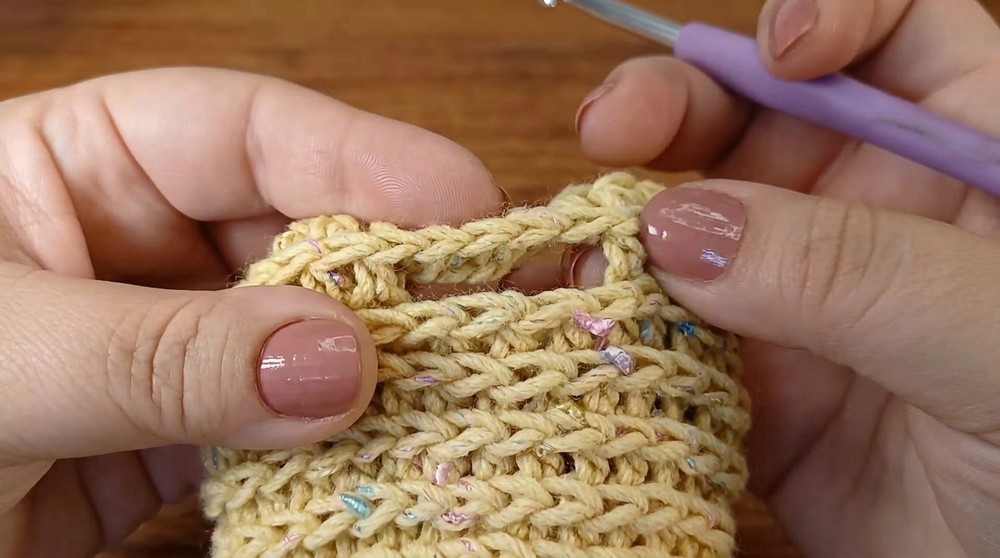
- Make thumb opening:
- Ch 4, skip next 4 sts, hdc in third loop of next st, and continue hdc in third loop to end of round.
- Sl st to join as usual.
Hand Section Above Thumb
- Round 14 (and 3 more rounds):
- Ch 1, hdc in third loop of each st/chain around (work into the back bump of each ch you made for the thumb).
- Total st count should remain consistent (26 sts).
- Repeat for 4 rounds beyond thumb opening.
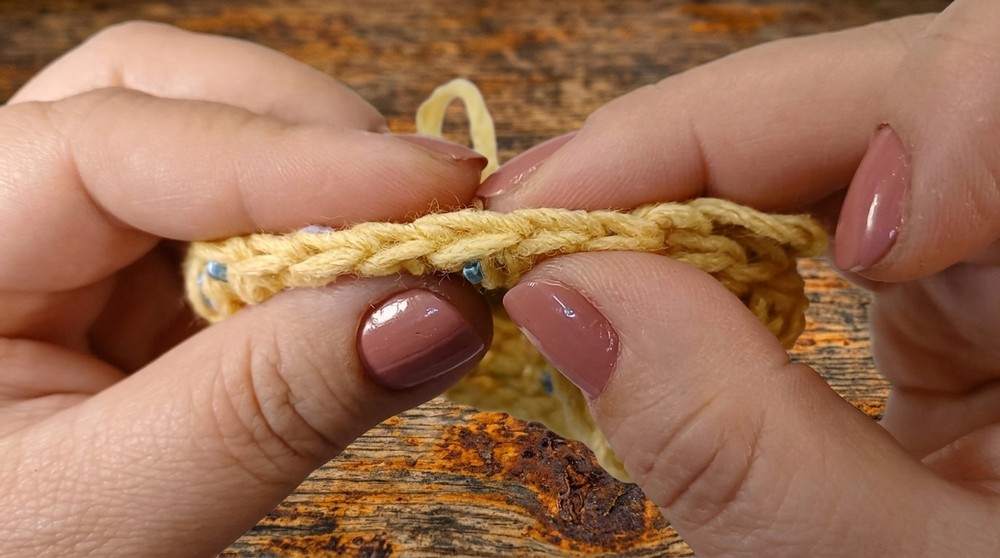
Finishing Edge (Optional Slip Stitch Edge)
- Do not close the last round as usual.
- Sl st loosely into each hdc around (use a larger hook if tension is too tight).
- Once all are worked, FO and weave end through final sl st for a neat edge.
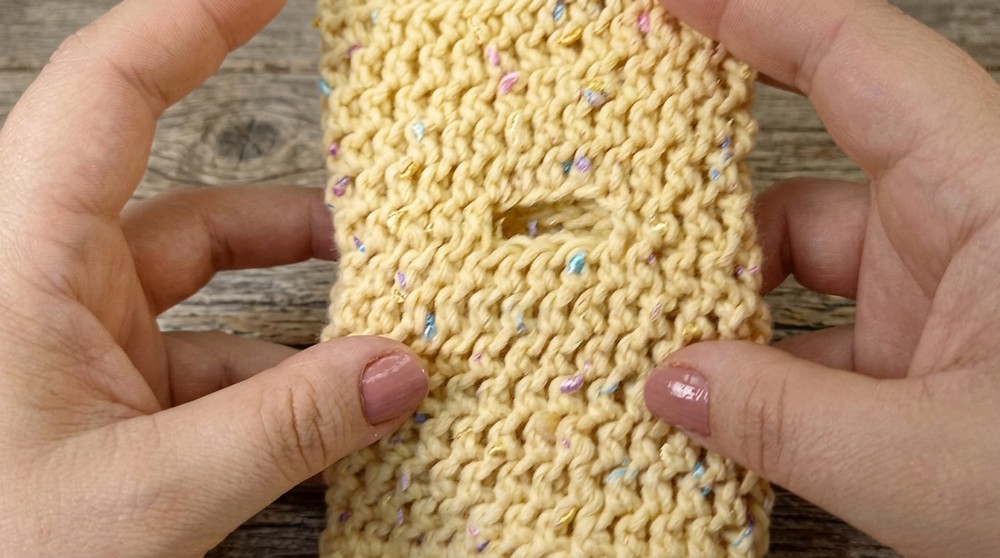
Thumb Opening (No Thumb Gusset)
These mittens are designed with a simple thumb opening—no additional thumb/digit is created.
To Finish
- Use tapestry needle to weave in all ends.
- Hide the starting tail vertically and horizontally under the stitches on the wrong side for a secure, flat finish.
Conclusion
You have crocheted a pair of modern, stretchy, and stylish mittens with a relief detail.
They are quick, minimalist, and economical – perfect for chilly days or gifting.
Pattern Correction & Tips
- Swatch for gauge. If your yarn or tension gives different sizing, adjust starting chain.
- Thumb placement: For right-hand mitten, place thumb opening toward end; for left, after 6 hdc.
- Finishing: Always check stitch count and work gently for neat slip stitch edging.
- Slip stitch edge: Work very loosely or use a larger hook to avoid a tight finish.
- Customization: Add more relief rounds for longer mittens; decrease for petite hands.
- Third Loop: Practice finding the third loop in hdc—this is crucial for the textured effect.