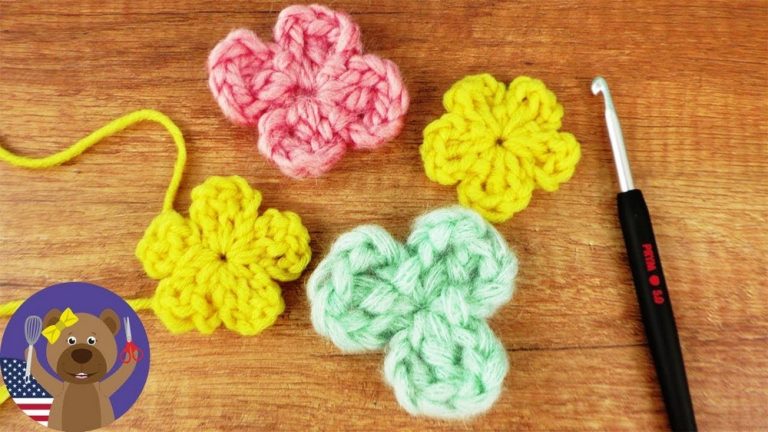
How To Crochet 3D Flower Granny Square for Beginners

In this post, you’ll learn how to crochet a flower granny square using blue and brown acrylic yarn with a 2mm crochet hook. Starting with a magic ring and chain stitches, the process involves detailed steps like forming petals, using back post single crochets, and constructing layered loops. The tutorial gradually builds the intricate design, increasing triple crochets as the flower expands. Finally, the square is completed with corner and edge stitches, making it ideal for projects like cushion covers.
The step-by-step guide is beginner-friendly, ensuring you can achieve a beautiful handmade creation by following along carefully. So, follow through with us for the complete tutorial.

How to Make a Flower Granny Square
This tutorial provides step-by-step guidance on creating a detailed flower granny square using a 2mm crochet hook and acrylic yarn. The process involves making a flower design in the center, surrounded by multiple petal layers, until the final square shape is achieved. Below is a structured summary of the tutorial broken into key stages and steps.
Materials Needed
- Yarn: Acrylic yarn (two colors – blue and brown are used in the tutorial).
- Crochet Hook: 2mm hook.
- Optional: Scissors for trimming yarn.
Steps to Create the Flower Granny Square
1. Starting the Magic Ring
- Begin with a magic ring to form the base of the design.
- Work the starting round with double crochets to create a solid circle as the foundation.

2. Making the First Layer of Petals
- Create petal designs within chain spaces by combining single crochet, half double crochet, and double crochets.
- Repeat the same pattern consistently across all the spaces to form a complete circular flower.
3. Adding a Back Layer for Petal Expansion
- Work in the back loops of the previous layer to prepare for additional petals.
- Use chain spaces and back post single crochet in this step.

Note: The back loops create a foundation for the next layer of larger petals.
4. Creating the Second Layer of Petals
- Repeat and expand the petal design, using similar stitches (single crochet, half double crochet, double crochet, and treble crochet).
- Increase the treble crochets in each petal for added length and symmetry.
- Ensure every chain space is worked evenly to maintain the circular shape.

5. Making the Third Layer of Petals
- Add another set of larger petals, slightly increasing the number of treble crochets in the design.
- The process mirrors the previous petal layers, combining single, half double, double, and treble crochets.
Transitioning to the Granny Square Shape
1. Forming Initial Square Foundation
- Divide the petals into sections that divide into corners (3 petals per side).
- Create chain spaces and place clusters of double crochets and chains to form the square’s corners.

2. Connecting the Square with Detailed Stitching
- Work evenly around the square using double crochet stitches for the edges.
- Add additional chains and clusters within corners to maintain the square’s shape while ensuring proper alignment.

Final Touches
- Complete the last round by adding uniform double crochet stitches along all edges.
- Secure the stitching with slip stitches and fasten off the yarn neatly.
- Trim any extra yarn tails and pull them tight to prevent unraveling.

Result and Uses
The completed granny square features a three-dimensional flower surrounded by a perfectly shaped square. This versatile project can be used for a variety of items, such as cushion covers, blankets, or other home décor.