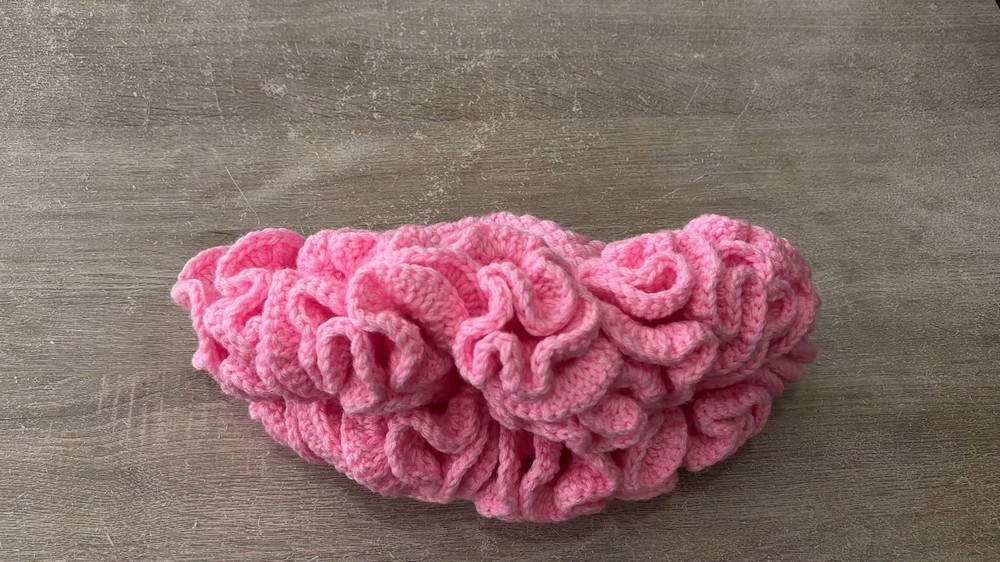
How to Crochet A Trendy Ruffle Hat for Ladies

Learn how to crochet a chunky ruffle hat for ladies using doubled strands of DK yarn instead of chunky yarn, following this step-by-step tutorial. You will also find tips on managing yarn, securing ends, and weaving in tails for a polished finish. It is comfortable and super stylish. Let’s get started!
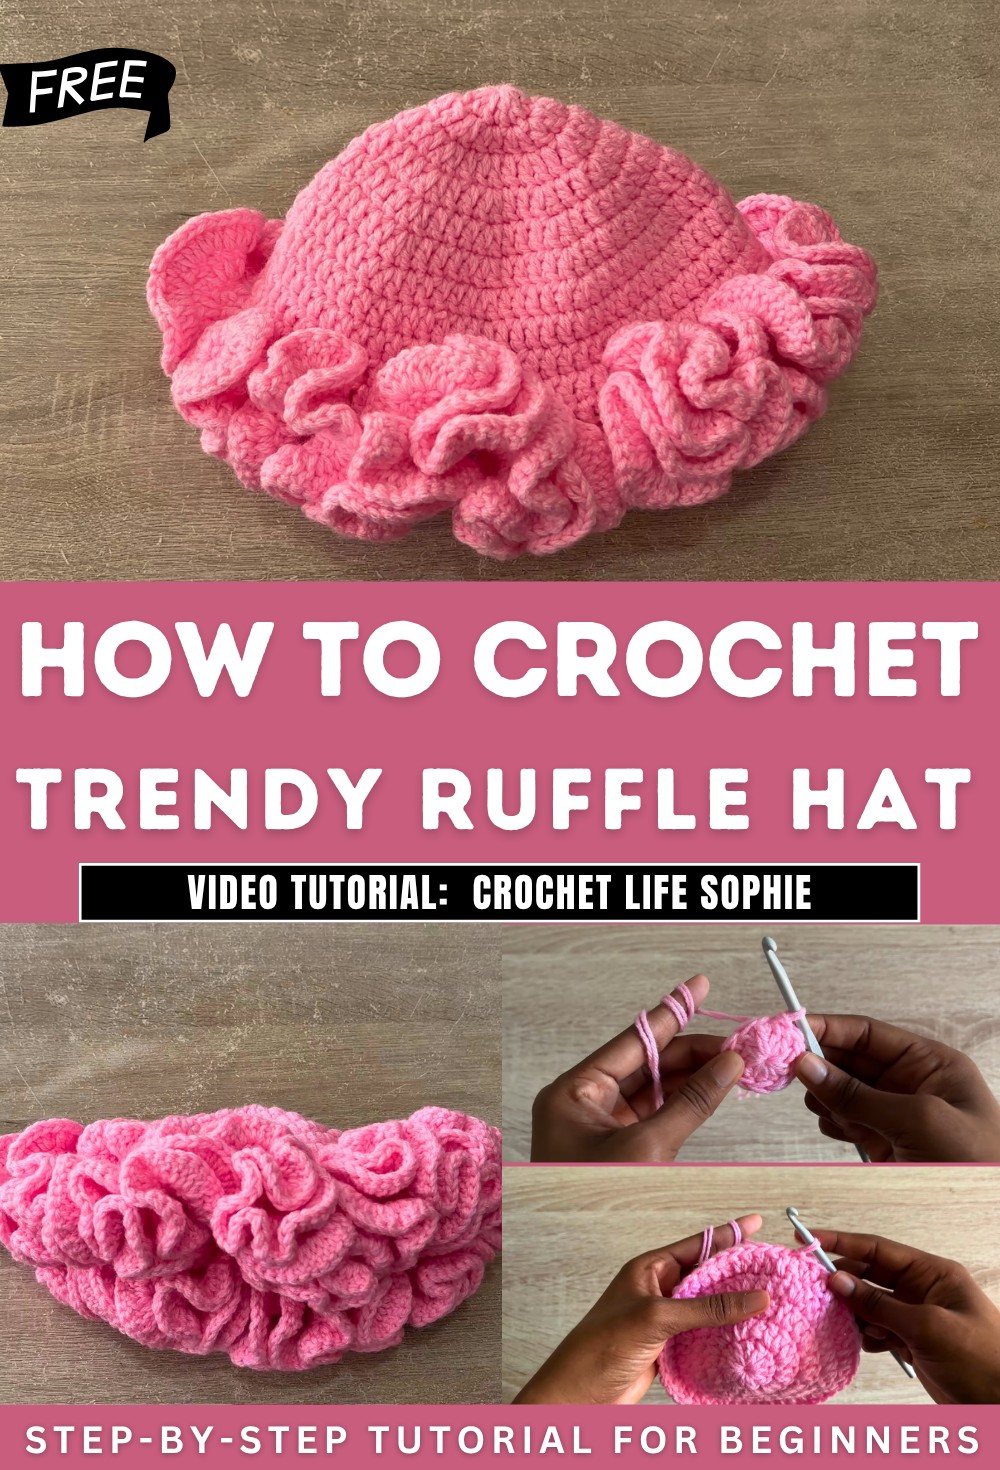
Crochet the Trendy Ruffle Hat
- Host and Project Overview: Here is a chunky ruffle hat designed to fit every age.
- Yarn Choice: She uses double-knit (DK) yarn held double to replicate the effect of chunky yarn, explaining the difference between DK yarn and a thinner variant to avoid confusion.
- Materials Needed: Suggested tools include:
- 5.5 mm crochet hook
- Scissors
- Tapestry needle
- Stitch markers
- Sophie emphasizes using approximately 300 g of yarn (or three balls) for the hat.
Getting Started: Creating the Base
-
Magic Circle Method: Sophie demonstrates starting the hat with a magic circle:
- Wrap the yarn to create a foundation loop.
- Secure the yarn with chains and work double crochets into the circle to form the base.
-
Slip Knot Alternative: She also provides an alternative method, beginning with a slip knot and a chain, followed by inserting stitches into the foundational chain.

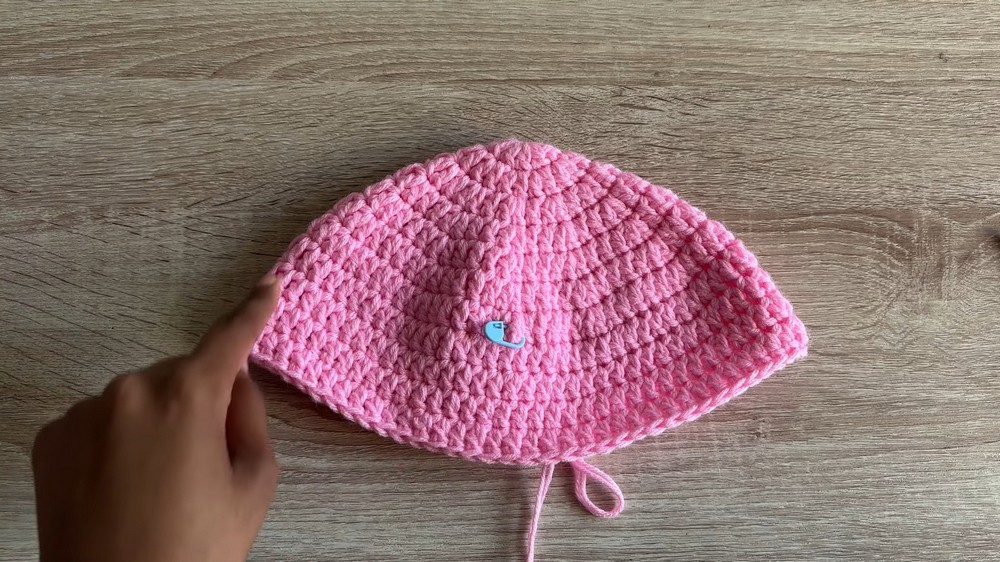
Building the Hat Structure
-
Foundation Rounds:
- Sophie guides viewers through the initial rounds, working double crochets and slip stitching to complete each round while building the structure. She notes the importance of alternating between increases and single stitches for balanced growth.
-
Increasing Rounds:
- Rounds include gradual increases, with Sophie explaining the process of adding double crochets in specific patterns to expand the hat’s size.

-
Non-Increasing Rounds:
- From rounds 8 to 11, no increases are made, and Sophie works consistent double crochets to maintain the hat’s depth and shape. She highlights the importance of stitch markers during these rounds.

Adding the Ruffle Layers
-
First Ruffle Row:
- To start the ruffles, Sophie begins with chains and creates clusters of three double crochets in every stitch around the circle. The goal is to create the first layer of voluminous ruffles.
-
Second Ruffle Row:
- For the second row, Sophie adjusts the ruffle density by alternating between clusters of three double crochets and occasional single stitches. This pattern helps enhance texture while economizing yarn.

-
Third Ruffle Row:
- The final ruffle row follows a similar approach, focusing on alternating dense clusters and single crochet points. Sophie notes that the ruffles can be customized based on individual preferences or yarn availability.
Managing Yarn and Securing Ends
- Sophie explains her technique for joining new yarn and how to crochet over knots to keep them secure.
- Using the Center Pull Method: She demonstrates pulling yarn from both the center and exterior of the skein to ensure a consistent double-strand thickness.
Finishing Touches
-
Fastening Off:
- After completing the final row of ruffles, Sophie chains one to secure the work and cuts the yarn, leaving enough tail to weave in.
-
Weaving Ends:
- Using a tapestry needle, she demonstrates how to weave in ends effectively, ensuring a clean and polished finish.