How To Crochet A Triangle Bunting for Beginners
Learn how to crochet beautiful granny square triangle bunting, perfect for decorating spaces or events perfect for beginners and experts. Using an 8-ply cotton-acrylic blend and a 4mm crochet hook, the instructor guides through crocheting vibrant, five-round triangles in different colorways. Key techniques like the magic loop, standing treble stitches, and joining methods are explained step-by-step, alongside tips for neat finishes, such as sewing in ends securely and adding tassels for weight.
The bunting is then joined with a neutral-colored string to create a sturdy banner. This project is beginner-friendly and ideal for colorful, handmade decor. So, follow through with us for the complete tutorial.

Crochet Granny Square Triangle Bunting
This tutorial demonstrates how to create colorful granny square triangle bunting, a versatile and charming decoration suitable for events, seasonal décor, or adding personality to personal spaces. The step-by-step video covers the crocheting process, tassel-making, and assembling triangles into bunting.

Materials Needed
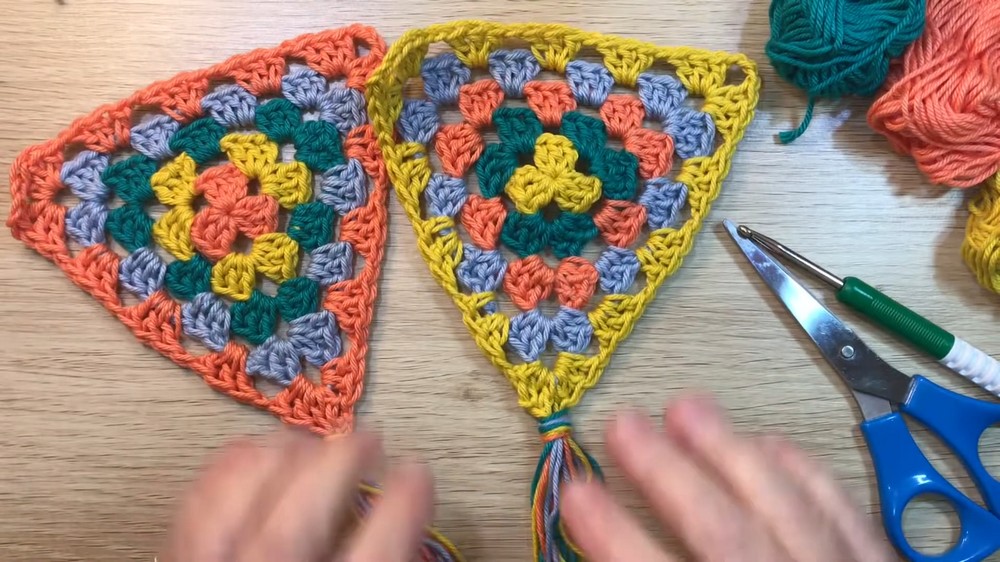
- Yarn: 8-ply cotton-acrylic blend (50% cotton, 50% acrylic) in four different colors.
- Hook: 4mm crochet hook.
- Additional Supplies: Yarn needles for sewing ends, scissors, and a yarn bowl for organizing threads.
Crocheting the Granny Square Triangles
The granny square triangles are made following a traditional pattern with modifications to suit beginners and those seeking a finished project that strikes a balance between ease and detail.

- Round 1: Begin with a magic loop to create evenly distributed corners and sides. The first round lays the foundation for the triangular shape.
- Round 2 to 5: Subsequent rounds add more layers, increasing the triangle’s size while maintaining well-defined edges. Each round incorporates corner clusters and chain spaces to ensure structural integrity and aesthetic appeal.
- Color Changes: To create striking designs, each triangle uses four colors, repeating the center color in the final round for symmetry.

Weaving Ends
After finishing each round, use a yarn needle to weave ends securely. By sewing in multiple directions, you minimize the risk of ends unraveling. The video emphasizes neatness and stability in finishing touches, ensuring a durable product.
Adding Tassels
Tassels provide added weight to each triangle, ensuring the bunting hangs neatly. To create tassels:
- Wrap yarn around your hand several times.
- Cut the loops and attach them to the bottom point of each triangle.
- Incorporate colors used in the triangles to maintain design harmony.

Assembling the Bunting
Once 20 triangles are crocheted (five in each colorway), they are joined using a neutral-colored yarn for the string.
- First Row: Use single or double crochet stitches (terminology varies by region) to work across the top of each triangle, ensuring consistency and alignment. Leave seven chain stitches between each triangle for spacing.
- Second Row: Add a second layer of crochet stitches along the string to provide extra stability and thickness, ensuring the bunting can be securely hung on walls or hooks.

Creating Loops for Hanging
A practical addition is crafting small loops at each end of the bunting. These loops help the bunting hang neatly by fitting onto nails, hooks, or poles.

Final Assembly and Display
Once all triangles are joined and the string completed, the bunting is ready for use. Its vibrant colors and tassels add personality and charm to any setting. The tutorial emphasizes simplicity, adaptability, and functionality, making this project ideal for beginners and experienced crocheters alike.