Crochet Along Lakeside Coatigan Pattern Free
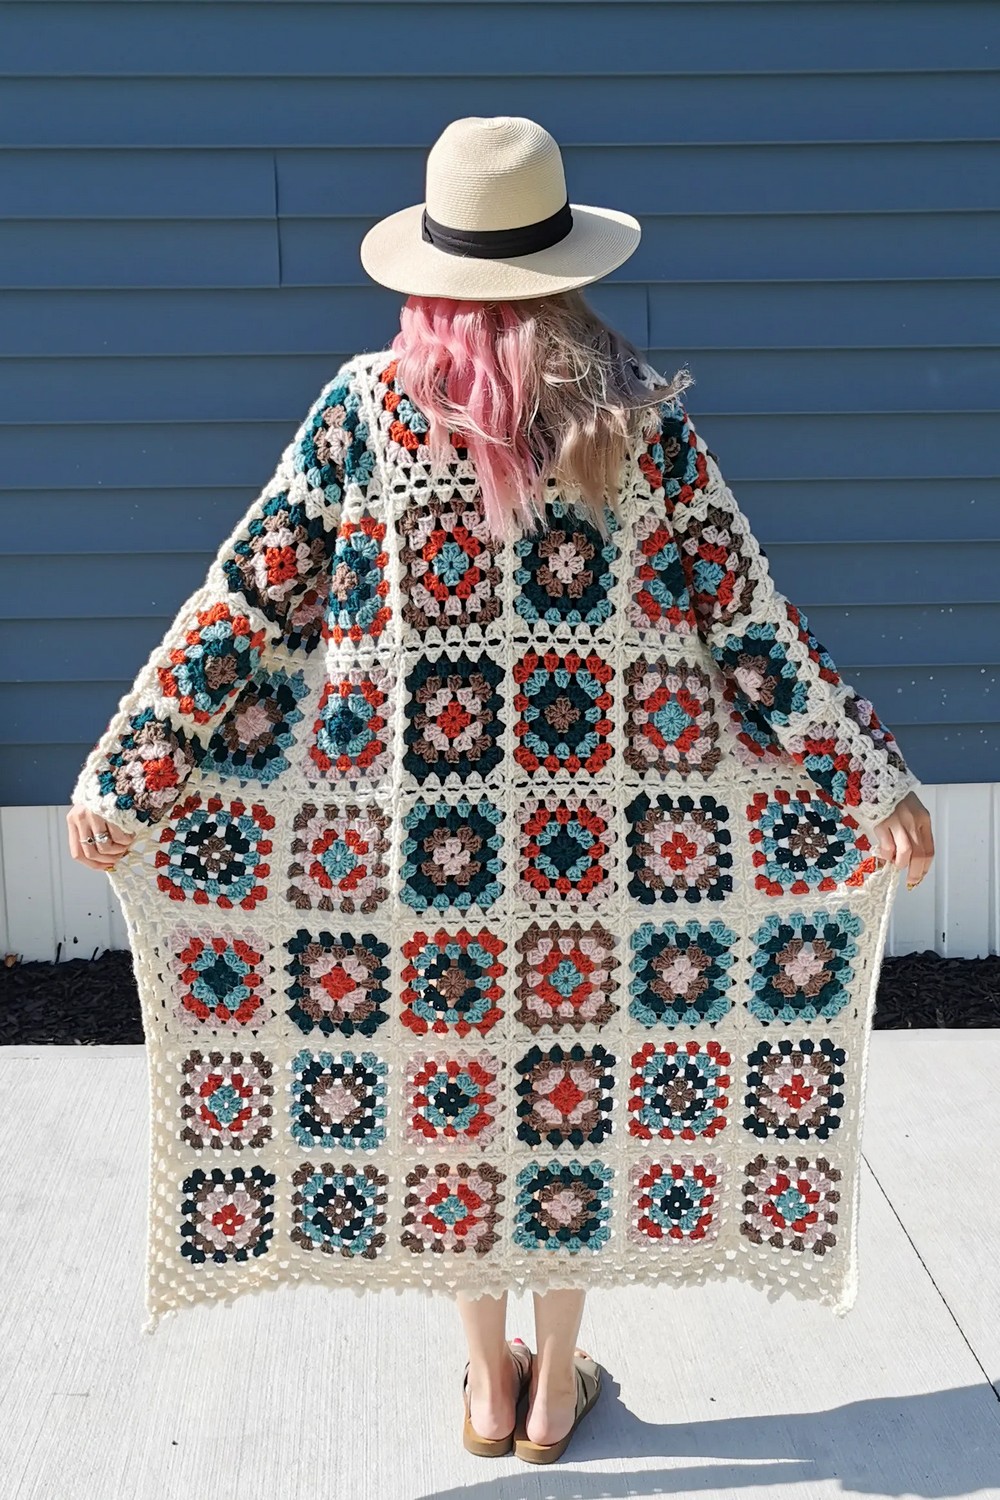
Coatigans are a brilliant fusion of comfort and style, combining the best attributes of a coat and a cardigan. They strike the perfect balance between the warmth of a coat and the laid-back elegance of a cardigan. Now, imagine the charm of a coatigan elevated by the timeless granny square crochet pattern, and voila! You have the Crochet Along Lakeside Coatigan. The appeal of this garment lies in the deft integration of the classic granny square design. The cleverly crafted granny squares not only give vintage appeal but also make the coatigan an enchanting piecing-together project. For beginners or experienced crocheters, this crochet beach wearable is an exciting project infusing color, creativity, and charm into your wardrobe!
Making Your Crochet Along Lakeside Coatigan
Materials Needed
- Yarn: Lion Brand Wool Ease in multiple colors. Main Color (MC): Fisherman, and Contrasting Colors: Succulent, Koi, Blush Heather, Thrush, Rainforest. The exact amount depends on the Coatigan size you’re planning to make.
- Crochet Hook: US Size J/10 (6.0mm)
- Other Tools: Yarn needle, scissors, stitch marker
Sizes
- The pattern provides details for multiple sizes with bust measurements ranging from XS-Sm to 3x-5x, specifically 38 inches to 68 inches, with a loose fit.
Gauge
- Your square should measure 6” x 6”.
Pattern Overview
The Coatigan is composed of granny squares joined as you go, creating a cardigan, a duster, and a coat all in one. It will be worked up in parts:
Step by step Pattern
Gauge and Square
- Granny Square:
- Round 1: Ch 4, dc in 4th ch from hook, [2 dc, ch 2] in same st, 3 dc, ch 2 in same space; repeat – 3 times, join—12 dc, 4 ch-2 spaces.
- Round 2: Sl st to next ch-2 space, ch 3, [2 dc, ch 2, 3 dc] in same st, ch 1, [3 dc, ch 2, 3 dc] in next ch-2 space; repeat – around, ch-1, join—24 dc.
- Continue through Rounds 3 and 4 increasing in a similar manner to achieve a 6″ x 6″ square.
- Round 5 (Change to MC): Follow a similar pattern to previous rounds to finish off the square.
- Complete the number of squares based on your Coatigan size.
Joining Squares
- Instructions will focus on the Join as You Go method, utilizing the granny squares made in Week One.
Border and Fringe
- Adding a border to the assembled Coatigan for finishing touches.
- Round 1 of Border: Start with ch 3, then [2 dc, ch 2, 3 dc] in the same space and follow instructions for working across sides, joining squares, and managing corners.
- Round 2: May involve similar steps to round 1 to finalize the border and add fringe if desired.
Final Touches
- Focus on final assembly, weaving in ends, and preparing your Coatigan to be worn or shared within the community.
Additional Notes
- The Coatigan is customizable in terms of length and sleeve size.
- There can be a slight gap in the underarm area for certain sizes which you’ll need to sew closed after seaming.

