How to Crochet Blueberry Tutorial For Beginners

Learn how to crochet a charming and lighthearted adorable blueberry with a cute face for beginners. The creator, guides viewers through the process step by step, from creating a magic ring to adding finishing touches like eyes, a mouth, and leaves.
Using Red Heart yarn, a 5.5 mm hook, and simple materials like stuffing, the tutorial is filled with personality, humor, and encouragement, making it accessible for both beginners and experienced crocheters alike. So, follow through with us for the complete tutorial.

Blueberry Crochet Tutorial
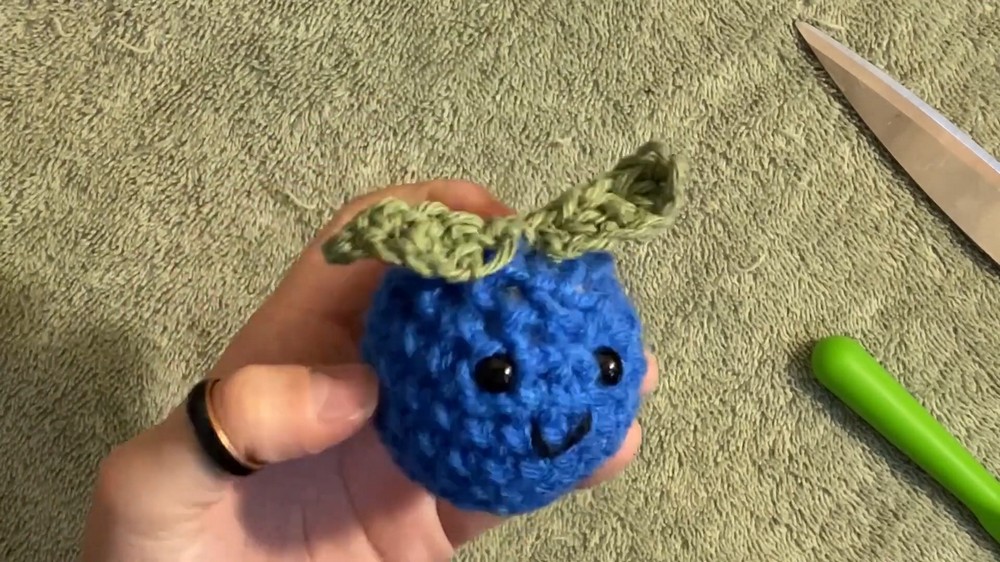
This tutorial demonstrates how to crochet a cute little stuffed blueberry. The instructions guide viewers through each step of making the blueberry, including forming the base, adding facial features, shaping the blueberry, and creating the leaves. Below is a detailed summary of the process:
Materials Needed
- Yarn: Red Heart yarn is used in the tutorial. You will also need green yarn for the blueberry leaves.
- Hook: A 5.5 mm crochet hook is recommended.
- Stuffing: You can use store-bought stuffing or repurpose stuffing from an old stuffed animal.
- Tools: A yarn needle and an optional stitch marker.
- Face Accessories: Plastic safety eyes (optional), or black yarn for embroidering facial features.
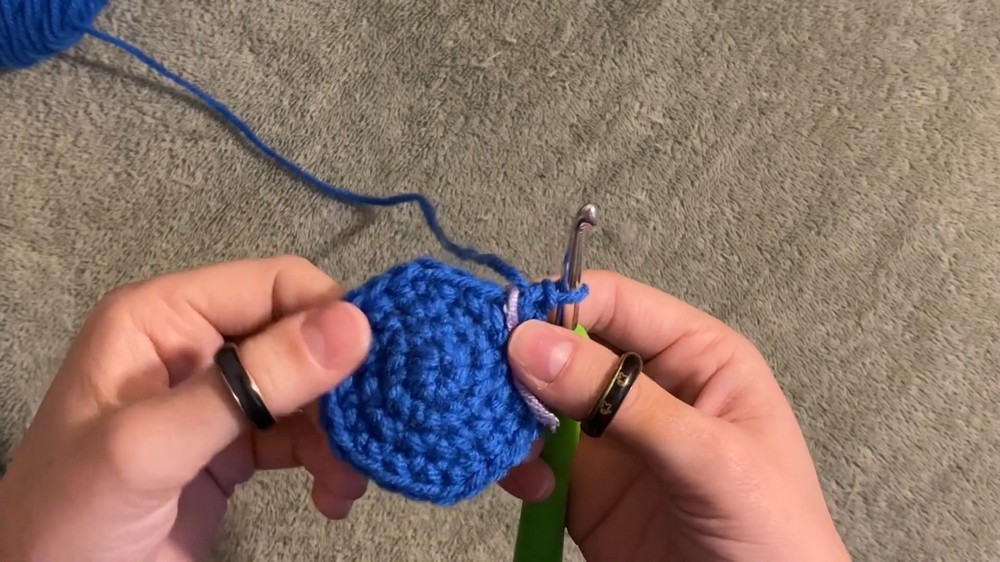
Creating the Base of the Blueberry
Making the Magic Ring
- The tutorial starts with creating a magic ring, which is a foundational circle used in crochet projects.
- The magic ring is formed by twisting the yarn into an “X” shape on the fingers and locking it in with a chain stitch.
Building Up the Rounds
- After forming the magic ring, the next step involves creating rounds of single crochet stitches to shape the blueberry.
- The tutorial adds stitches systematically, starting with six single crochets in the ring, and then continues building rounds with increases (adding stitches) to expand the shape.
Adding Rows for Volume
- As the blueberry grows in size and shape, several rows of single crochets are completed without any further increases. This creates the rounded body of the blueberry.

Starting the Decreases
- The tutorial then starts decreasing the stitches to narrow the shape, working in patterns such as single crochet followed by a decrease. This helps to close up the form gradually.
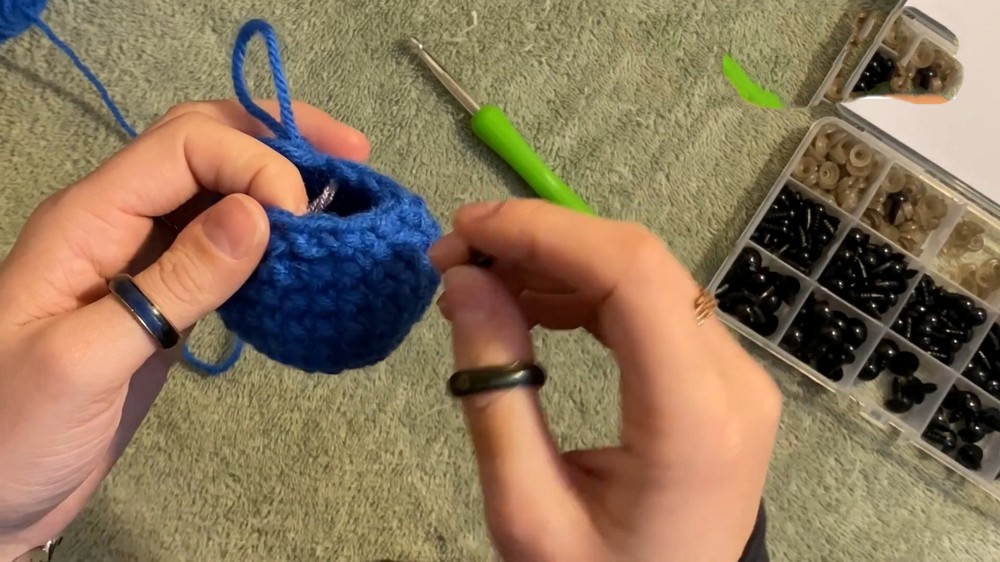
Adding Facial Features
The tutorial includes a segment on adding expressive facial features to the blueberry. This step is optional, and those who prefer a minimalist design can skip it.
Attaching Safety Eyes
- Plastic safety eyes are attached by pushing them through selected stitches on the blueberry.
- The tutorial suggests placing the eyes about two rows down from the top of the blueberry for best results, with a small gap between them.
Embroidering the Mouth
- Black yarn is used to embroider a simple U-shaped mouth.
- This involves threading yarn through stitches to create a smiling expression, as shown in the guide.

Closing the Blueberry
- Once the stuffing is added, decreases are used to close up the top.
- Using a yarn needle, the final stitches are sewn through the “front loops only,” which helps tighten and seal the work. Excess yarn is tucked back inside the blueberry for a clean finish.
Creating and Attaching Leaves
- Forming Leaves: Green yarn is used to create small leaves. A variety of crochet stitches (e.g., single crochet, half double crochet, and double crochet) are demonstrated to give the leaves texture.
- Attaching Leaves: The leaves are secured to the top of the blueberry using a yarn needle. The tutorial suggests adding one or more leaves based on personal preference.