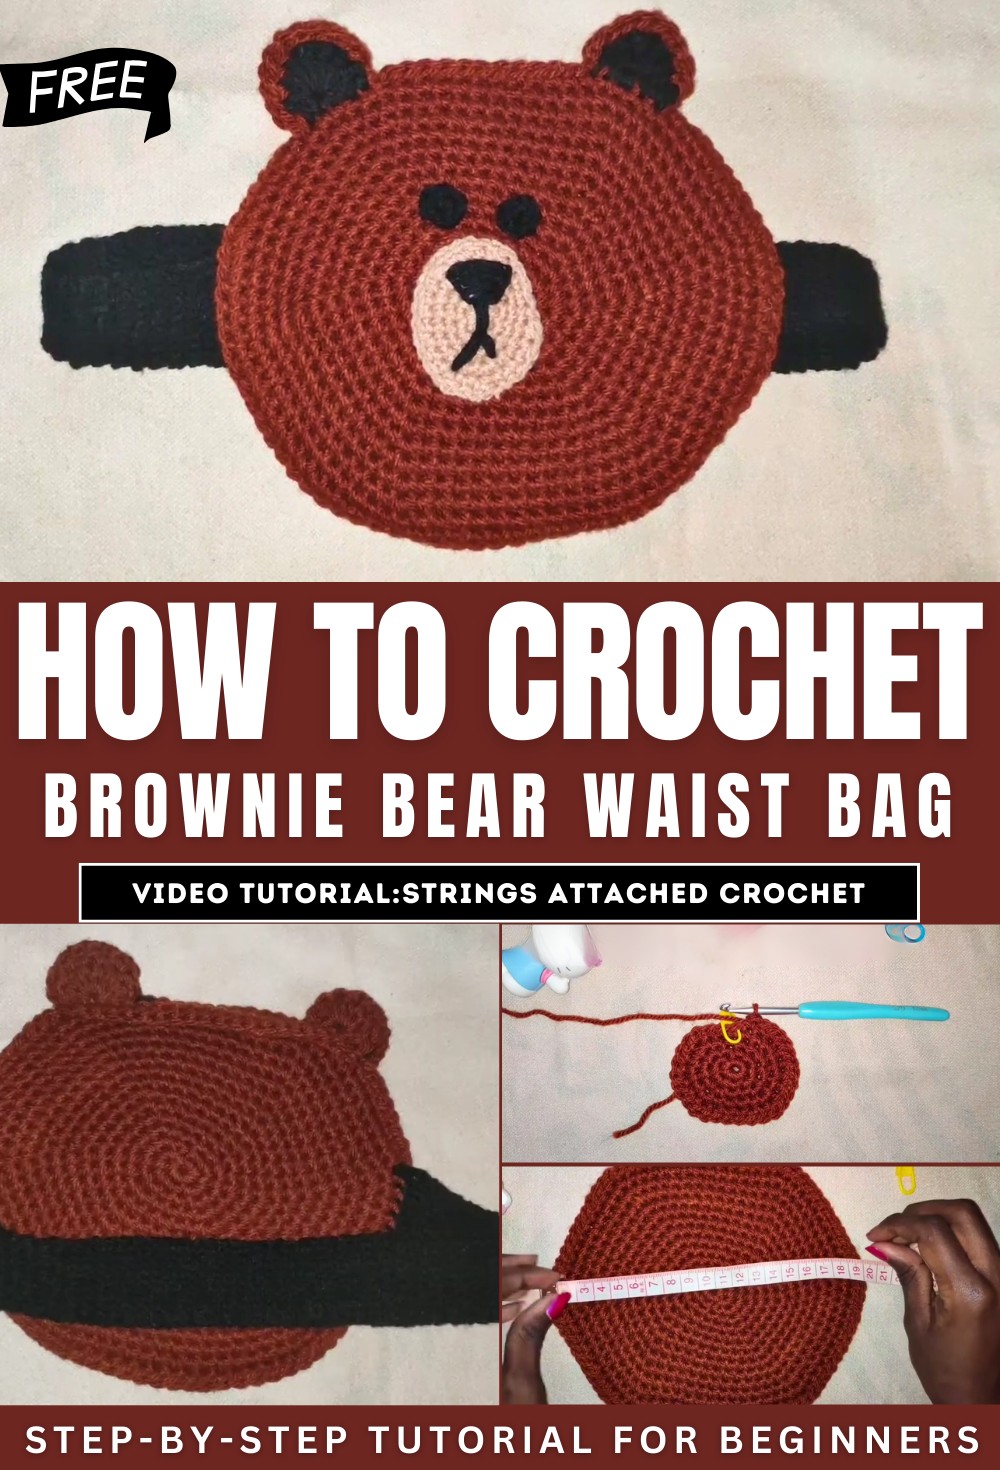
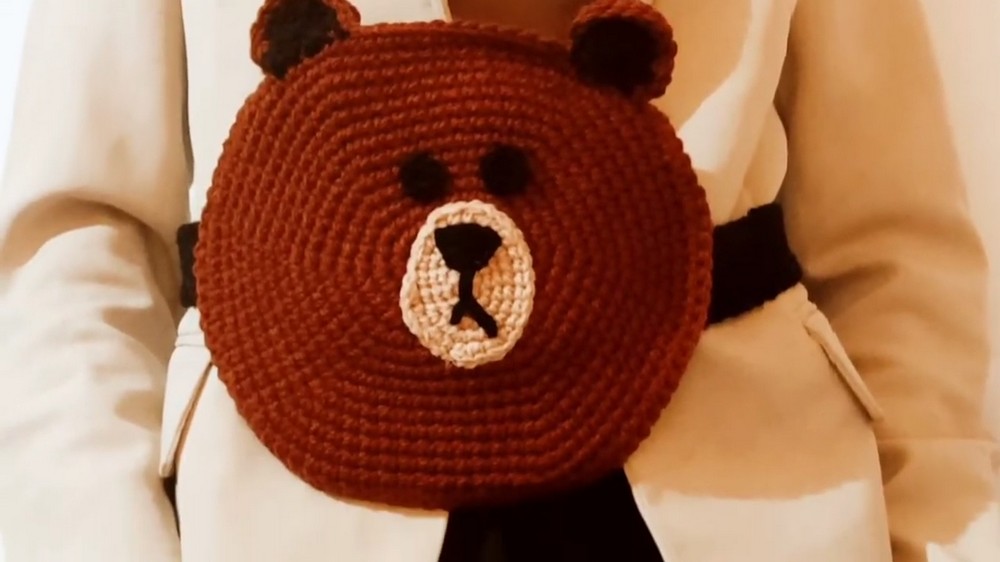
How to Crochet Brownie Bear Waist Bag for Beginners
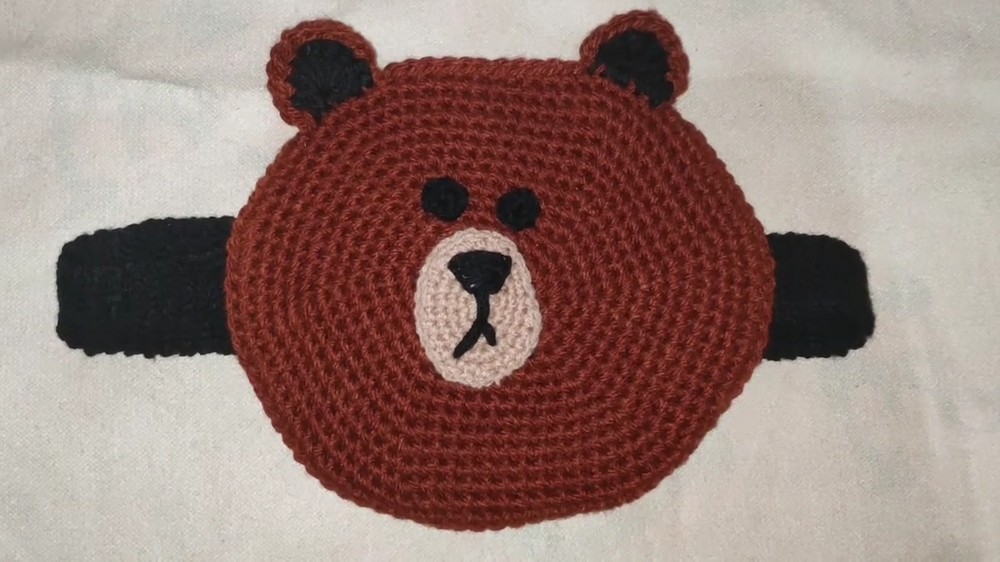
With a step-by-step tutorial for beginners, learn how to crochet a Brownie Bear Waist bag, perfect for bear fans. The tutorial covers making a magic ring for the foundation, then crocheting an oval base with a specific increase pattern. It details how to create the bear ears, which are made in two colors and joined together. The video also shows how to crochet and embroider the nose and make the small circular eyes.
The final component is the waistband, which is created using chain and slip stitches. The tutorial concludes with a guide on how to assemble all the finished components to form the complete bear waist bag. So, follow through with us for the complete tutorial.
Crochet Oval Bag with Embellishments
This tutorial walks viewers through the step-by-step process of creating a crochet oval-shaped bag, complete with detailed instructions for crafting its main body, ears, nose, eyes, and waistband. It’s designed for crocheters of varying skill levels and is packed with helpful techniques, tips, and customization ideas.
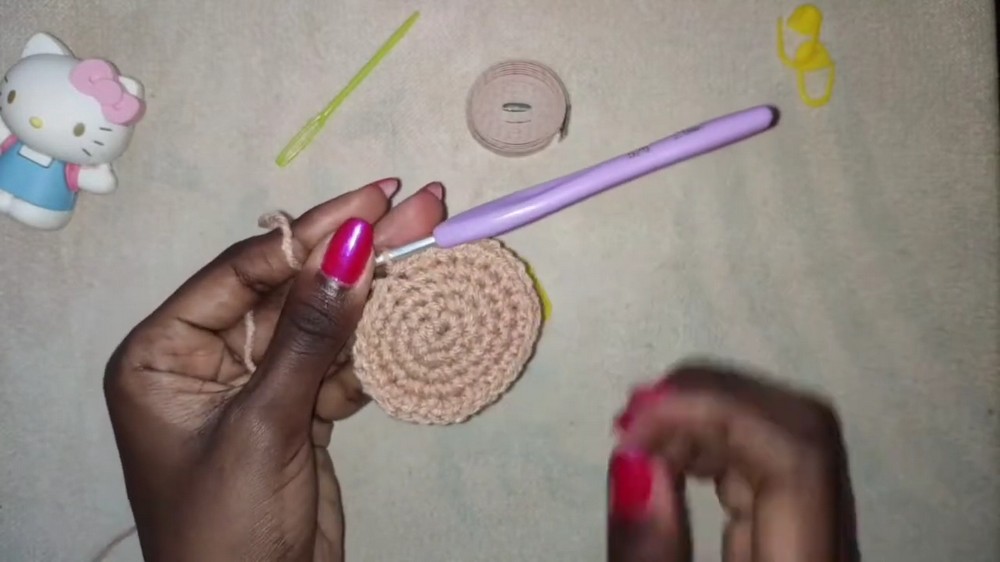
1. Creating the Magic Ring
- The project starts with a magic ring, a fundamental crochet technique.
- The instructor demonstrates how to wrap the yarn into an “X” shape and pull it through using a crochet hook.
- A securing chain is added before working single crochets into the center of the ring.
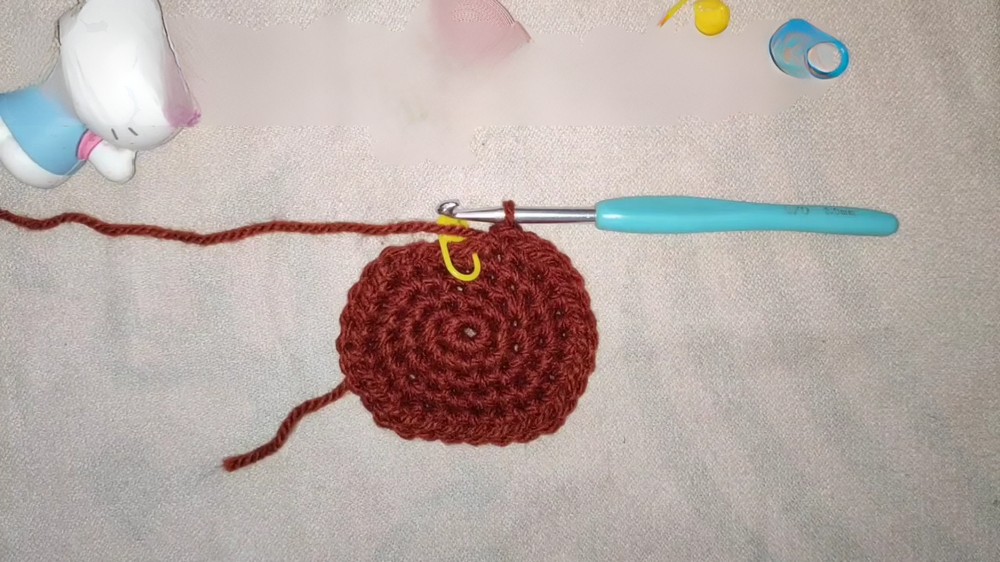
2. Crocheting the Oval Bag Base
- The base of the bag is formed by crocheting in rounds, starting from the magic ring and building outward.
- The instructor explains how to work increases in specific stitches to achieve an oval shape.
- Tips for marking the starting stitch using a stitch marker ensure the stitch count stays consistent.
- Rows continue until the desired width of the oval is reached—approximately 20 cm in diameter.
- Two additional rows of single crochet (without increases) are added to smooth the oval’s corners.
3. Crocheting the Ears
- The ears are made using a magic ring and double crochet stitches.
- Two pieces are created for each ear, one black and one brown, and then stitched together for a layered effect.
- The tutorial demonstrates how to join the black and brown pieces using single crochet stitches along the perimeter.
- The completed ears are set aside for assembly later.
4. Adding Facial Features: Nose and Eyes
-
Nose:
- The instructor creates a nose shape by embroidering a triangular outline using black yarn and a tapestry needle.
- The process involves adding diagonal lines and filling in the shape for a clean finish.
-
Eyes:
- The eyes are created with a magic ring and six single crochets.
- The instructor emphasizes leaving enough yarn for sewing the eyes to the bag later.
5. Making the Waistband
- A slip knot is made to begin the waistband, followed by a foundation chain of nine stitches.
- Rows of slip stitches are worked into the back loop of the stitches to create texture.
- The waistband is crocheted long enough to fit comfortably around the smallest part of the waist.
- Tips are provided for matching the waistband length to the bag’s dimensions for proper assembly.

- The tutorial concludes with instructions for attaching all components—ears, nose, eyes, and waistband—to the bag.
- The finished project is a unique, personalized crochet bag that can serve as a creative accessory.