How to Crochet Daily Blossoms Affirmation Blanket for Spring
Here is a new year-long project of crocheting a daisy blossom affirmation blanket, inspired by temperature and mood blankets. It is a super-easy blanket using simple flower motifs and a “join as you go” method. The project blends creativity, mindfulness, and crochet techniques seamlessly.

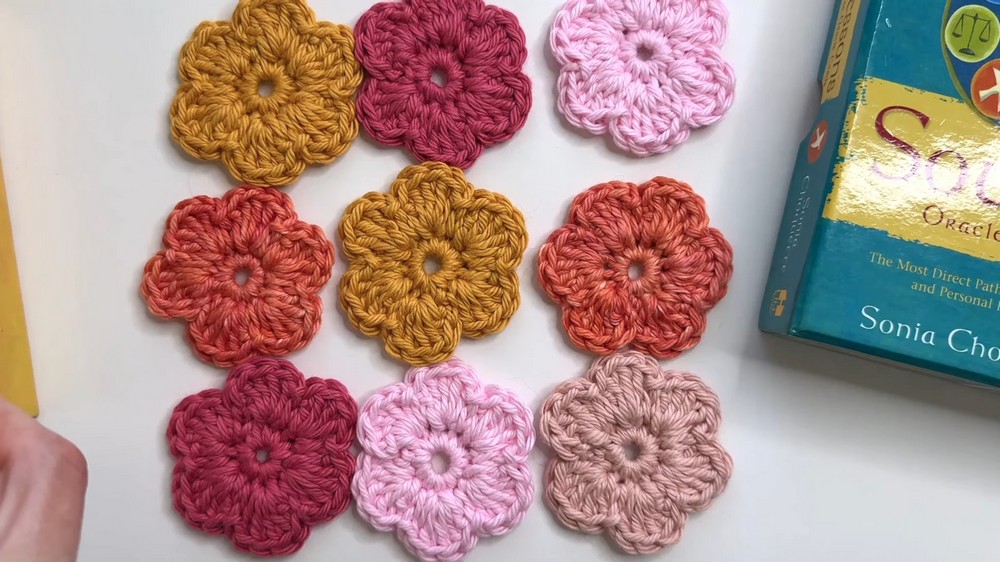
In this cozy tutorial, the creator demonstrates how to crochet simple floral motifs daily, combining them into a beautiful affirmation blanket. Using an oracle deck for daily positivity and color inspiration, she explains the flower pattern, join-as-you-go method, and optional filler motifs. Ideal for mindful crafting, this project blends creativity and self-care into a soothing year-long endeavor.

Free Crochet Blossoms Affirmation Blanket Pattern
Materials List
- Yarn: Worsted weight yarn (choose a variety of colors you love; acrylic or cotton recommended for ease of care and affordability)
- Example: Red Heart Super Saver, Style craft Special DK, or Paintbox Yarns Simply Aran
- Crochet Hook: US Size H-8 (5.0 mm)
- If using the three double crochet alternative for petals (see tips), increase hook size to US I-9 (5.5 mm).
- Scissors
- Tapestry needle
- Affirmation or oracle cards (optional, for daily prompts)
- Notebook or journal (optional, for documentation)
Key Abbreviations
| Abbreviation | Term |
|---|---|
| ch | chain |
| sl st | slip stitch |
| sc | single crochet |
| dc | double crochet |
| st(s) | stitch(es) |
| sp | space |
Special Notes
- Pattern is written in US crochet terminology.
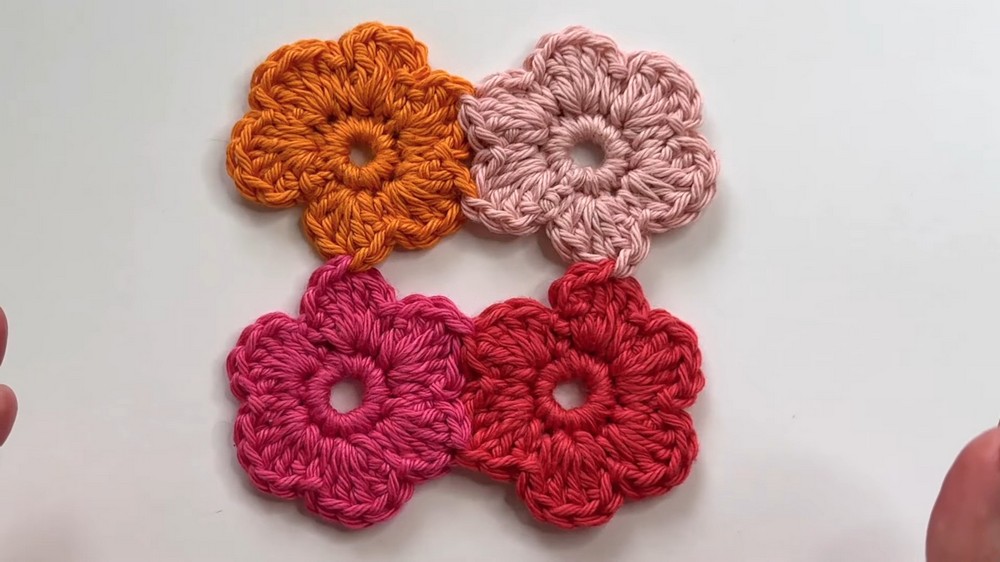
- Each flower motif is approximately 2″ square.
- The suggested layout is 18 flowers across and 20 rows high (total 360 motifs).
- The finished blanket will measure approximately 36″ x 40″, depending on your gauge, yarn, and hook.
- If your flowers become too wavy, see the “Tips & Corrections” section below.
Pattern Instructions

Flower Motif
Center
- Begin with your chosen yarn color.
- Make a slip knot, then ch 5.
- Sl st into the first ch to form a ring.
- (Optional: Use a magic ring if you prefer a closed center.)
- Work 12 sc into the ring, carrying your starting tail along for easier weaving later.
- (Optional: ch 1 for space before the first sc; this does not count as a st.)
- Do not join the round with a sl st.
Instead, begin Round 2 immediately in the first sc.
Petals (Round 2)
- Sc in the first st.
- In the next st, work 5 dc into the same st (this forms one petal).
- Sc in the following st.
- Repeat:
- (5 dc in next st, sc in next st)
- Continue this sequence around.
- At the end, you should have 6 petals in total (each separated by a sc).
- Sl st into the very first sc of the round to close.
- Finish off and weave in or knot your ends tightly.
Tips & Corrections
- If your flower is very ruffled or waving:
- Switch to 3 dc per petal instead of 5 dc.
- If you do this, go up one hook size; this helps maintain motif size.
- Counting:
- Ensure you do not miss any sts hidden behind petals. Move petals aside to check.
- Tail:
- Pull and knot the center tail to neaten and flatten the center.
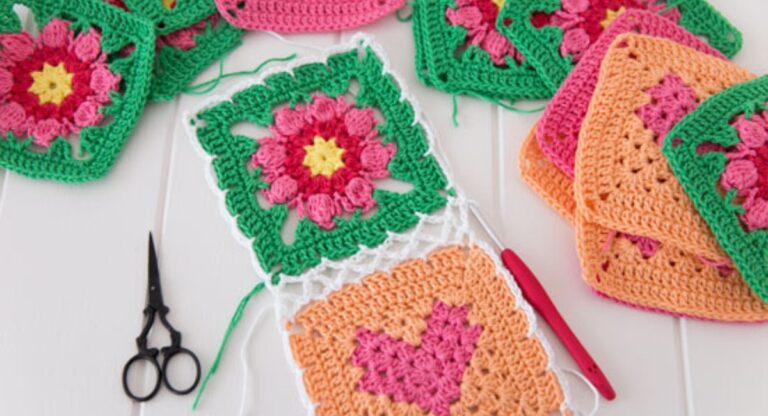
Join-As-You-Go Technique
Pay attention to petal orientation. For a cohesive look, always have “one petal pointing upwards” for each motif.
Row 1 (First Row of Flowers)
- Attach the motifs as you complete their second round.
- Join each new flower to the previous motif at two petals (the sides), using the third dc of each group for the join.
- Continue across the desired length of the blanket (suggested: 18 motifs).
How to Join:
- When you reach the third dc of the petal, remove your hook, insert it through the middle dc of the corresponding joining motif, pick up the working loop, and pull it through. Then, continue the next dc in the same st.
- Repeat at two side petals per motif in Row 1.
Row 2 and Beyond
- The first flower in every new row: join one petal (on the top) only.
- All subsequent flowers in the row: join three petals (one below, two at sides).
- Continue this pattern for each row.
- Always orient motifs so one petal faces upward.
Optional Filler Motif (For Gaps)
If you prefer to fill the small square gaps between flowers:
- With new color, ch 5, sl st to the first ch to form a ring.
- Sc 12 into the ring as before.
- As you work, join at 4 points: between petals where motifs join.
- Join after stitches 1, 4, 7, and 10 (i.e., sc 3, join, sc 3, join, sc 3, join, sc 3, join, sc 2, sl st/invisible join).
- Invisible Join:
- Fasten off, and using a tapestry needle, mimic the top of final st to finish neatly.
Assembly and Border
- Continue joining motifs with one petal up throughout.
- Flatten and shape gently as you join.
- After assembly, weave in all ends well.
- Add an optional border of your choice.
Conclusion
This pattern produces a meaningful, customizable blanket perfect for daily affirmations, gratitude, or as a temperature or mood project. The join-as-you-go method means minimal finishing and natural blanket assembly as you progress.
Pattern Correction and Additional Tips
- If your flowers are shrinking or uneven when switching to 3 dc petals, increase your hook size as noted above.
- Always count your stitches carefully. Moving petals to one side can help avoid missing hidden sts.
- Choose colors that bring you joy, especially if you are correlating them to daily affirmations or oracle prompts.
- Document your progress in a journal for added reflection and memory.