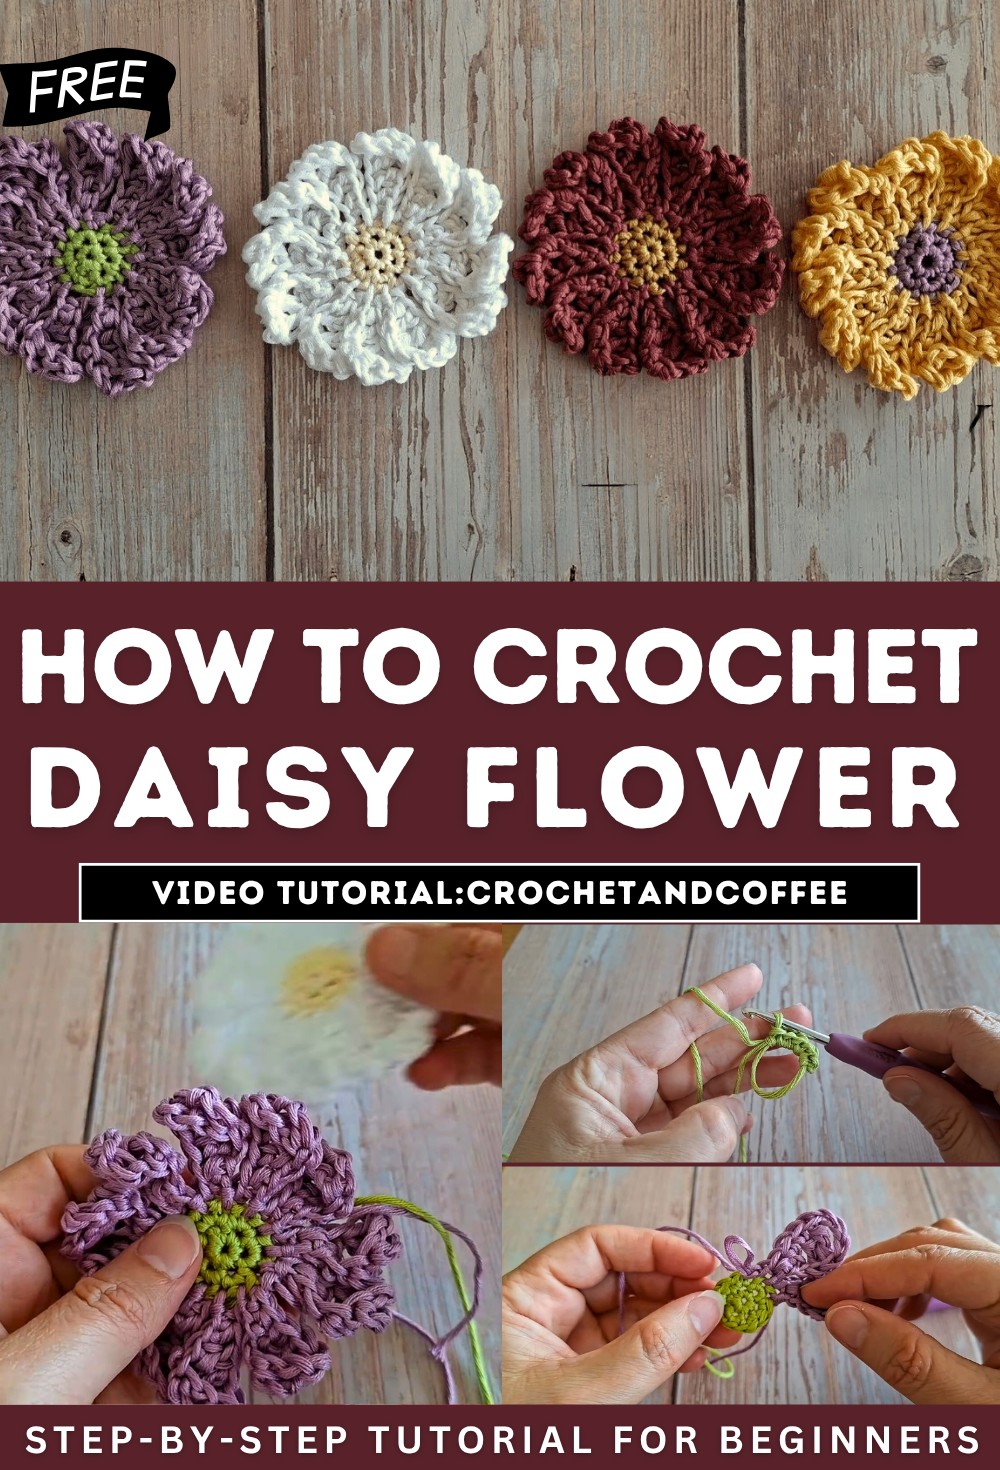
How to Crochet Daisy Flower for Spring
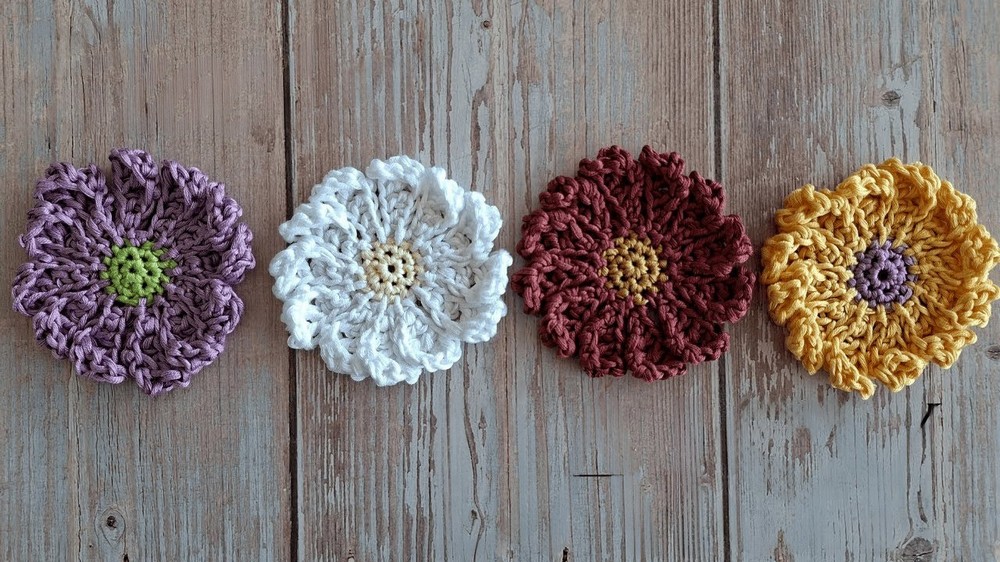
Learn how to crochet a classic daisy flower with a smooth, elegant finish perfect for making spring blankets. The step-by-step guide covers creating a magic ring, crocheting the detailed petals using chains, and color changes for added flair. This project is beginner-friendly, with options to customize the colors and style. Whether you prefer a classic or vibrant look, this charming flower is fun to make and perfect for various crafts. Follow along and make your daisy blanket!
Detailed Summary: How to Crochet a Classic Daisy Flower
The video is a step-by-step tutorial on how to crochet a classic and elegant daisy flower. The presenter explains that this flower can be made in traditional colors or customized with vibrant or darker shades for a unique twist. The design focuses on smooth petals and clean edges that are visually appealing. It is a simple yet rewarding project perfect for crochet enthusiasts of all levels.
Materials and Preparation
- Required materials:
- Yarn (customizable in terms of color).
- Crochet hook (specific size not mentioned in the text, but appropriate for the selected yarn).
- Scissors for cutting yarn.

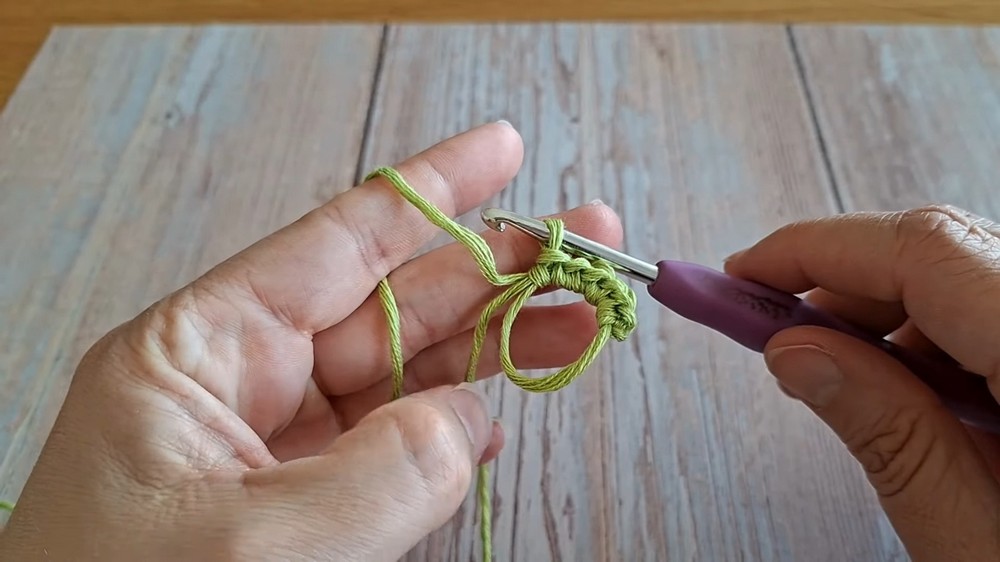
- The tutorial begins with instructions on creating a magic ring, which acts as the foundation of the flower.
- The presenter demonstrates how to properly hold yarn and hook to form the ring and begin crocheting.
Base Ring and First Round
- The magic ring is formed by looping yarn around the fingers and securing it.
- The first stitches are worked into the ring to form a circular base for the flower.
- The presenter explains how to pull on the yarn tail to tighten the ring into a neat circle.
- After completing the round, slip stitches are used to secure the circle, and the process moves to the second round.
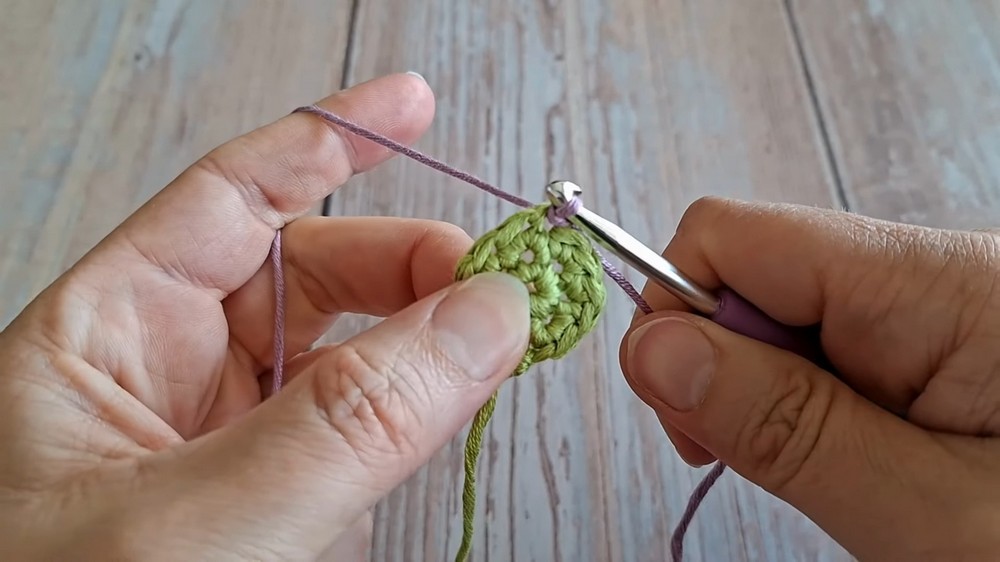
Second Round: Expanding the Base
- In the second round, stitches are worked into the initial set to create more stitches and expand the base.
- The focus is on maintaining neat and even stitches to prepare for attaching petals later.
- The presenter provides tips on avoiding overly tight stitches, which could cause difficulty in later rounds.
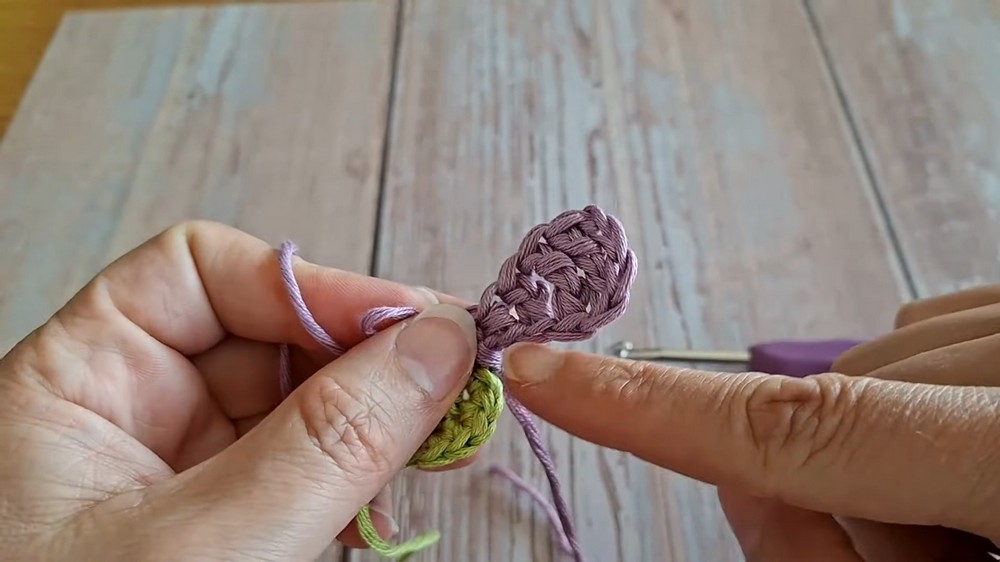
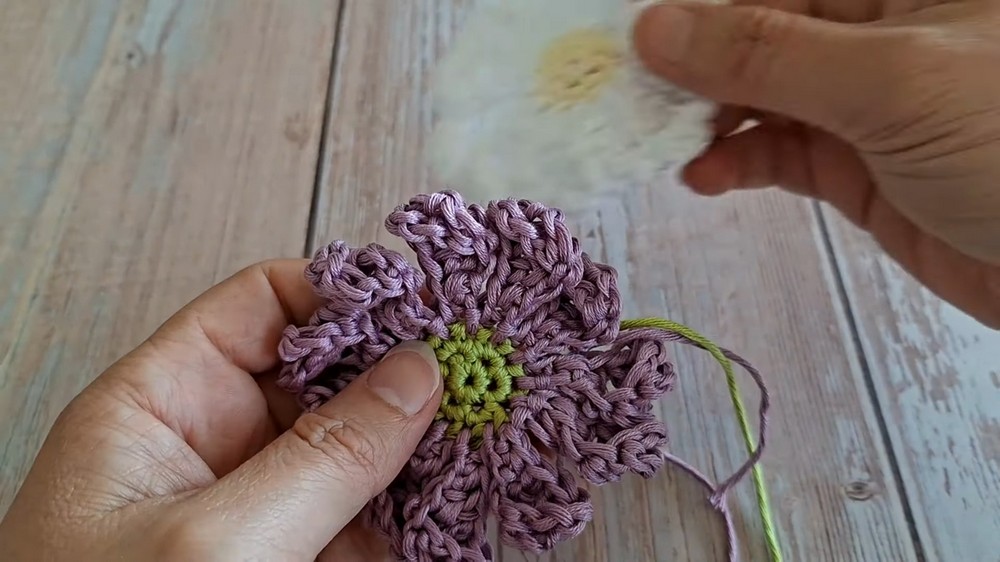
Color Change and Petal Formation
- The presenter demonstrates how to change yarn color for the petals, though viewers are welcome to stick with a single color.
- A slip knot is used to attach the new yarn effectively, enabling clean transitions.
- Petals are created by chaining specific lengths and working into the back loop of the chain for a smoother and more polished finish.
- Each petal is formed using a progressive series of stitches: treble crochet, double crochet, half-double crochet, and single crochet.
Tips for Petal Edging
- The presenter emphasizes the importance of using the back loop of the chain to achieve a smooth and uniform edge.
- Examples are shown to compare using the back loop versus the front loop, highlighting the difference in appearance.
- Each petal is completed by connecting it to the underlying base with slip stitches, ensuring secure attachments.

Final Assembly and Finishing
- After completing all petals, slip stitches are used to secure the flower and complete the design.
- The yarn is fastened off, and loose ends are woven in carefully on the back of the flower.
- The back of the flower still looks clean and tidy, making it easy to use for various projects.
Conclusion and Personal Touch
- The presenter discusses the satisfaction of making this flower, noting its slightly longer duration compared to typical crochet projects.