How to Crochet Fan Stitch Bookmark for Fall

Learn how to crochet a delicate fan-inspired bookmark, ideal for beginners and advanced crocheters alike. Using a 4mm hook and thicker yarn for clarity, the instructor walks through the process step-by-step, starting with a magic circle and progressing through double crochets, chain spaces, and picots to form intricate fan motifs. The design is customizable, allowing you to add as many fans as desired.
The tutorial also explains how to weave in ends and personalize the bookmark with tassels or hanging elements. The project is versatile, with options to use lace-weight yarn for a more elegant finish. So, follow through with us for the complete tutorial!

Crochet Tutorial: Fan Bookmark
This tutorial demonstrates how to crochet a beautiful fan-inspired bookmark. The instructor explains the pattern step-by-step, starting with a magic circle and building layers of fans and decorative picot edging. The project is versatile, allowing for customization with different yarn types, hook sizes, and fan counts.
Tools and Materials
- Yarn: The tutorial uses thicker yarn for clarity, though lace-weight yarn is typically recommended for a delicate look.
- Hook: A 4mm crochet hook is used in the demonstration, while a 2mm hook is suggested for completing the project in lace-weight yarn.

Creating the First Fan
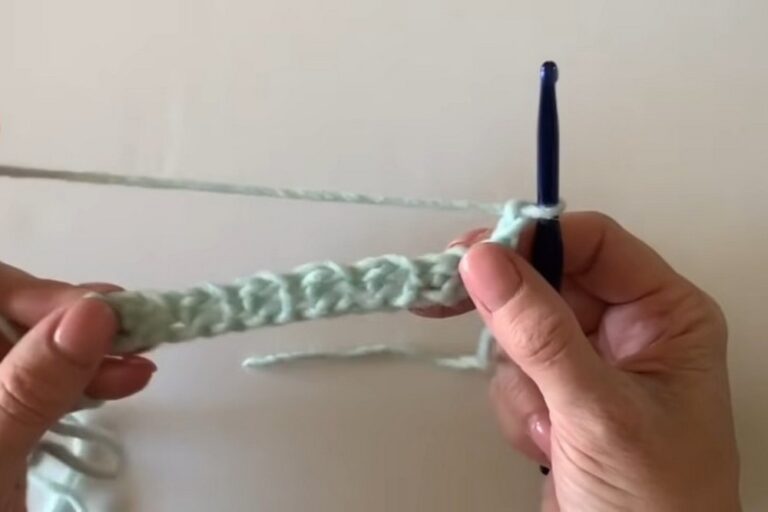
- Foundation:
- Begin by chaining and joining the stitches into a circle to form the foundation of the fan.
- First Row:
- Double crochets are worked into the circle to create the fan’s body. The instructor emphasizes careful stitch counting to ensure accuracy.
- Second Row:
- After turning the work, double crochets are separated by chain spaces. These spaces will later serve as the foundation for the decorative picots.

Adding the Picot Edging
- Third Row – Picots:
- Picots are created within the spaces between the double crochets. Each space consists of single crochets, chains, and single crochets to form the picot shape.
- Transition to the Next Fan:
- After completing the picots, the next fan is started by creating a chain that forms a small circle, acting as the foundation for the new fan.

Repeating the Fan Pattern
- Creating Additional Fans:
- The second fan is crocheted using the same pattern as the first, starting with double crochets and progressing to picot edging.
- Connecting Fans:
- Fans are joined seamlessly by skipping specific stitches and continuing the pattern as described.
- Fan Count:
- The tutorial suggests making up to eight fans for a complete bookmark, but users can customize based on their preference.

Personalizing the Bookmark
- Adjusting Fan Count:
- The design allows flexibility in the number of fans, making it adjustable for different bookmark lengths.
- Lace Finish:
- For a finer and more elegant bookmark, lace-weight yarn and a smaller hook are recommended.
- Tassels and Hanging Elements:
- The tutorial suggests adding tassels or other decorative hanging elements to personalize the bookmark.

Completing the Bookmark
- Final Row:
- The final row consists of completing the picot edging for any remaining fans.
- Weaving in Ends:
- The instructor demonstrates how to tie off the yarn and weave in the ends for a clean finish.
Conclusion
The tutorial wraps up with examples of completed bookmarks made with different yarn types and fan counts. Viewers are encouraged to modify the project to suit their preferences by adjusting the number of fans or adding embellishments. This beginner-friendly project is both practical and decorative, perfect for personal use or as a thoughtful handmade gift. Feedback and attempts are welcomed by the instructor.