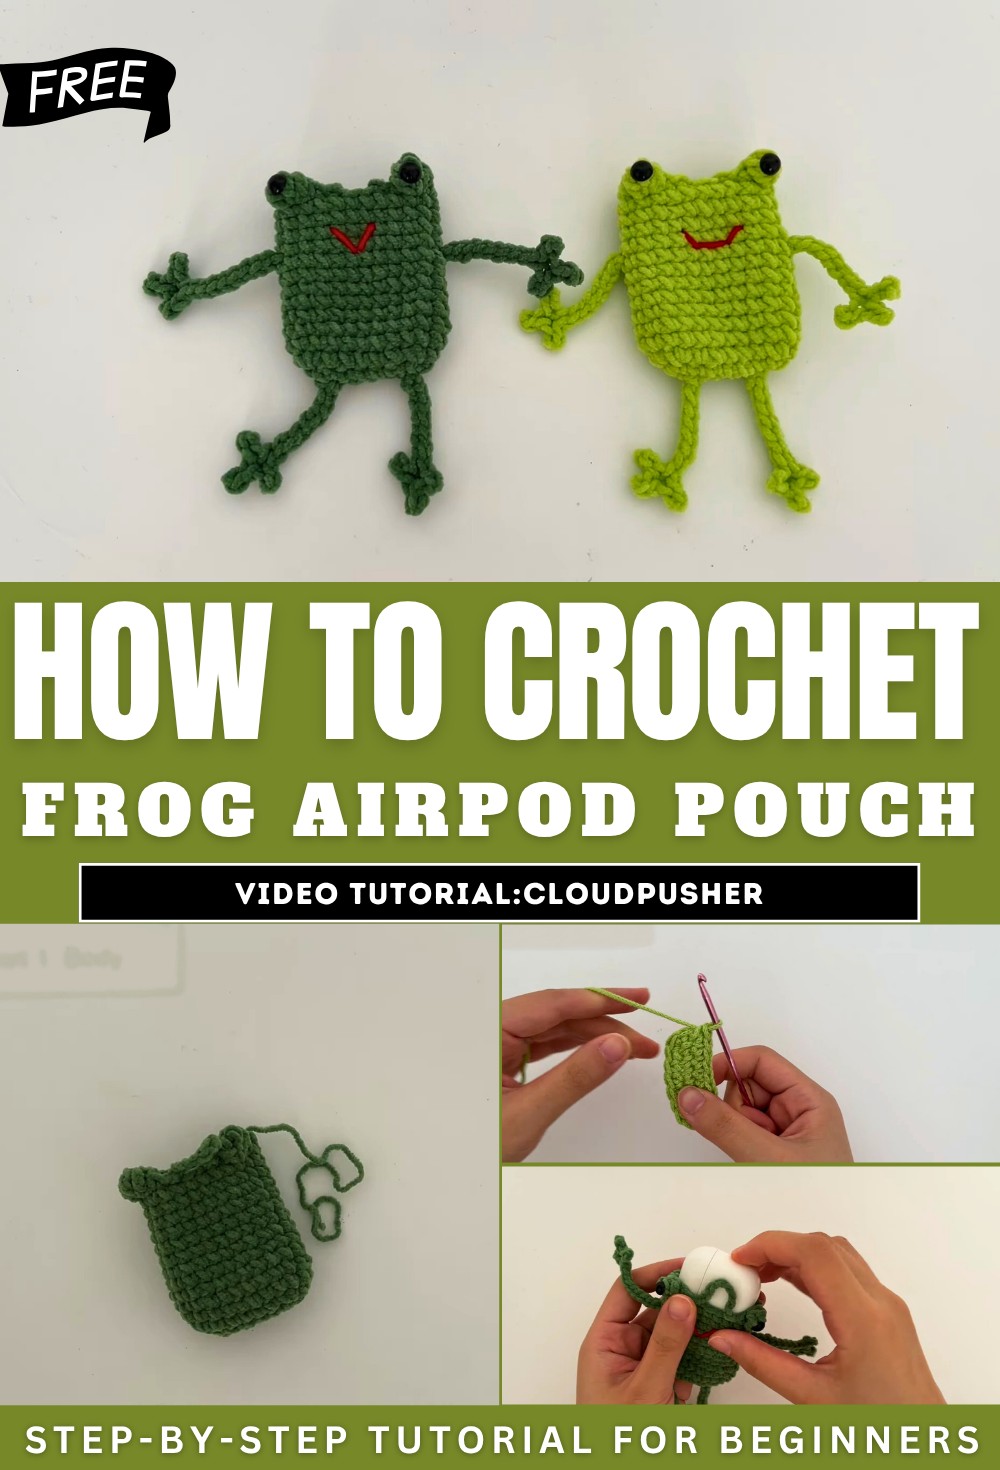
How to Crochet Frog AirPod Pouch for Beginners
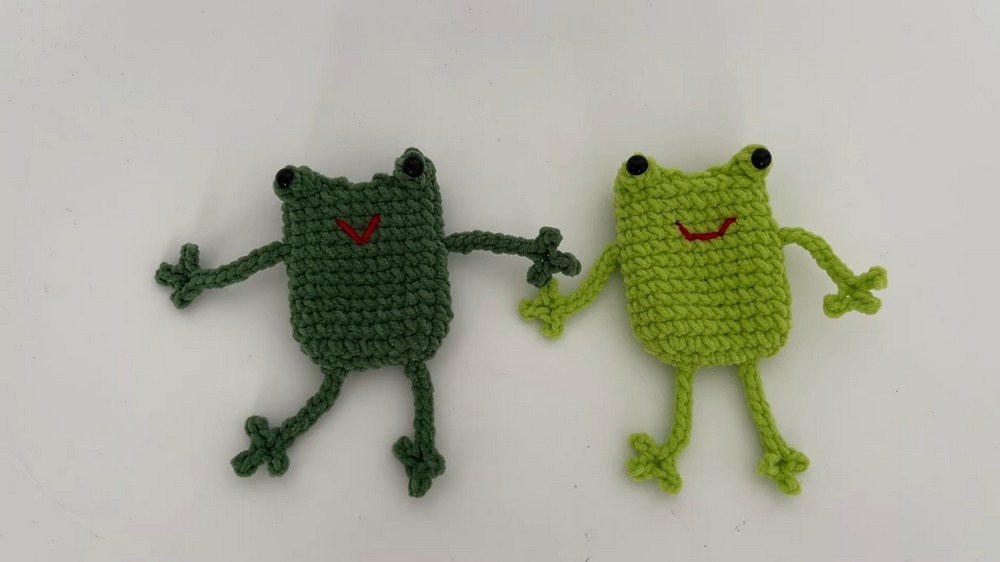
In this tutorial, learn how to crochet an adorable AirPod pouch shaped like a frog for beginners. The step-by-step guide includes creating the pouch body using single crochet techniques, forming legs with chain and slip stitches, and adding a buttoned closure. Detailed instructions for decorative elements, such as attaching eyes and stitching a smile, bring the pouch to life.
With easy-to-follow explanations, this project is perfect for crocheters looking to make a fun, functional, and creative accessory! So, follow through with us for the complete tutorial.
Crochet Frog AirPod Pouch Tutorial
This tutorial provides a detailed step-by-step guide to creating a functional and adorable AirPod pouch shaped like a frog. The video walks you through the process of crocheting the base, assembling details such as legs, eyes, and a smile, and adding a functional button closure. Below is a quick summary of the tutorial:
Introduction and Materials
- The project begins with an introduction to the AirPod pouch design.
- Materials used include yarn (optimal color: green), a crochet hook, and additional accessories such as a button, glue, and yarn for detailing (black and red for eyes and smile).
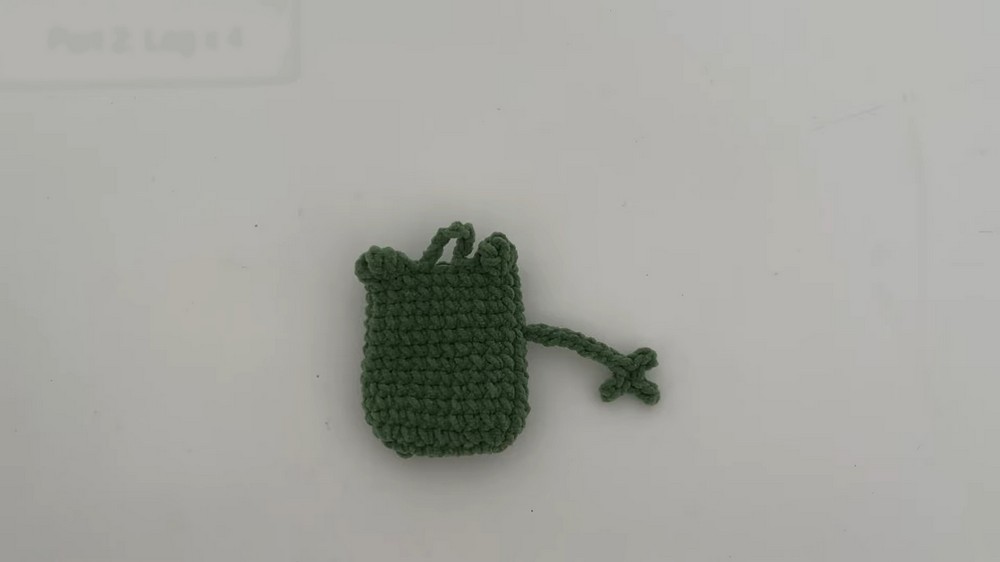
Creating the Pouch Body
-
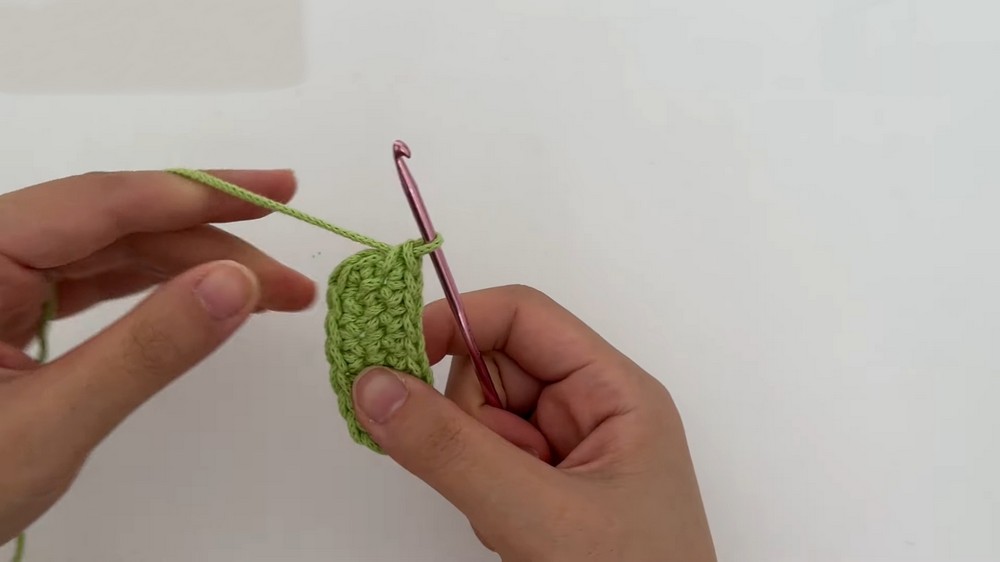
Foundation and First Round:
- Begin with a slip knot and chain eight to create the foundation chain.
- Use single crochet stitches to work on both sides of the foundation chain, creating an oval base.
- Remember to mark the first stitch of each round for accurate tracking.
-
Building Up the Body:
- Continue working in rounds, using single crochets and increases to expand and shape the pouch.
- Complete 11 identical rounds with single crochet stitches to achieve the desired size and dimension.
-
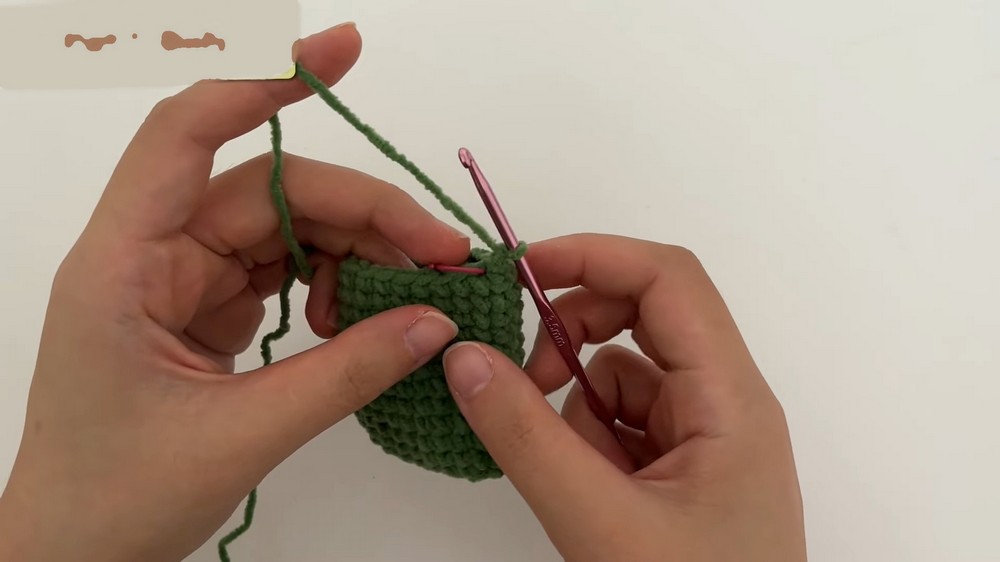
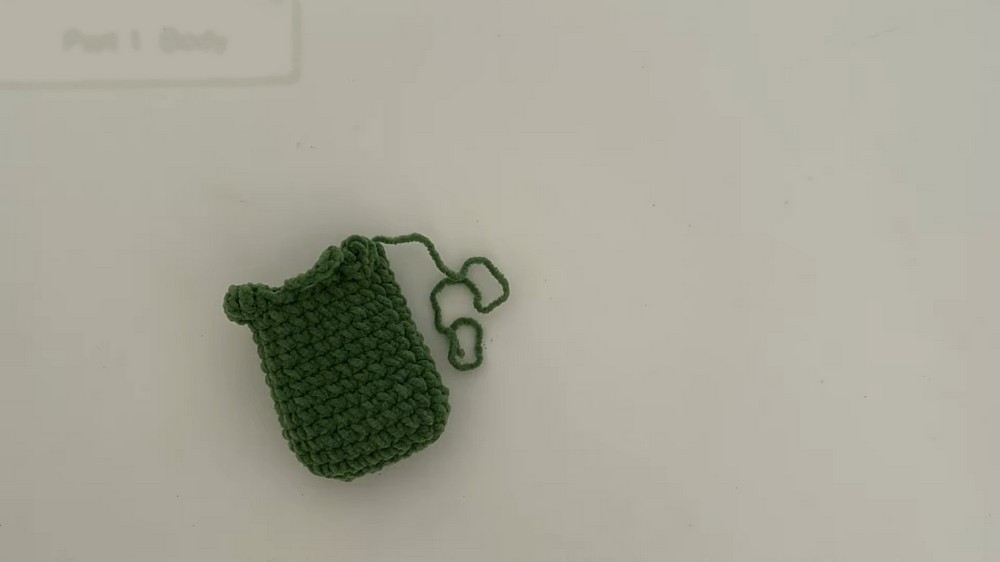
Finishing the Body:
- The final round of the body features decorative stitches, such as incomplete treble crochet clusters, placed evenly for design details.
- Include a chain to create a buttonhole closure.
- Conceal and secure yarn ends after completing the pouch body.
Adding the Legs
- Attach yarn between specific rounds of the body to begin crocheting the legs.
- Each leg is created with a chain and worked back using slip stitches.
- Sections of the legs are highlighted with a simple pattern of slip stitches and additional chains to achieve the desired shape.
- Repeat the process to create a total of four legs. Secure the ends with knots.
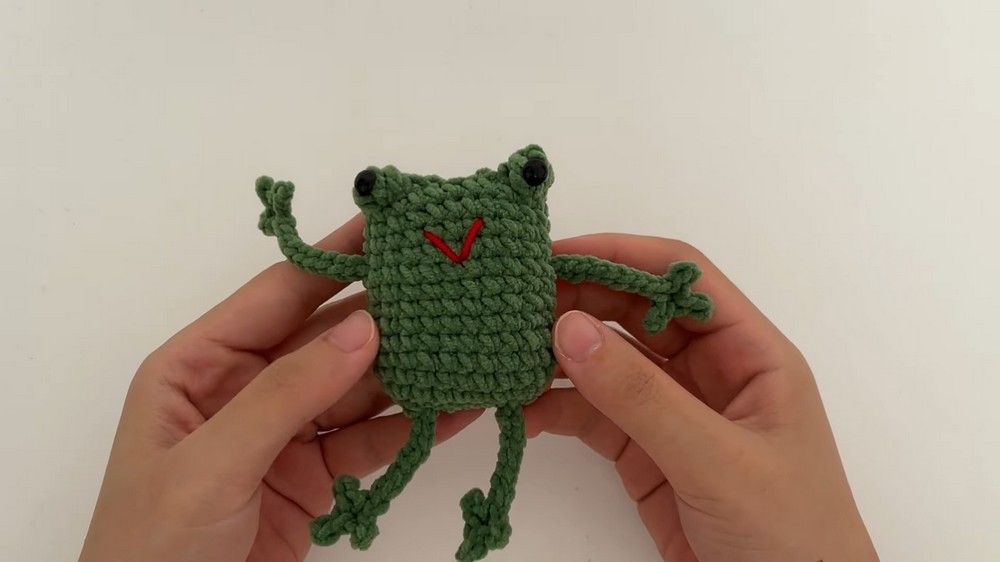
Decorative Features
-
Eyes:
- Eyes are created separately and attached to the pouch using glue. Alternatively, you can crochet or stitch eye shapes using black yarn for a more custom look.
-
Smile:
- The iconic froggy smile is stitched onto the pouch using red yarn, adding charm and bringing the frog design to life.
Button Closure
- Sew a button onto the front of the pouch, aligning it with the previously made buttonhole to ensure the pouch can be securely closed.
Conclusion
- The tutorial concludes by assembling all parts, revealing the finished AirPod pouch.
- This is a fun and functional project, perfect for crocheters of all skill levels. The creator thanks viewers and encourages them to try the project and explore future tutorials.